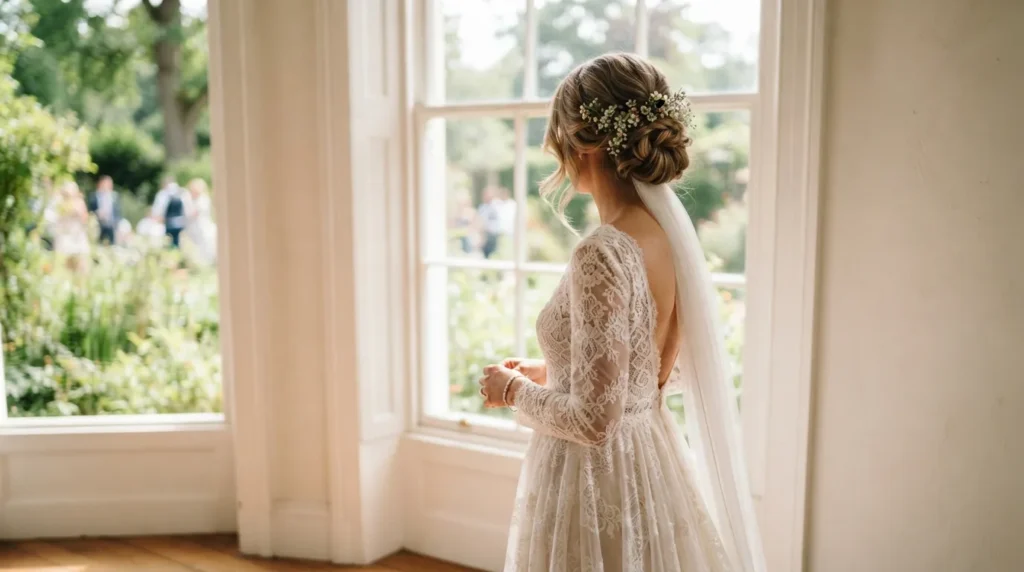

Your wedding hair should feel like you, only dressed up for the biggest day of your life. A bun is one of the most timeless choices out there because it works with almost any dress neckline, veil style, and hair length. Whether you want something soft and romantic or sleek and polished, there’s a bun version that fits your personality. Brides love buns because they hold up through hours of dancing, hugging, and happy tears without falling apart. Below you’ll find 23 wedding bun ideas that range from low and loose to high and structured, plus simple tips to recreate them without spending a fortune. Grab a few bobby pins and let’s find your perfect look.
1. Classic Low Chignon
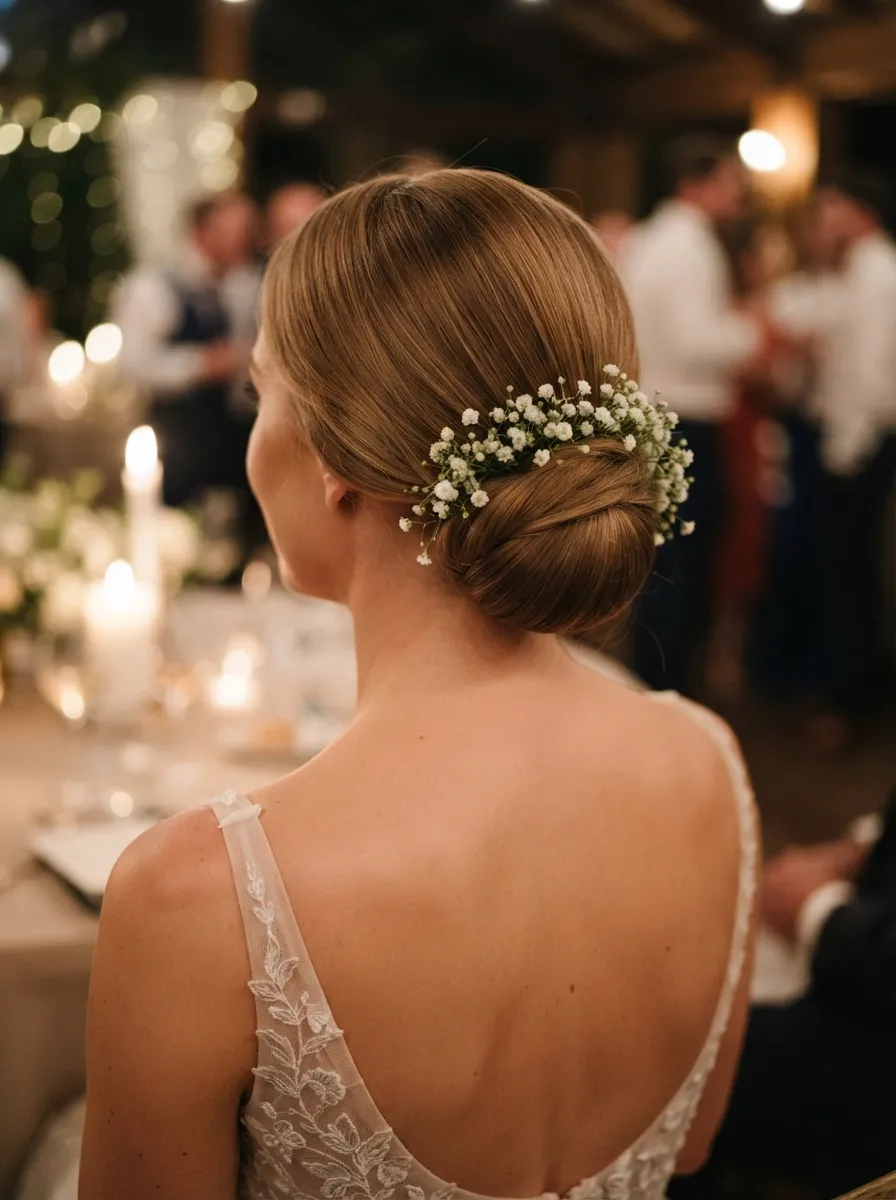
The low chignon sits right at the nape of your neck and never goes out of style. It pairs beautifully with cathedral veils since there’s nothing bulky getting in the way of the fabric. To create it at home, smooth your hair into a low ponytail, twist it into a coil, and pin it flat against your head. A texturizing spray before you start gives the twist enough grip to stay put all night. If your hair is fine, tease the ponytail slightly at the crown first so the bun doesn’t look flat. This style flatters nearly every face shape and works whether your hair is straight, wavy, or naturally curly. It’s also one of the easiest buns to master with a YouTube tutorial and a practice run a week before the big day.
2. Textured Top Knot
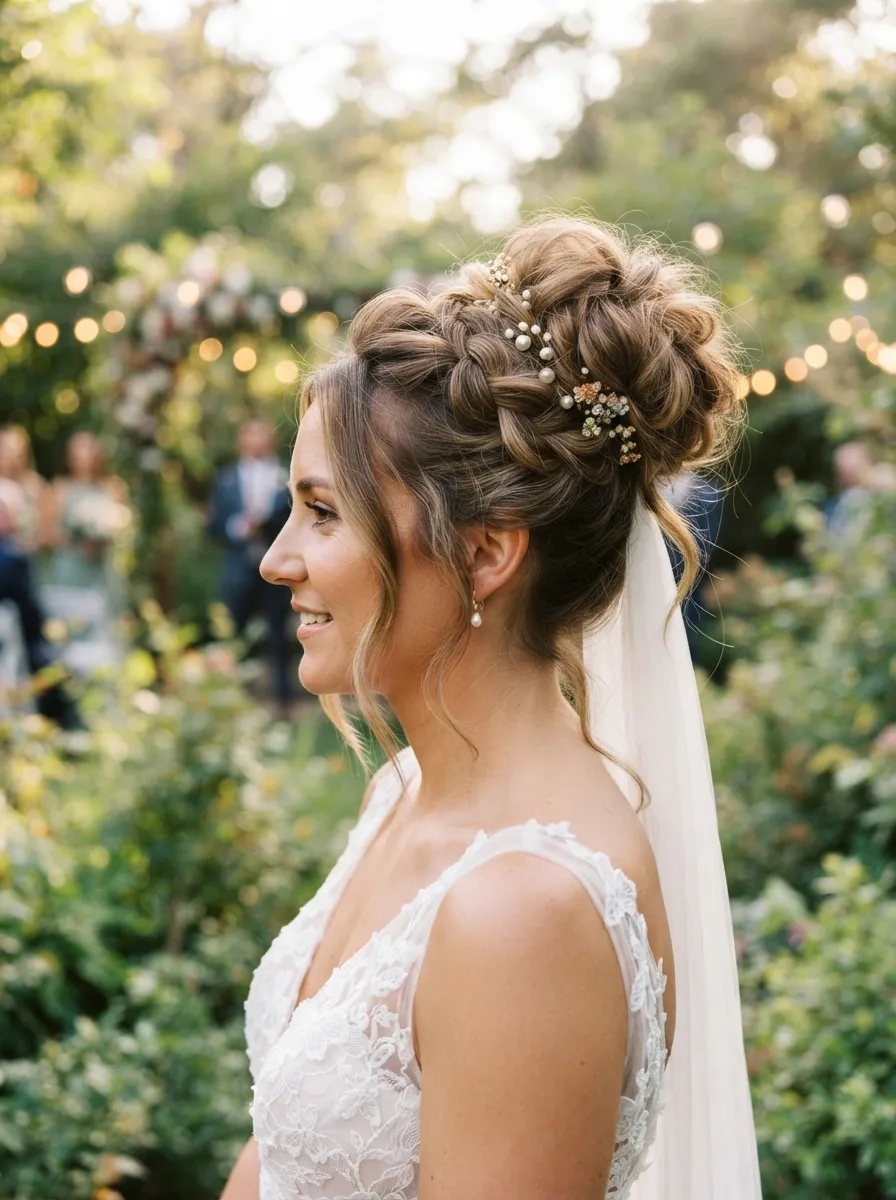
A top knot instantly reads modern and a little edgy without losing romance. This version isn’t slicked back tight, it’s deliberately messy with pieces pulled loose around the crown. Start with dry shampoo or texturizing powder at the roots for grip, then gather hair high on your head and wrap it into a loose knot. Pull a few strands out around your hairline before pinning everything down. If you are searching for Bun Hairstyle Ideas for Thick Hair, this textured top knot is an excellent choice because it comfortably holds a large amount of hair while creating a stylish, effortless look. It works especially well for brides who want their earrings to be the star of the show since it keeps the neck and ears totally visible. It also holds up incredibly well for outdoor weddings with wind or humidity, since the intentional texture hides any flyaways instead of fighting them.
3. Braided Halo Bun
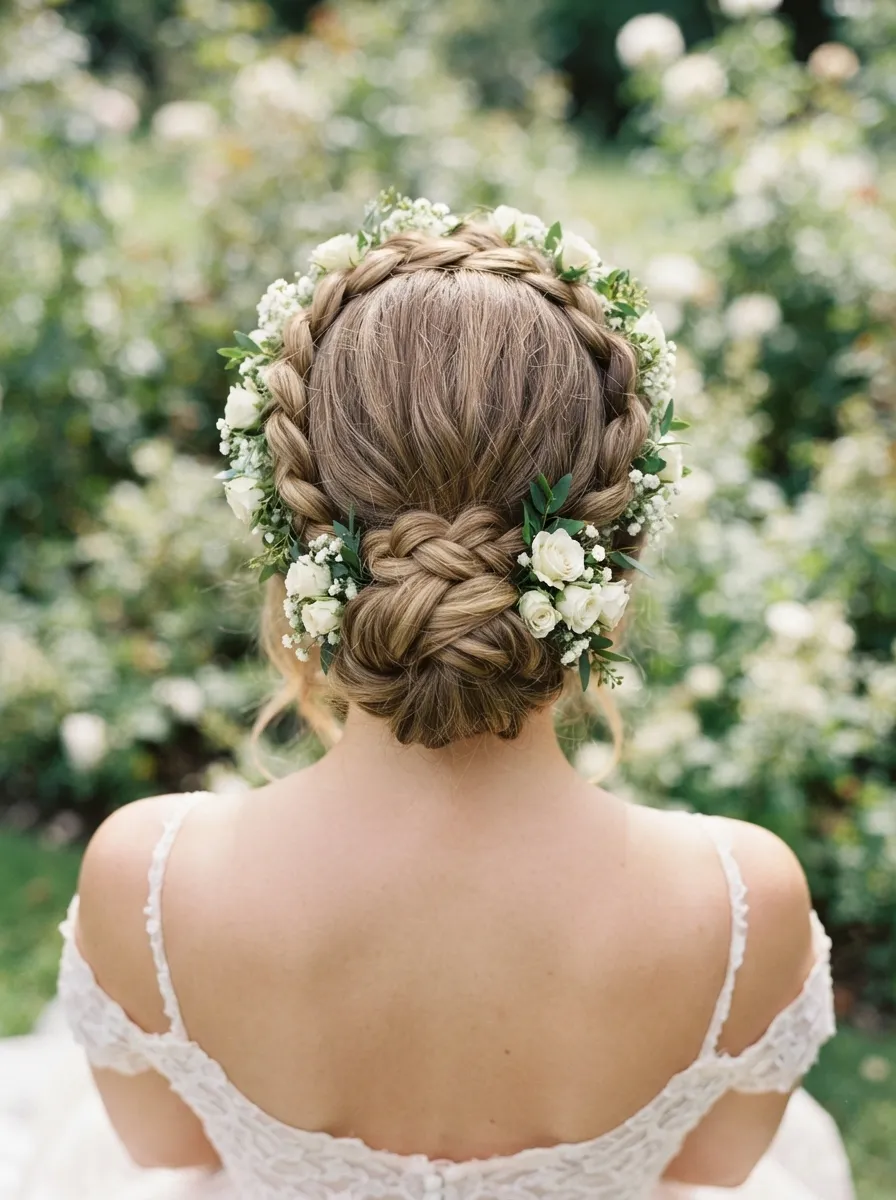
This one combines a braid that circles the head like a crown with a bun tucked neatly in the center. It’s a favorite for boho and garden weddings because the braid adds texture without needing extra accessories. Section your hair into two pieces, French braid each one around your hairline, then pin the ends together at the back and twist them into a small bun. A dutch braid instead of a regular one makes the plait pop even more since it sits on top of the hair rather than underneath. This style genuinely holds all day, which makes it ideal if you’re skipping a mid reception touch up. Add a single flower or leave it bare for a more natural finish.
4. Sleek High Bun With Bouffant
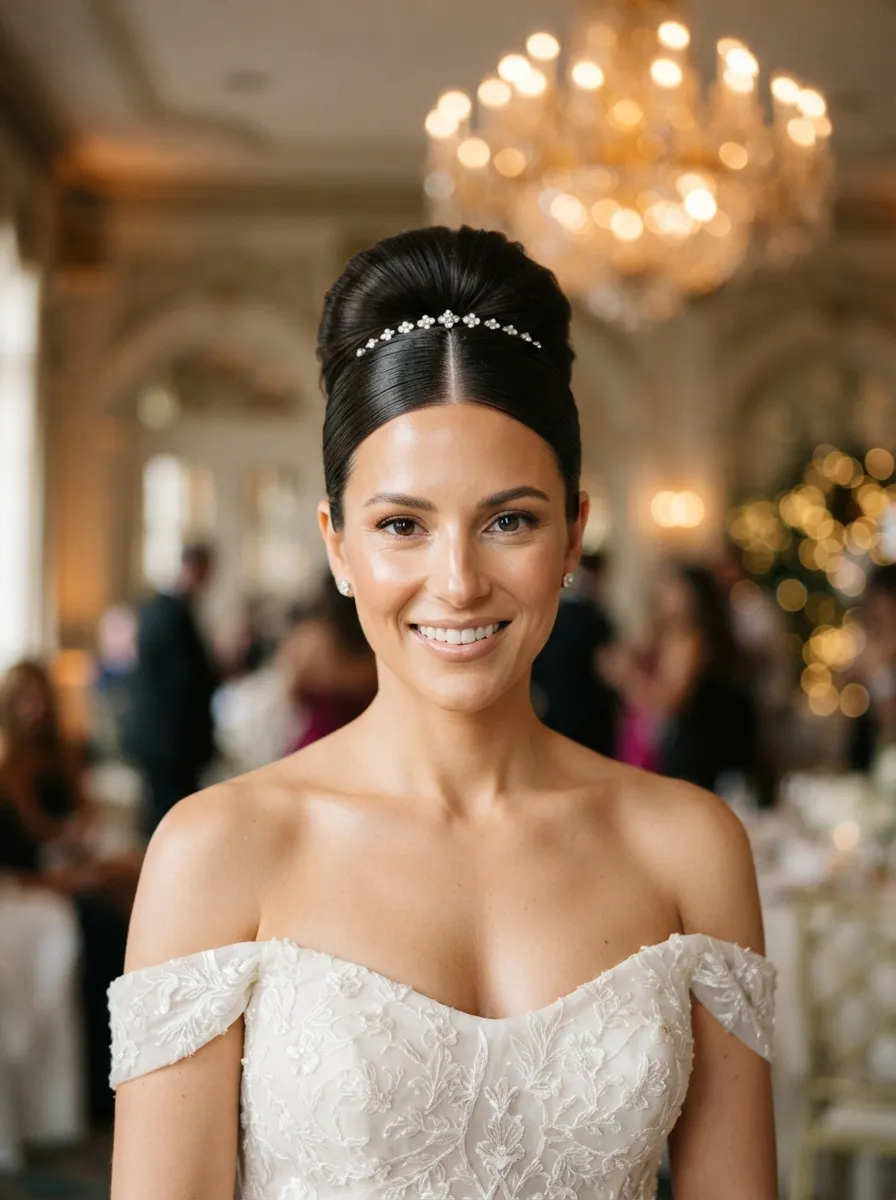
If you want old Hollywood glamour, this is the bun to try. The crown gets teased and lifted before the hair is smoothed back into a high, polished bun. It’s a striking choice for black tie weddings or anyone wearing a dramatic gown with a fitted bodice. To recreate the volume at home, backcomb small sections at the crown with a fine tooth comb, then gently smooth the top layer over it with a boar bristle brush to hide the teasing without flattening it. Finish with a strong hold hairspray so the bouffant survives your first dance. This look pairs especially well with a birdcage veil or a statement tiara since both sit naturally against the raised crown.
5. Loose Waves Into a Side Bun
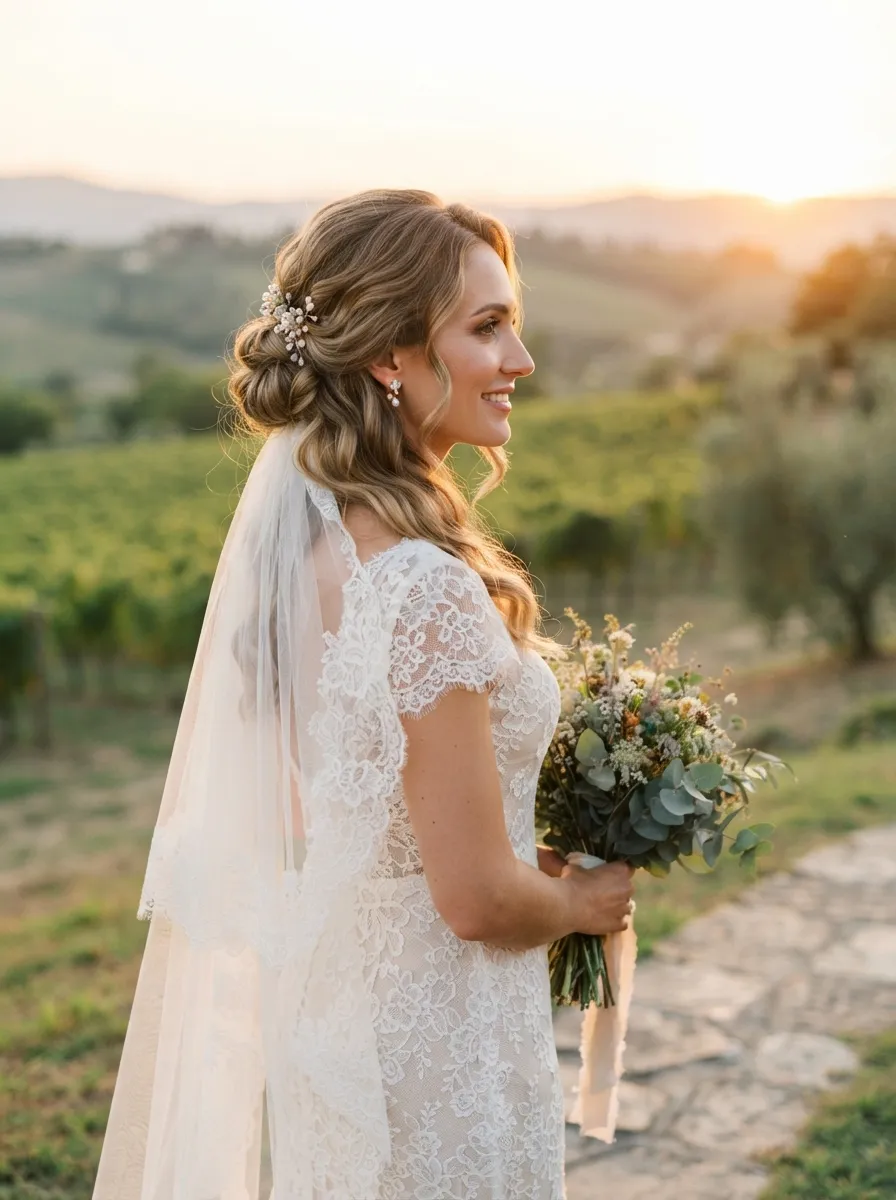
A side bun feels romantic and slightly undone in the best way. Instead of centering the bun, it sits just behind one ear, letting soft waves frame the opposite side of your face. Curl your hair with a one inch wand first, then gather everything loosely to one side and twist into a low bun, leaving a few waves out near your face. This is a wonderful option if your dress has one shoulder detailing or an asymmetrical neckline, since the bun placement echoes that same off center energy. Finger comb the waves rather than brushing them out to keep the texture soft and undone looking.
6. Sleek Bun With Statement Comb
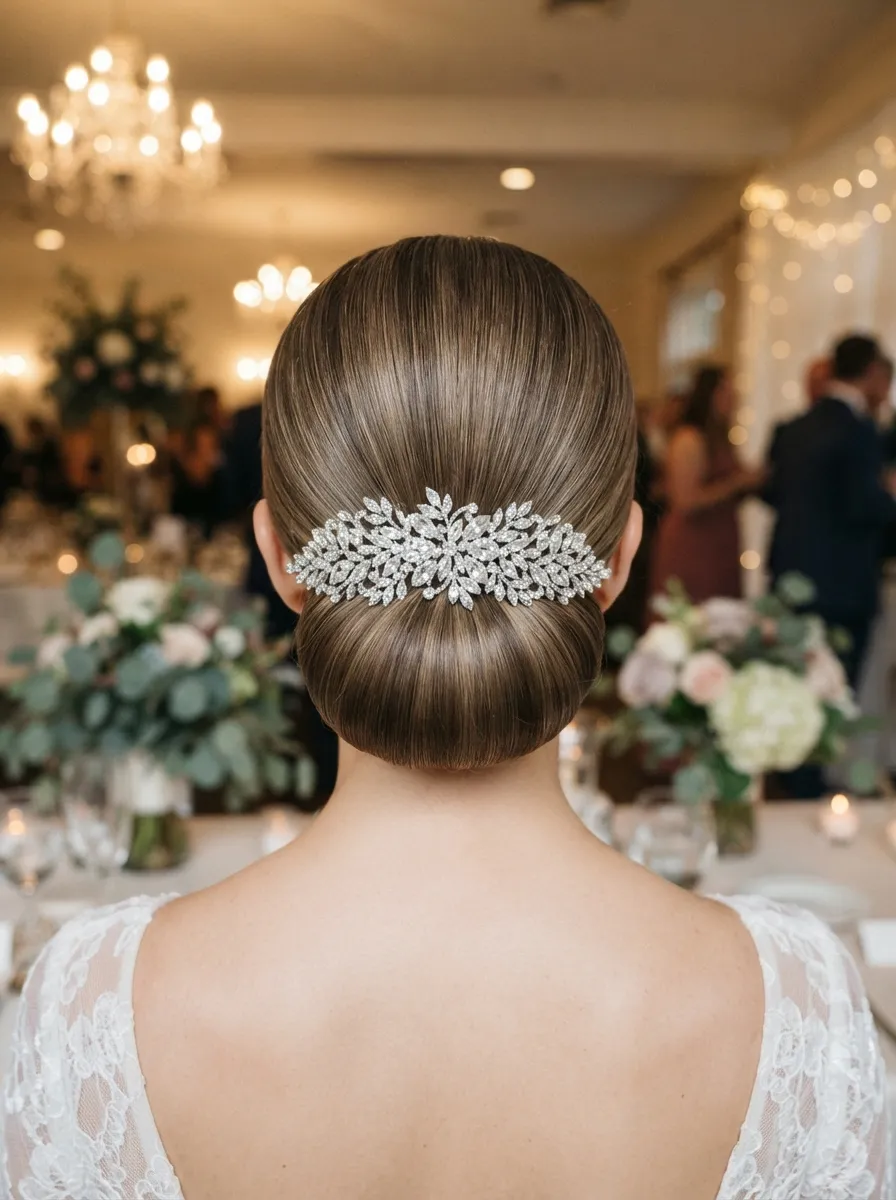
Sometimes the simplest bun becomes the showstopper once you add the right accessory. This style keeps everything smooth and glass like, letting a jeweled comb do all the talking. Use a flat iron on small sections before pulling hair back to eliminate any frizz, then secure a low bun with pins hidden underneath. Slide your comb in right where the bun meets your head. A shine serum applied lightly before smoothing gives the whole look a polished, almost wet finish that photographs beautifully under reception lighting. This is a great pick for minimalist brides who still want one clear focal point in their hair.
7. Curly Bun for Natural Texture
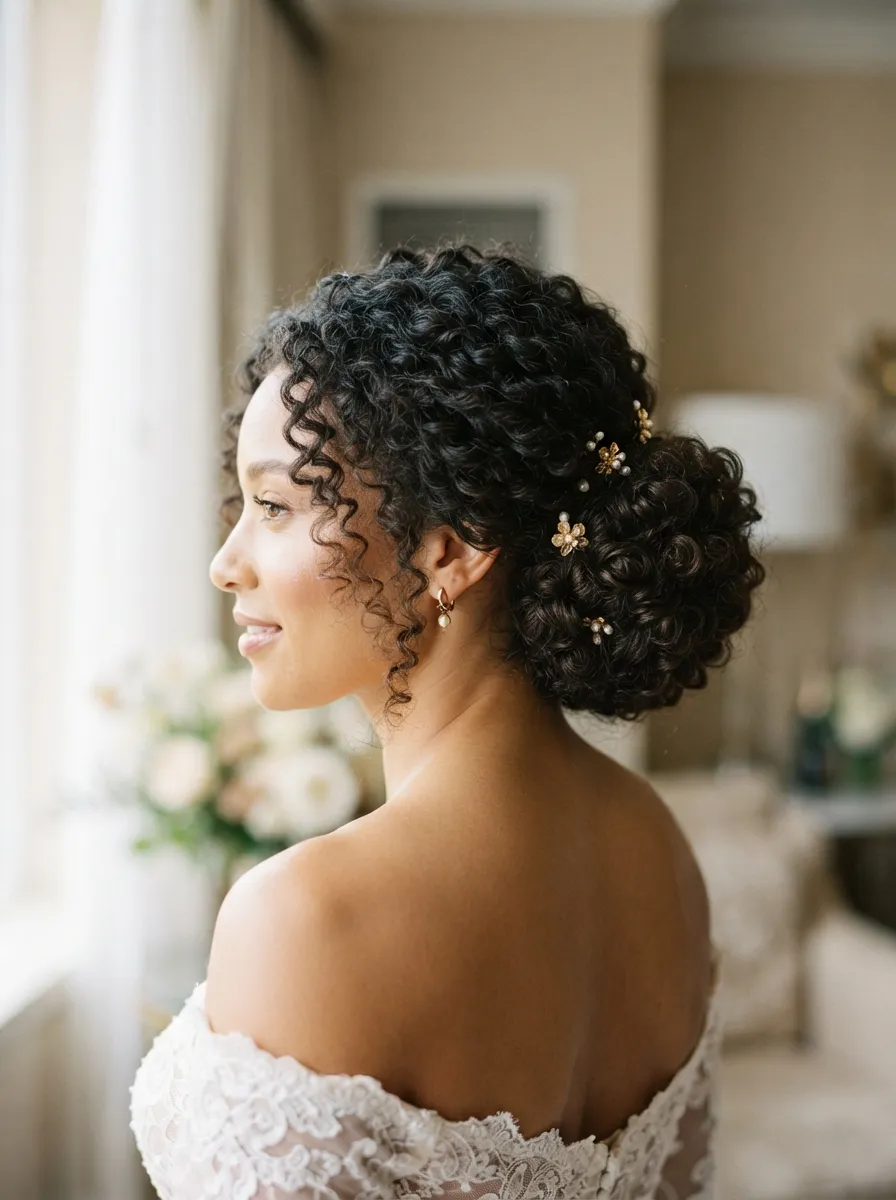
Curly haired brides don’t need to straighten their hair to get a beautiful bun. This style works with your natural curl pattern instead of against it, keeping definition visible even once it’s pulled up. Apply a curl defining cream on wash day, let curls air dry or diffuse, then gather them gently into a bun using your fingers instead of a brush to avoid frizz. Leave a few curls loose around your hairline for softness. This look holds shape wonderfully through humid outdoor ceremonies since the curls already expect moisture in the air. It’s proof that your natural texture belongs in your wedding look exactly as it is.
8. Double Braided Bun
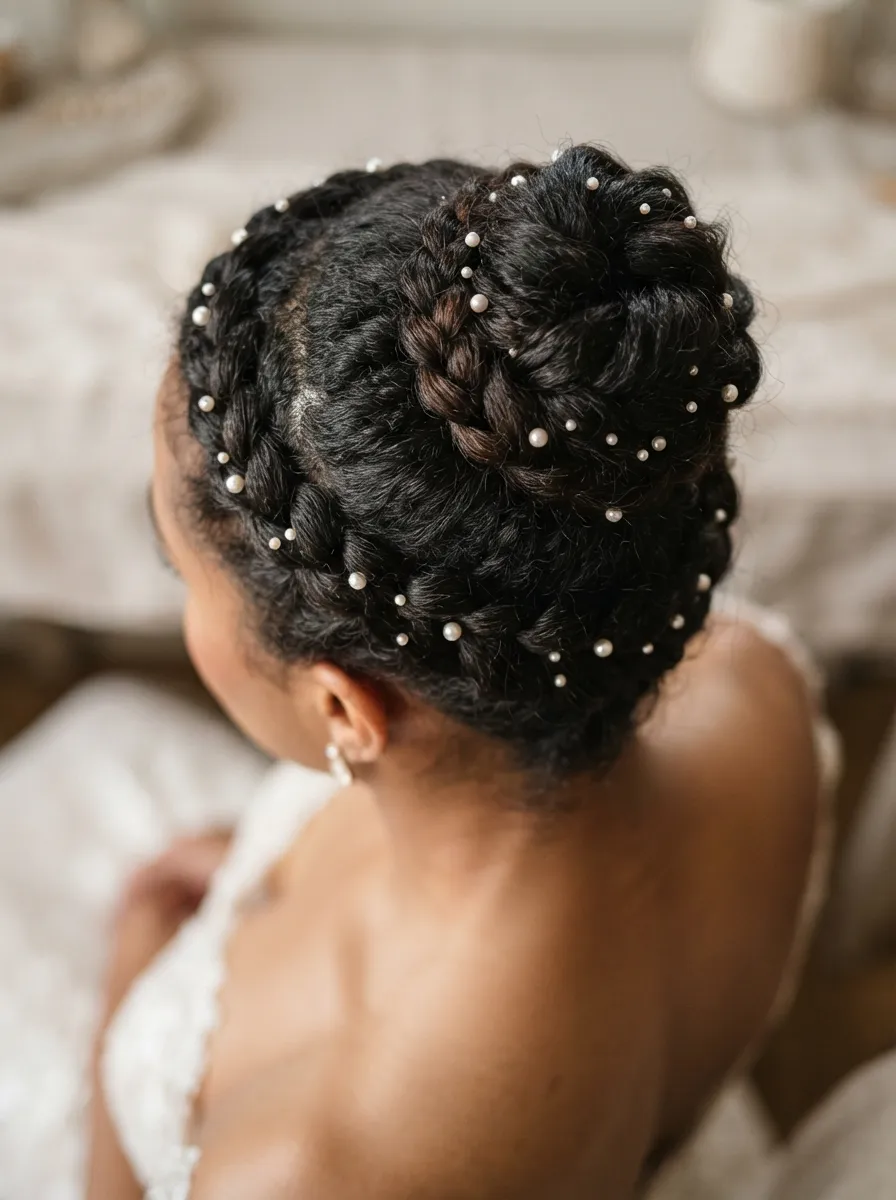
Two braids twisted into one bun give you extra texture and visual interest without adding bulk. Part your hair down the middle, braid each side separately, then wrap both braids around each other at the crown before pinning them flat. This style is a great middle ground between a fully braided look and a simple bun, since it keeps some structure while staying easy to wear under a veil. It also tends to survive long ceremonies particularly well because the braids act like built in security for the bun itself. Try a fishtail braid on each side instead of a standard three strand for a slightly more delicate finish.
9. Vintage Finger Wave Bun
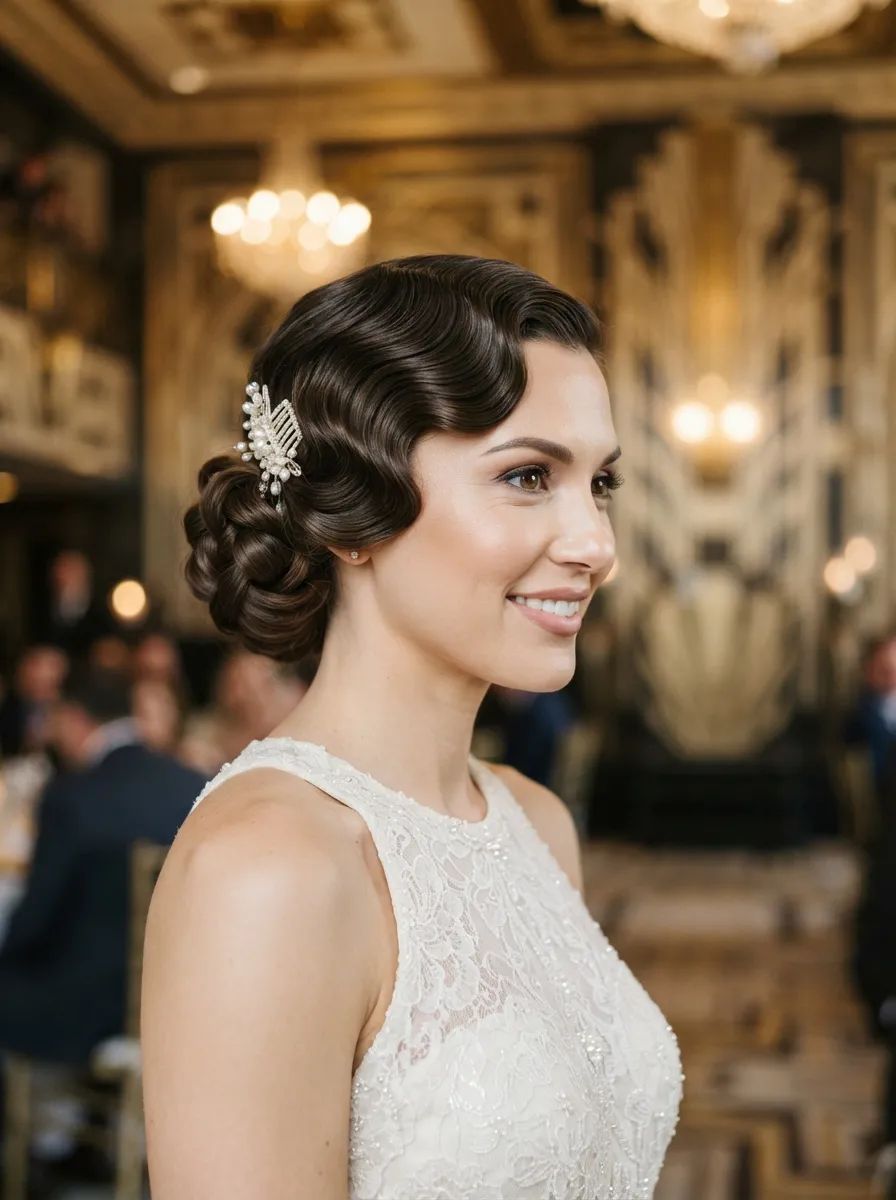
For brides drawn to a 1920s aesthetic, finger waves paired with a low bun create instant vintage glamour. The waves sit close to the scalp and lead the eye smoothly into a neat bun at the back. Set the waves using flat clips and setting gel while your hair is damp, let them dry completely, then remove the clips and gently gather the ends into a low bun. This style needs a bit more patience to master, so practice at least twice before the wedding day. It photographs incredibly well in both color and black and white, making it a favorite for brides planning a vintage themed shoot.
10. Half Up Bun With Face Framing Layers
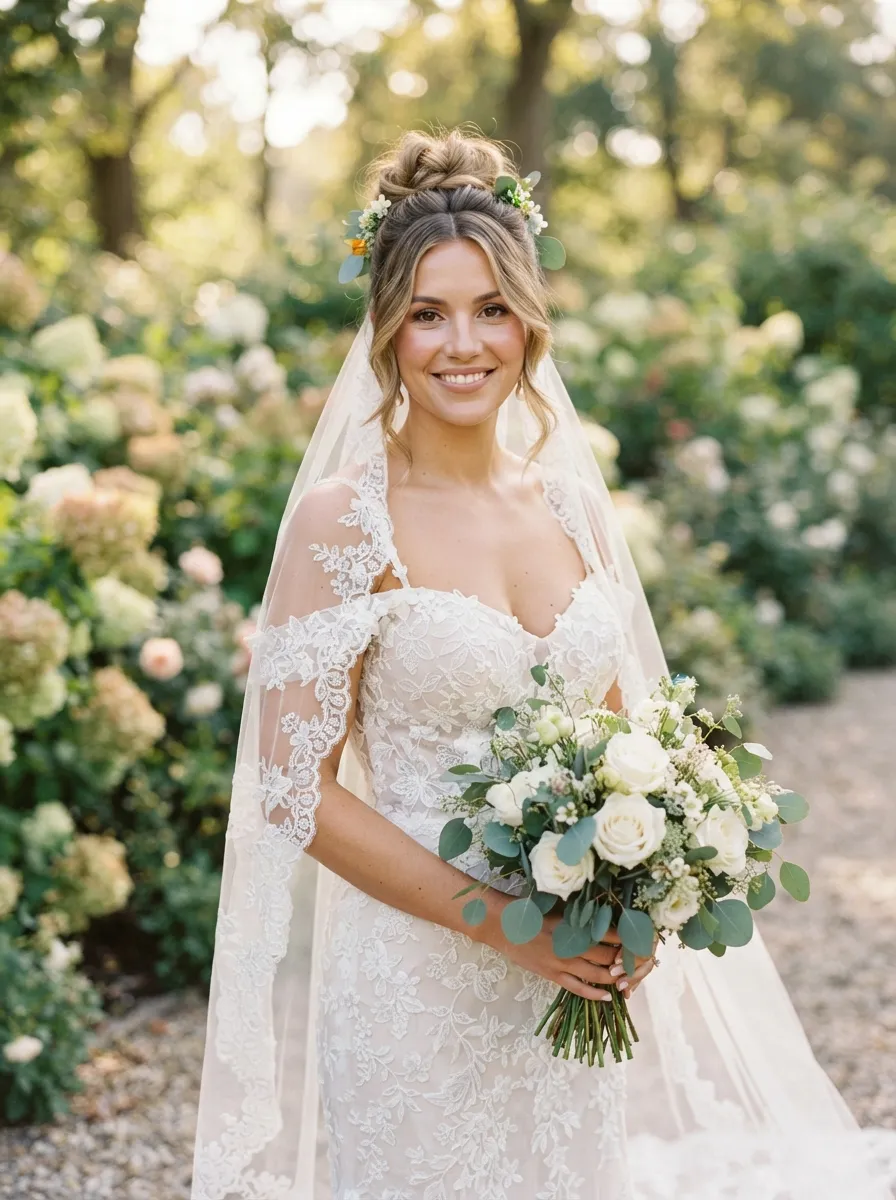
If you can’t decide between hair up or down, this style splits the difference. The top section gathers into a small bun while the rest falls in soft waves around your shoulders. Curl your hair first, then take the top third and twist it into a bun, pinning it securely at the crown. This gives you a formal element without losing the romance of down hair. It’s especially flattering for round or square face shapes since the framing pieces soften angles. Attach your veil comb just behind the bun so it stays hidden and secure through your ceremony.
11. Sleek Bun With Baby’s Breath Crown
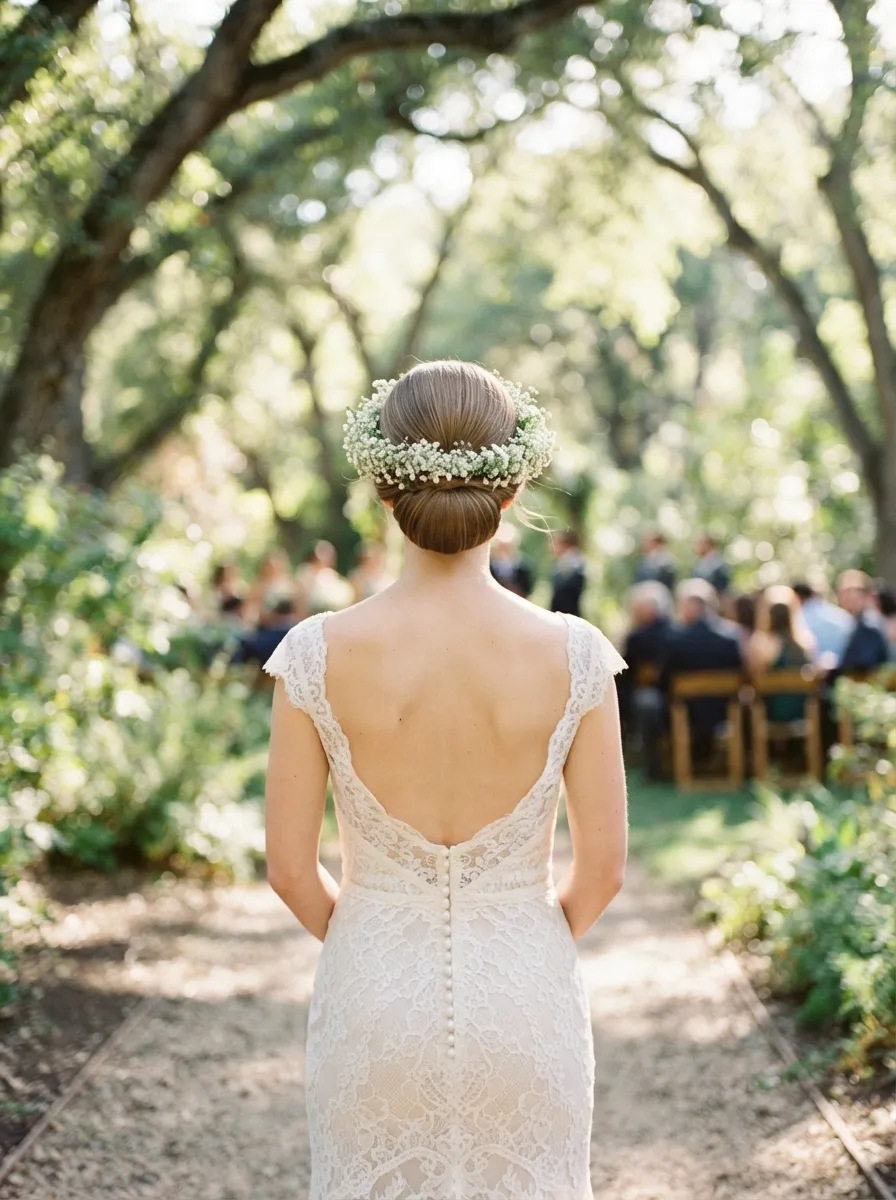
This style takes a simple, smooth bun and elevates it with a ring of tiny white flowers circling the head like a crown. It’s an easy DIY combination since the bun itself takes only a few minutes, and floral crowns can be bought pre made from most craft or floral shops. Smooth your hair back into a low bun, then place the flower crown around your hairline, securing it with a couple bobby pins so it doesn’t shift. This look is a natural fit for outdoor or rustic weddings and pairs nicely with minimal makeup for a fresh, garden party feel.
12. Braided Bun With Ribbon Accent
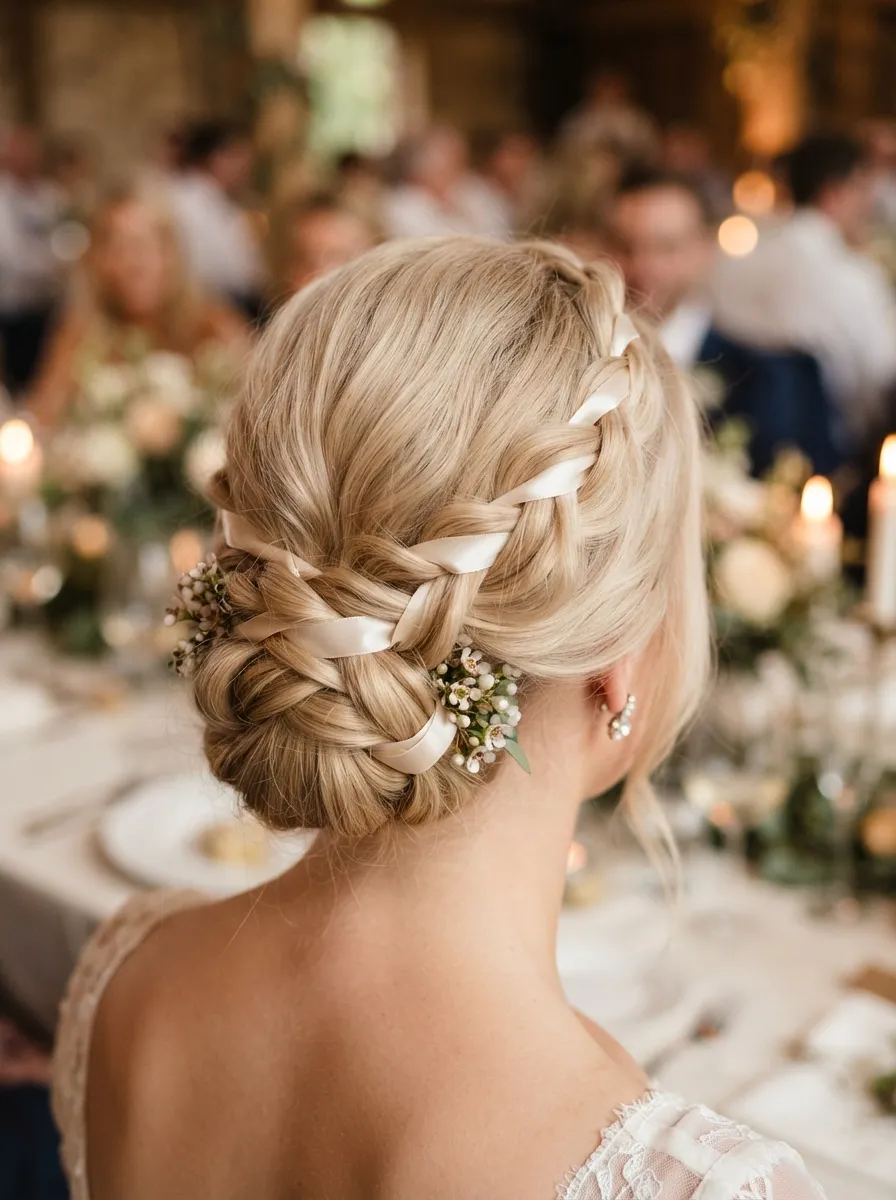
Adding a ribbon into your braid before twisting it into a bun gives you a pop of color or texture without needing floral additions. Choose a ribbon in your wedding palette, weave it in as you braid one section of hair, then coil the braid into a bun and pin it down. This works particularly well for brides who want to nod to a color scheme through their hair rather than through flowers. A satin ribbon photographs better than grosgrain since it catches light more softly. This style also makes a lovely option for bridesmaids since it’s easy to replicate across different hair lengths and textures.
13. Low Bun With Deep Side Part
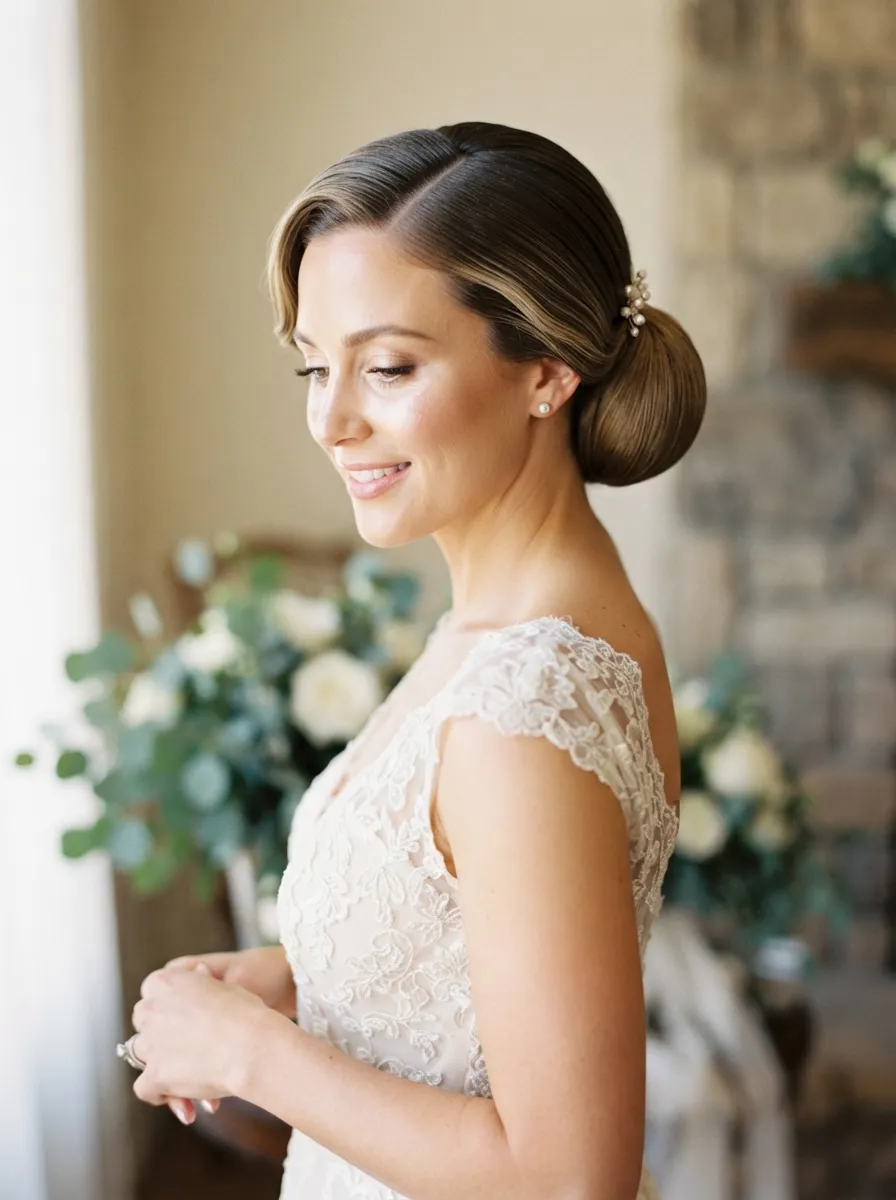
A deep side part changes the entire feel of a low bun, giving it a more editorial, modern look. Part your hair deeply to one side, smooth it back with a comb, and gather it into a low bun at the nape. Use a bit of gel along the part line to keep it crisp throughout the day. This style suits brides who want something sleek but not fussy, and it works beautifully with statement earrings since one side of the face stays completely open. It’s also a great option if your dress has a plunging back, since it keeps the focus on your spine and shoulders.
14. Rope Braid Bun
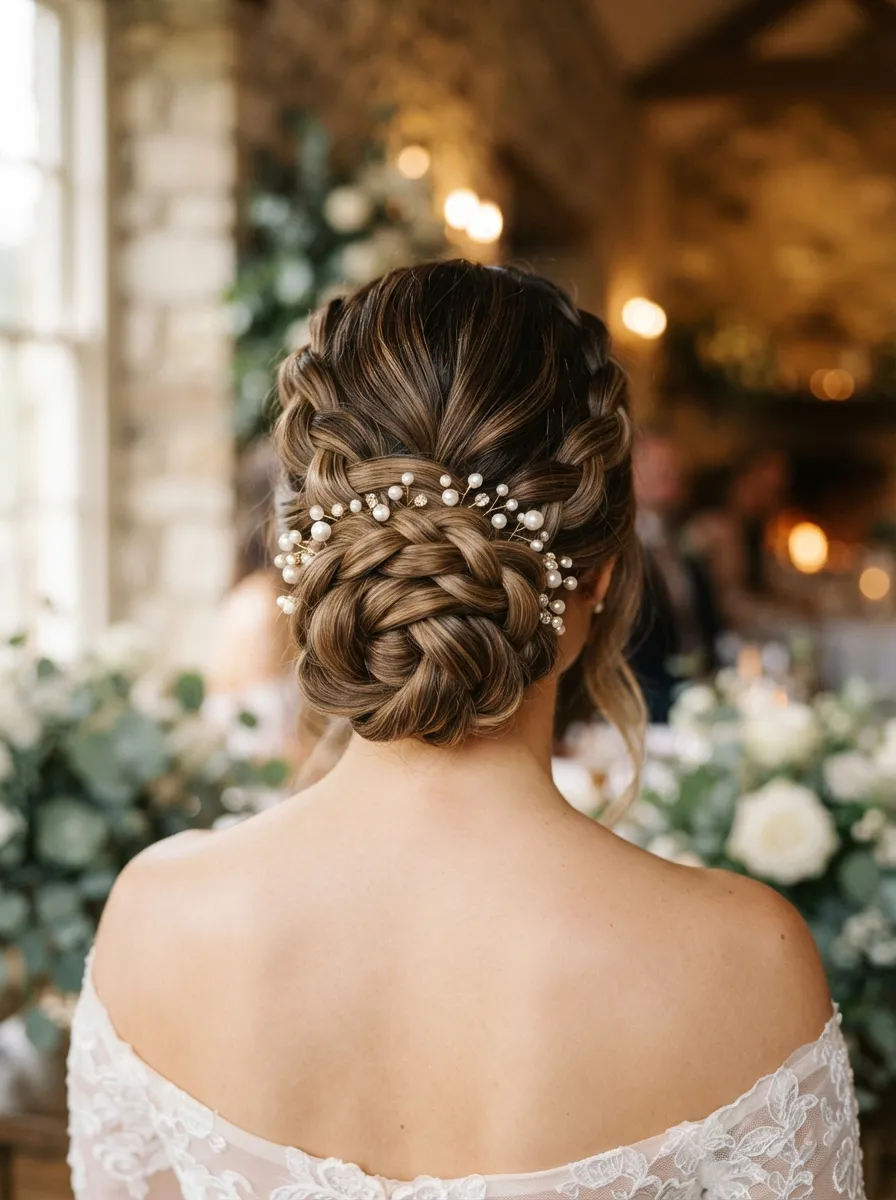
Rope braids create a twisted rather than plaited texture, giving your bun a completely different look from a standard braid. Take two sections of hair, twist each one individually, then twist them around each other before coiling the whole thing into a bun. It reads more polished and dimensional than a flat braid and holds its shape exceptionally well through long receptions. This style pairs nicely with minimal jewelry since the texture itself is the statement. It’s also a good option for second day hair if you want to repurpose your wedding style for a post wedding brunch.
15. Bubble Bun
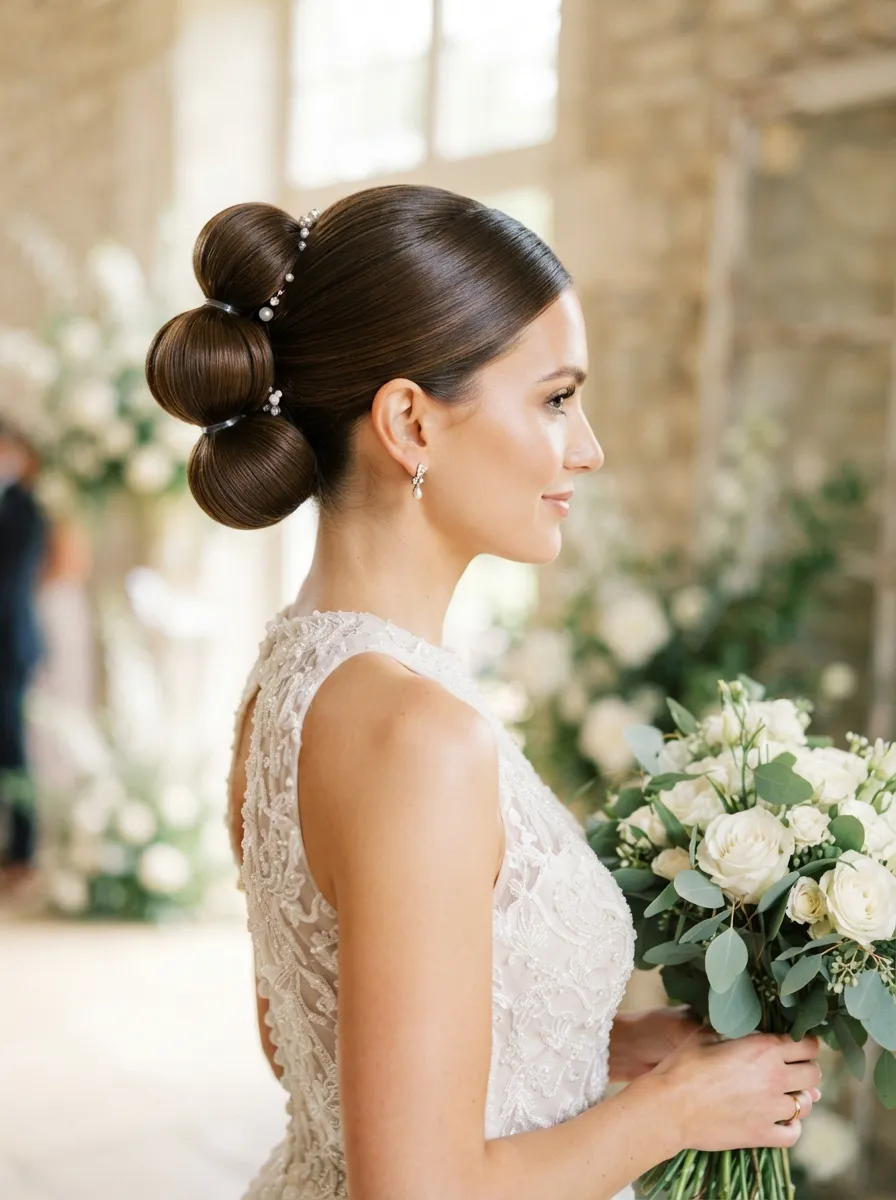
The bubble bun uses small elastics along a ponytail to create rounded sections before the whole thing is coiled into a bun shape. It gives a playful, textured look that feels a little different from a traditional smooth bun. Gather hair into a ponytail, add three or four small elastics spaced evenly down the length, gently pull each section to create the bubble effect, then wrap the ponytail around itself and pin it in place. This is a fun choice for younger brides or those with a more whimsical wedding theme. It also disguises thin hair well since the sections create the illusion of extra volume.
16. Bun With Fresh Floral Cluster
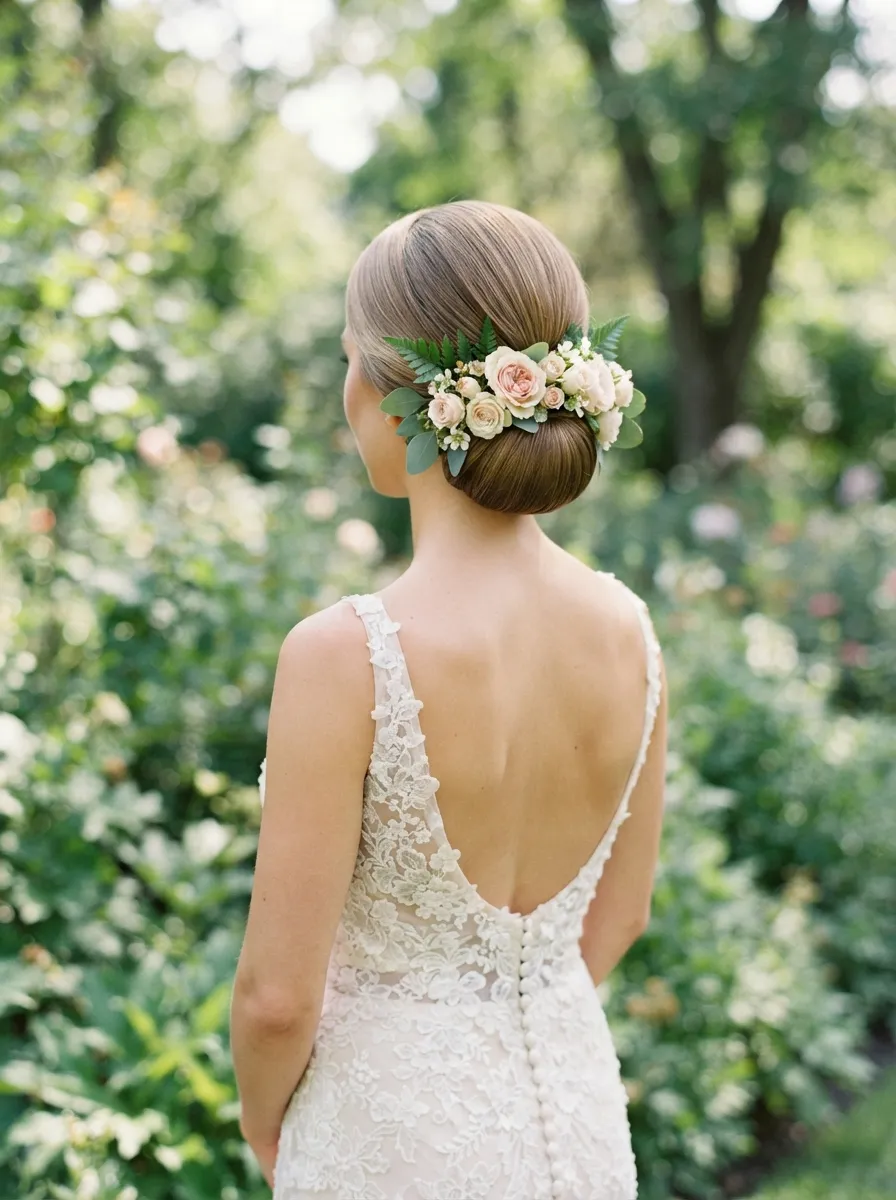
Instead of scattering flowers throughout the whole style, this look concentrates a small cluster right where the bun meets the head. It’s simple to execute and lets fresh flowers stay fresher longer since they’re grouped together rather than spread thin. Smooth your hair into a classic bun, then have your florist wire together two or three small blooms to tuck in with a bobby pin. Roses, ranunculus, or spray orchids all work beautifully here. This is an easy way to tie your hairstyle into your bouquet without overwhelming the whole look with florals.
17. High Bun With Sleek Baby Hairs
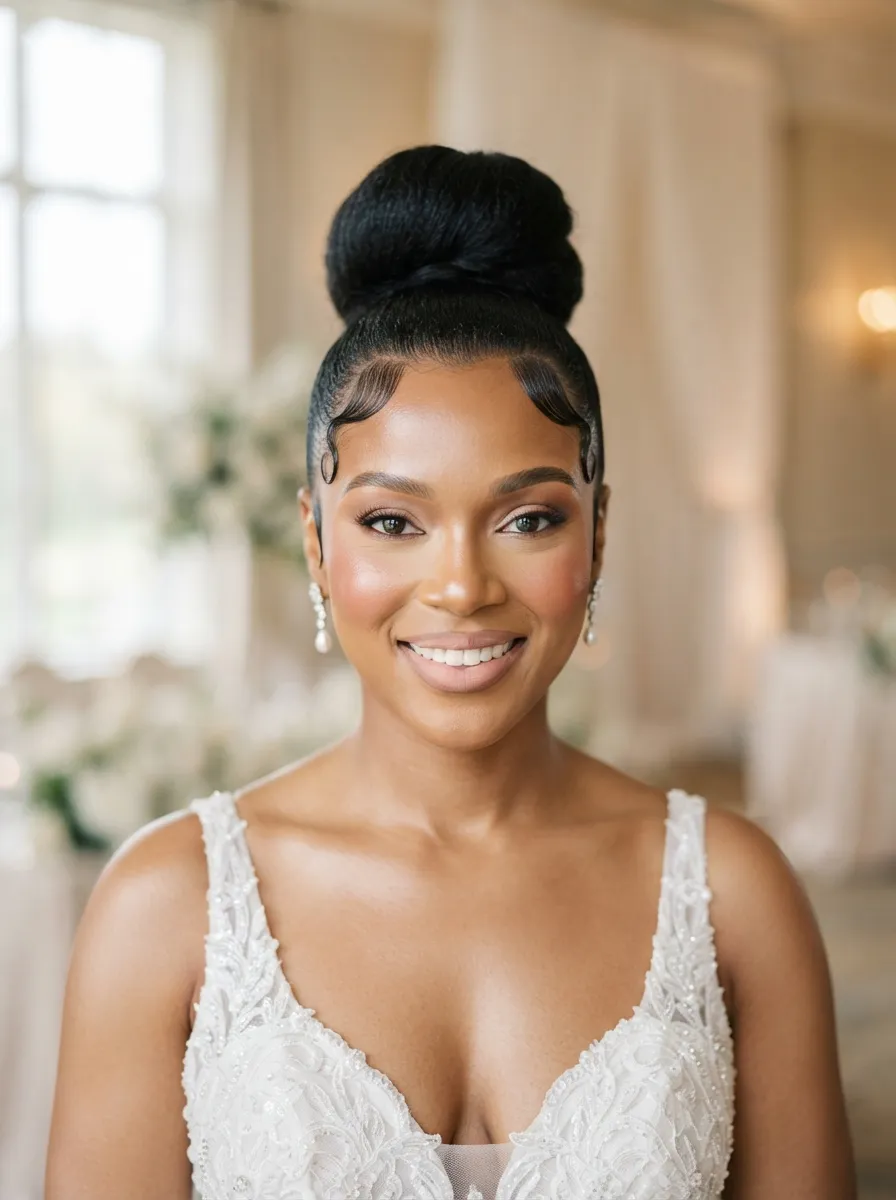
This modern take on the classic high bun focuses on a crisp, styled hairline with tiny baby hairs shaped using a small brush and edge control. It gives a clean, sculptural finish that photographs beautifully up close. Smooth your hair back into a high, tight bun, then use a soft toothbrush with a small amount of edge control gel to shape the baby hairs into gentle swirls along your forehead. This style works wonderfully for brides who love a fashion forward, precise look. Keep the rest of the bun simple so the hairline detail stays the focal point.
18. Twisted Low Bun With Veil Underneath
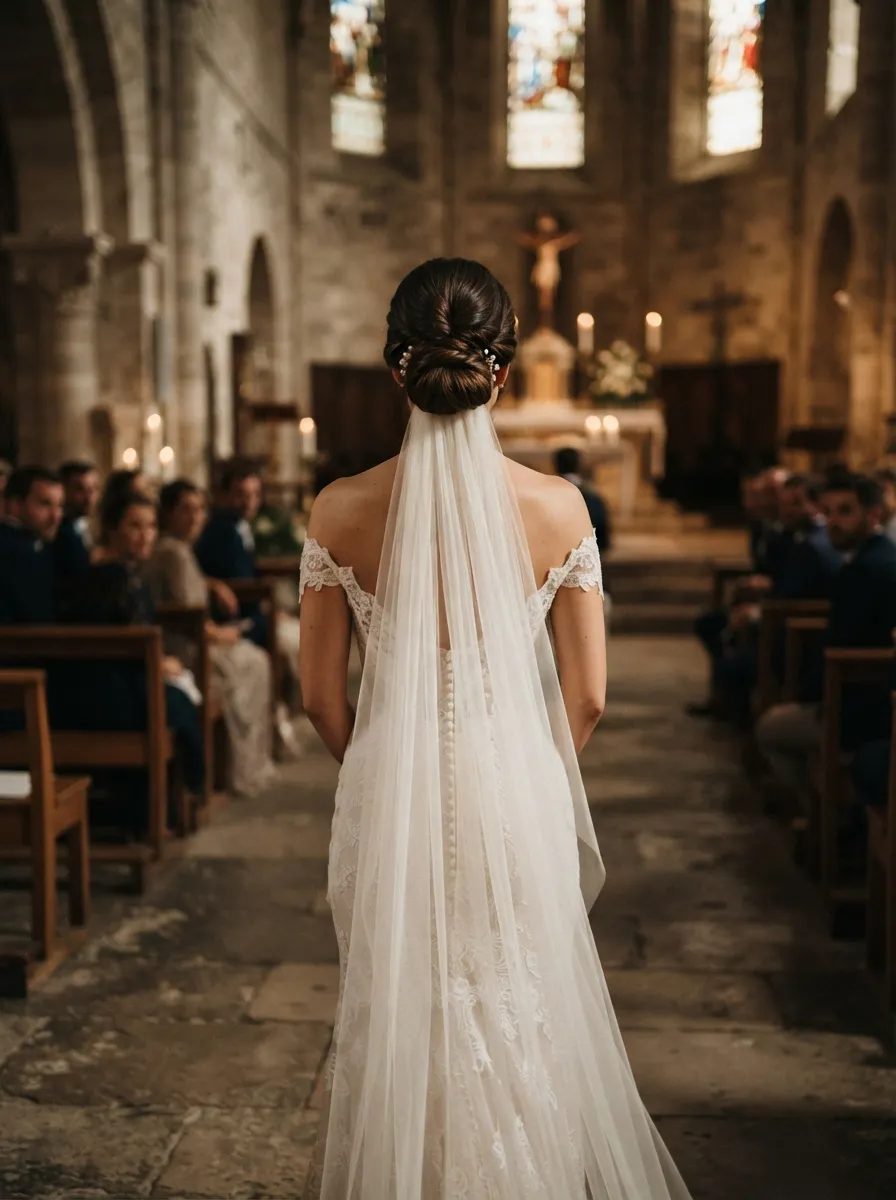
Placing your veil just above the bun rather than on top of your head creates a seamless, elegant line down your back. Twist sections of hair together instead of braiding them, gathering the twists into a low bun, then attach your veil comb directly above it so the tulle flows naturally over the bun. This placement works especially well with long veils since there’s nothing interrupting the fabric’s fall. It also means you can remove the veil later in the night without disturbing your hairstyle underneath, giving you a fresh reception look with zero extra styling needed.
19. Bun With Gold Hair Vine
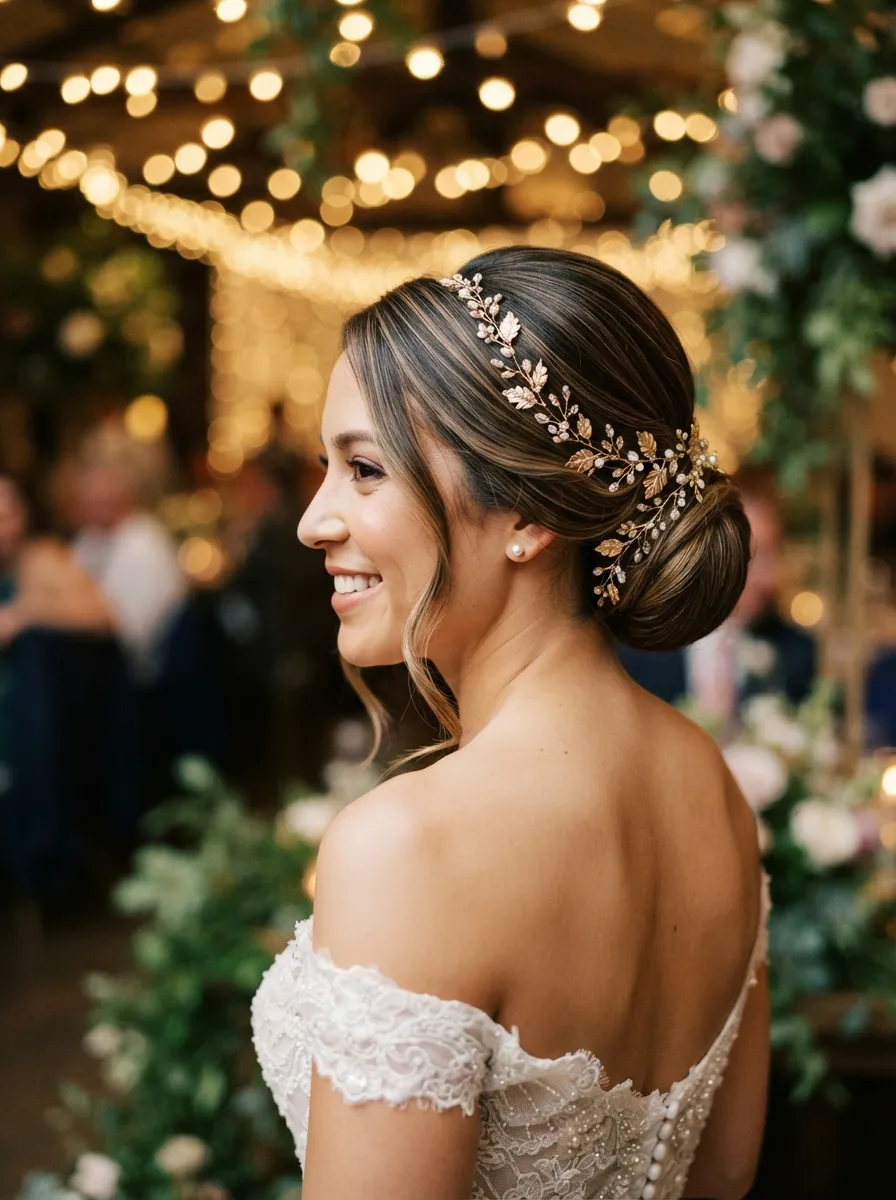
A thin gold hair vine wrapped around a simple bun adds shimmer without competing with your veil or jewelry. These vines are flexible and inexpensive, and you can shape them yourself right before the ceremony. Smooth hair into a bun, then wind the vine around the base a few times, tucking the end underneath and securing it with a bobby pin. This look works beautifully for evening weddings where candlelight or string lights will catch the metallic detail. It’s also a low maintenance option since the vine itself needs no touch ups once it’s pinned in place.
20. Low Bun With Micro Braids Woven In
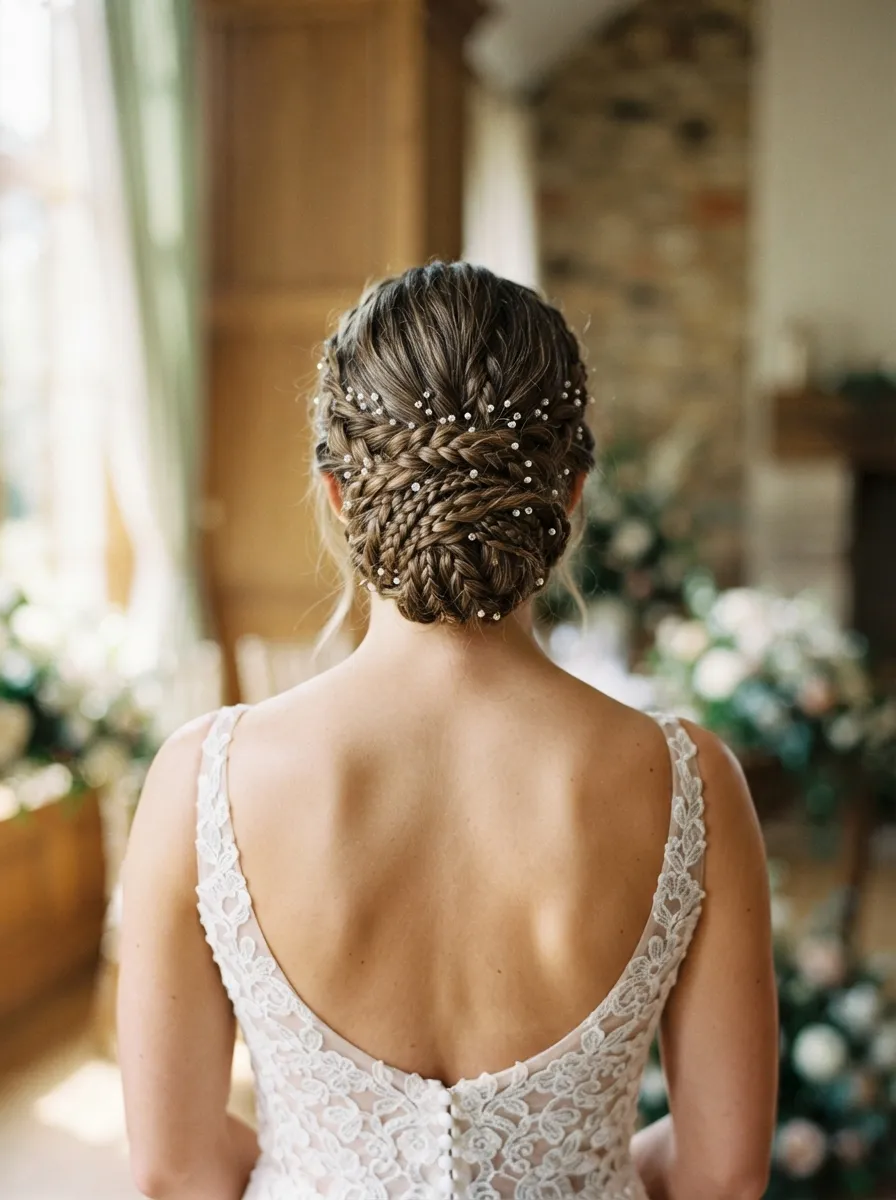
Weaving several thin micro braids into your hair before pulling it into a bun adds intricate texture that catches the eye up close without looking overdone from a distance. Braid four or five small sections around your crown, leave the rest of your hair loose, then gather everything into a low bun so the braids blend naturally into the twist. This style takes a little more time to prep but holds beautifully through an entire wedding day. It’s a great option for brides with naturally textured or coily hair who want their braiding skills to shine through their formal style.
21. Bun With Oversized Bow
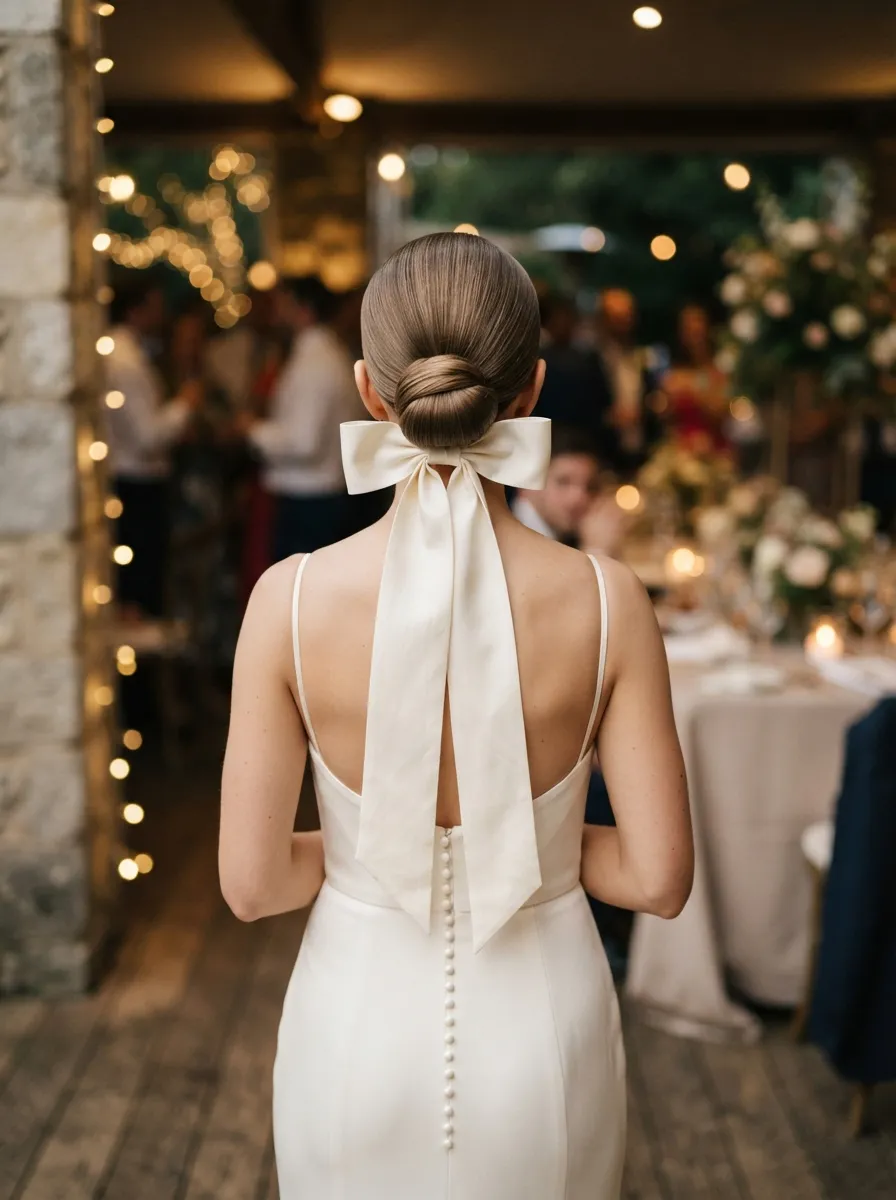
Bows have become a favorite bridal accessory, and pairing one with a simple bun keeps the whole look playful yet elegant. Smooth your hair into a low or mid height bun, then clip a silk bow directly above it using a small comb attachment. Choose a bow in ivory or your dress’s exact shade so it feels intentional rather than costume like. This style is especially popular for brides going for a modern romantic aesthetic, and it photographs wonderfully from behind, which matters more than people expect once the professional photos come back.
22. Textured Bun With Face Framing Curls
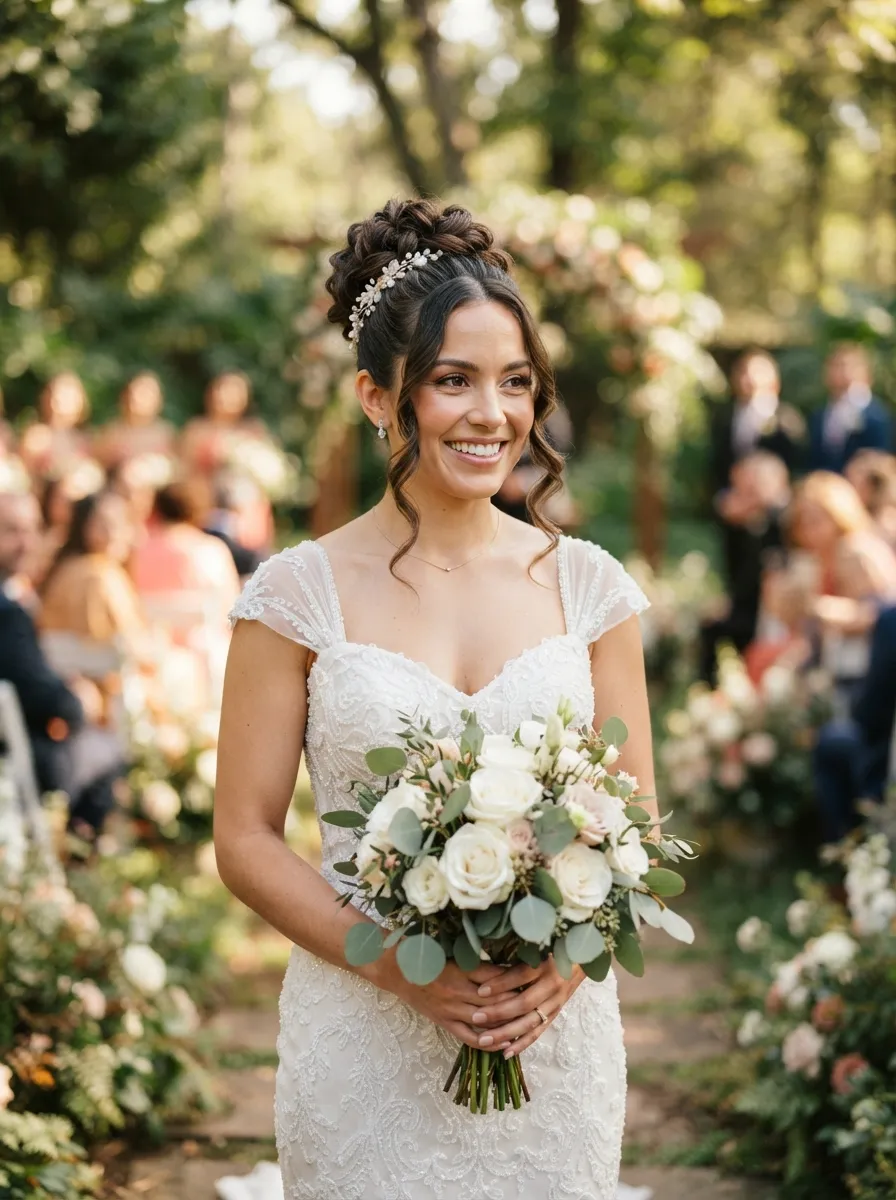
This style keeps most of your hair up in a textured bun while leaving two soft curled pieces down to frame your face. Curl the two face framing sections with a small barrel wand first, then gather the rest of your hair into a loose, textured bun at the crown. This combination softens the overall look and works for nearly every face shape, since the curled pieces draw the eye toward your features rather than away from them. It’s a popular choice for brides who want an updo that still feels soft and approachable rather than overly formal.
23. Sculptural Bun With Metallic Pins
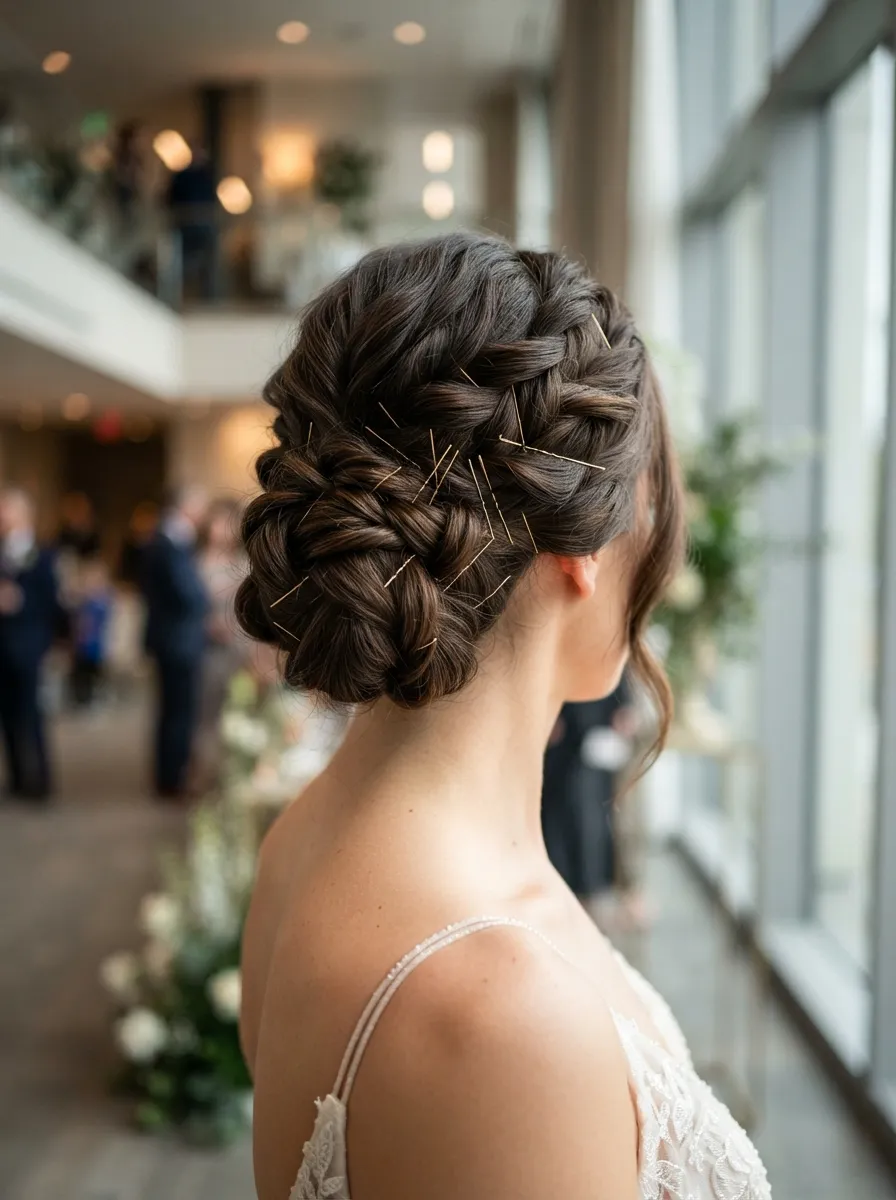
For brides who love a fashion forward, architectural style, this bun leans into visible structure rather than hiding it. Instead of tucking pins away, thin metallic pins are placed deliberately across the bun as part of the design. Section your hair into two or three twists, wrap them into a bun shape, and layer the pins across the surface in a pattern rather than hiding them underneath. This works particularly well for modern venues with clean architectural lines, tying your hairstyle into the overall aesthetic of the day. It’s a bold choice, but one that photographs with real impact.
Conclusion
A wedding bun can be as simple as a smooth low twist or as detailed as a fully braided crown, and there’s genuinely a version here for every hair type, dress style, and personal taste. Try a few of these at home before your big day so you know exactly what products and pins you’ll need, and don’t be afraid to mix elements from different styles to make it your own. Whichever bun you choose, it’s one more detail that’ll make your wedding day feel completely, beautifully you.