
Thick hair holds a bun like nothing else, but it can also fight you the whole way there, sliding out of elastics, weighing down at the nape, or turning into a tight ball that pulls at your temples by noon. The good news is that thick strands actually give you more to work with than thin hair ever could. You get fuller shapes, more texture, and buns that hold all day without a can of hairspray. Below are 28 ways to wear a bun when you have thick hair, from lazy five minute versions to styles that look like you spent an hour at a salon chair. Each one is built to feel light on your scalp instead of heavy, so your neck does not ache by dinner. Grab a few extra pins because thick hair usually needs one or two more than the box says, and let’s get into it.
1. The Loose Low Bun
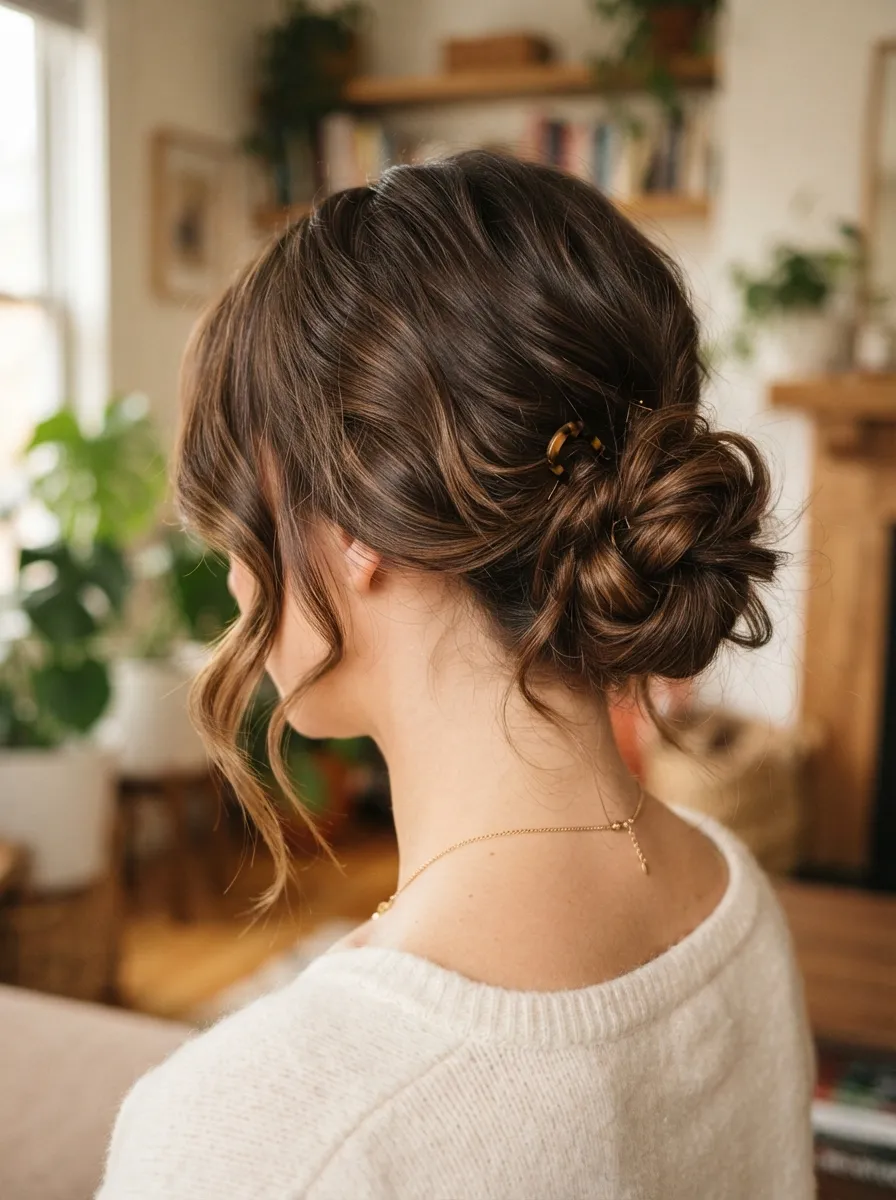
Start at the nape instead of the crown. Gathering thick hair low takes the strain off your scalp because gravity is doing less work against you. Brush your hair back, loop it into a low ponytail, then twist the tail around the base and pin it in a soft, slightly lopsided circle. You want it a little undone, not sleek. Pull a few face-framing pieces loose before you pin anything down. This shape works with second or third day hair better than fresh wash hair, since a little natural oil helps the twist hold its shape without sliding apart. If your hair is very thick, split the ponytail in half before twisting so you get two thinner ropes instead of one thick, stiff one; twist them together and it lays flatter. A texturizing spray at the roots beforehand gives the twist enough grip to stay put through a full workday without a single bobby pin popping loose.
2. High Bubble Bun
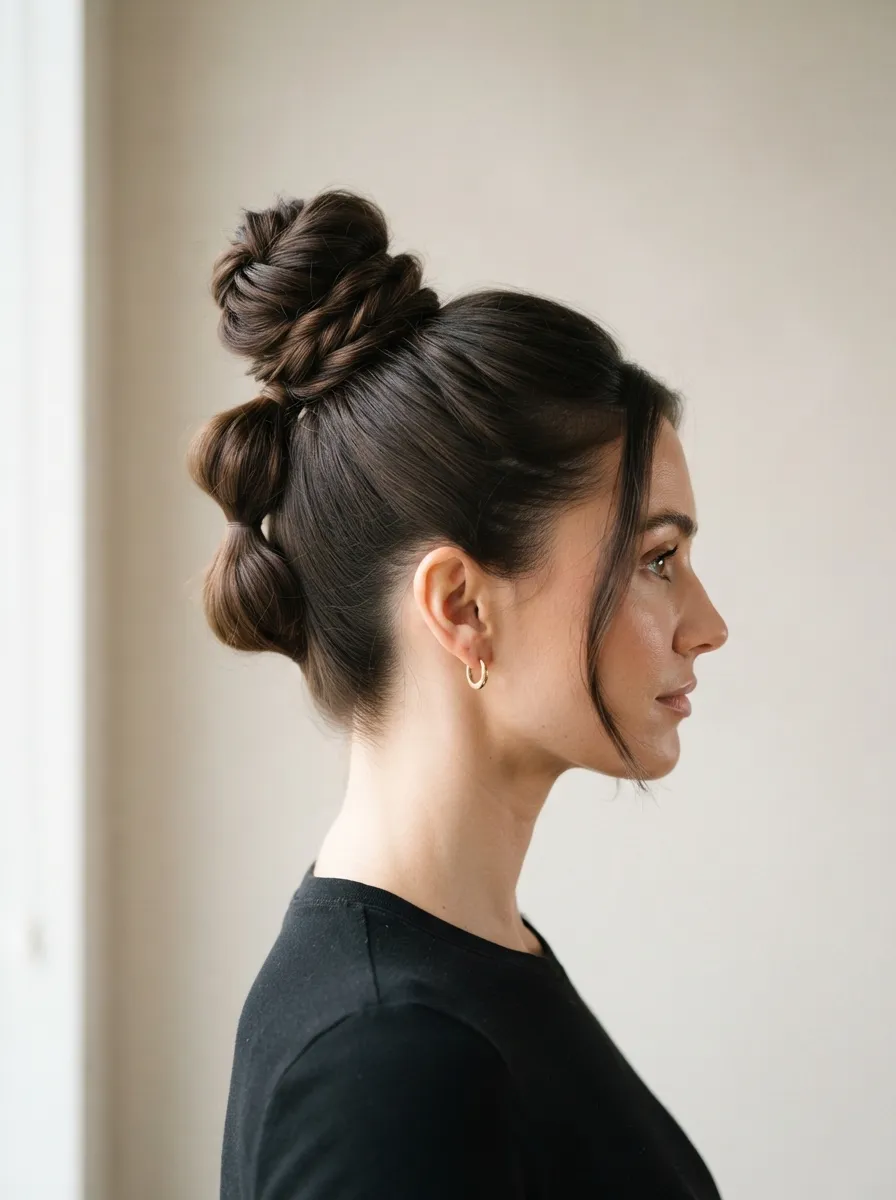
A bubble bun uses several small elastics stacked up the ponytail instead of one, which spreads the weight of thick hair across your whole head rather than one tired spot. Pull hair into a high pony, then add three or four elastics spaced an inch apart down the length. Gently pull the sections between each elastic outward to create the bubble effect, then coil the tail up and pin it flat against your head. Because the weight is distributed, this style actually feels lighter than a single thick bun, even though it uses the same amount of hair. It photographs well too, since the bubbles catch light in a way a flat twist never does. If you are looking for Bun Hairstyle Ideas for Thin Hair, this bubble bun creates the illusion of fuller hair while remaining lightweight, making it a flattering option for fine or thin strands. If you want it to last through a workout, use silicone grip elastics instead of plain rubber bands so thick strands do not slip free mid bounce.
3. Two Twisted Space Buns
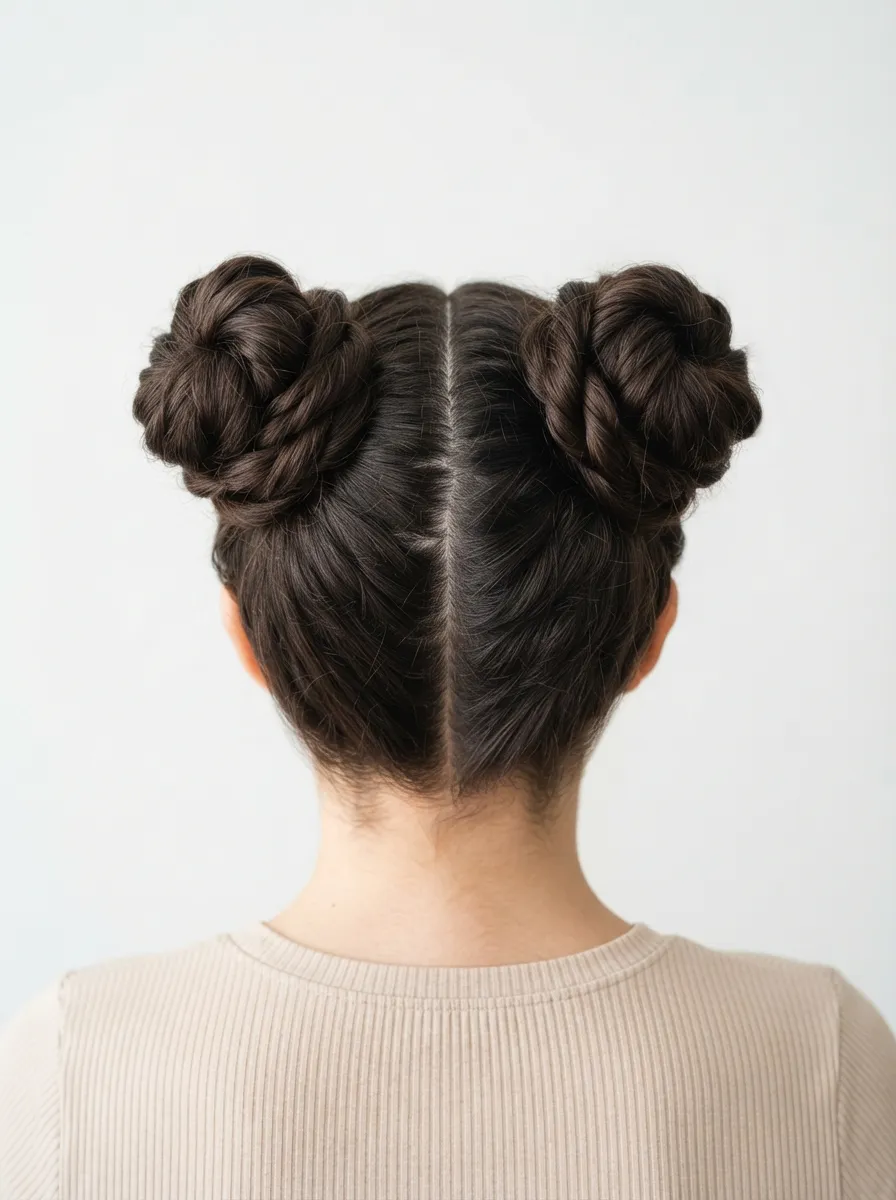
Space buns split the load in half, which is the real trick for thick hair. Part down the middle, section into two even pigtails, then twist each one tightly before wrapping it around its own elastic to form a bun. Two smaller buns sit lighter on your head than one giant one and tend to stay symmetrical longer because each side balances the other. This look works for festivals, gym days, or just a Tuesday when you want something with more personality than a plain pony. If your part keeps drifting, use the tip of a rat tail comb dipped in a little gel to trace a crisp line before you divide the sections. Uneven space buns are a dead giveaway of a rushed part, so take the extra thirty seconds here.
4. Braided Crown Bun
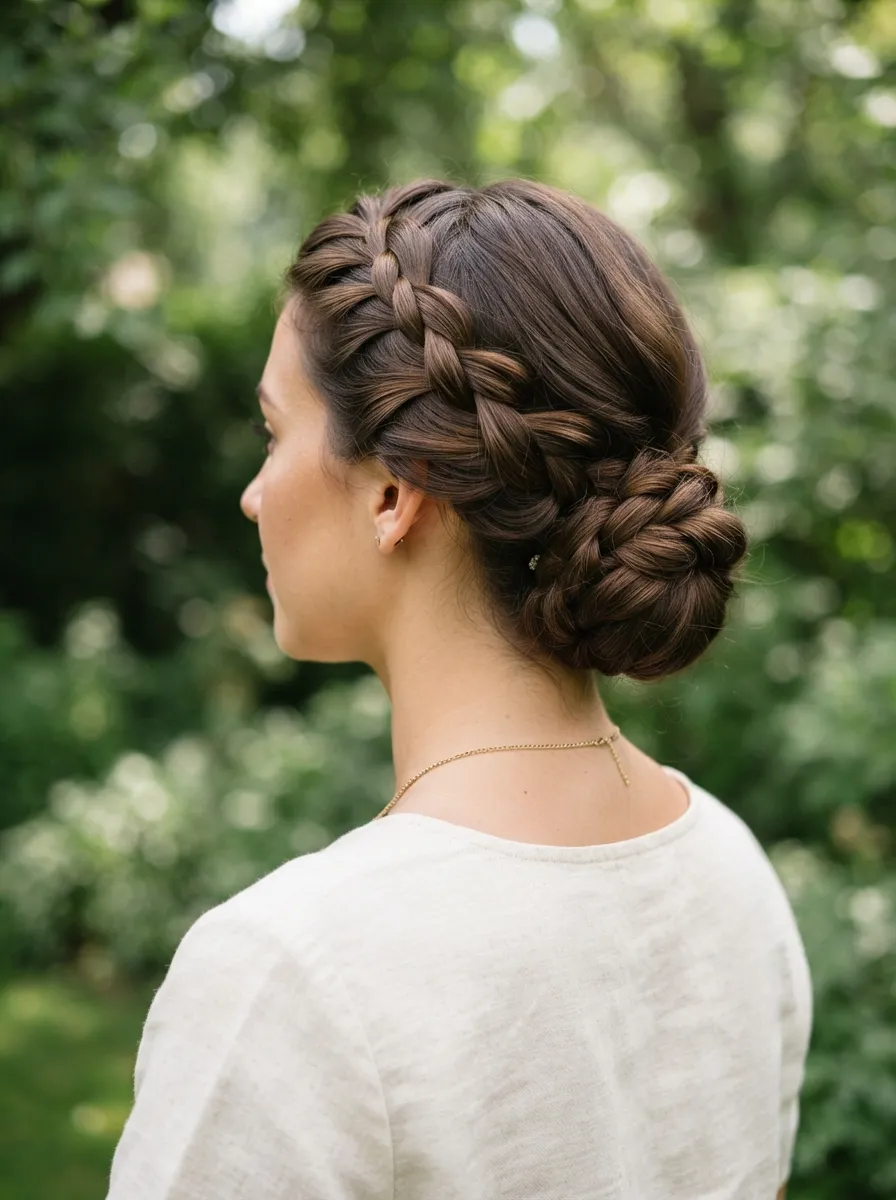
Combining a braid with a bun spreads thick hair along the head instead of piling it all in one spot, which cuts down on that dragging feeling by afternoon. French braid one side from your temple back toward the nape, then gather everything, braid included, into a low bun and pin it flat. The braid adds texture and structure so the bun itself can stay loose and soft rather than tightly wound. This is a great option for second day hair since braids actually hold better with a bit of natural grease in the strands. Tuck the braid tail into the base of the bun so the ends disappear rather than poking out, and mist with a light hold spray to keep flyaways down without stiffening the whole style.
5. Messy Top Knot
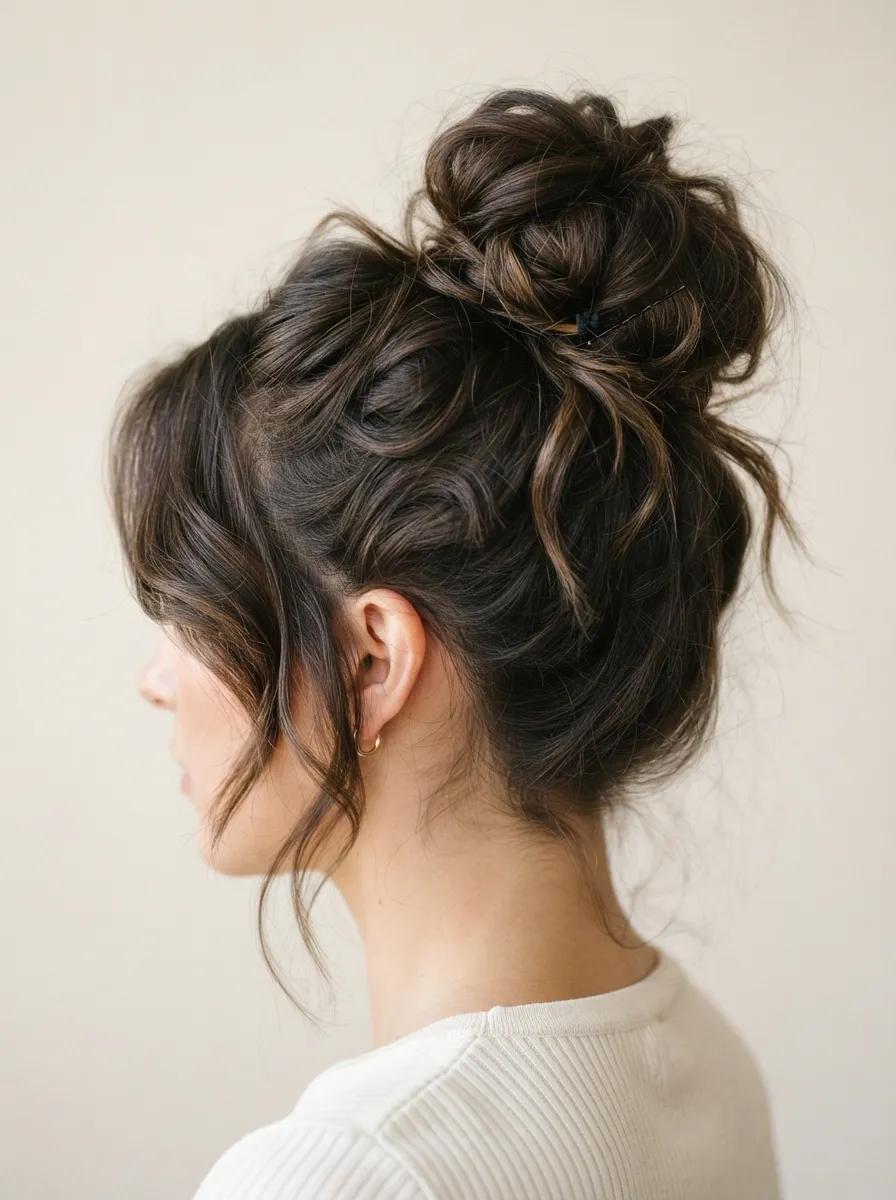
A top knot at the crown puts weight where your scalp is strongest, which is why it holds up so well on thick hair through long days. Flip your head forward, gather hair at the crown, and twist loosely before wrapping it into a knot rather than a tight coil. Leave some volume in the twist instead of pulling it flat. Secure with a single strong elastic and two crossed bobby pins for backup, since thick hair needs the extra hold a single pin cannot give. This style pairs well with oversized sweaters and hoop earrings because it keeps the neck and shoulders visually open. If your hair tends to slip out mid morning, backcomb the base slightly with a fine tooth comb before you twist; the added texture gives the elastic something to grip.
6. Rope Twist Bun
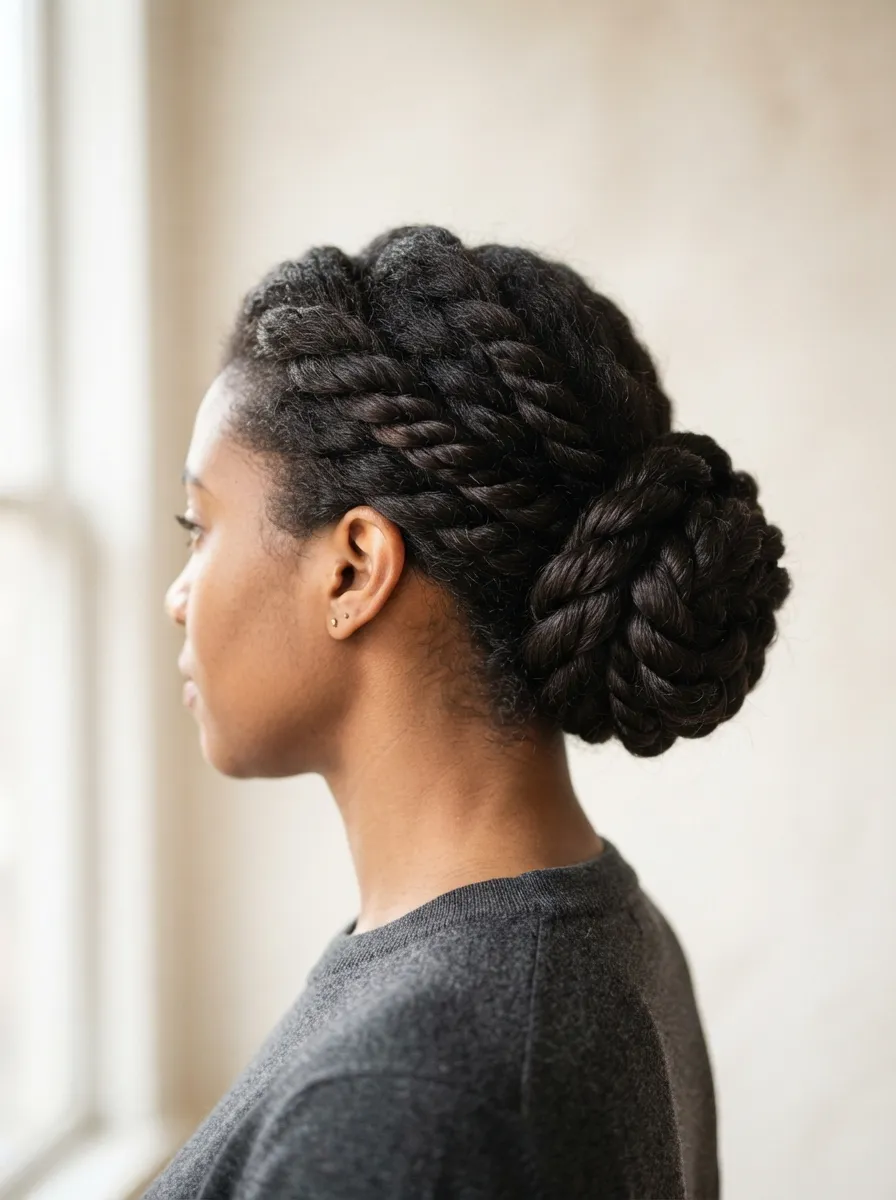
A rope twist is two strands twisted around each other instead of one section twisted alone, and it holds thick hair better than a plain twist because the tension locks in on itself. Split your ponytail in two, twist each half in the same direction until it kinks slightly, then twist the two halves together in the opposite direction. Coil the resulting rope into a bun and pin around the edge. The texture reads more polished than a simple twist bun, which makes it a solid pick for office days or dinners out. A small amount of smoothing serum on your palms before you start keeps flyaways contained without weighing the twist down, and it helps the rope hold its shape for hours instead of loosening by lunchtime.
7. Half Up Bun with Loose Waves
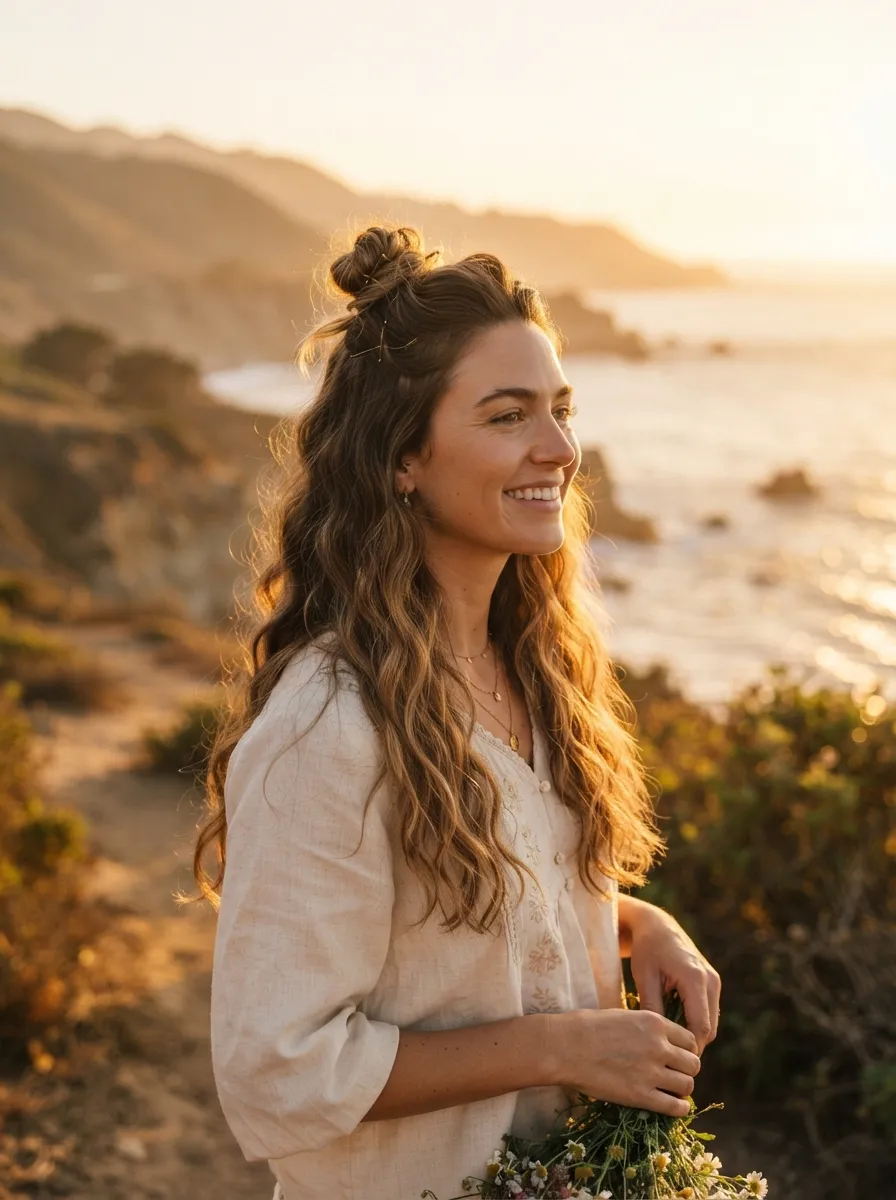
Not every bun needs to hold all your hair. Gather only the top half into a small bun at the crown and leave the rest down in loose waves. This is one of the lightest options on this list for thick hair because you are only working with a fraction of it, which means less pulling on your scalp overall. Curl the bottom half loosely with a one inch wand before you start, since waves under a half up bun look far more finished than flat strands. Twist the top section a couple of times before securing so it has some shape rather than sitting like a lump. This style works especially well for date nights or brunch, when you want your hair to look done without spending twenty minutes on it.
8. Braided Bun for Round Faces
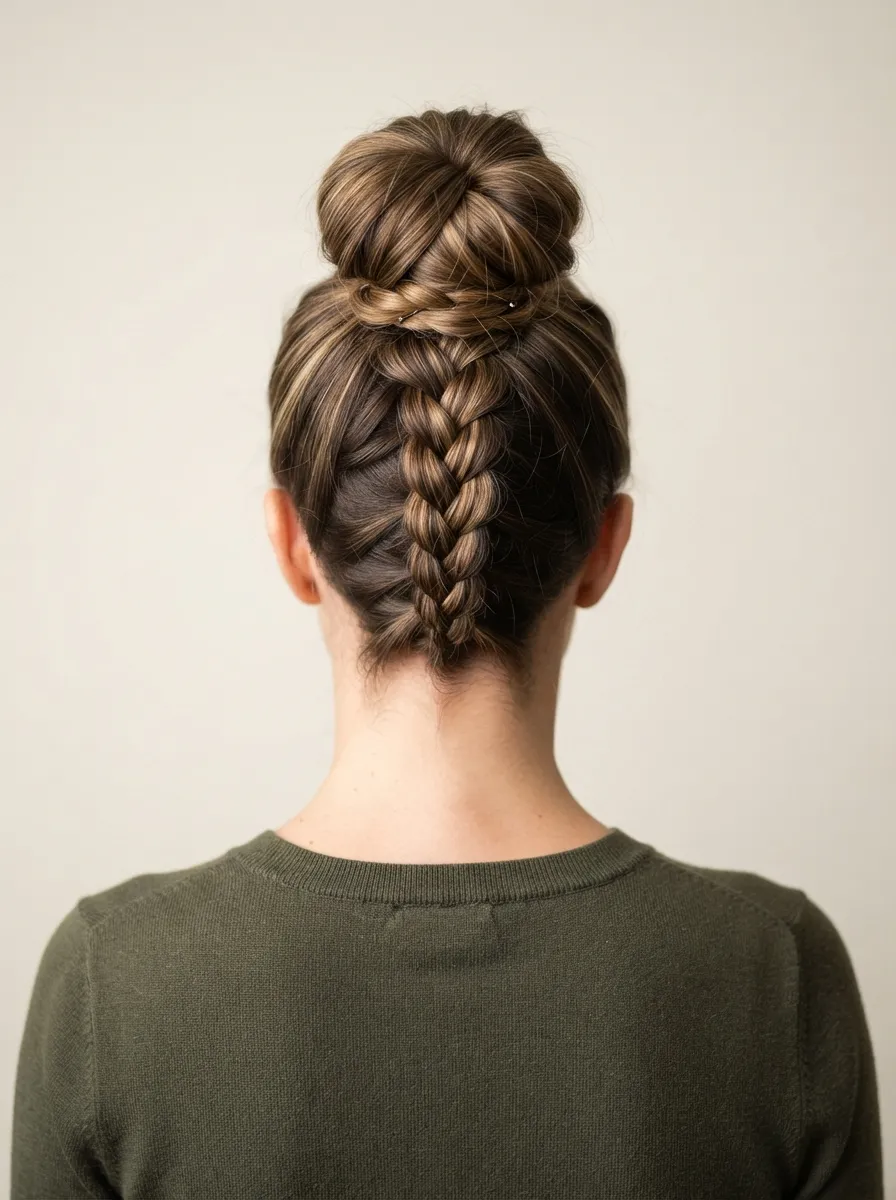
Round faces benefit from height and vertical lines, and a braided bun set slightly above the crown does exactly that. Dutch braid your hair from the nape upward, which pulls the eye up rather than out, then coil the braided length into a bun positioned just above the natural crown. Leave two thin pieces loose near your cheekbones to soften the jaw. Because thick hair braids up thick and full, this shape reads as intentional rather than accidental, and the added height elongates a rounder face shape without any trick beyond hair placement. Finish with a light shine spray rather than a matte product, since shine draws attention upward and matte finishes can flatten the visual lift you just built.
9. Low Bun for Heart Shaped Faces

Heart shaped faces carry width at the forehead and taper at the chin, so a low, soft bun with face framing pieces balances that out nicely. Keep the crown flat rather than voluminous, smoothing hair back with a boar bristle brush before gathering it low. Leave two longer pieces out at the temples and curl the ends slightly inward toward the jaw to add width at the bottom of the face. This is one of the simplest styles on the list to execute, needing only a brush, an elastic, and a couple of pins, but the placement does real work visually. A dab of pomade on the brush before smoothing keeps thick baby hairs from springing back up around the hairline.
10. Sock Bun Upgrade
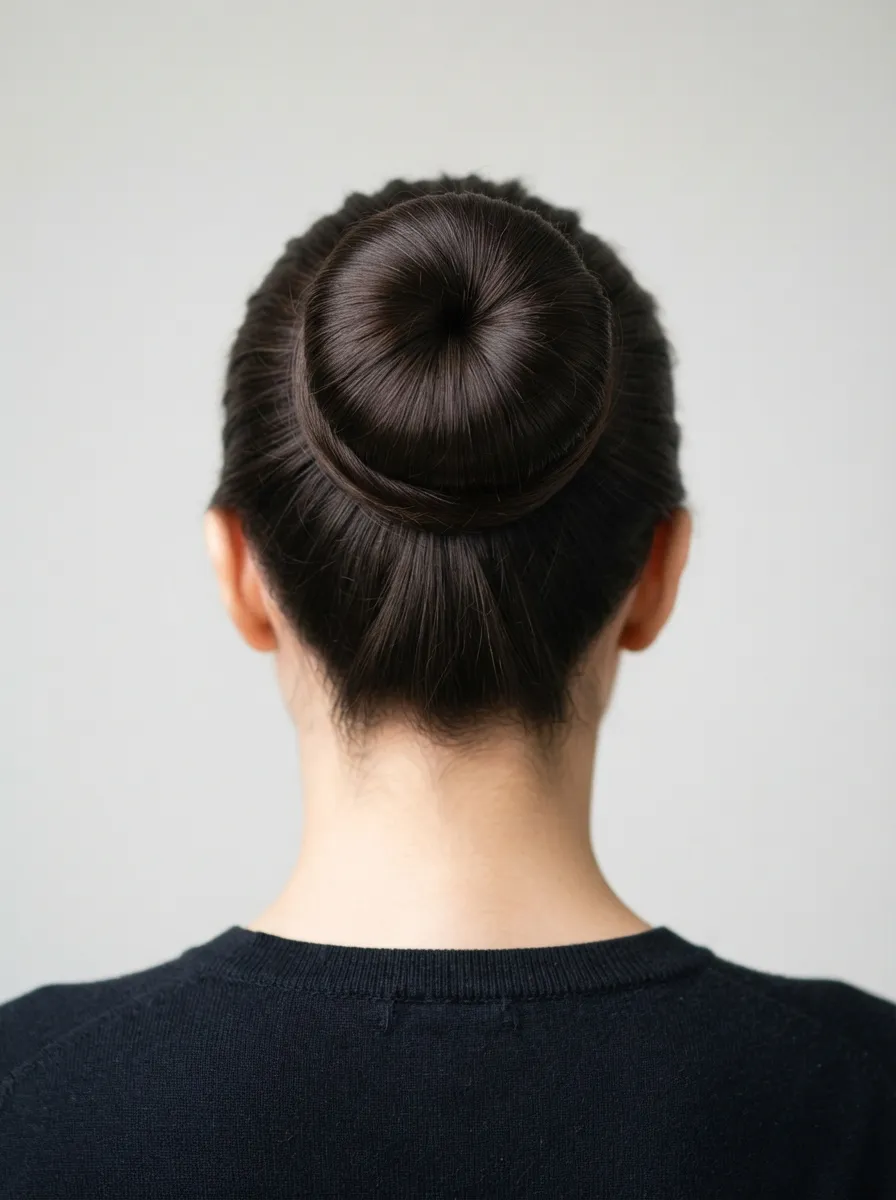
The classic sock bun trick still works wonders on thick hair because the foam donut gives your ponytail something to wrap around instead of collapsing under its own weight. Pull hair into a high or mid pony, thread it through a bun donut, and spread hair evenly around it before securing loose ends with bobby pins tucked underneath. Thick hair actually fills the donut shape better than fine hair, giving you a fuller, rounder bun with almost no effort. If you do not own a foam donut, an old sock with the toe cut off and rolled into a ring works just as well, which is where the style gets its name in the first place.
11. Twisted Half Bun
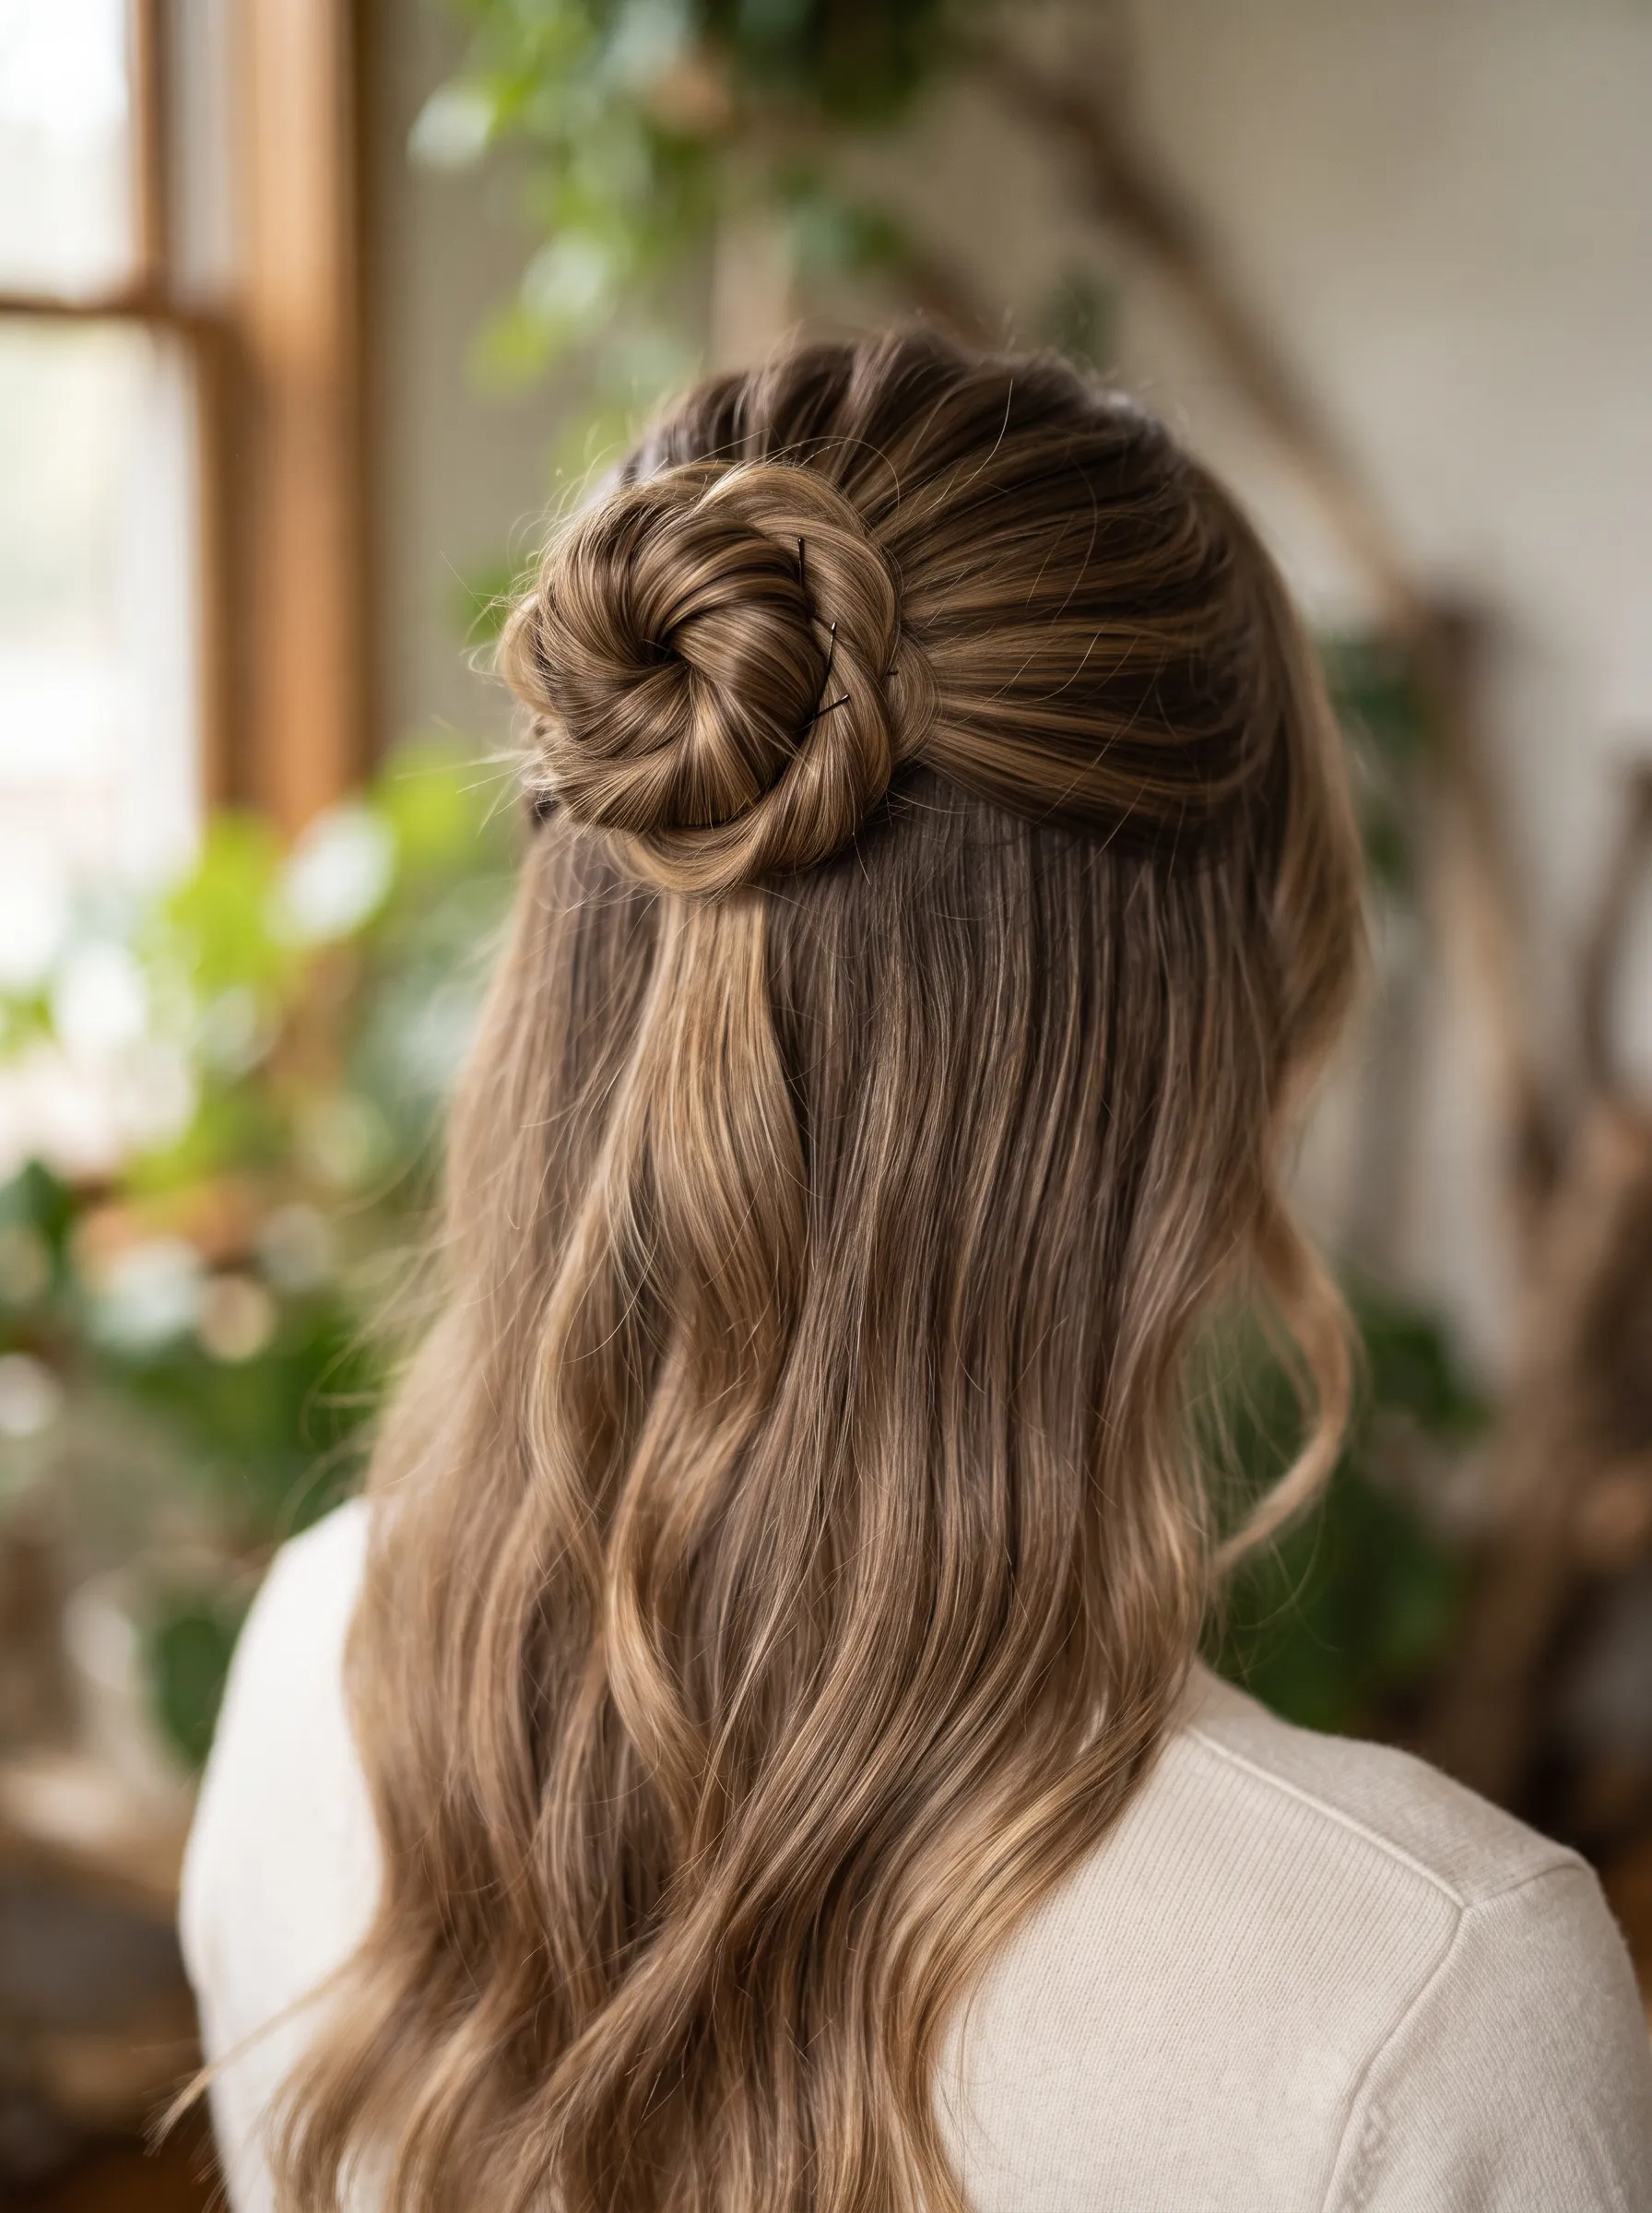
This is a quicker cousin of the half up bun, using a simple twist instead of a full gathered knot. Take the top section of hair, twist it twice, and pin it flat against the crown so it sits almost like a small rosette. The rest of your hair stays down and untouched. Because you are twisting rather than wrapping, this takes under two minutes and barely disturbs the rest of your style, which makes it perfect for switching up a blowout without undoing it. Thick hair holds the twist shape especially well since there is enough volume in the strands to keep the rosette from flattening out during the day.
12. Chignon with a Center Part
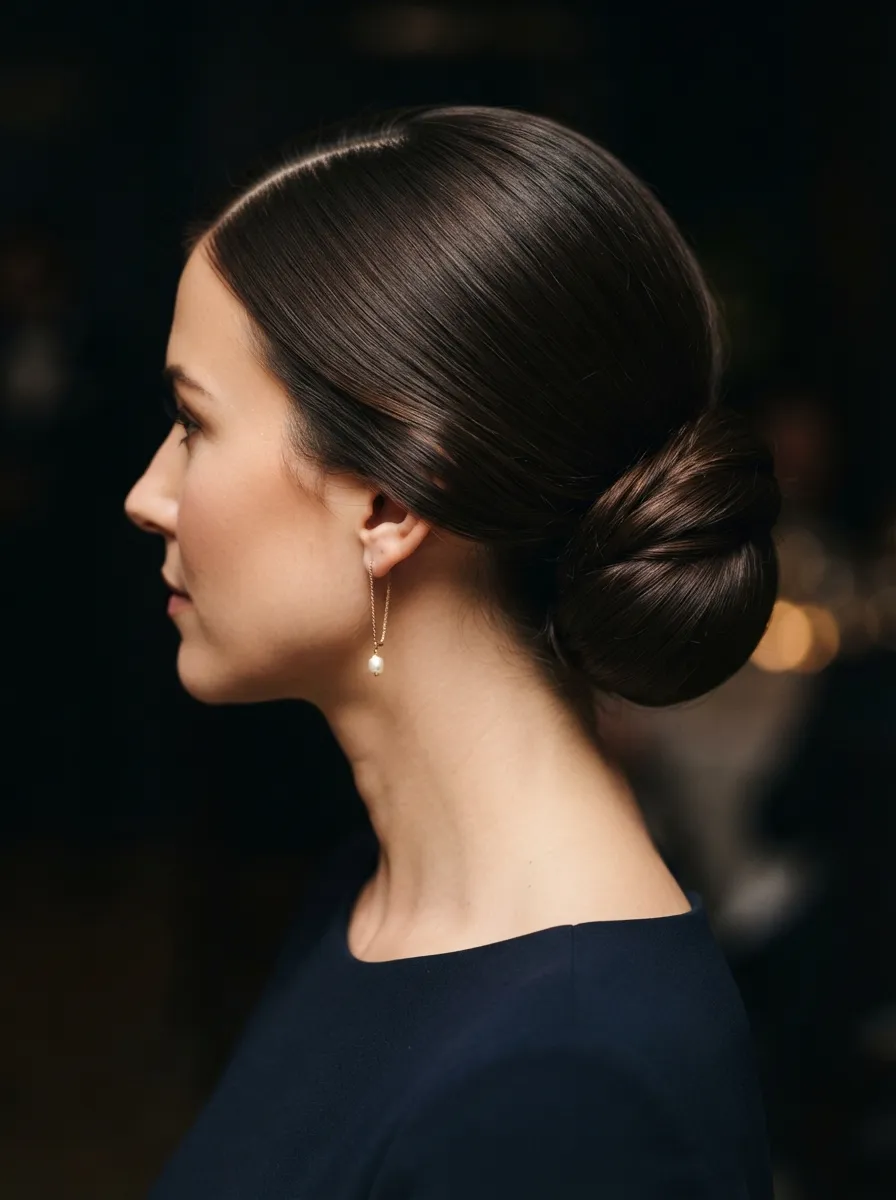
A chignon sits low and close to the neck, and pairing it with a sharp center part gives thick hair a formal, pulled together look without much technical skill. Part hair down the middle, smooth each side back, and gather into a low bun at the nape. Fold the ends under rather than wrapping them around, then pin flat so the shape reads as a smooth oval instead of a round ball. This is the style to reach for on wedding guest days or formal dinners, since it pairs cleanly with statement earrings and does not compete with a strong outfit. Thick hair actually holds a chignon shape better than fine hair, which tends to look thin and sparse in the same style.
13. Braided Bun Wrap
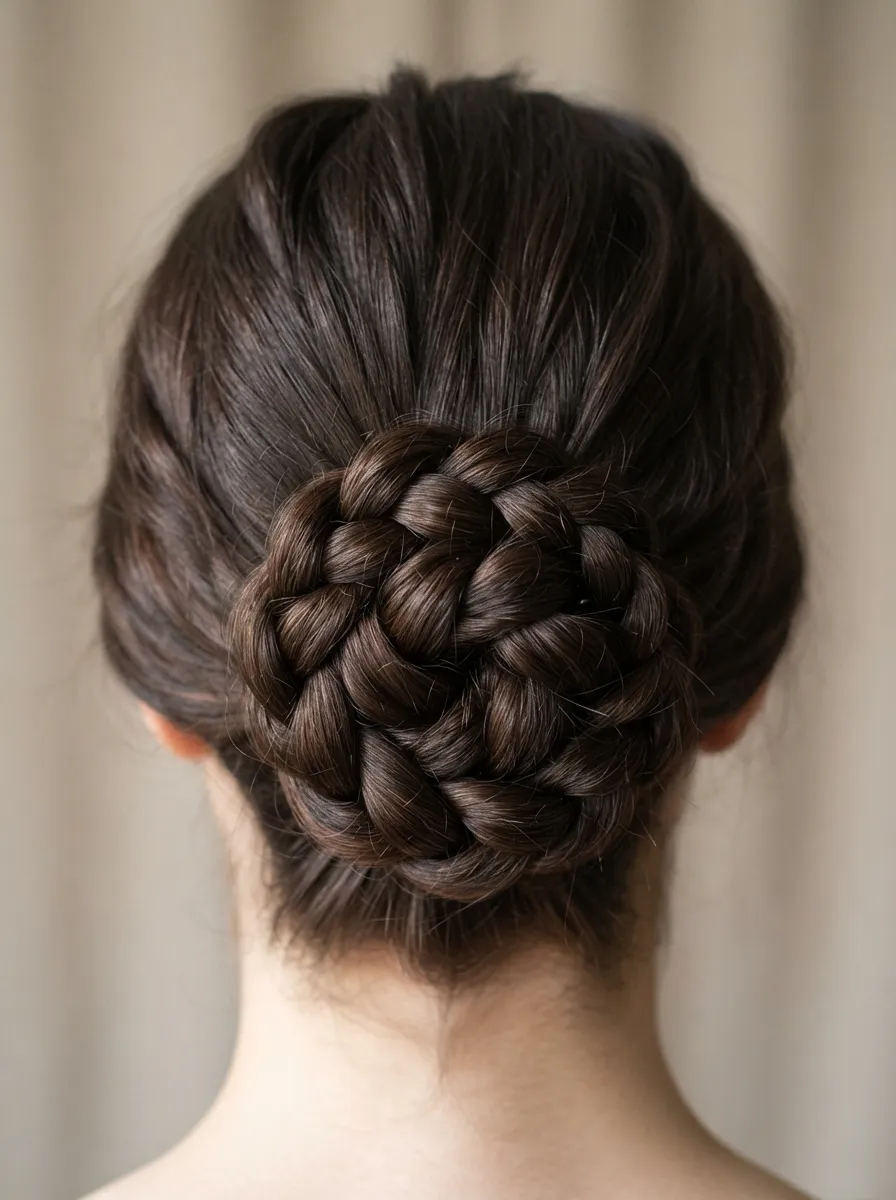
Instead of twisting your ponytail into a bun, braid it first, then wrap the braid around the base like a rope. This gives thick hair extra texture and a woven look that a plain twist cannot replicate. Braid your ponytail to the end, secure the tip with a small elastic, then coil the braid around the base and pin every couple of inches so it holds its shape through movement. This version is especially good for humid weather since a braided bun resists frizz far better than a smooth twisted one. It also tends to survive a full day at work or school without needing a single touch up, which thick hair owners will appreciate.
14. Bantu Knot Bun Cluster
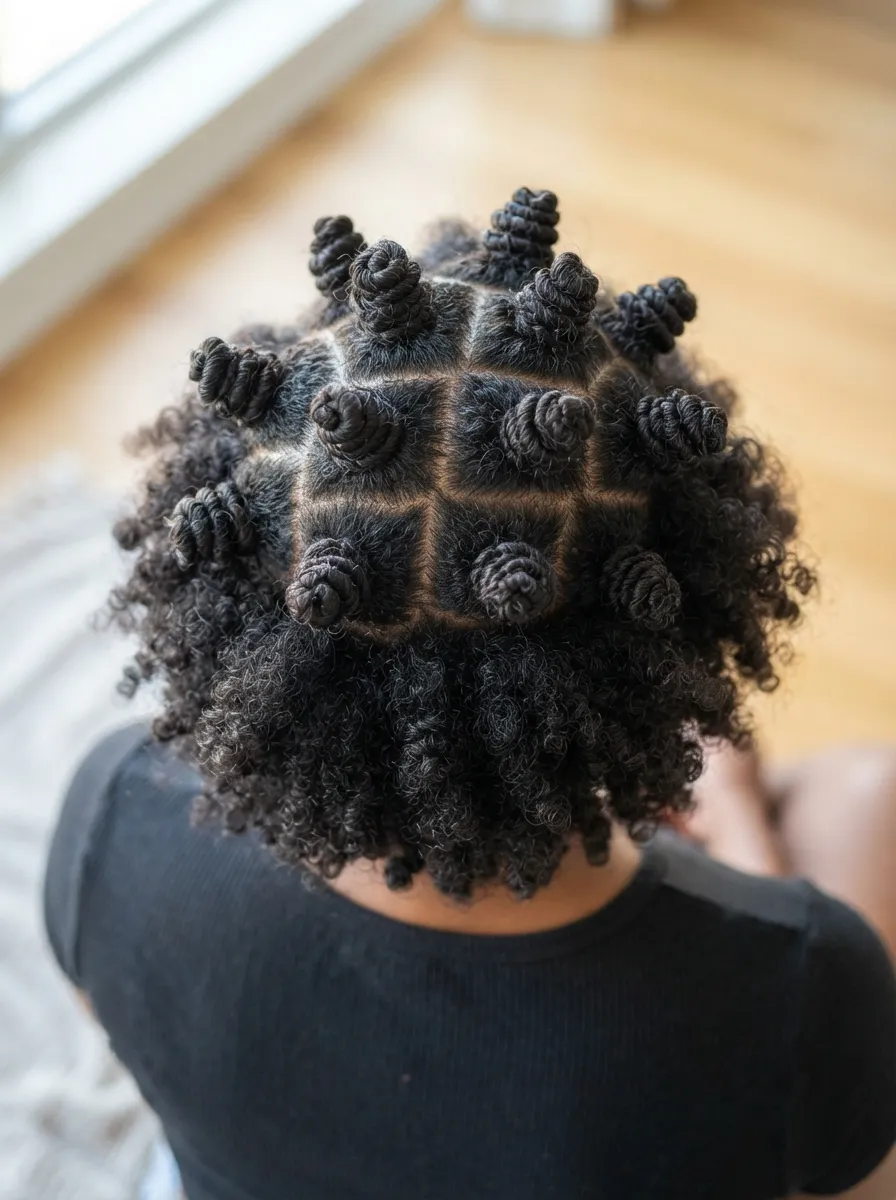
Instead of one large bun, section thick hair into four or five parts and twist each into its own small Bantu knot across the crown. This spreads the weight across multiple points on your scalp rather than one central spot, which genuinely feels lighter by the end of the day. Each knot should be tight enough to hold its shape but not so tight that it pulls at the root. This look works beautifully for textured and curly thick hair especially, since the knots highlight natural curl pattern once released, and even styled as is, they create a sculptural, striking silhouette that reads as intentional rather than rushed.
15. Slicked Back Bun
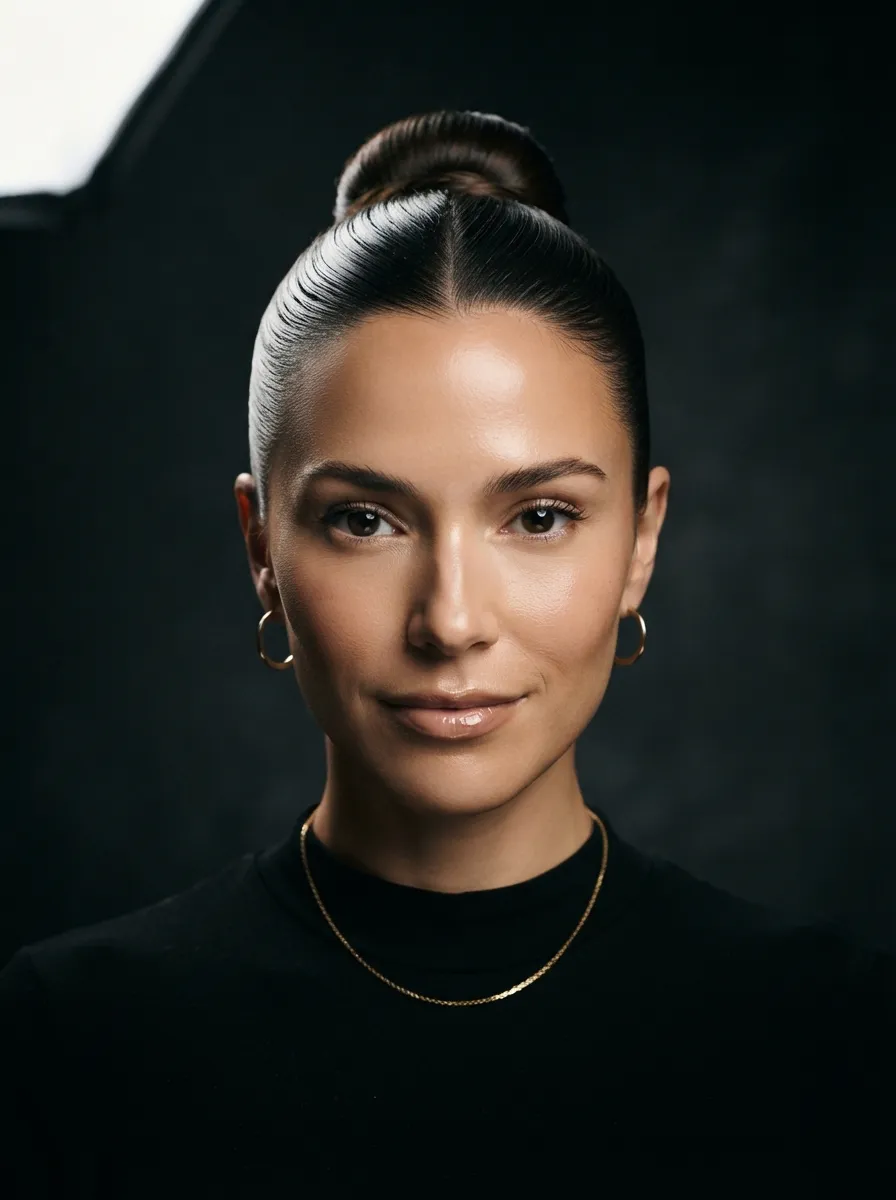
For a sleek, modern look, comb thick hair straight back with a wet look gel and gather it into a tight, glassy bun at the nape or crown. This style removes texture entirely in favor of shine and precision, which makes it a strong choice for evenings out or professional headshots. Use a fine tooth comb to smooth every section before gathering, then secure with a strong elastic and pin the ends flat. A little setting spray over the finished bun locks down baby hairs that would otherwise spring loose within the hour. Thick hair holds a slicked style longer than fine hair because there is more surface area for the gel to grip onto.
16. Double Braided Bun
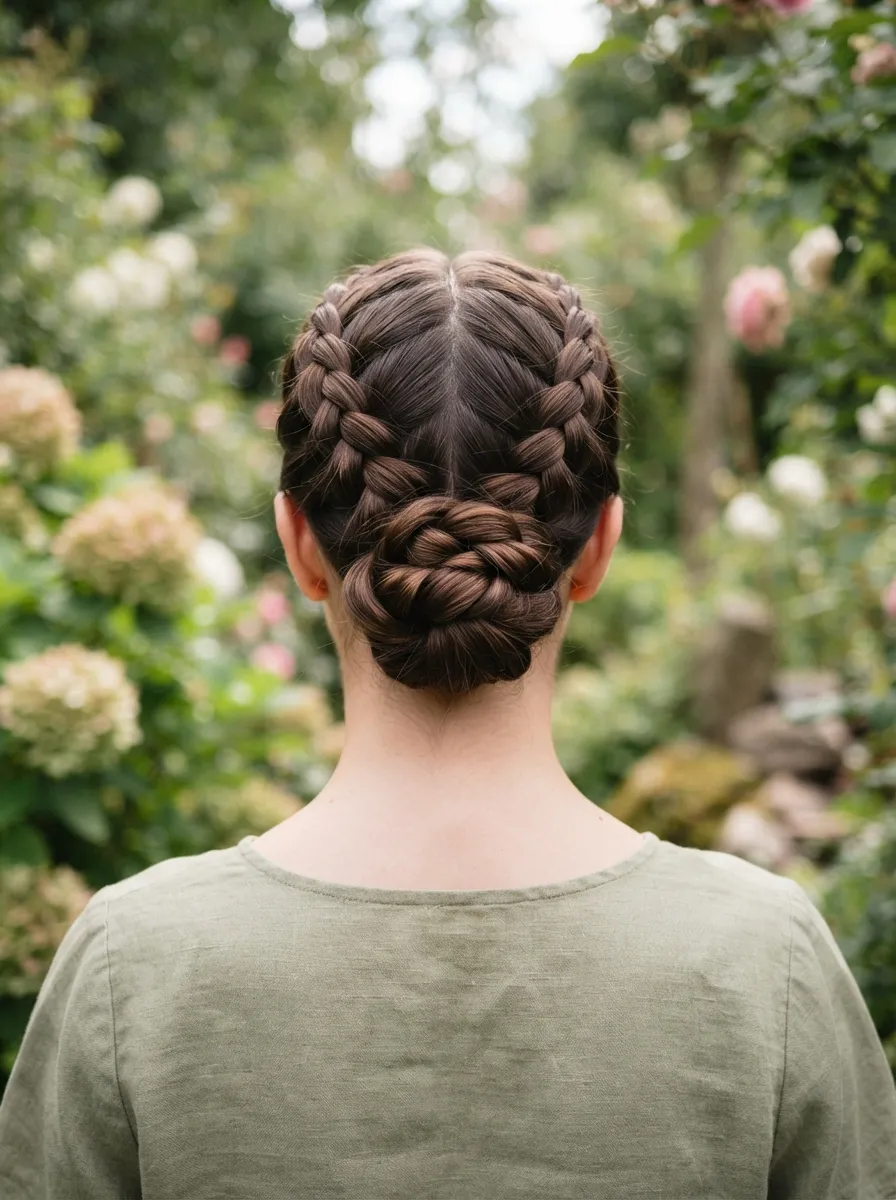
Two French braids that meet at the nape and twist together into one bun give thick hair a structured, almost editorial look. Part your hair down the middle, French braid each side down to the nape, then combine both braided tails and twist them together before coiling into a bun. This spreads tension evenly across your whole scalp since two braids share the pulling that one ponytail would otherwise concentrate at a single point. It is a favorite for outdoor weddings and summer events because it holds through heat and light wind far better than a loose style would, without looking overly done.
17. Low Bun for Oval Faces
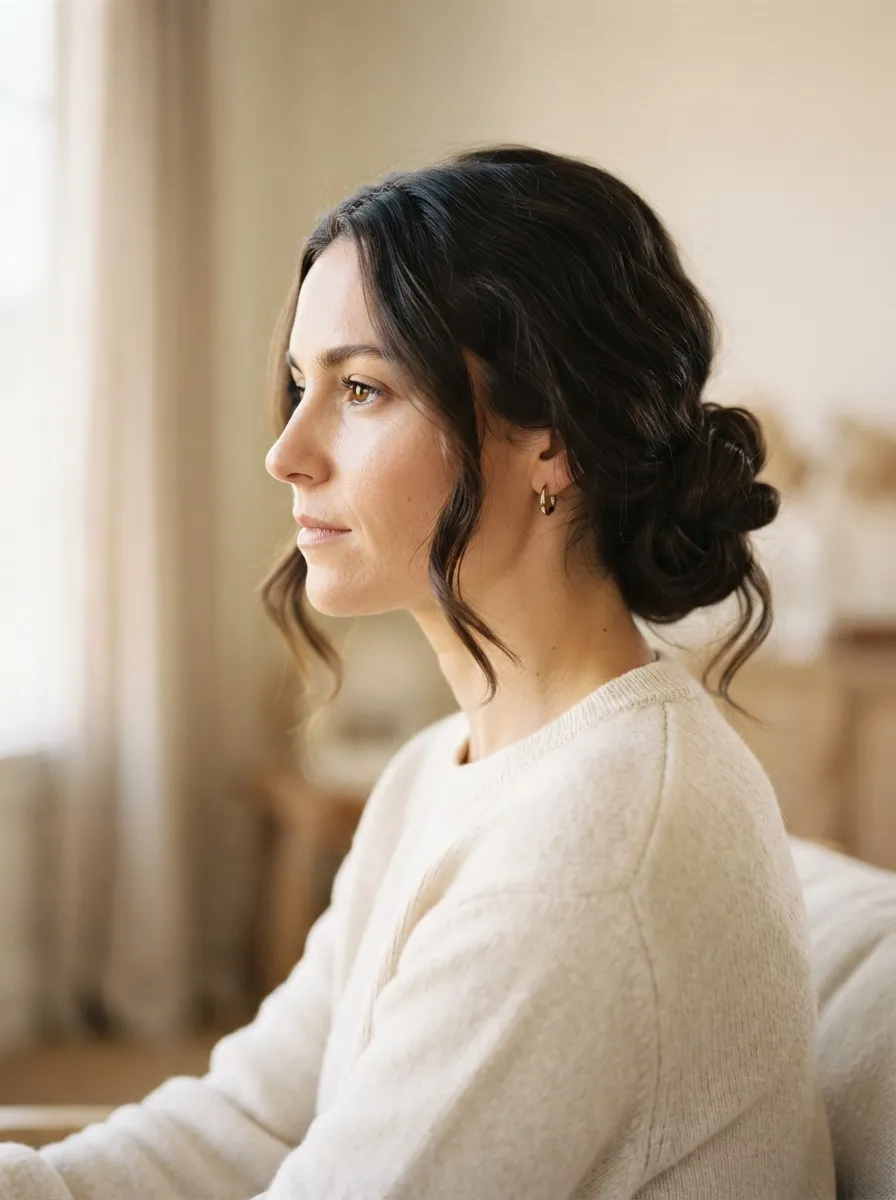
Oval faces can wear almost anything, but a slightly off center low bun adds a bit of visual interest without fighting the face shape’s natural balance. Gather hair low, twist it, and instead of centering the bun, let it sit an inch to one side. Pull a few pieces loose around the face for softness. This asymmetry keeps a simple bun from looking too plain on an already balanced face shape. It is a five minute style that still photographs like it took real effort, which makes it a reliable go to for days when you want polish without spending much time in front of the mirror.
18. Curly Bun with Defined Ringlets
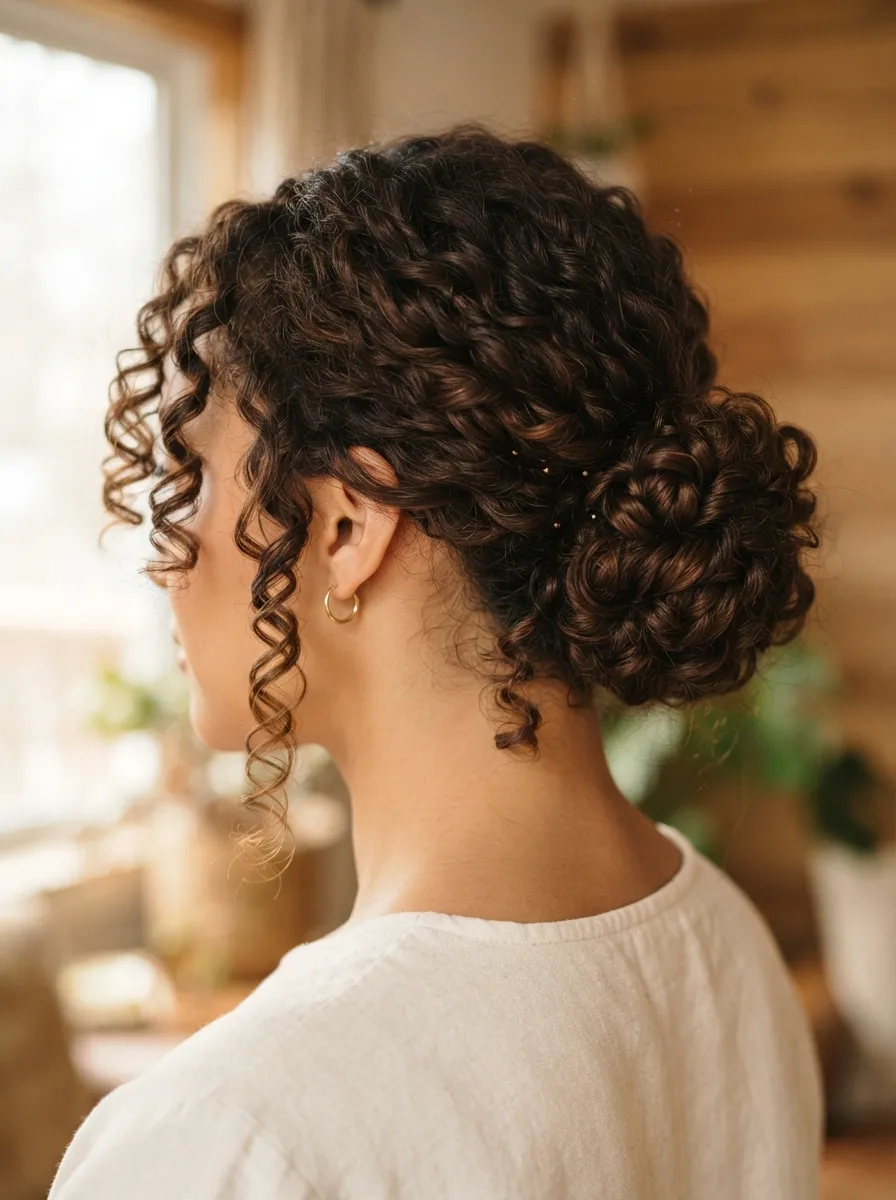
For naturally curly thick hair, skip the smoothing step entirely. Gather curls loosely at the crown or nape without brushing them out, twist once, and pin. Leave a few defined ringlets hanging loose around the face rather than pulling everything back tight. Brushing curly hair before a bun often creates frizz and hides your natural texture, so finger detangling instead keeps curl definition intact through the whole style. A curl cream scrunched through damp hair before you even start gathering makes a real difference here, locking in shape so the loose ringlets frame your face with clean, bouncy curls instead of fuzz.
19. Bun with a Silk Scarf Wrap
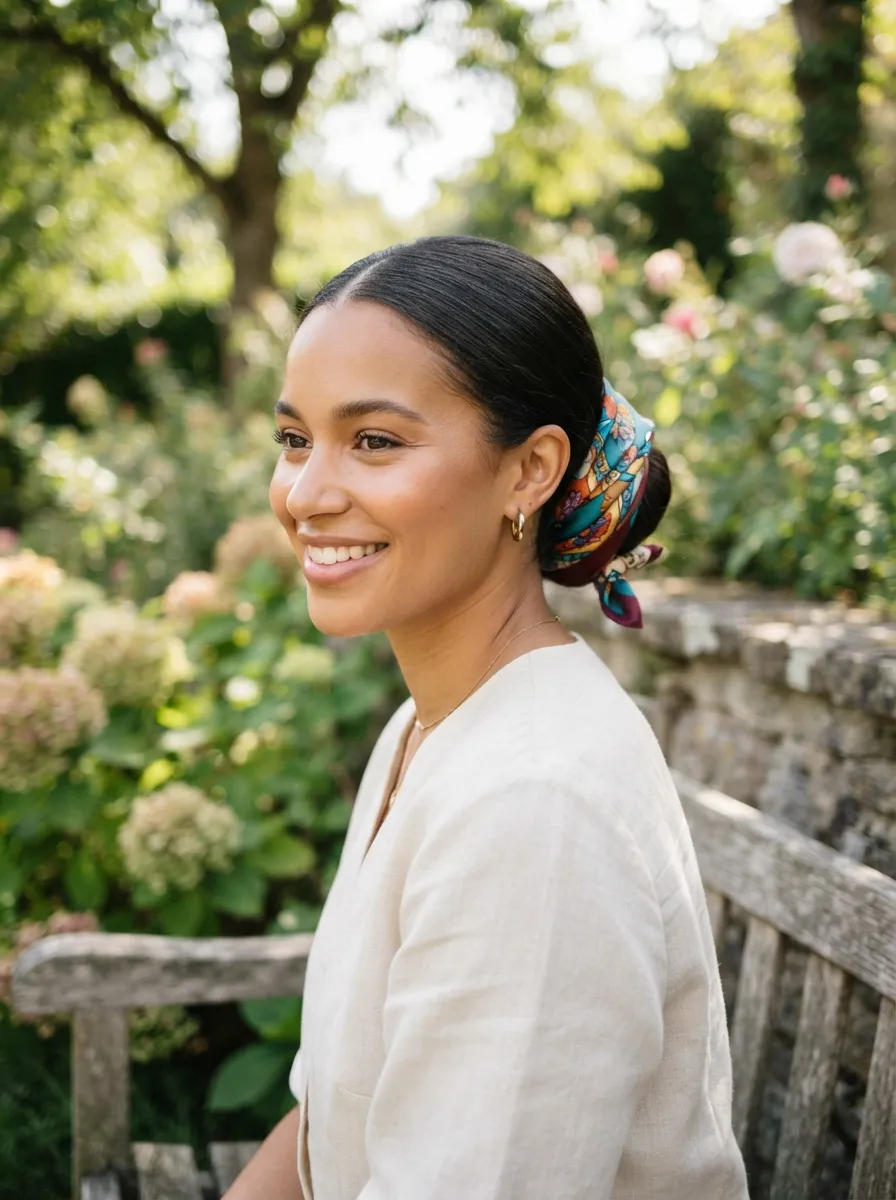
Wrapping a silk scarf around the base of a bun adds color, texture, and a little extra hold all at once. Twist your hair into a low or mid bun as usual, then wind a folded silk scarf around the base and tie it off in a small knot or bow at the side. This works especially well for thick hair on days when your ends look a little rough, since the scarf covers the base entirely and draws attention to color and pattern instead. It is also a practical trick for protecting hair overnight or during a workout, since the fabric adds friction that keeps a bun from sliding loose the way bare elastic sometimes does.
20. Textured Beach Bun
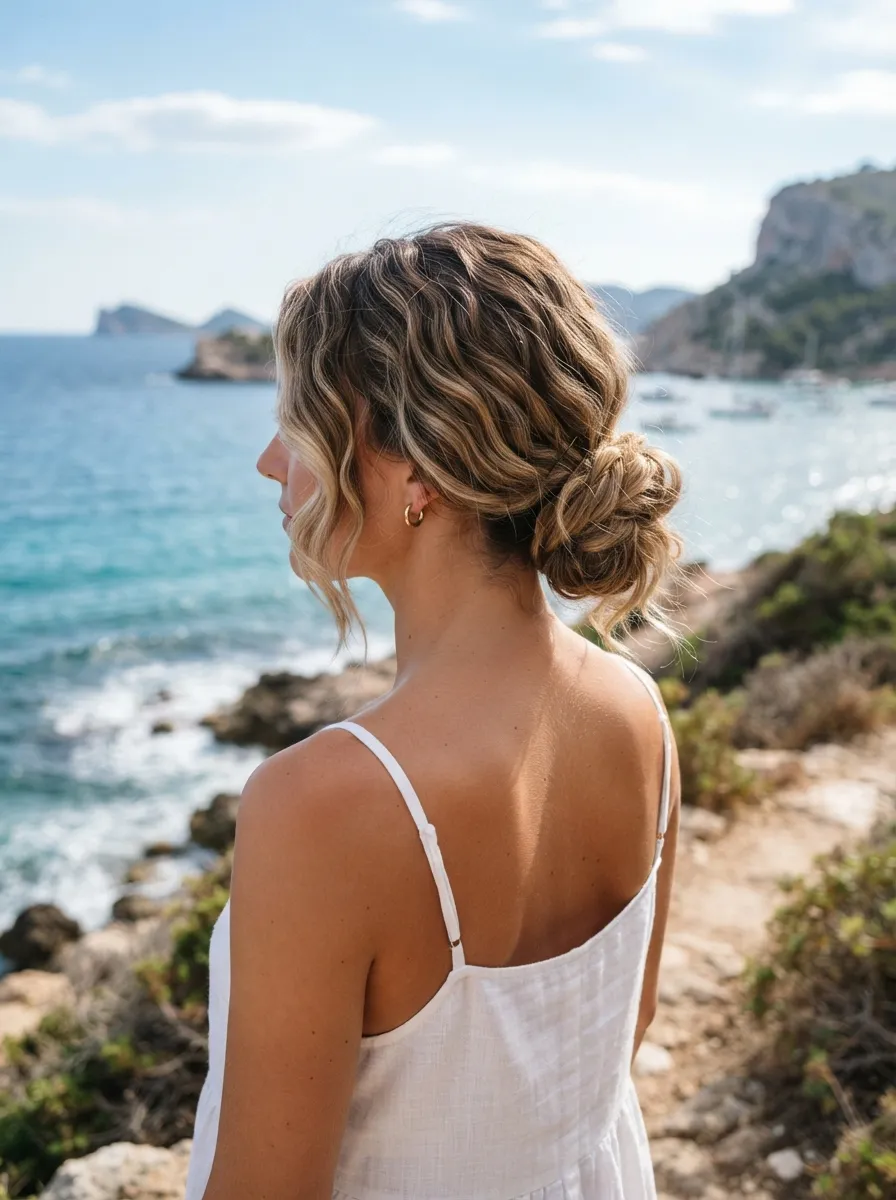
This one starts with salt spray rather than a flat iron. Scrunch a texturizing sea salt spray through damp or dry hair, let it air dry into loose waves, then gather it into a loose, undone bun without smoothing first. The natural texture keeps the bun from looking too polished, which suits casual weekends, beach trips, or errand days. Thick hair takes to this style particularly well since the extra volume fills out the bun shape without needing backcombing or teasing. Pull a couple of pieces loose at the temples afterward for a lived in finish that looks like you just got back from somewhere warm.
21. Bun with Statement Hairpins
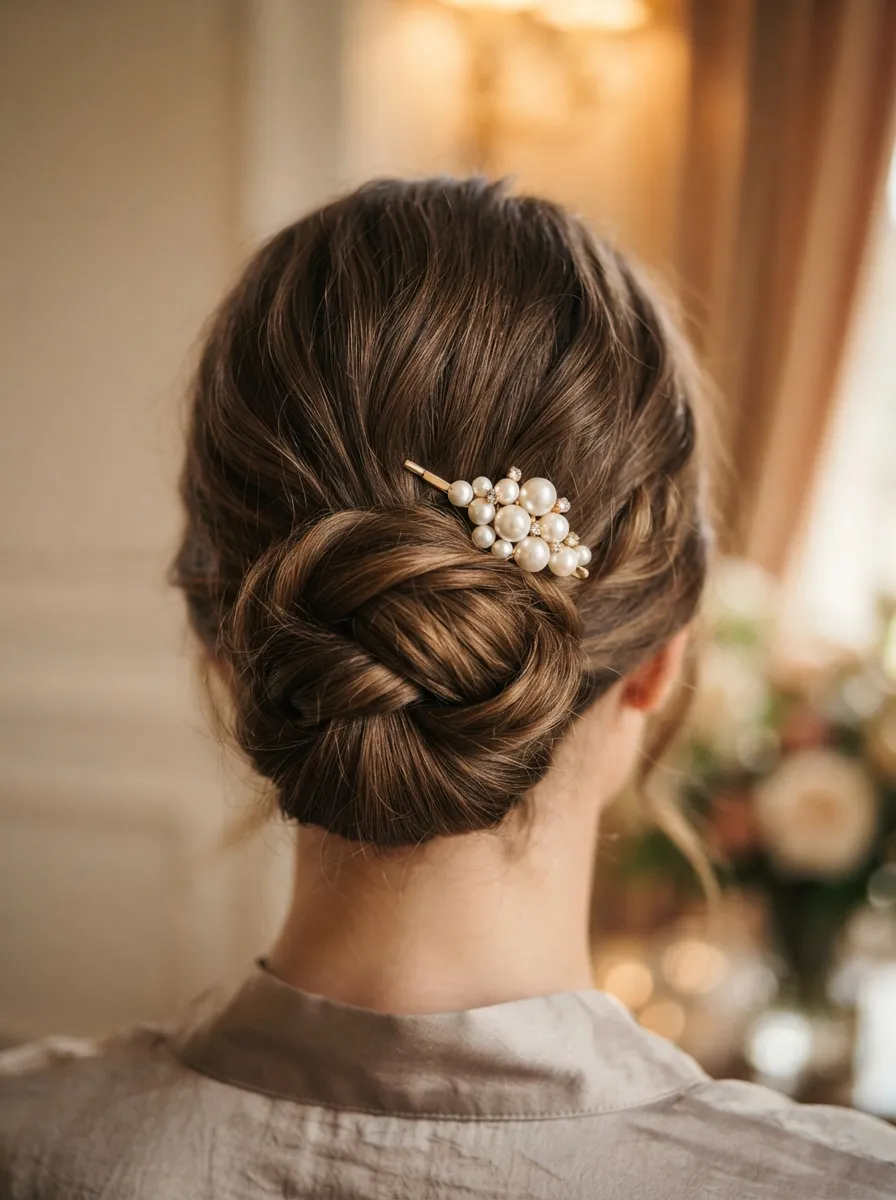
Sometimes the simplest bun becomes the standout style just by adding a decorative pin or two. Twist hair into any basic low or high bun, then slide in a pearl, crystal, or metallic hairpin at an angle across the front. Thick hair holds pins securely since there is enough density for the pin’s teeth to grip without slipping. This is an easy way to dress up an everyday bun for a party or event without redoing your whole hairstyle, and it means you can keep a fast five-minute bun in your back pocket for busy mornings that still need to look a little special by evening.
22. Bubble Braid into a Bun
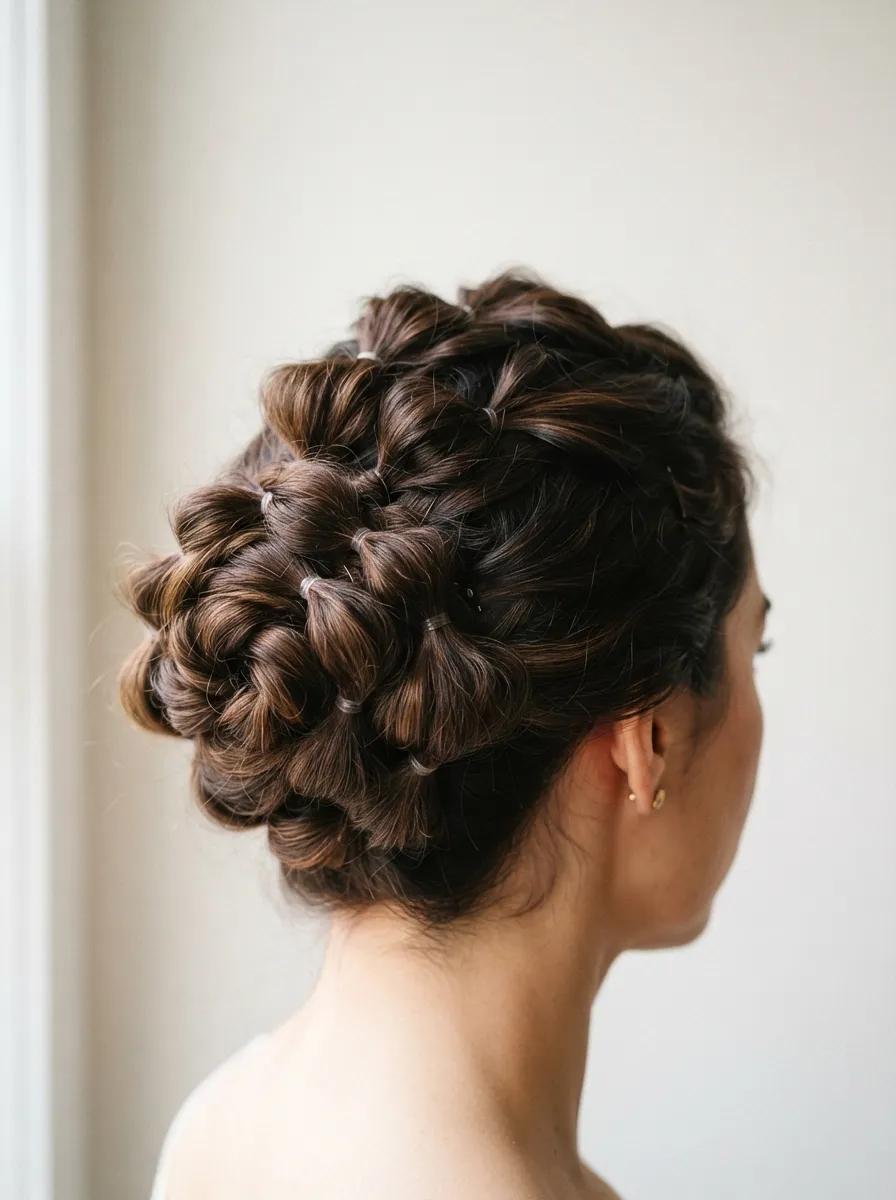
Combine the bubble ponytail technique with a braid for a textured, dimensional bun. Braid your hair loosely, then gently pull apart the braid sections to create a bubbled, fuller look before coiling the whole thing into a bun and pinning. Because you are already working with a braid, the resulting bun has visible texture in its shape rather than reading as one smooth mass, which suits thick hair beautifully since there is plenty of volume to pull apart. This one takes a bit more time than a standard bun but holds up especially well for long event days when you need a style to survive from morning to night.
23. Bun for Long Square Faces
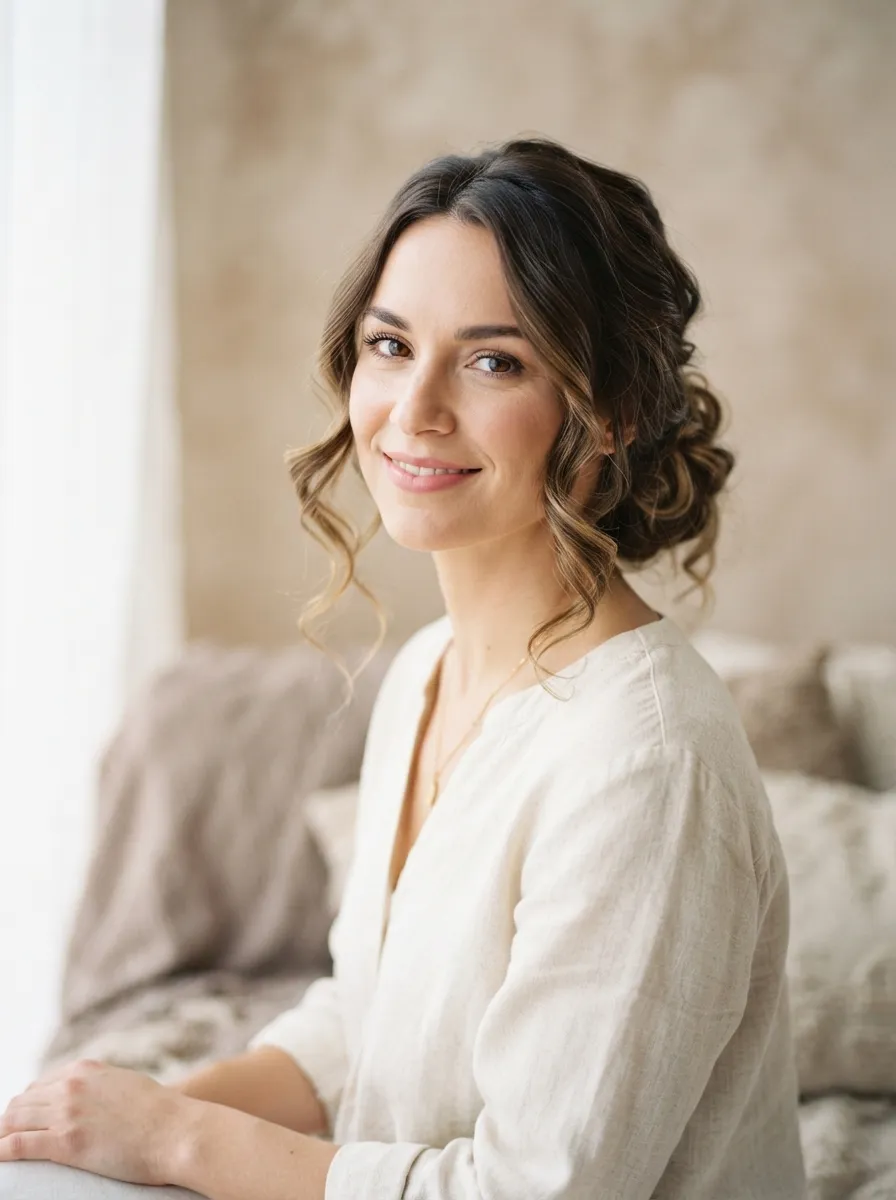
Square and long face shapes benefit from softness around the jaw and a bun that does not add extra height. Keep the bun low, near the nape, and loosen it slightly rather than pulling tight, since a severe style can emphasize sharp angles. Curl a couple of face-framing pieces to soften the jawline further. This shape works well for thick hair because the natural volume fills out the low bun without needing extra teasing, giving a rounder, softer silhouette overall. Pair with soft, rounded earrings rather than angular ones to keep the whole look cohesive rather than fighting your face’s natural lines.
24. Woven Basket Bun
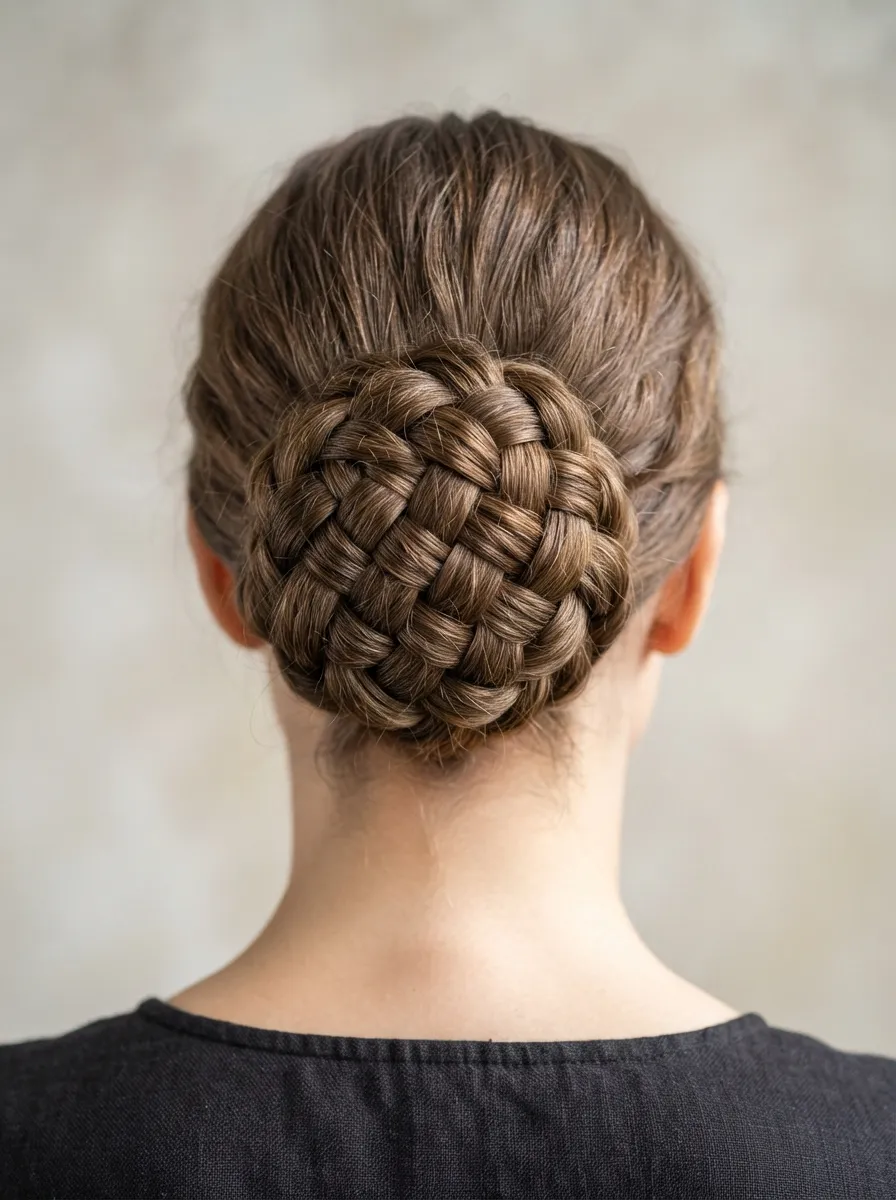
This one uses three small sections woven together like a basket rather than one twist or braid. Divide the gathered ponytail into three even parts, cross them over one another in a simple over under pattern a few times, then coil the woven section into a bun and pin. The basket weave gives thick hair a raised, textured surface that catches light differently than a flat twist would, making it a strong option for photos or events where you want something a little more detailed than a standard bun without committing to a full braid.
25. Low Bun with a Deep Side Part
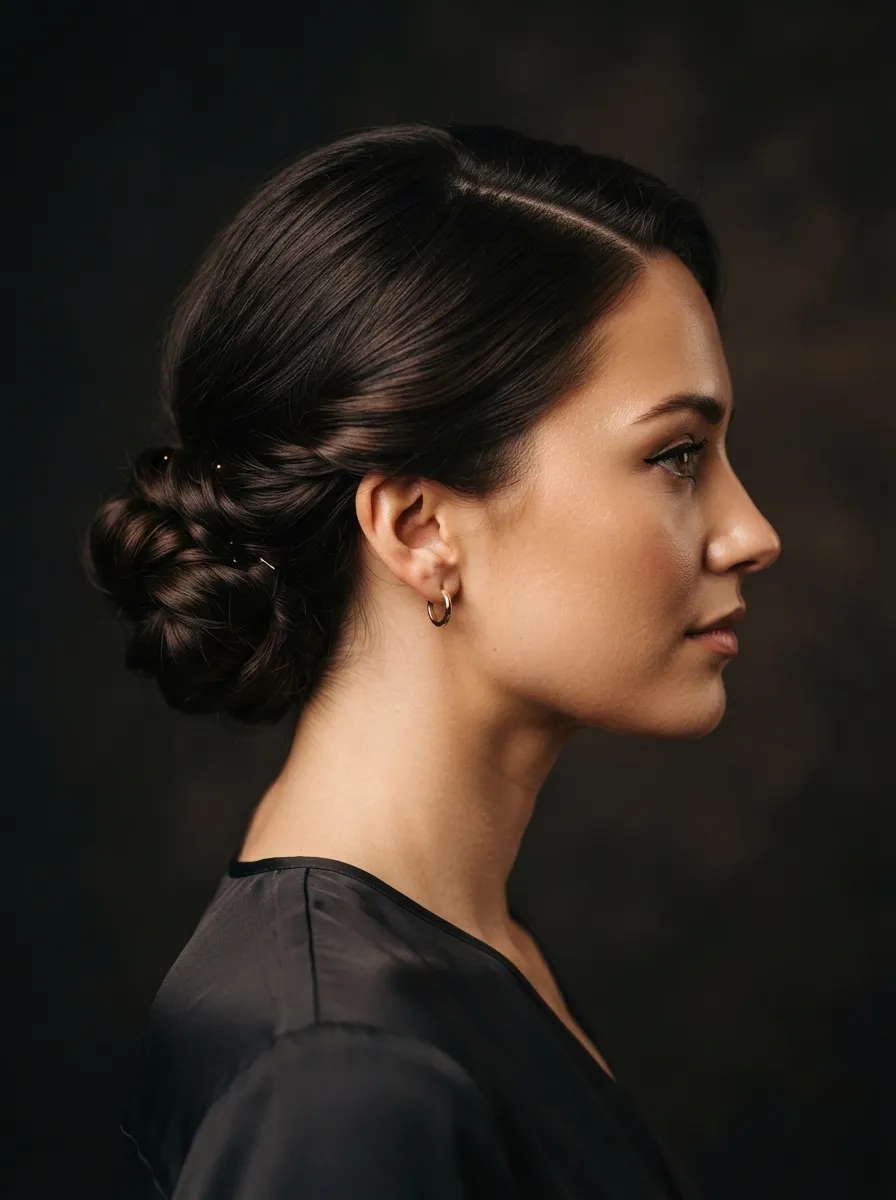
Switching your usual center part to a deep side part changes the whole feel of a basic low bun. Part hair deeply to one side, smooth the longer side back toward the nape, and gather into a low twisted bun. The deep part adds asymmetry and a slightly retro, glamorous edge to what would otherwise be a plain style. Thick hair holds a deep side part well since there is enough density to keep the part from sliding back to center throughout the day. Finish with a light hold spray along the part line specifically, since that is the spot most likely to shift first.
26. Bun for Active Days

Built for workouts and busy mornings, this bun skips styling products entirely. Pull hair straight up into a high pony, twist tightly, and wrap into a compact bun secured with a strong scrunchie rather than a thin elastic, since scrunchies grip thick hair without leaving a dent afterward. Keep it tight enough to stay through movement but not so tight it causes a headache within the hour. This is less about looking polished and more about staying out of your face for a run, a gym session, or a busy day of errands, and thick hair actually holds this practical shape longer than thinner hair tends to.
27. Bun with Face Framing Curtain Pieces
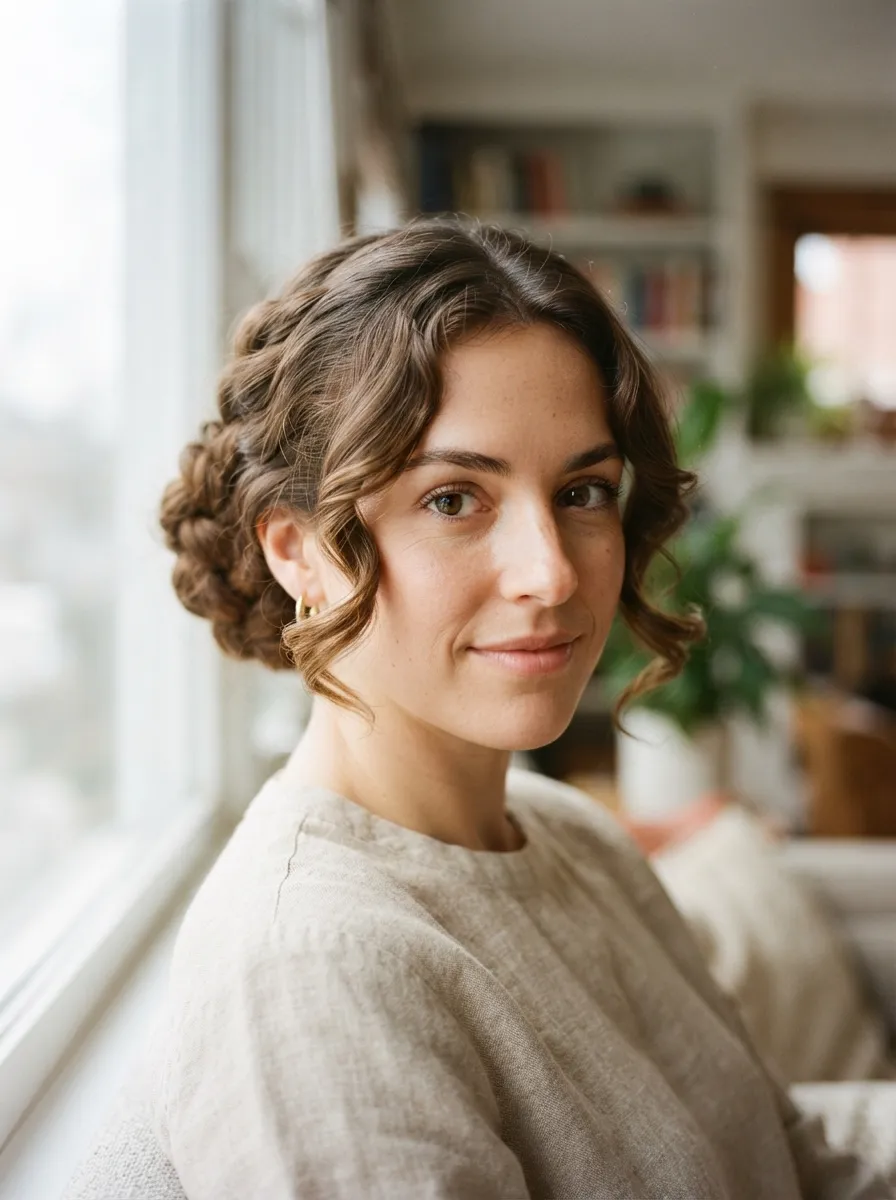
Leave two longer curtain style pieces out at the front before gathering the rest into any bun of your choice, then curl just those two pieces with a wand for soft movement around the face. This combination softens whatever bun shape you choose underneath, whether sleek or messy, since the framing pieces draw attention to your features rather than the back of your head. Thick hair provides enough length and body in these framing pieces to hold a curl through the day without them going limp by the afternoon, which is a common complaint with finer hair types attempting the same look.
28. Vintage Victory Roll Bun
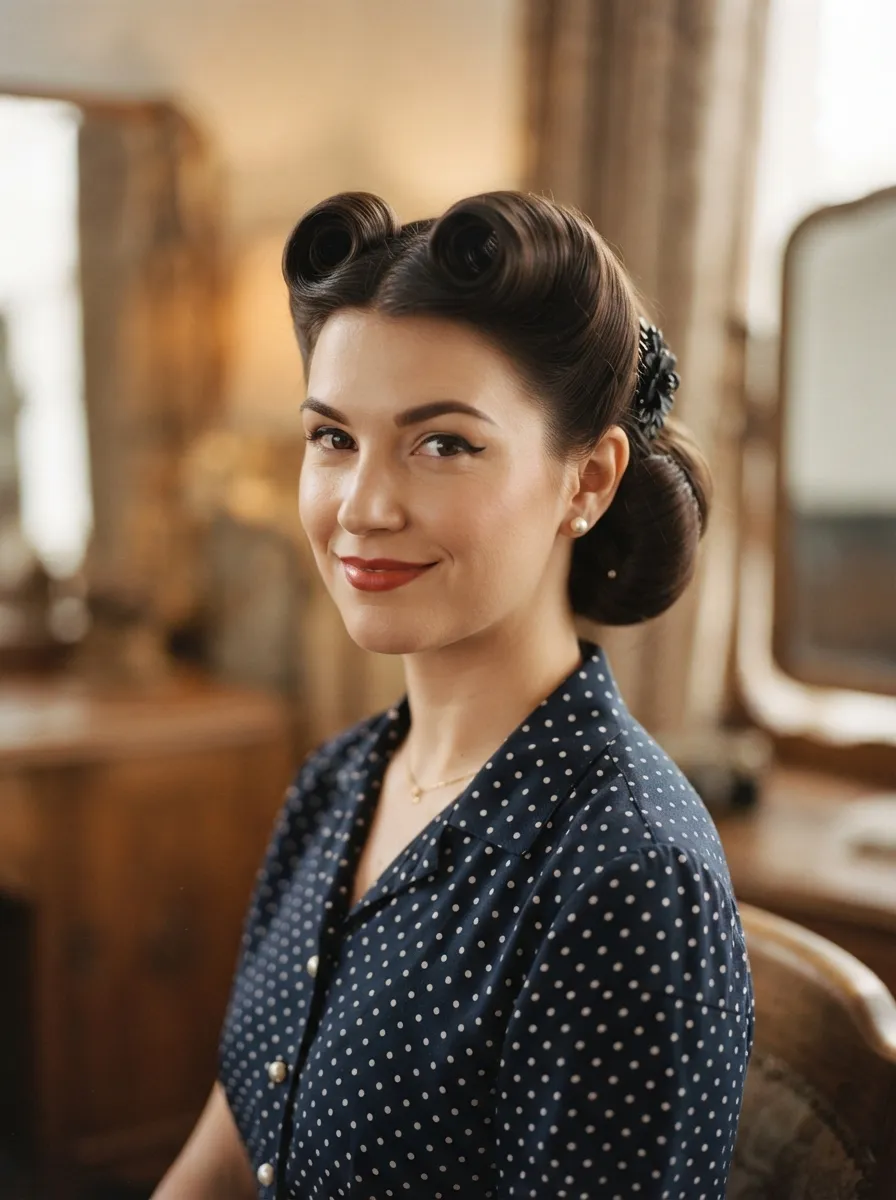
For a retro inspired look, roll the front sections of hair away from your face into two small victory rolls before gathering the remaining length into a low bun at the back. Pin each roll securely at its base before moving on to the bun so the shapes hold independently of each other. This style takes more time than most on this list, closer to fifteen or twenty minutes, but it delivers a dramatically different result for special occasions, costume parties, or pin up themed events. Thick hair rolls beautifully into these vintage shapes since there is enough volume to keep the rolls round and full rather than flat.
Conclusion
Thick hair gives you more room to play with shape, texture, and hold than any other hair type, and these 28 buns prove there is no single right way to wear it. Some days call for a five minute twist and pin, others for a braided, woven style that takes a bit longer but holds through a full event. Try a few from this list, keep the ones that felt easiest on your scalp and held longest through your day, and build your own rotation from there.