
Long hair opens the door to styles that short hair simply cannot copy. Twists, braids, buns, and pinned looks all work better when there is more length to play with. Whether you are getting ready for a wedding, a work event, or just want to feel put together on a regular Tuesday, an updo can change your whole look in minutes. The best part is that most of these styles do not require a salon visit or expensive tools. A few bobby pins, a comb, and some patience are often all you need. This list walks through 22 updo ideas for long hair, each one simple enough to try at home, with tips to keep the process budget friendly and realistic for everyday life. If you’re also searching for Updo Hairstyle Ideas, there are countless options ranging from sleek and elegant styles to relaxed and romantic looks, making it easy to find the perfect updo for any occasion or hair type.
1. Classic Low Bun
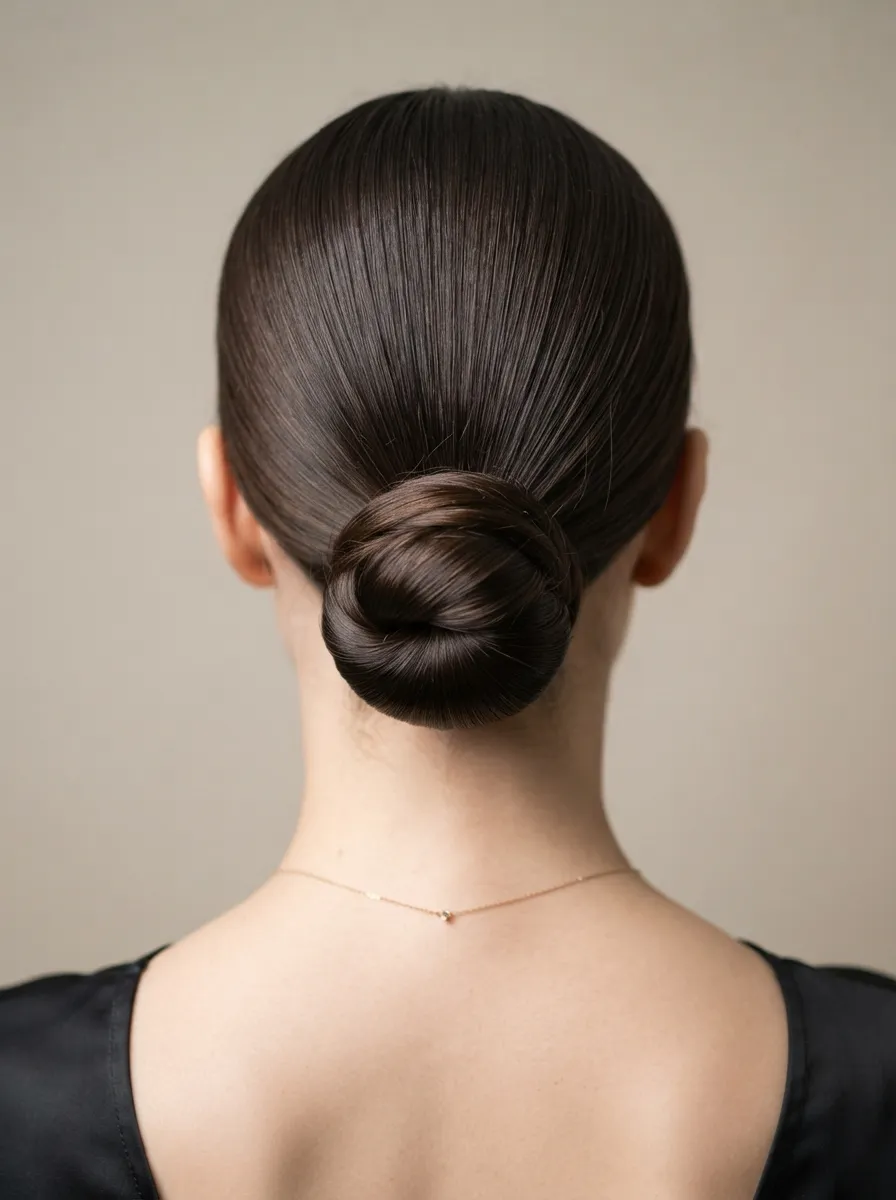
The low bun is the style everyone should know how to do. Gather your hair at the base of your neck. Twist it into a rope shape. Wrap it around itself and pin it down. That is it. This look works for the office, dinner, or a quick errand run. You do not need fancy tools. A few bobby pins from the dollar store will hold it all day. For extra hold, spray a little dry shampoo at the roots before you start. This adds grip so the bun does not slip. If your hair is very slippery or fine, a small hair donut can help bulk it up without spending much money. Practice this a few times and you will be able to do it in under two minutes. It also works well on day two or three hair, so you can skip a wash day and still look neat. Keep a few loose pieces near your face if you want a softer, less severe finish.
2. Braided Crown
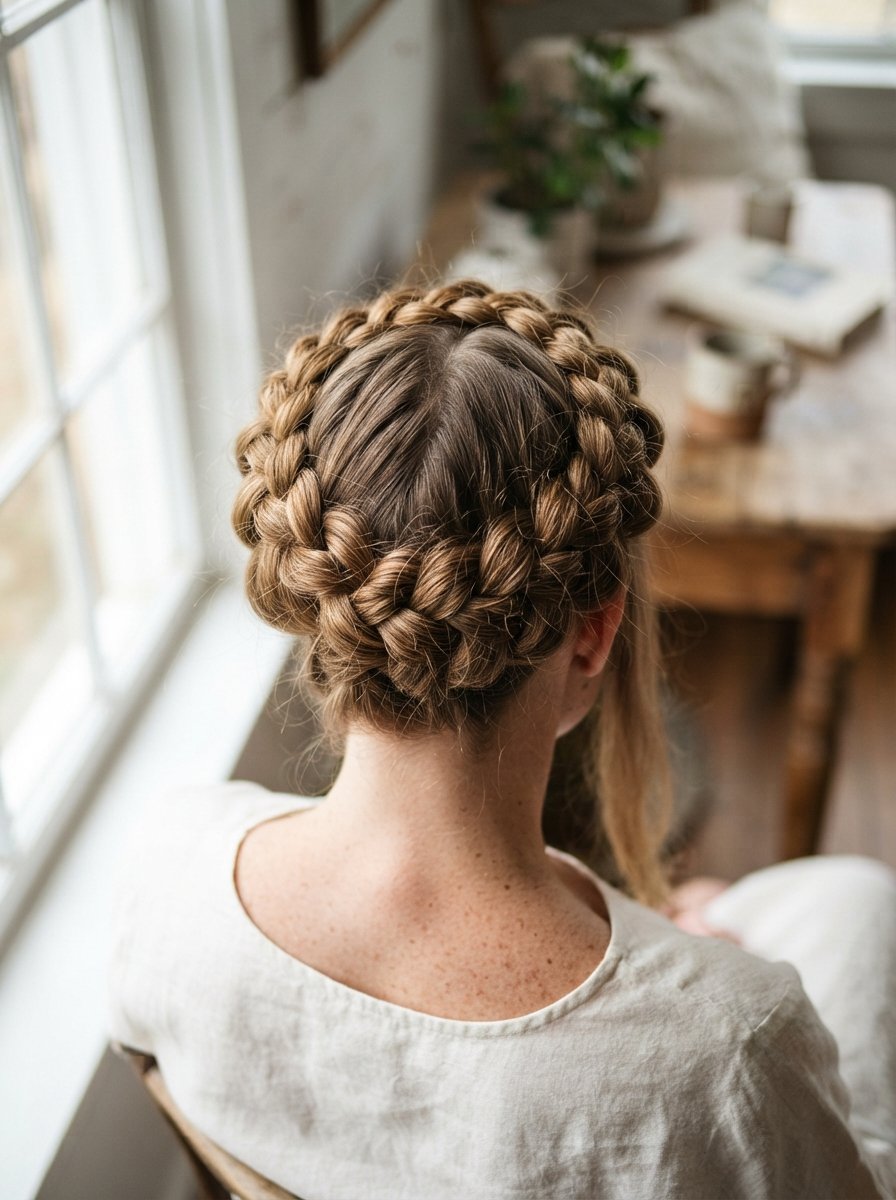
A braided crown looks fancy but is easier than it seems. Start two braids on each side of your head. Cross them over the top and pin them in place. You can use regular three strand braids if French braids feel tricky. This style works for garden parties, festivals, or any warm weather event. It also keeps hair off your neck, which is a bonus in the heat. Budget tip: use small clear elastics to end each braid so they blend in and do not need replacing often. If you want extra shine, rub a tiny bit of coconut oil between your palms and smooth it over the braids before pinning. This softens flyaways without looking greasy. Practice the crossover step in the mirror a few times before the event day so you feel confident. This style also holds up well through dancing or outdoor activities, which makes it a smart pick for all day wear.
3. Twisted Half Up Bun
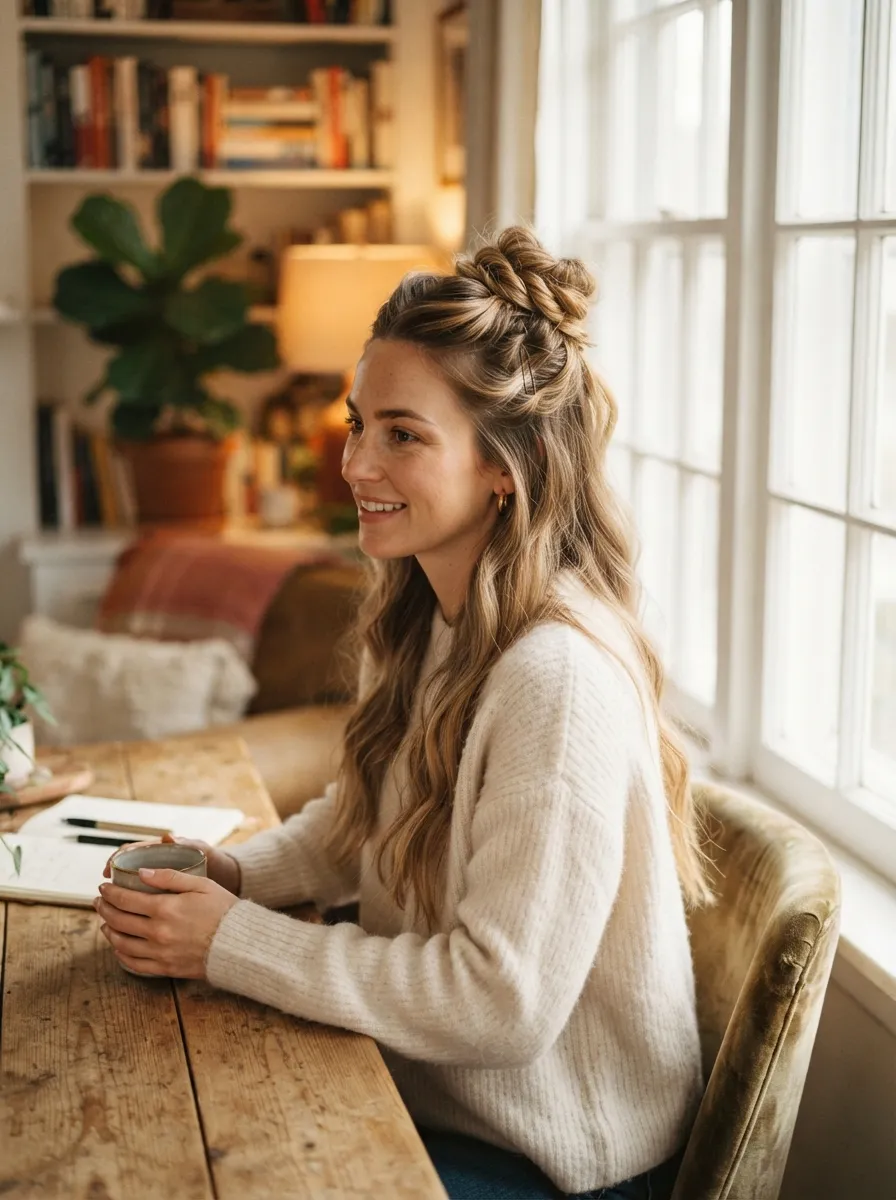
This style mixes down hair with a small updo element. Take the top section of your hair. Twist it back and secure it with a small elastic or pins. Let the rest fall naturally. It works for casual days, coffee runs, or a quick way to look styled without much effort. Budget tip: use a spare elastic you already own, no special tools needed. If your hair is very straight, add a loose wave with a flat iron first so the twist has more texture to grip onto. This style takes under a minute once you get the hang of it. It also grows out gracefully through the day, meaning even if pieces fall loose later, it still looks intentional. Try adding a second twist below the first for a layered look. This is a good option for school runs, work from home days, or any time you want your face to look framed without full effort on the rest of your hair.
4. Low Side Bun
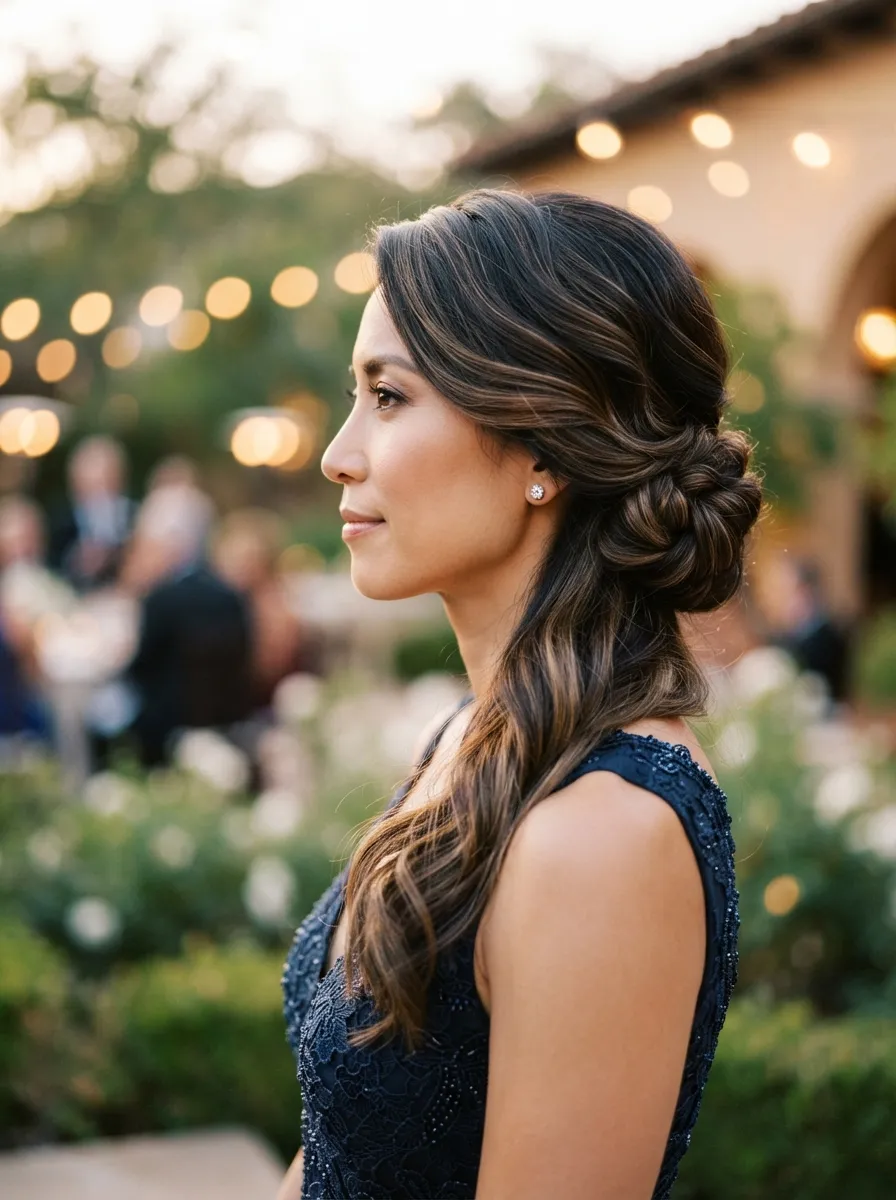
A low side bun brings a soft, romantic feel to any outfit. Sweep all your hair to one side. Twist it gently and pin near your ear or collarbone area. This works well for date nights or dinner parties. It also suits hair that has some layers, since the side placement hides shorter pieces. Budget tip: use two crossed bobby pins instead of buying a specialty clip, this is just as secure and costs nothing extra. If you want a softer texture, run a curling wand through your hair first so the bun has gentle waves peeking out. This style pairs well with off shoulder tops or dresses with detail on one side, since it keeps the neckline open. Practice tilting your head slightly while pinning so you can see the shape forming in a mirror. This bun also holds well through a full evening of talking, eating, and moving around, which makes it a reliable pick for events.
5. Rope Twist Updo
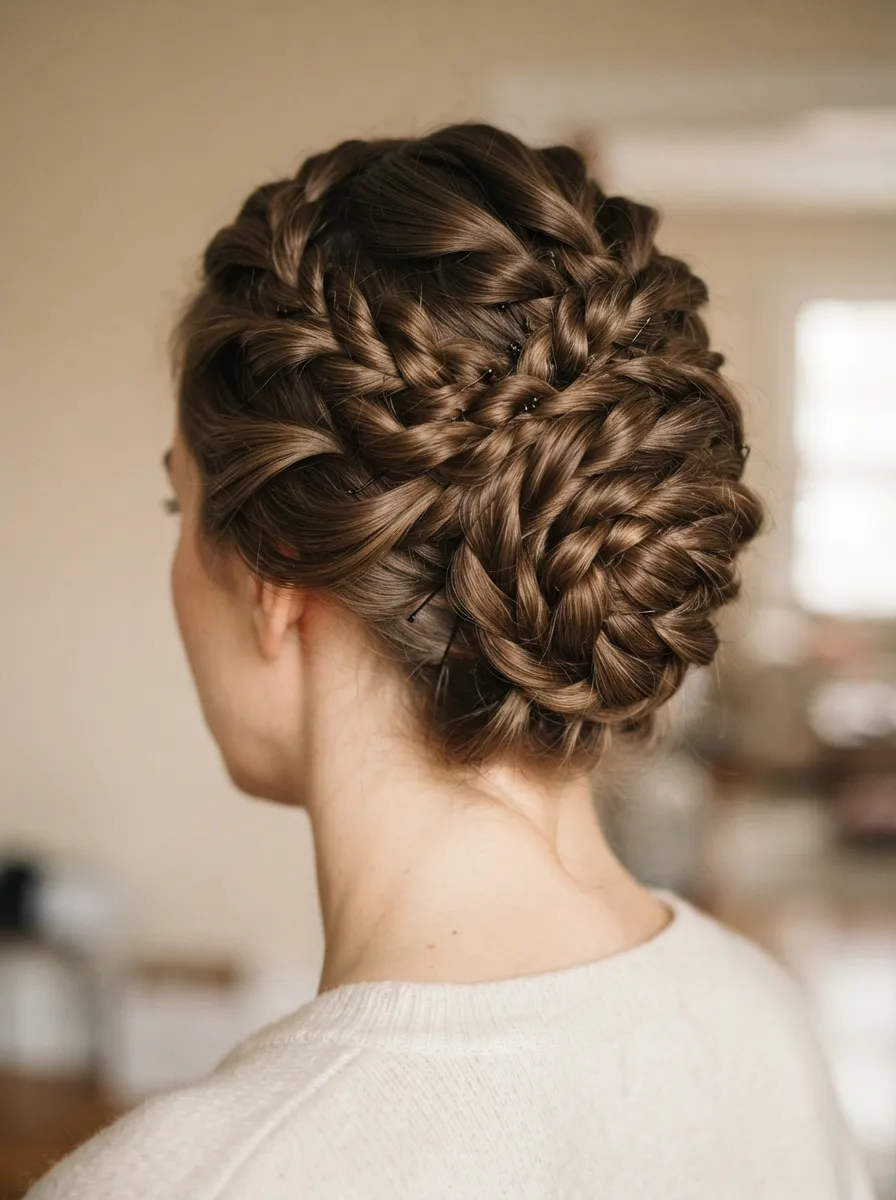
Rope twists give a braided look without the actual braiding. Split your hair into two sections. Twist each section, then twist them around each other. Pin the end at the crown or nape. This style looks complex but only takes two twisting motions. It works for casual outings or slightly dressed up settings. Budget tip: you only need two or three pins for the whole look, so it costs almost nothing to try. If your hair feels too smooth to hold the twist, spritz a little salt spray or texturizing spray before starting. This gives the strands more grip. This updo also works well on hair that has not been washed in a day or two, since some natural oil helps the twist stay in place longer. Try it as a quick fix on a rushed morning, since the whole process takes under three minutes once you know the motion. It also looks neat from every angle, which is helpful for group photos.
6. High Ponytail Bun Combo
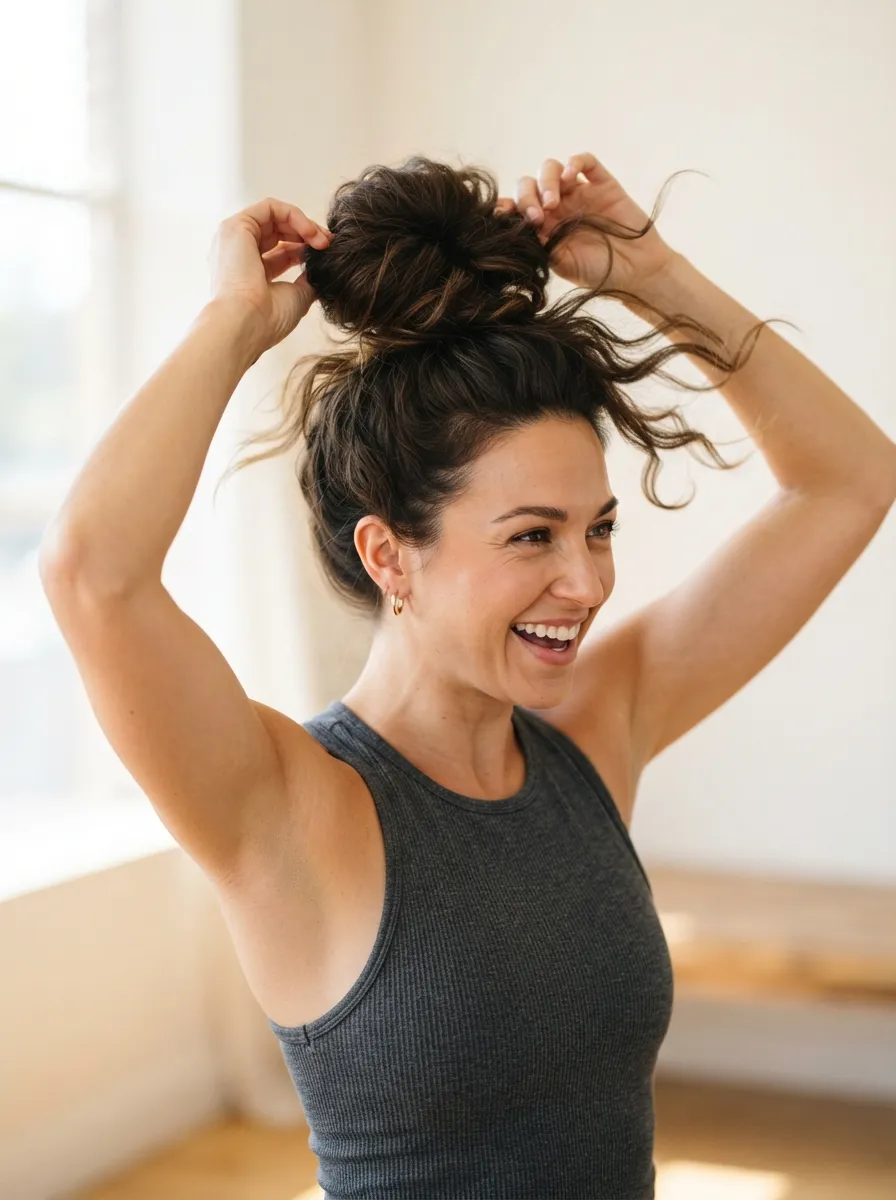
This combo style starts as a high ponytail before turning into a bun. Gather your hair high on your head. Secure it with an elastic. Then wrap the ponytail around the base and pin it down. This gives you the sleek look of a bun with the lift of a ponytail. It works for workouts, brunch, or casual weekend plans. Budget tip: reuse an elastic you already have on hand, no need to buy new hair ties. If you want a fuller look, backcomb the ponytail gently before wrapping it, this adds volume without extra products. This style stays secure through movement, so it is a smart pick for active days. It also works on second or third day hair, since a bit of natural texture helps the bun hold shape longer. Try pulling a few face-framing pieces loose for a softer finish if you do not want the fully pulled back look.
7. Braided Bun
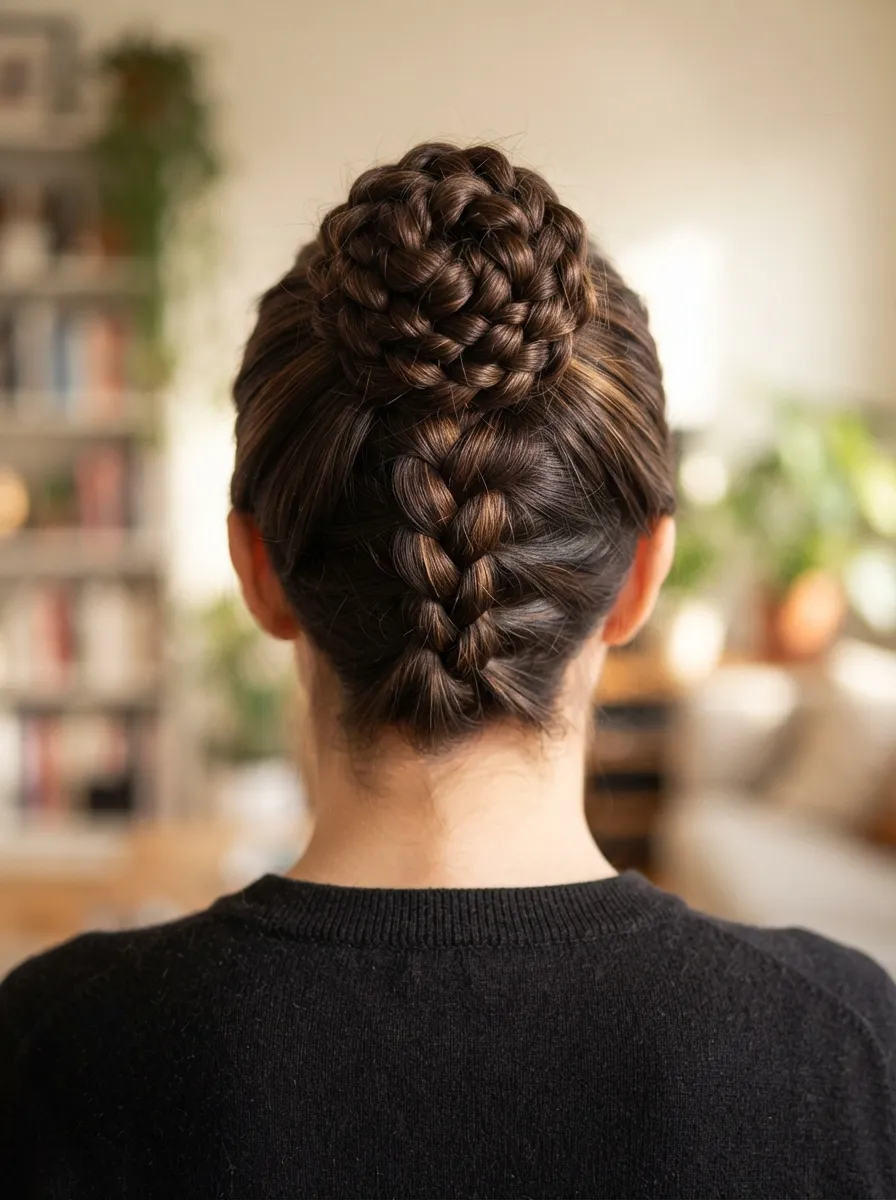
A braided bun combines two classic styles into one. Braid your hair into a single braid down the back. Then coil the braid into a bun and pin it in place. This style works for weddings, graduations, or any event where you want something that looks done without much cost. Budget tip: use small clear pins so they blend into the hair and you do not need many of them. If your braid feels too loose, spritz a little hairspray on it before coiling, this keeps the shape tight through the day. This updo also holds up well through long events since the braid structure keeps everything locked in place. Try practicing the coil step slowly, since getting the spiral shape right takes a bit of patience the first few times. Once you get comfortable, this becomes a reliable go to style for formal occasions without needing a professional stylist.
8. Messy Top Knot
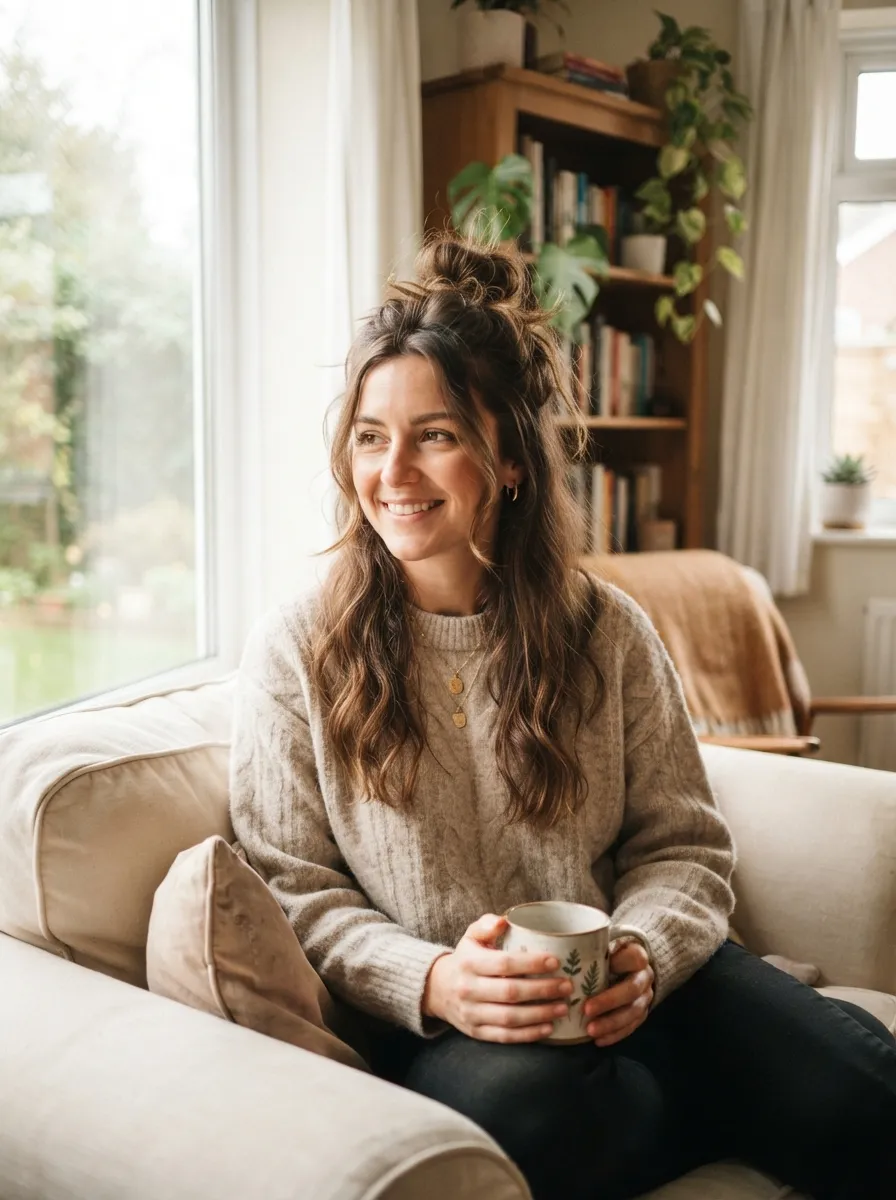
The messy top knot is the easiest updo on this list. Gather your hair at the very top of your head. Twist it loosely and wrap it around itself. Do not worry about perfection, the messier the better here. This works for lazy days, gym trips, or quick video calls. Budget tip: one large scrunchie is all you need, and it is gentler on hair than thin elastics. If you want more texture, apply dry shampoo before starting, this adds grip and a matte finish. This style also works well when you are short on time, since it takes under thirty seconds once you know the motion. It suits almost every hair length as long as it reaches the top of your head. Try pulling a few strands loose around your face for a relaxed, undone look. This knot also holds up through naps, workouts, and busy days without needing constant fixing.
9. Victorian Inspired Updo
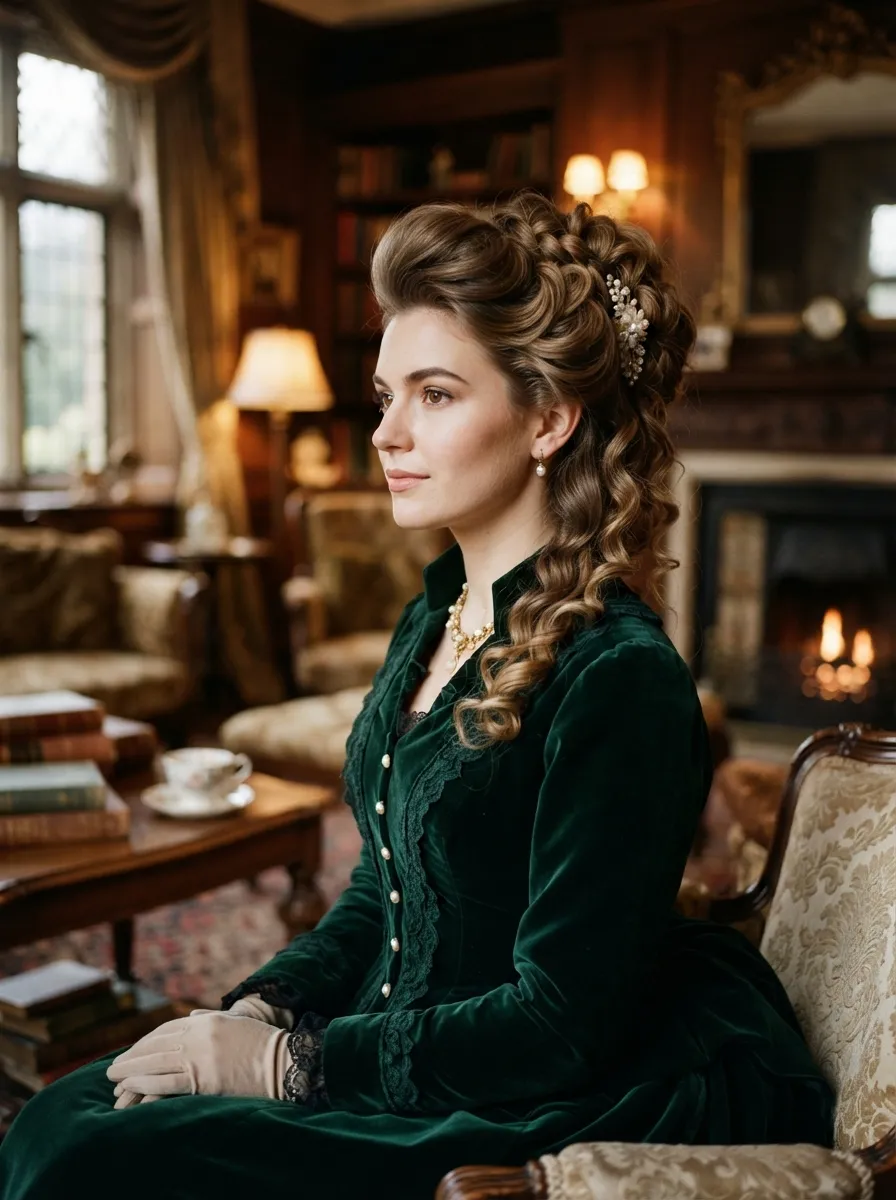
This style borrows from old fashioned elegance. Curl your hair first, then gather it up gently, leaving some volume at the crown instead of pulling it flat. Pin loosely so the shape stays soft rather than sleek. This works for costume parties, themed events, or photoshoots. Budget tip: use foam rollers overnight instead of a curling iron, this saves on heat damage and electricity. If you do not own decorative pins, small flowers from a craft store can add a similar vintage touch for very little money. This updo takes a bit more time than others on this list, but the payoff is a dramatic, romantic look. Try practicing the volume step separately first, since building height at the crown without flattening it takes some trial and error. This style photographs beautifully, which makes it a good pick for events where pictures matter.
10. Double Twisted Bun
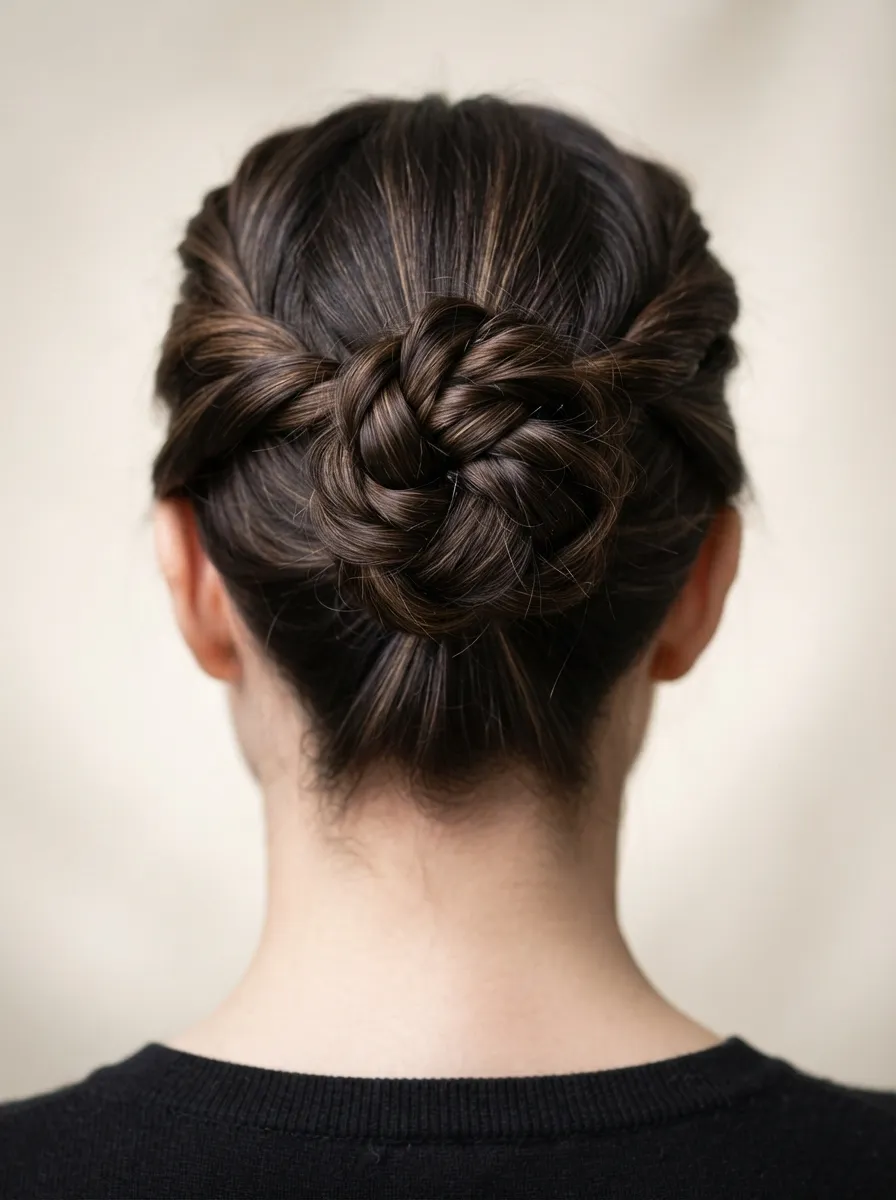
This style layers two twists into a single bun for extra texture. Split your hair into two sections at the crown. Twist each one separately, then combine them into a bun and pin. This works for work meetings, casual dinners, or daily wear. Budget tip: no special products are needed, just your regular pins and a comb. If your hair separates too easily, a small amount of gel on your fingertips before twisting helps keep the sections neat. This updo looks more detailed than a single twist bun but only takes a minute longer to create. Try practicing the merge step where both twists meet, since this is the part that gives the style its layered appearance. This bun also holds well through a full workday, making it practical for anyone who wants a polished look without spending real time each morning.
11. Low Braided Ponytail
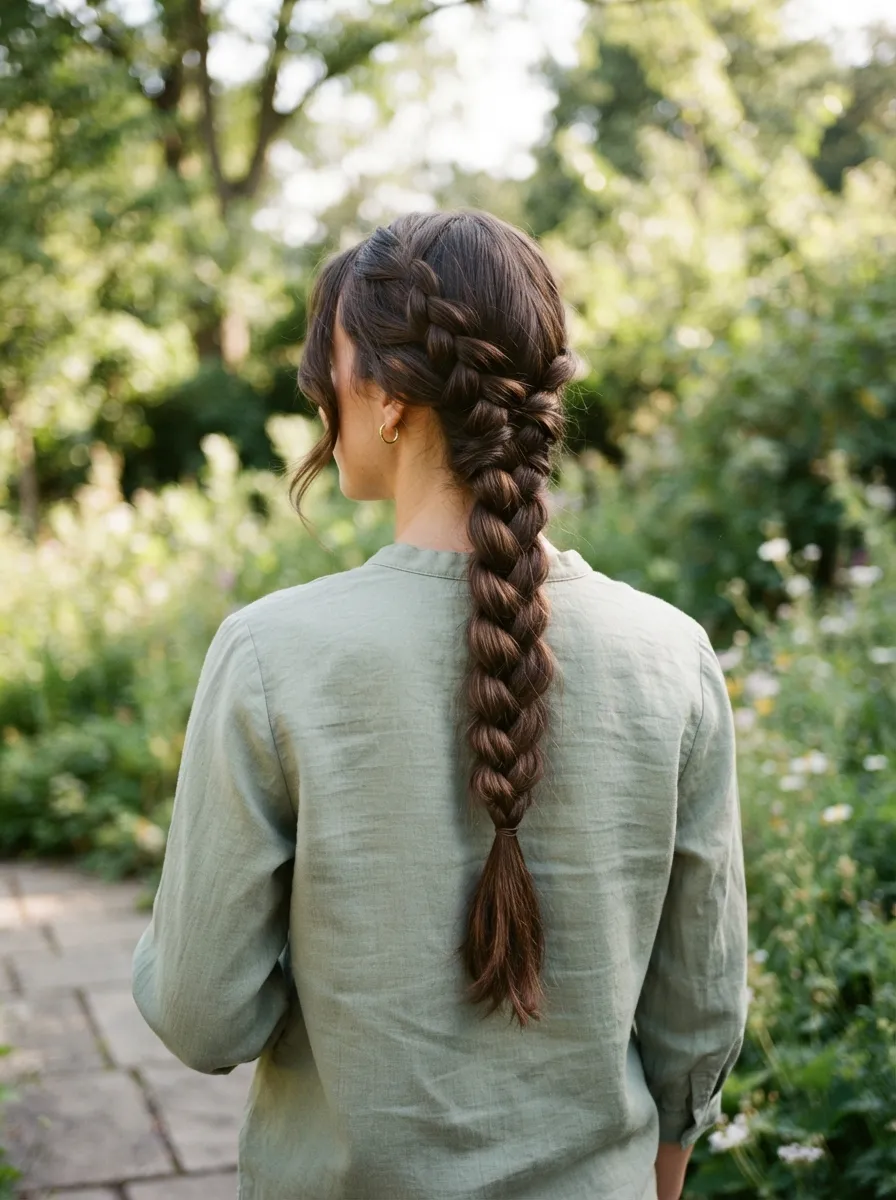
This style is a simple upgrade from a regular ponytail. Gather your hair low, secure it, then braid the remaining length. This works for outdoor activities, travel days, or casual gatherings. Budget tip: use a spare elastic at the base and another small one at the braid end, both items you likely already own. If your hair is layered, tuck shorter pieces in as you braid so they do not stick out. This style keeps hair contained during windy weather, making it practical for outdoor plans. Try loosening the braid slightly with your fingers after finishing for a softer, fuller look. This updo also works well for kids or teens since it is quick to do and holds up through active play. It requires no heat and no expensive tools, just your hands and a couple of elastics.
12. Pinned Back Waves
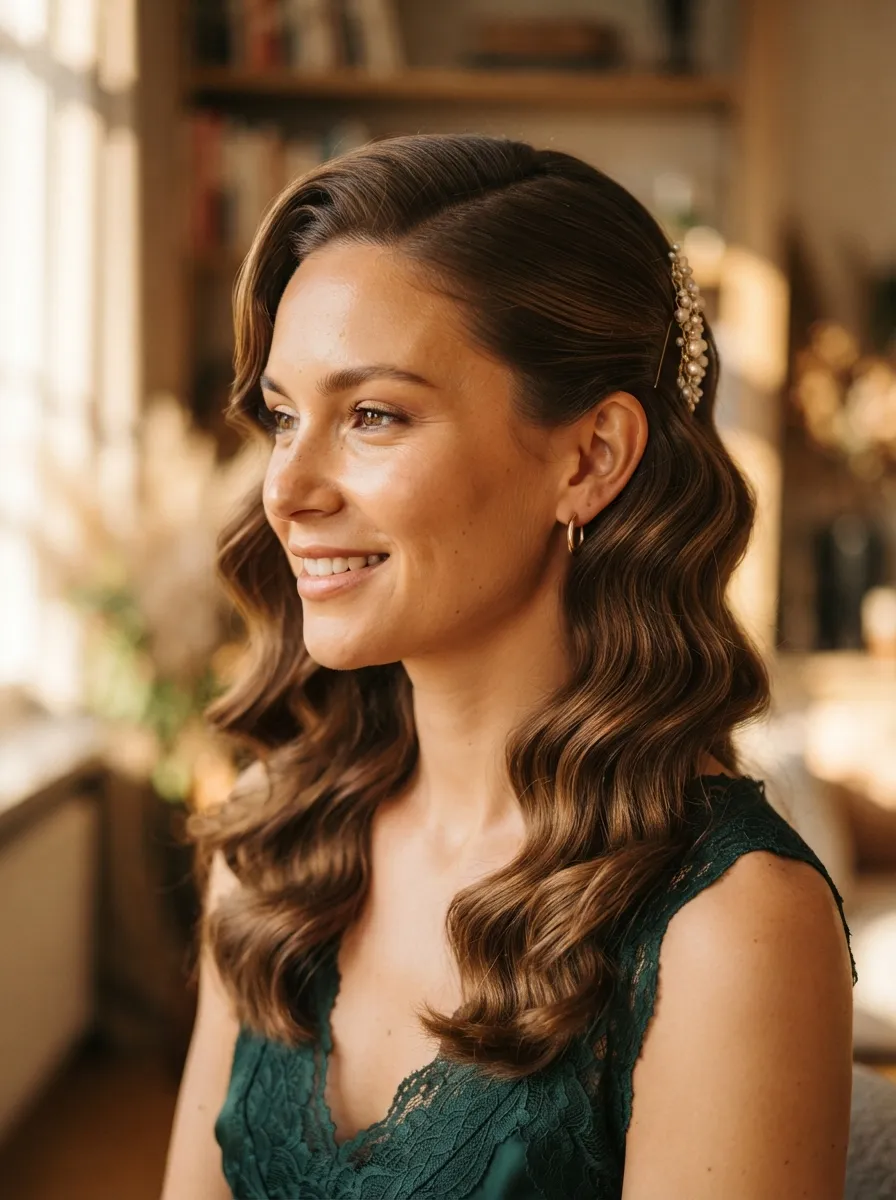
This style keeps hair down but pulls it away from the face for a cleaner look. Curl your hair first, then pin back the front sections, crossing them at the back of your head. This works for semi formal events or date nights. Budget tip: bobby pins in a color close to your hair blend in without needing decorative clips. If you do not have a curling iron, braid damp hair overnight and unravel it in the morning for natural waves at no cost. This style takes only a few pins to complete, making it quick compared to full updos. Try tucking the pins slightly under the top layer of hair so they stay hidden. This look works well for photos since your face stays visible while your hair still looks styled and intentional.
13. Bubble Ponytail Updo
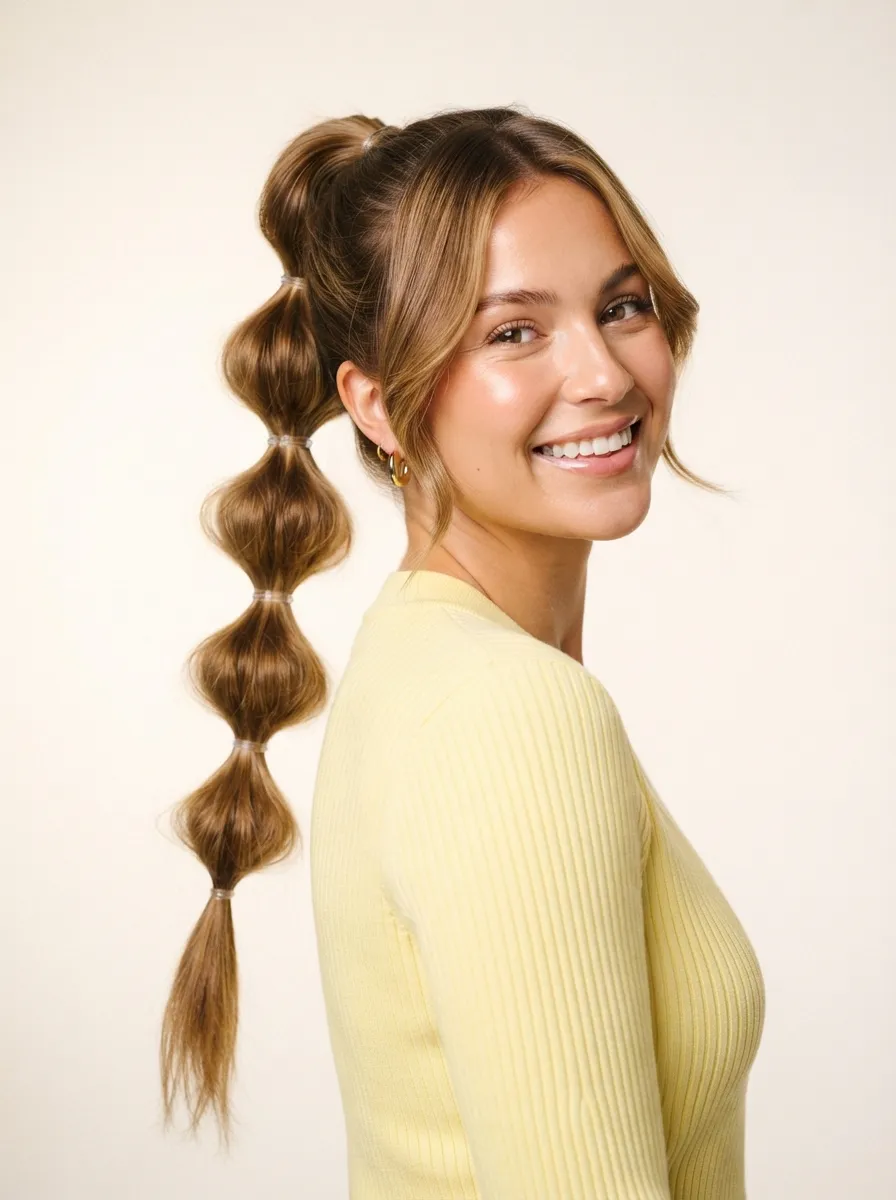
This playful style uses small elastics spaced along a ponytail to create bubble sections. Gather hair into a ponytail, then add elastics every two or three inches down the length. Gently pull each section outward to create the bubble shape. This works for parties, festivals, or fun casual outings. Budget tip: use a pack of small clear elastics, which cost very little and can be reused many times. If you want extra shine, apply a small dot of hair oil to your palms and smooth over each bubble. This style takes a few extra minutes but does not require any skill beyond placing elastics evenly. Try keeping the bubbles loose rather than tight for a more relaxed, modern look. This updo also works well for kids or anyone wanting a playful twist on a regular ponytail without much cost or effort.
14. Sleek Low Ponytail With Wrap
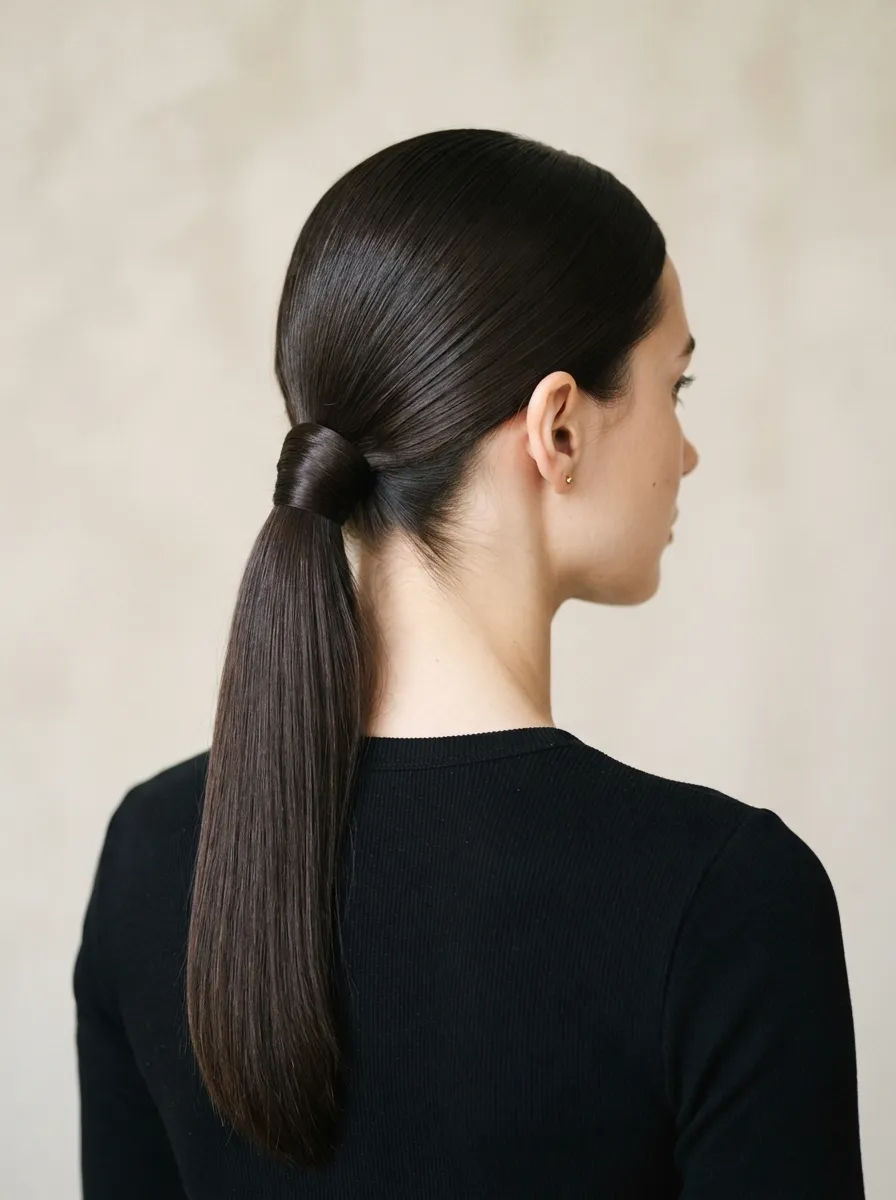
This style hides the elastic for a polished finish. Pull hair into a low ponytail. Take a small section, wrap it around the base, and pin the end underneath. This works for interviews, formal dinners, or any setting where a clean look matters. Budget tip: this technique uses hair you already have instead of a decorative accessory, so it costs nothing extra. If your hair is not naturally straight, a flat iron on the ponytail section only helps create a sleek finish without styling the whole head. This look takes a little practice to wrap neatly, but once mastered, it becomes a fast go to style. Try smoothing the front section with a small amount of gel before pulling back for extra sleekness. This ponytail works for almost any hair texture and holds up well through long days without slipping.
15. Braided Half Crown
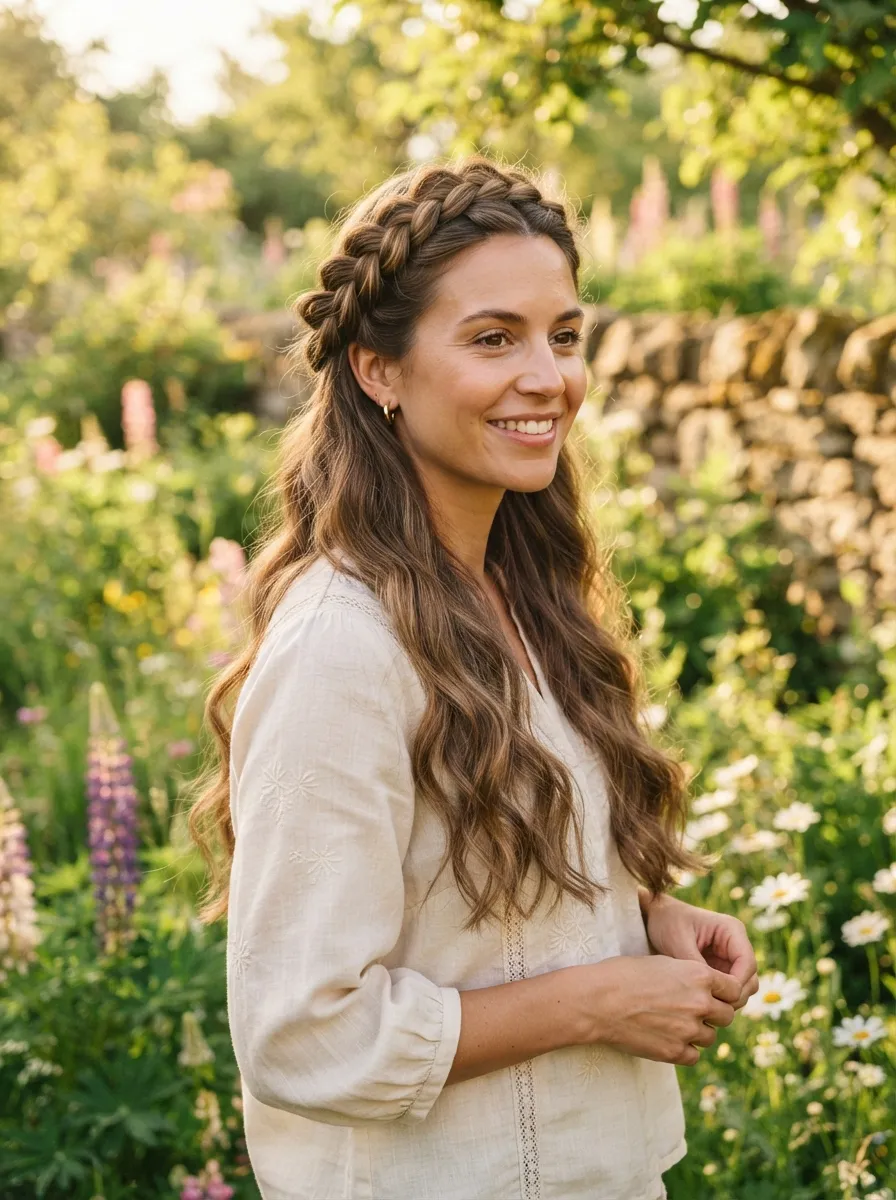
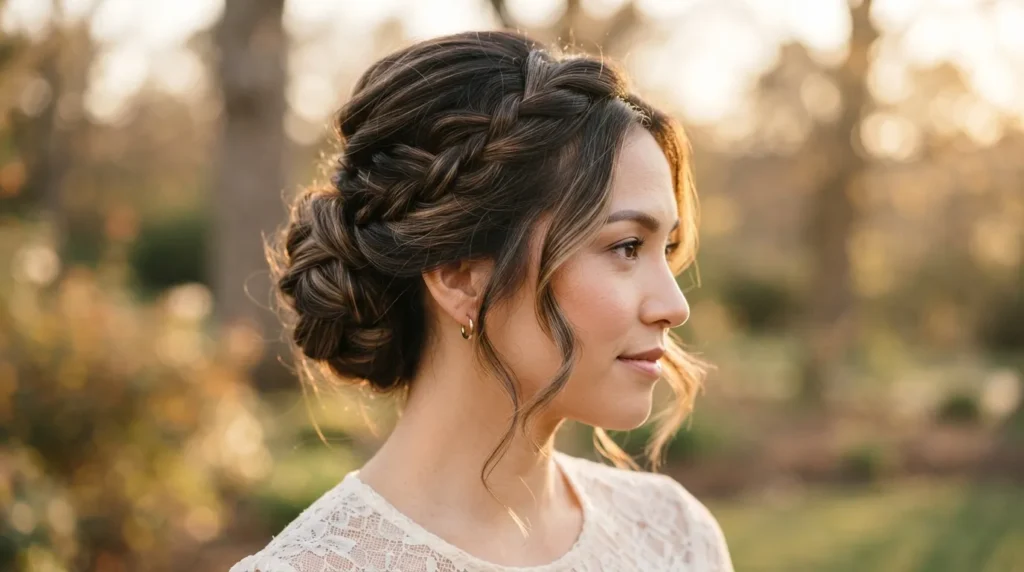
This style combines a partial braid with loose hair below. Braid a section from one side of your head to the other, pinning it across like a small crown. Leave the rest of your hair down. This works for brunch dates, casual weddings, or daytime events. Budget tip: only a few pins are needed to secure the braid, no extra products required. If you want the braid to stand out, use a small section of contrasting hair color if you have highlights or balayage, this creates a nice visual effect at no added cost. This style takes about five minutes and suits almost any face shape. Try starting the braid slightly further back for a more subtle look, or closer to the front for a bolder statement. This updo also works well for second day hair since a bit of texture helps the braid hold shape longer.
16. Twisted Chignon
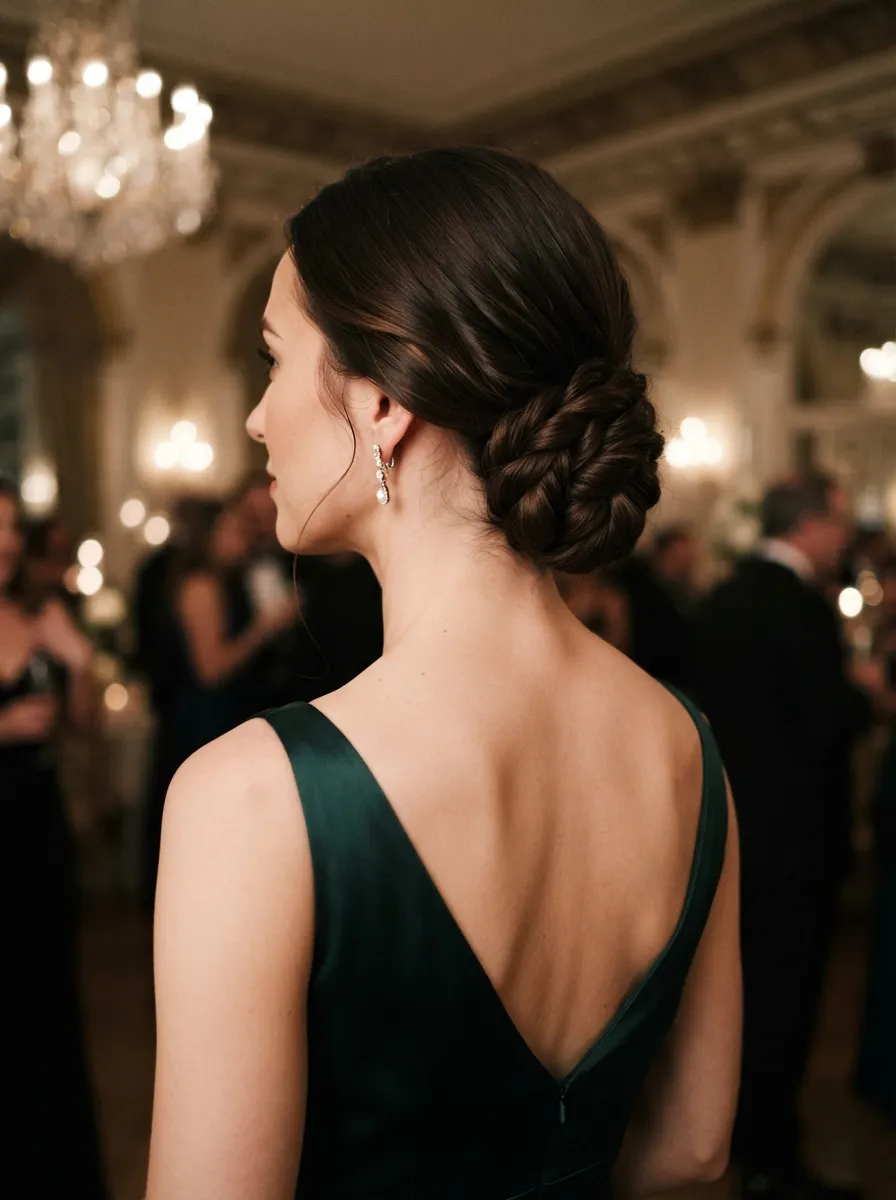
A chignon is a low, twisted knot that looks formal without much effort. Gather hair low, twist it upward, and tuck the end under, pinning as you go. This works for weddings, galas, or professional events. Budget tip: this style needs only pins, no clips or extensions required. If your hair is fine or thin, teasing the base slightly before twisting adds fullness without spending on volumizing products. This look takes a few tries to master the tucking motion, but once learned, it becomes a reliable formal option. Try practicing in front of a mirror with two angles, a front view and a hand mirror for the back, so you can see the shape as you work. This updo photographs well from the side, making it a strong choice for events with formal portraits or group pictures.
17. Half Up Braided Bun
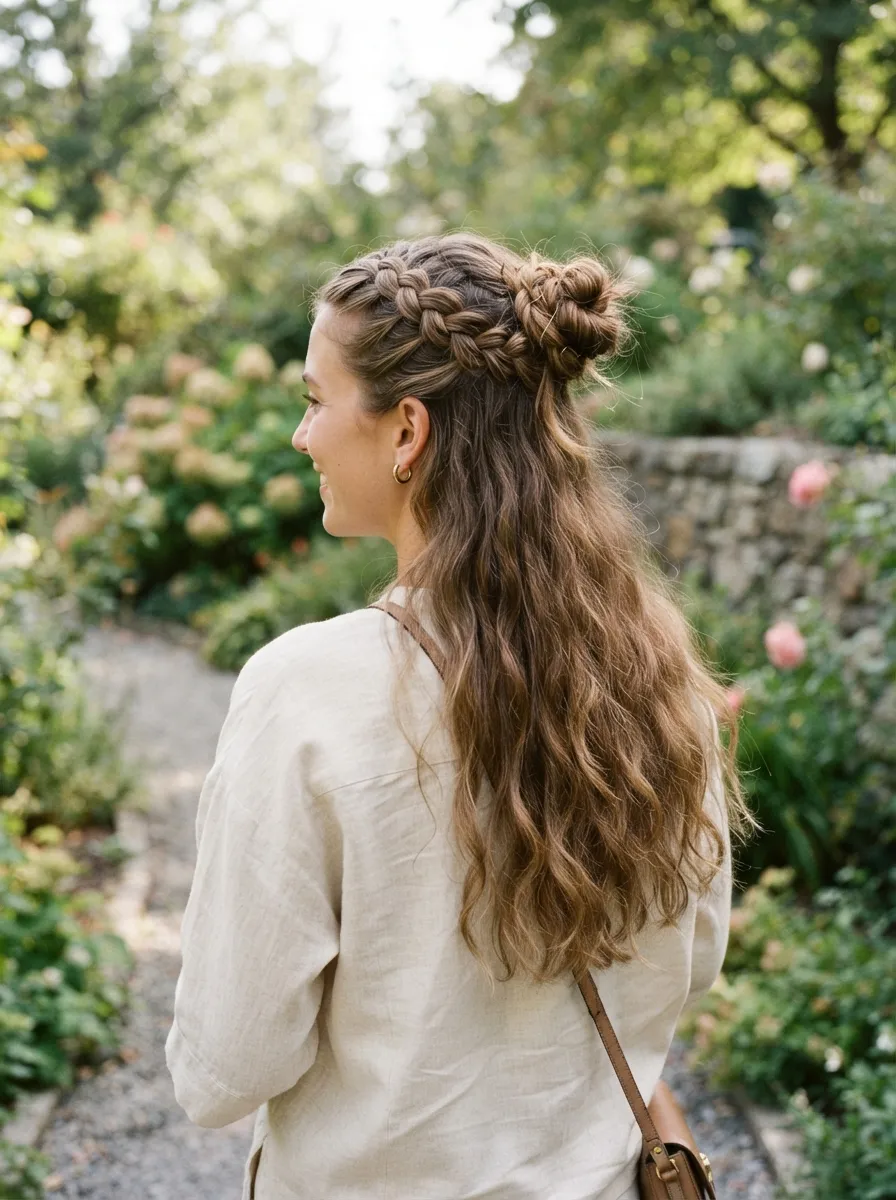
This style mixes a small braid with a half up bun for a cute, simple look. Take the top section of hair, braid it, then coil it into a small bun and pin. Leave the rest down. This works for daily wear, school, or casual outings. Budget tip: this uses minimal hair, so even a small elastic and two pins are enough. If your hair is short on top, this style may need a bit more length pulled from the sides to make the bun secure. This look takes under two minutes and suits almost any hair type. Try adjusting the size of the bun depending on how much hair you pull up, smaller for a subtle look, larger for more presence. This style also works well for humid weather since it keeps some hair off your neck while still looking relaxed.
18. Braided Ponytail Wrap
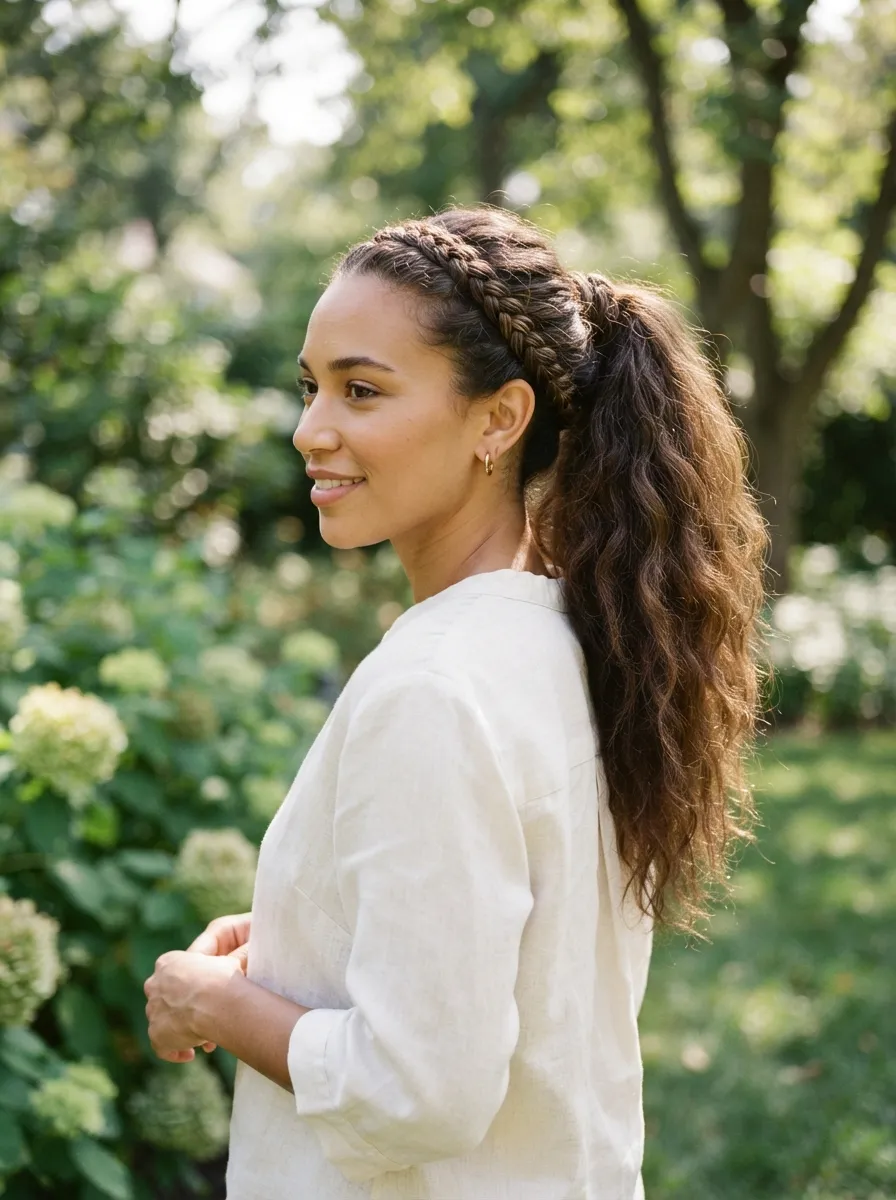
This style hides the elastic using a thin braid instead of a hair wrap. Gather hair into a ponytail. Take a small section, braid it, then wrap it around the base and pin the end. This works for outdoor events, casual parties, or daily errands. Budget tip: no accessories needed, since the braid itself replaces any decorative element. If your hair does not hold braids well, a small amount of texturizing spray on that section beforehand helps it stay neat. This look adds a small detail to an otherwise simple ponytail, making it look more finished without extra cost. Try practicing the wrap motion a few times so the braid lays flat rather than bulky. This style also works well for humid or windy days since the braid stays secure even when the rest of the ponytail moves around.
19. Low Twisted Side Updo
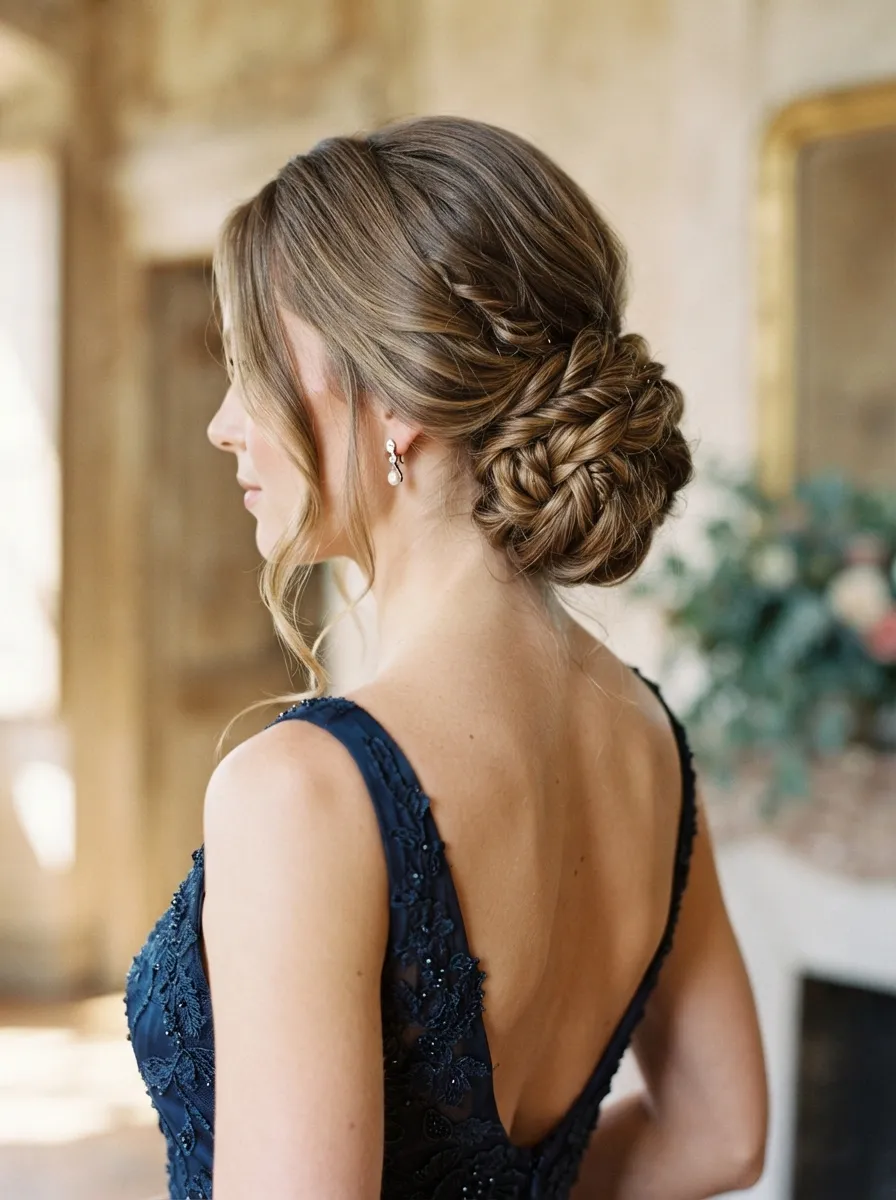
This style brings an asymmetrical touch to a classic updo. Sweep hair to one side, twist it downward, and pin near the shoulder or collarbone. This works for date nights, dinners, or semi formal events. Budget tip: bobby pins are the only tool needed, making this a zero cost style beyond what you already own. If you want extra hold, spray a little hairspray on the twist before pinning. This look pairs well with dresses that have detail on one shoulder, since it keeps the opposite side open and visible. Try adding soft waves before twisting for a fuller, more romantic finish. This updo takes a bit of practice to get the twist tension right, not too tight, not too loose, but once mastered, it becomes a flattering option for many face shapes and hair textures.
20. Braided Top Knot
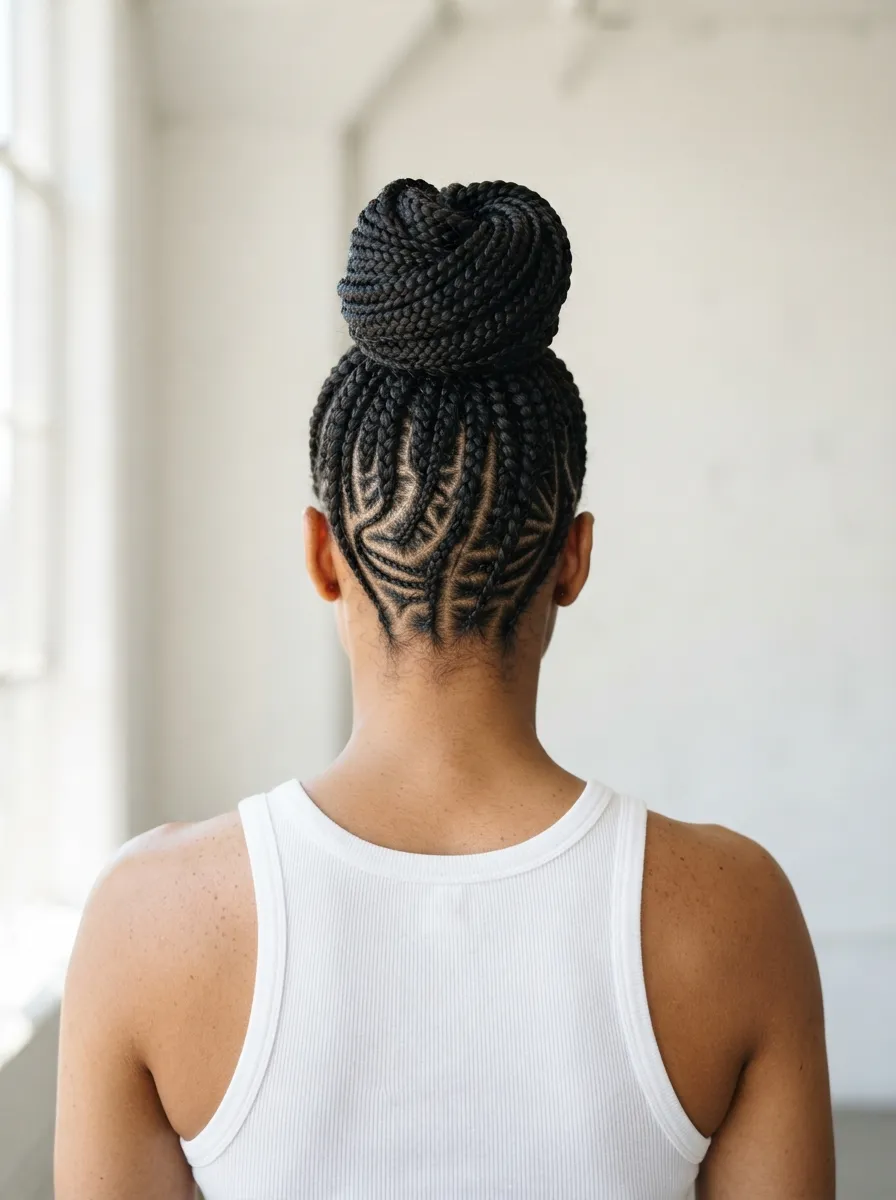
This style takes the classic top knot and adds a braid for extra texture. Gather hair high on your head. Braid the ponytail, then coil it into a bun and pin. This works for workouts, casual days, or quick errands. Budget tip: this uses the same tools as a regular top knot, just an elastic and a couple of pins, so there is no added cost. If your hair is very slippery, a small amount of texturizing spray before braiding helps the coil hold its shape longer. This look takes a little more time than a plain top knot but adds visual detail without much extra effort. Try practicing the coil step slowly so the braid spirals neatly rather than bunching up. This style also holds up well through active days, making it a practical choice for anyone who moves around a lot.
21. Loose Braided Updo
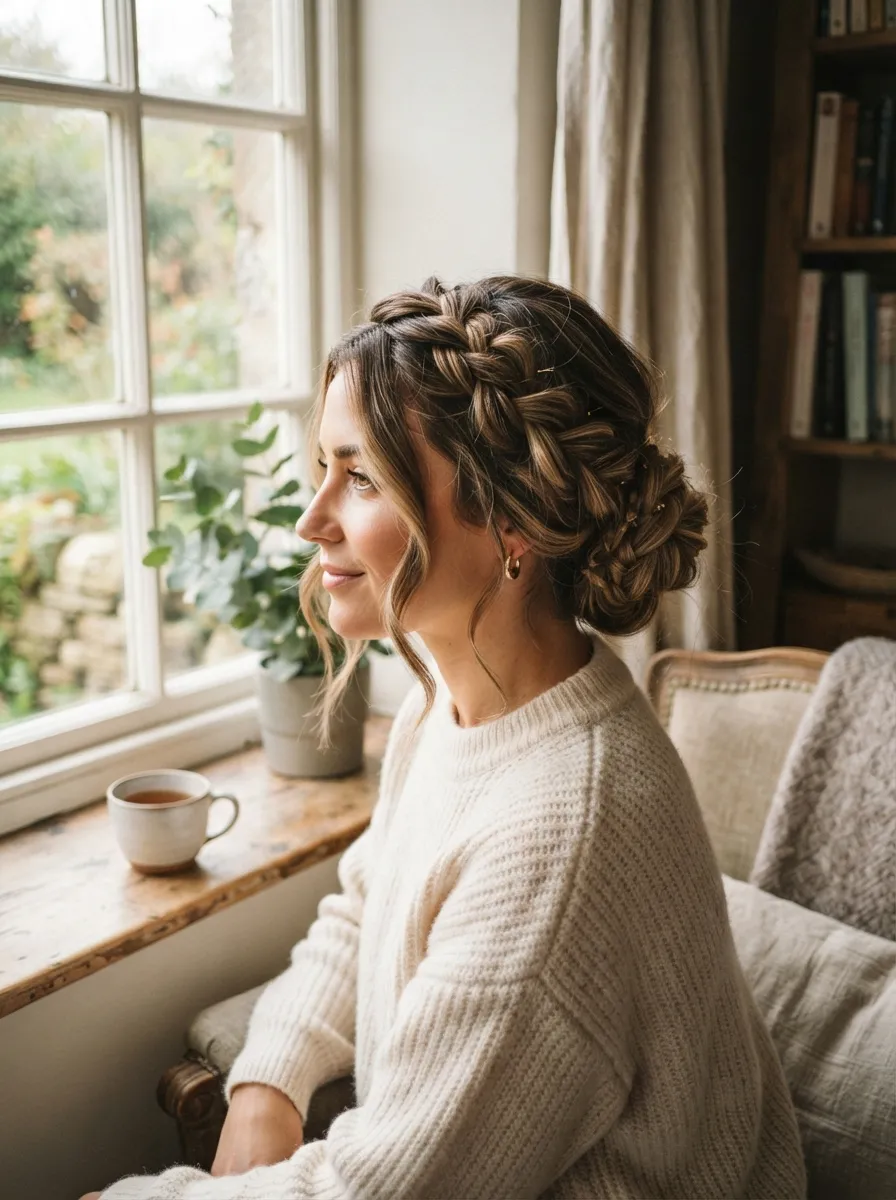
This style takes a relaxed approach to the braided bun. Braid your hair loosely, without pulling too tight, then coil it into a bun and pin. Leave a few pieces out for a soft, undone look. This works for casual weekends, coffee dates, or relaxed gatherings. Budget tip: this style needs no products at all, just your hands and a few pins. If your hair feels flat, scrunching a bit of texturizing spray into damp hair before styling adds natural volume. This look is forgiving of small mistakes since the loose, relaxed style hides imperfections well. Try pulling a few strands loose around your face and neck for a softer finish. This updo also works on hair that has not been washed recently, since some natural oil helps the loose braid hold its shape without looking too polished or stiff.
22. Statement Bun With Accessories
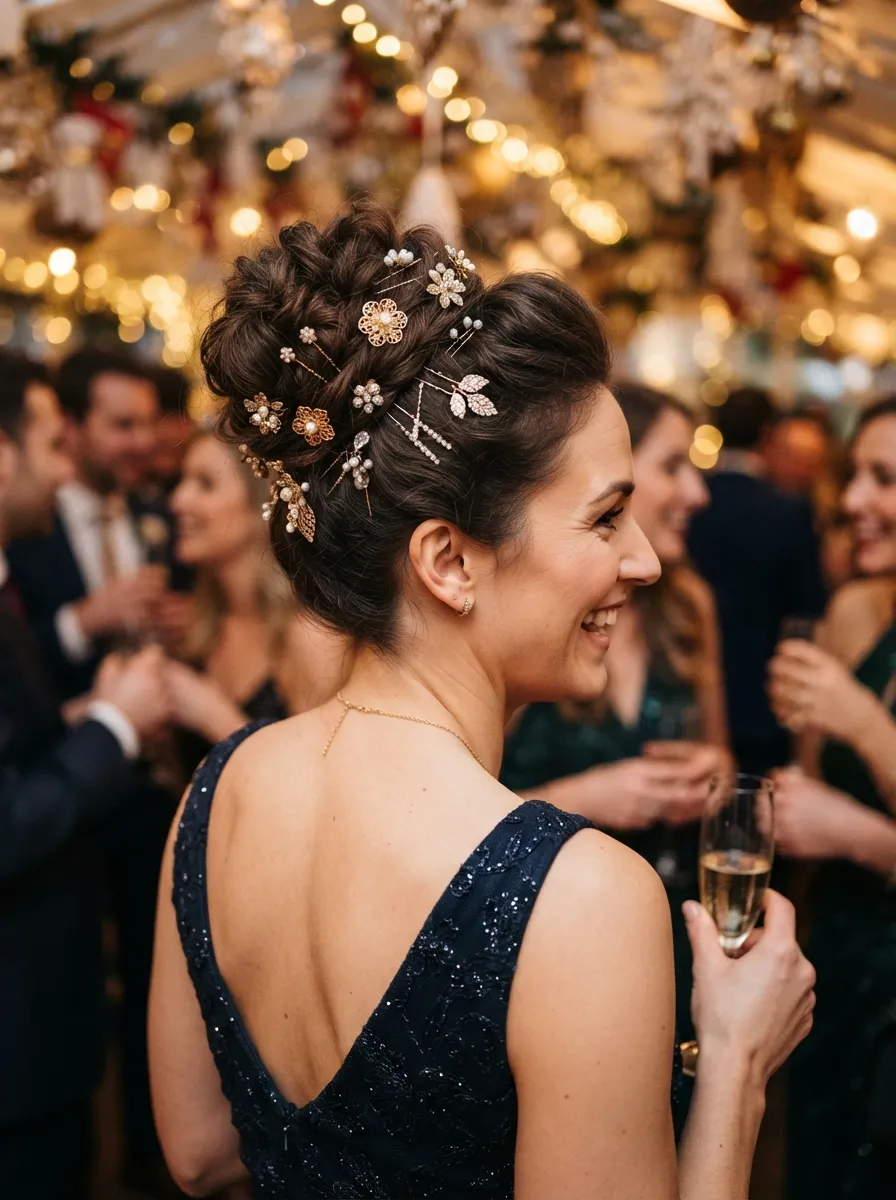
This style takes a simple bun and dresses it up with accessories. Create any basic bun style, then add decorative pins, small clips, or a thin ribbon woven through. This works for birthdays, celebrations, or any event where you want a bit of sparkle. Budget tip: dollar store hair pins or ribbon scraps from home decor projects work just as well as expensive accessories. If you do not own decorative pins, small flowers from your yard or a nearby store can add a similar festive touch. This look takes the same time as a regular bun, with a few extra minutes to place accessories evenly. Try spacing pins or flowers around the bun rather than clustering them in one spot for a balanced look. This style is a good reminder that a small addition can change how finished and intentional a simple hairstyle feels.
Conclusion
Long hair gives you more room to experiment, and these 22 updos prove that a great look does not require a big budget or a professional stylist. From the classic low bun to a statement bun with accessories, each style on this list uses tools you likely already have at home. Practice a few of these on a quiet afternoon so you feel ready when a real event comes around. Small details, like a loose braid or a wrapped ponytail, can turn a plain hairstyle into something that feels special. Pick two or three styles from this list to start with, get comfortable with the steps, and build your own routine from there. With a little patience, any of these updos can become part of your regular hair routine.