


Thin hair, meaning fewer strands overall rather than fine individual strands, comes with its own set of styling challenges, though the two often get lumped together. If your scalp shows through more than you’d like or your ponytail feels smaller than it used to, the goal is creating strategic coverage and dimension rather than chasing volume everywhere at once. The right cut, some smart parting choices, and a handful of styling techniques can make a real visible difference. These twenty five ideas focus on distributing hair for maximum coverage, adding texture where it counts, and avoiding the styles that tend to expose thinning the most.
1. Zigzag Part
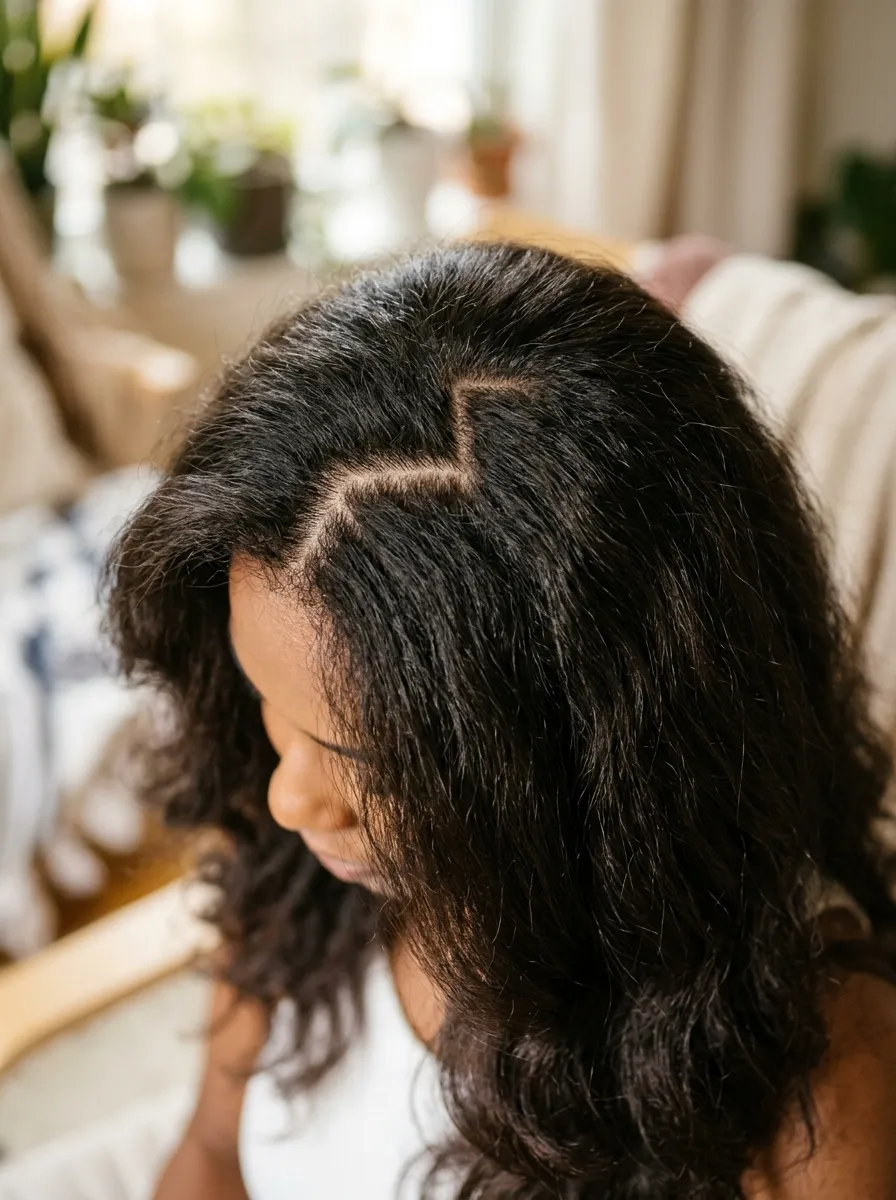
A straight part creates one continuous line where the scalp is fully visible, which is exactly what thin hair doesn’t need. Using the pointed end of a rat tail comb, create a zigzag part instead, moving the comb in small diagonal motions from front to back rather than one straight line. This breaks up the visibility of the scalp by scattering hair across a wider, irregular path rather than concentrating the part in one spot. It takes a little practice to get an even zigzag, so go slowly the first few times rather than rushing through it. A root touch up powder in a shade matching your hair color, dabbed lightly along the part, adds even more camouflage for particularly noticeable areas. This trick works on any length and any style underneath, making it one of the easiest, most immediate changes for anyone dealing with thinning hair to try before making any bigger cut or color decisions.
2. Textured Pixie Crop
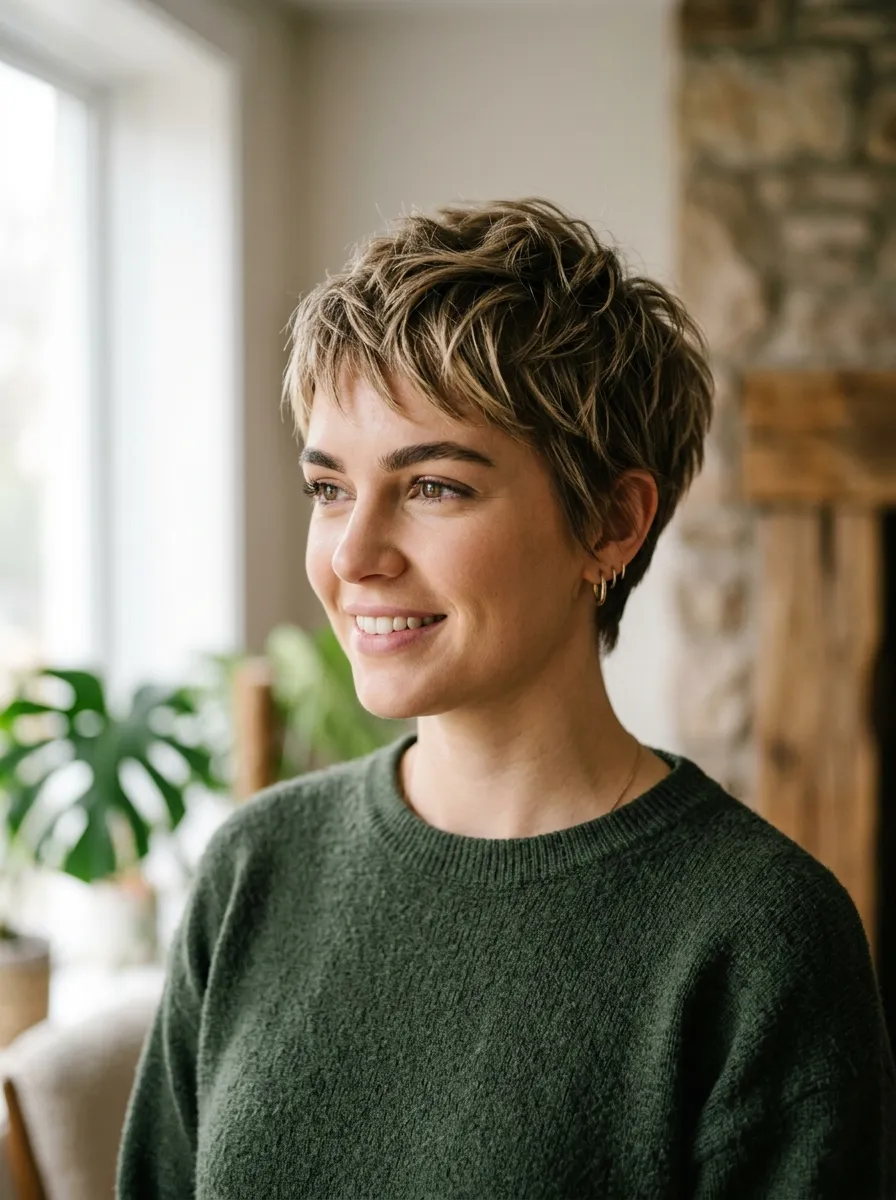
Among the best Fine Hair Hairstyle Ideas, a textured pixie cut stands out because it makes thinning hair appear fuller by concentrating volume into a smaller, more defined shape. Going shorter may seem counterintuitive, but a well-cut pixie can create a fuller-looking overall silhouette. Ask your stylist for point-cut, textured layers rather than a smooth, close crop, as this adds movement and the appearance of density through varied lengths instead of relying on hair quantity alone. Style with a small amount of matte texturizing paste, working it through with your fingers and pushing pieces upward and forward rather than combing them flat against the head. This cut does require regular maintenance, typically a trim every four to six weeks, but it consistently looks intentional and polished in a way that longer, visibly thinning hair sometimes struggles to achieve. Since it’s a bigger change than some other styles, bring reference photos and discuss your natural hair pattern with your stylist before making the cut.
3. Low Side Part
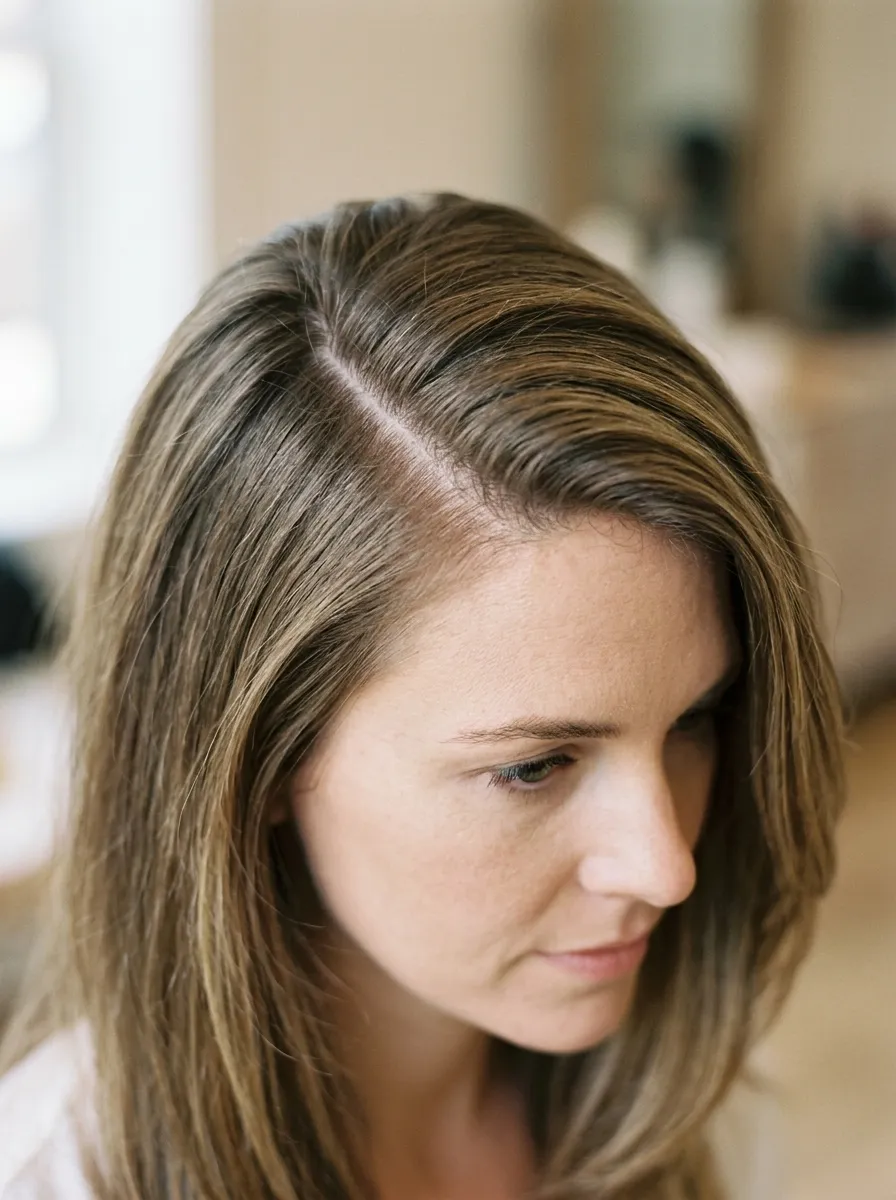
A deep, low side part shifts the majority of hair over to one side, creating a thicker curtain of coverage across the crown and hairline where thinning often shows the most. Part hair low, close to the ear, then blow dry with a round brush, lifting at the root on the fuller side to maximize the coverage this angle provides. A volumizing spray applied at the root before drying helps the lift last through the day rather than collapsing back down within an hour. This technique works especially well for anyone experiencing thinning specifically at the crown or part line, since it physically relocates more hair over that vulnerable area rather than trying to add volume there directly. Switch which side you part on every so often to avoid additional stress on one specific area of the scalp over time, which can worsen thinning in that spot if the same section is pulled and styled the same way for months on end.
4. Soft Layered Bob

A softly layered bob that hits around the chin creates a rounded shape that visually reads as fuller than the same amount of hair would at a longer length. Ask for layers that are subtle rather than heavily thinned out, since over thinning with texturizing shears can actually make already thin hair look sparser rather than more textured. Style with a round brush blowout, curving the ends inward slightly to create a solid, curved line at the bottom rather than letting strands hang straight and separated. This shape works because shorter hair has less length for gravity to pull down and separate, keeping strands closer together and creating a denser looking silhouette overall. A light shine serum on the ends adds polish without weighing down the roots. This cut suits most face shapes and offers a manageable, everyday style that doesn’t require much daily effort once the initial cut is dialed in correctly.
5. Root Teasing With a Fine Comb

Root teasing remains one of the most effective, low cost techniques for creating the appearance of thicker hair anywhere volume has fallen flat. Take small sections at the crown, hold them up and away from the scalp, and gently backcomb toward the root using short, controlled strokes with a fine tooth comb. Smooth the top layer back over the teased section with a soft bristle brush for a natural finish that doesn’t look overtly done. A light dusting of texturizing powder worked into the roots before teasing gives the comb extra grip, helping the lift hold longer than teasing alone. This technique can be incorporated into nearly any style on this list, ponytails, buns, half up looks, or hair worn fully down, making it a foundational skill worth practicing regardless of which specific cut or style you land on. Go easy with the teasing intensity to avoid unnecessary breakage over repeated use.
6. Extensions for Targeted Fullness
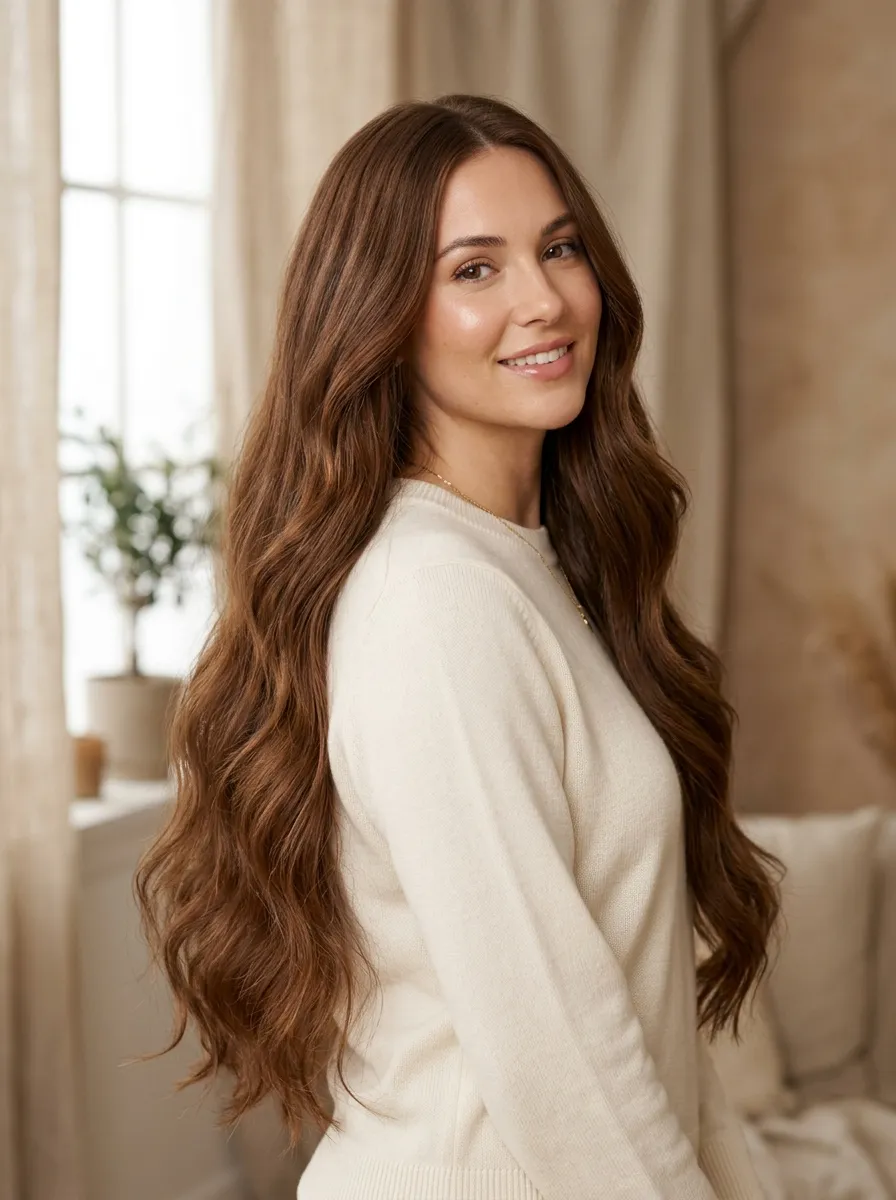
Clip in or tape in extensions offer a more immediate solution for those wanting fuller hair without waiting on growth or committing to a shorter cut. Choose extensions that match your natural hair color and texture closely, and consider having a professional color match done rather than guessing from an online swatch. Clip ins can be added just for special occasions, concentrated at the crown and sides where thinning is often most visible, while tape ins offer a longer term, more permanent boosting effect that lasts several weeks between reapplications. A heat protectant spray is essential if you plan to style the extensions with hot tools alongside your natural hair. This option requires more investment than most styling techniques on this list, both in cost and maintenance, but it offers noticeably dramatic results for those wanting significant fullness or length that their natural hair currently can’t provide on its own.
7. Voluminous French Braid

A french braid, gently loosened after braiding, creates the appearance of a fuller head of hair by spreading strands across a wider woven pattern rather than concentrating them in a tight single braid. Braid loosely from the crown down, then once secured, gently pull at the edges of each woven section with your fingers to widen and soften the overall shape. A texturizing spray applied before braiding gives strands enough grip to hold the loosened shape without slipping back into a flat, tight braid. This style works particularly well for covering thinning at the crown since the braid itself starts right at that vulnerable area and distributes hair outward from there. It also holds up well through a full day of activity, making it a solid choice for workouts or long days when you need hair secured but still want it looking full rather than scraped back and thin.
8. Rooted Color for Depth
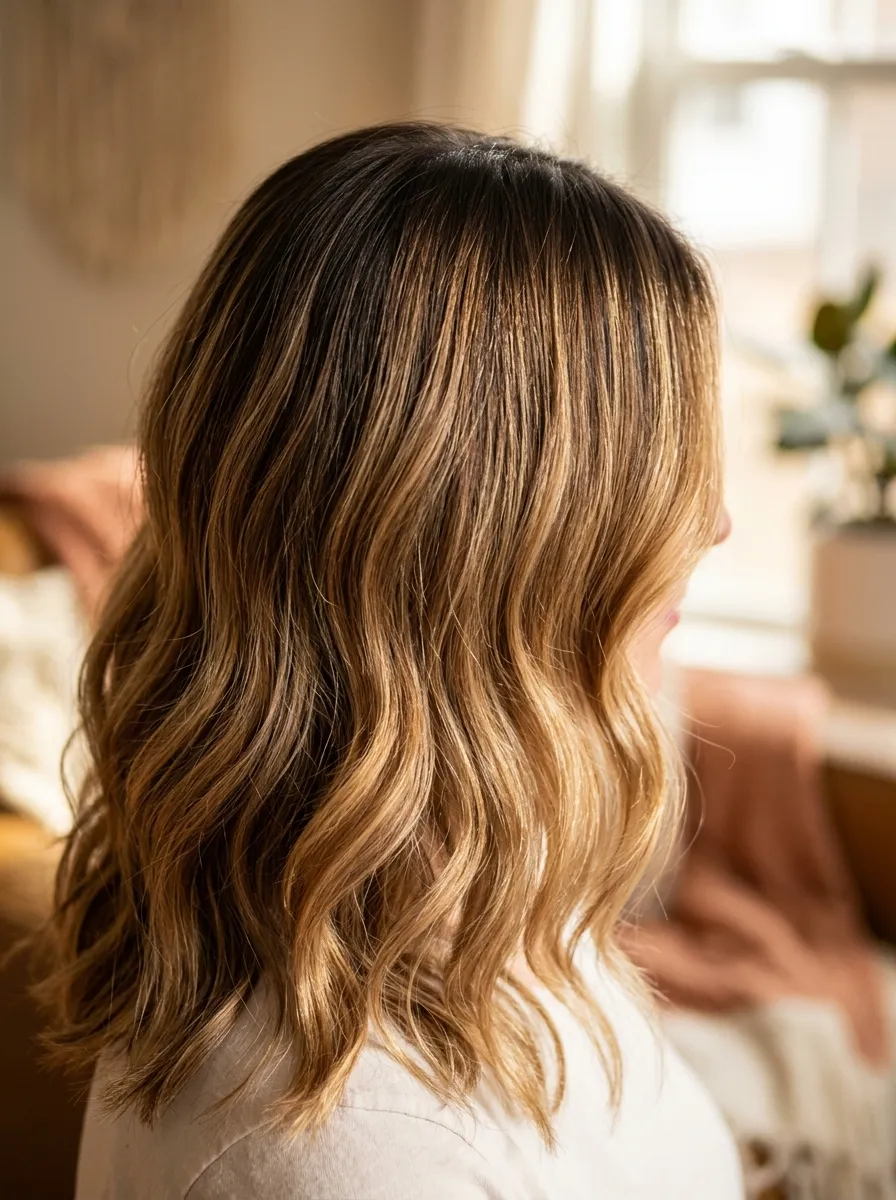
While not a hairstyle in the traditional sense, adding a rooted color technique, where the roots are left slightly darker than the rest of the hair, creates a shadow effect at the scalp that genuinely helps disguise thinning. The darker roots blend more naturally with any visible scalp, since scalp tone typically reads closer to a shadow than bright hair color would against it. Ask your colorist for a soft root shadow rather than a harsh, obvious line of demarcation between the root color and the rest of the hair. This technique also reduces the frequency of touch up appointments needed, since the grow out looks more intentional over time rather than immediately showing a stark regrowth line. Pair this coloring approach with any cut or style on this list for an extra layer of visual density that styling techniques alone can’t quite achieve on their own.
9. High Ponytail With Strategic Teasing
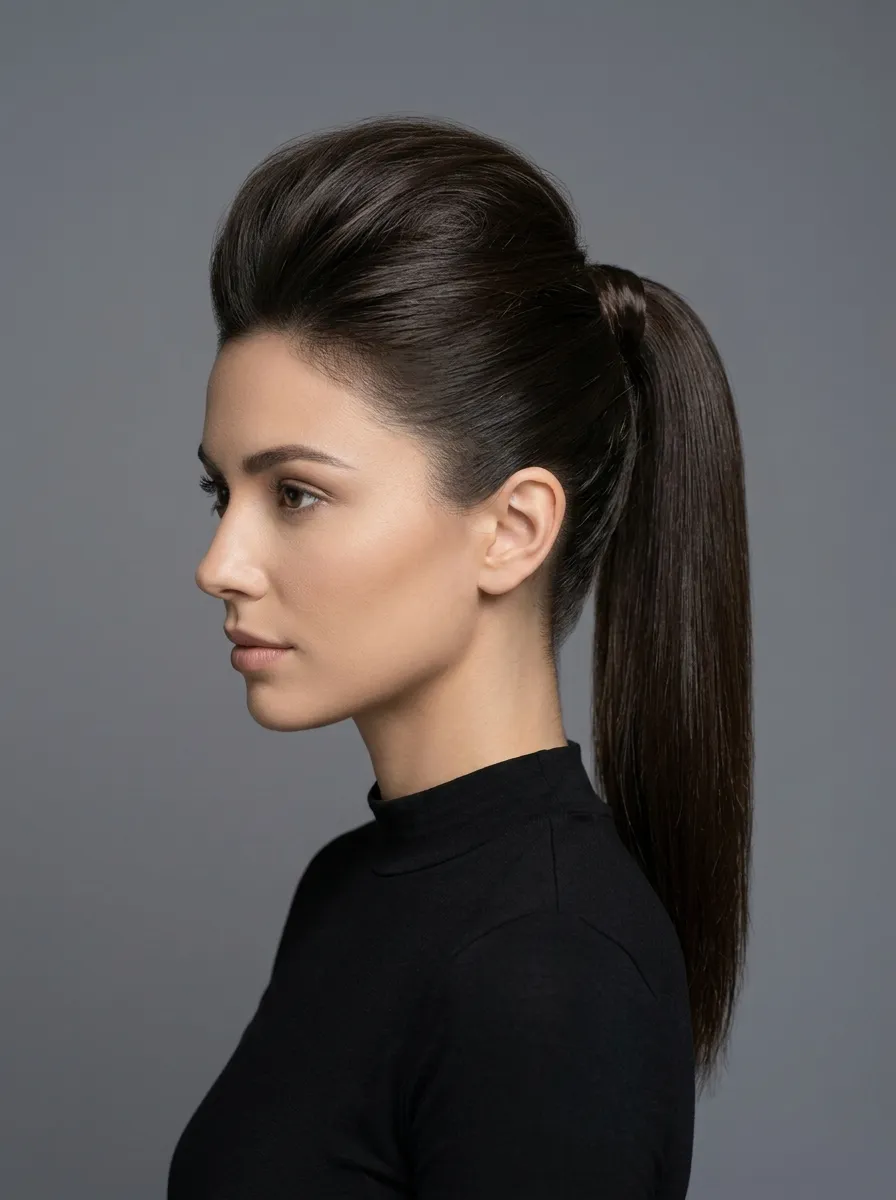
A high ponytail draws attention upward and, when paired with root teasing at the crown, can look surprisingly full even on thinner hair. Tease the crown section generously before gathering hair into the pony, then smooth just the top layer over it with a boar bristle brush, leaving the teased volume intact underneath. Wrap a small section of hair around the elastic to hide it, and gently pull at the base of the ponytail to widen it slightly for extra visual width. A thickening spray applied through the length of the ponytail itself adds texture and grip that a completely smooth ponytail lacks, which matters since smooth strands tend to lay flat and reveal exactly how much hair is actually there. This style works well for both casual and dressed up occasions and holds its shape for hours once properly set with a strong hold hairspray.
10. Curly Perm for Added Density

A loose, soft perm adds texture and body that naturally straight, thin hair often lacks entirely on its own. Curled or waved hair takes up noticeably more physical space than straight hair of the same density, which creates an immediate visual impression of fullness without adding a single additional strand. Talk to your stylist about a looser rod size for a soft wave rather than tight curls, which tend to look more natural and easier to maintain on thinning hair specifically. Follow up appointments with a deep conditioning treatment are important, since the perming process itself can be drying and potentially stressful on hair that’s already more fragile. This is a bigger commitment requiring several hours in the salon chair and months of growing out before a touch up is needed, but the volume payoff is genuinely significant for those willing to take that step.
11. Bangs for Instant Coverage

Bangs add a dense, textured section right at the front hairline, an area that often thins earlier and more visibly than the rest of the head. Ask for bangs cut with a bit of texture rather than a completely blunt, flat line, since texture helps disguise any unevenness in density across the section itself. Style with a round brush, drying the bangs with lift at the root and a slight curve at the ends rather than pressing them flat against the forehead. This addition works on nearly any length and instantly draws attention to a fuller, denser area of hair rather than the crown or part where thinning may be more pronounced. Regular trims every three to four weeks keep bangs looking crisp and full, since growing out bangs tend to separate and look thinner as they get long enough to fall into the eyes and split apart on their own.
12. Low Bun With Volumized Crown
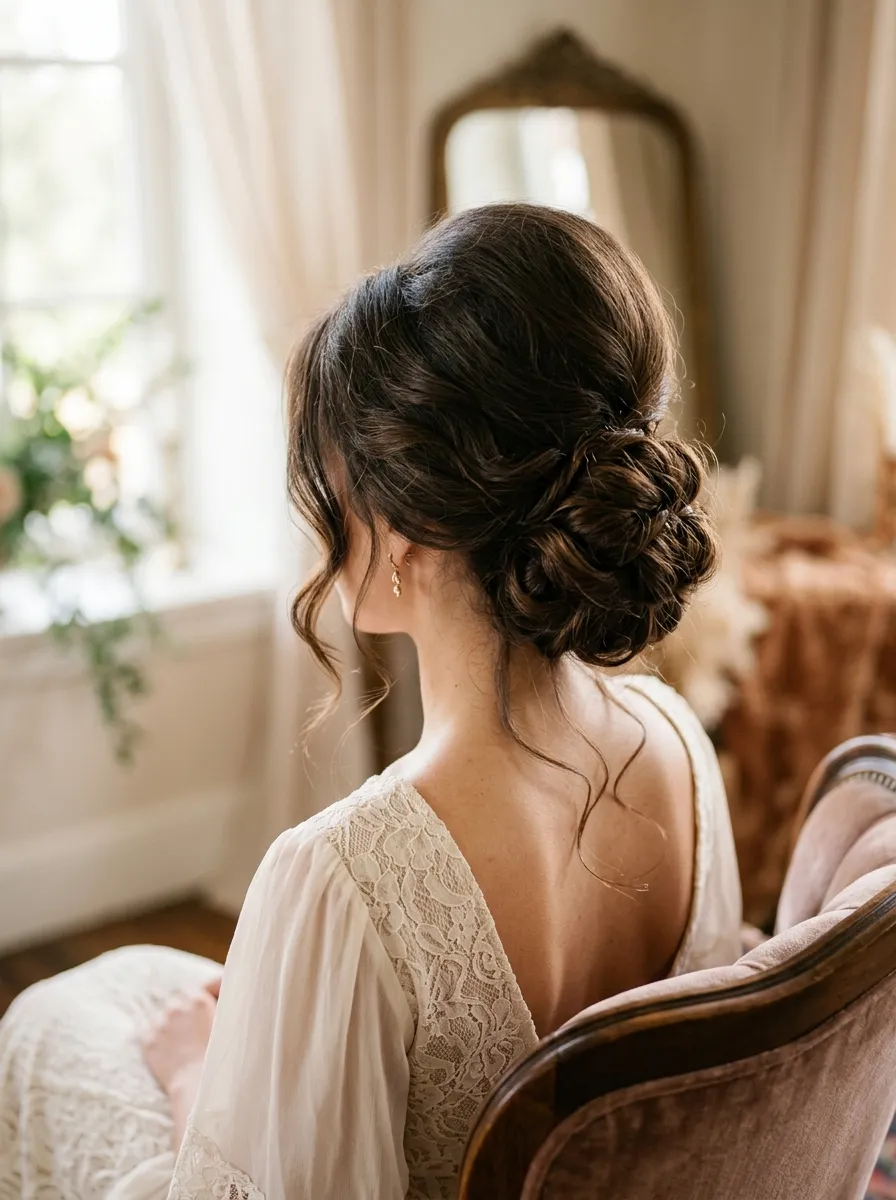
A low bun paired with a teased crown offers a polished, elevated look that still accounts for thinning at the root. Tease the top section before gathering the rest of the hair into a low, loose bun at the nape, allowing the teased volume to remain visible rather than smoothing it completely flat. Secure loose pieces around the hairline with small pins rather than pulling everything back too tightly, which can emphasize a receding or thinning hairline rather than disguise it. A matte finishing spray keeps the look soft rather than shiny, since shine tends to draw more attention to the scalp underneath. This style works beautifully for professional settings, weddings, or any occasion calling for a put together updo, offering coverage exactly where it’s needed most while still looking effortlessly elegant rather than overly engineered.
13. Wispy Curtain Bangs

Curtain bangs, parted down the middle and swept to either side, add softness and a bit of extra density right around the face without the commitment of a full, blunt fringe. Because they blend into the rest of the hair rather than standing apart as a separate section, they work particularly well on thinning hair where a heavier bang style might look disconnected from the thinner length behind it. Style with a round brush, curling the ends slightly away from the face for a face framing effect that draws the eye toward fuller looking sections. A light hold pomade smooths flyaways without adding heaviness. Curtain bangs suit nearly every face shape and hair length, and they require relatively low daily maintenance once properly cut, usually just a quick touch up with a brush and maybe a small amount of texturizing spray to keep the shape looking soft rather than stiff.
14. Micro Bead Extensions at the Hairline
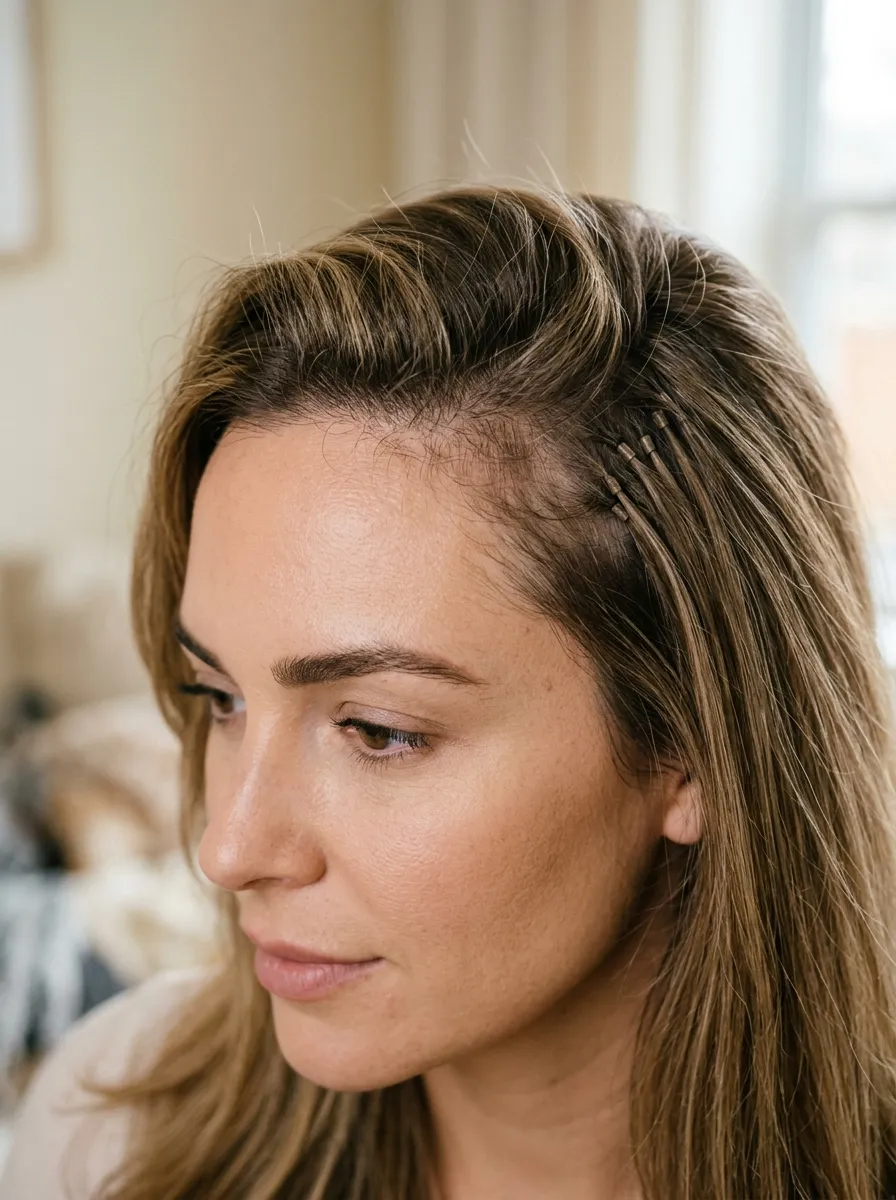
For targeted thinning specifically along the hairline or temples, micro bead extensions applied only in those specific areas can add noticeable density without the cost or commitment of a full head application. A skilled stylist attaches small, individual strands using tiny beads that sit close to the scalp, blending seamlessly with existing hair in the treated area. This method works especially well for those with generally healthy hair density everywhere except a few specific thinning spots. Maintenance includes regular repositioning as the natural hair grows, typically every eight to twelve weeks, along with gentle care using a sulfate free shampoo to avoid loosening the beads prematurely. This is a more involved and costly option than most on this list, so consulting with a stylist who specializes specifically in extensions for thinning hair, rather than a general extensions specialist, is worth the extra research before committing.
15. Loose Waves With Volumizing Mousse
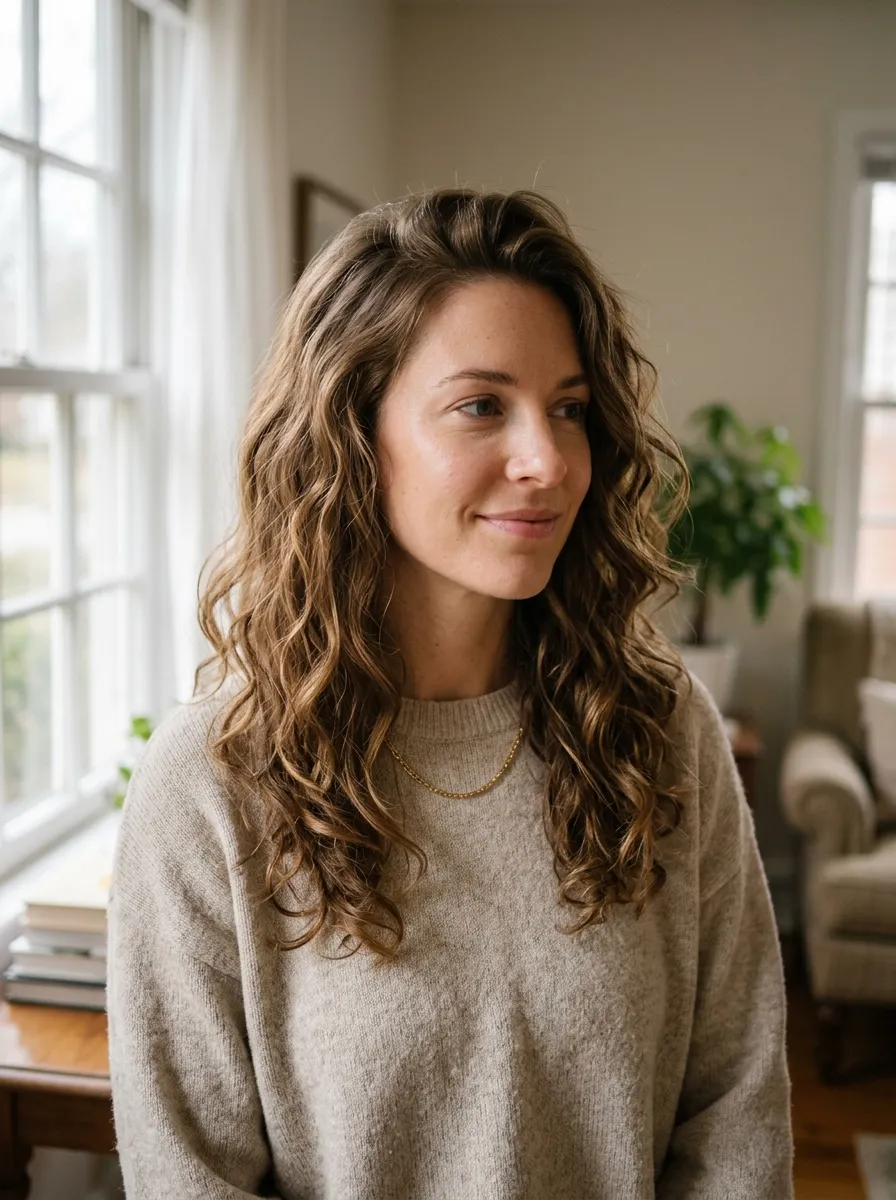
Loose waves add dimension and movement that straight, thin hair often lacks, creating the visual effect of more hair simply through the added texture. Apply a volumizing mousse to damp hair from root to tip, then curl with a one inch wand in alternating directions, leaving the ends out for a softer, more natural finish. Once cooled, brush through gently with a paddle brush to loosen the curls into waves, then flip your head upside down for a few seconds and shake gently at the roots for extra lift before flipping back over. A light hold hairspray applied from a distance sets the waves without stiffness or crunch. This style works on most lengths from shoulder length and longer, and the added texture throughout genuinely helps distract from any visible scalp or sparse areas that straight, flat hair would otherwise expose more directly.
16. Choppy Layers Throughout

Choppy, textured layers cut throughout the length remove some of the heaviness that can make thin hair look stringy and flat, replacing it with movement and visual interest instead. Ask your stylist for layers that start around the chin or shoulder rather than very short, choppy pieces up top, which can sometimes emphasize thinning at the crown rather than disguise it. Style with a texturizing paste worked through dry hair with fingers, scrunching pieces upward and outward for a piecey, undone finish rather than smoothing everything flat with a brush. This cut works particularly well paired with a wave or slight curl, since straight choppy layers on thin hair can occasionally look more separated and sparse than an equivalent length with some added texture. Regular trims keep the choppy shape looking fresh rather than growing out into stringy, uneven ends over time.
17. Half Up Style With Front Section Teasing
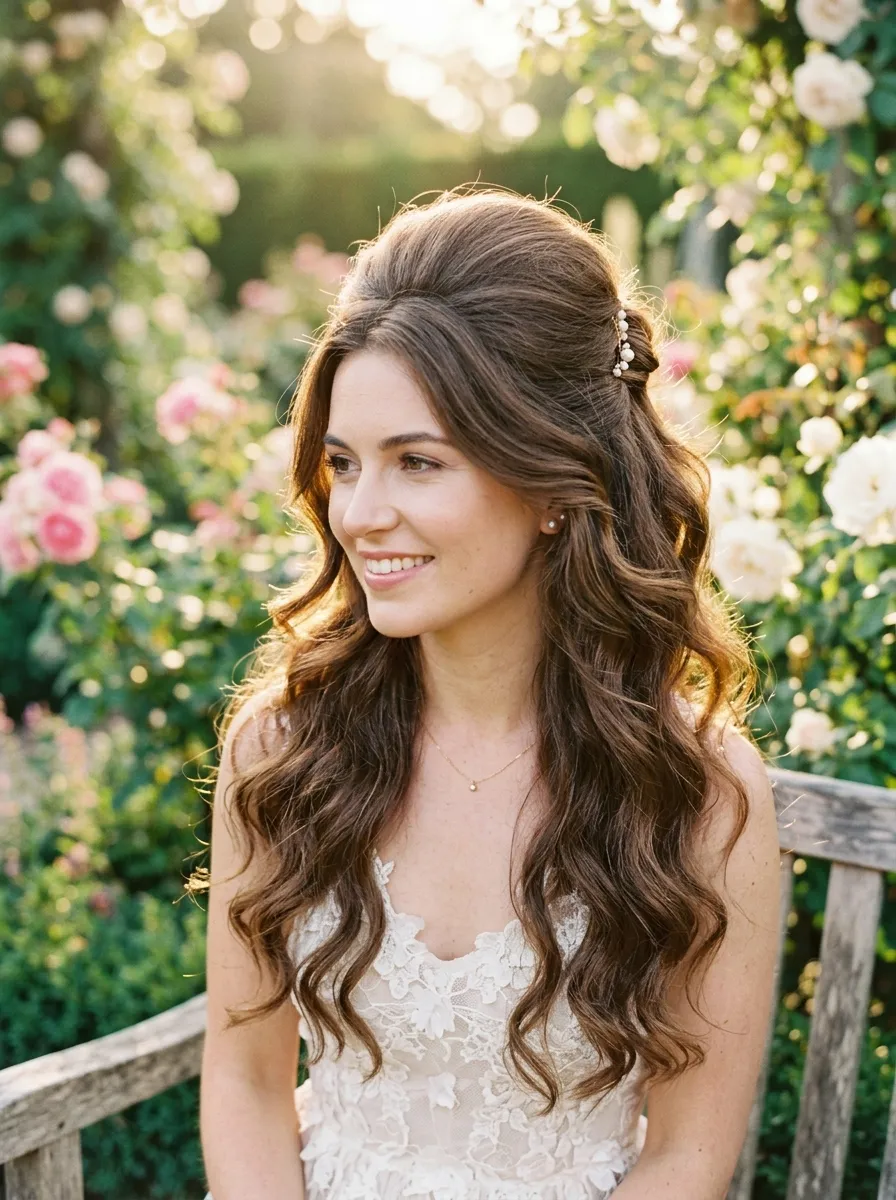
A half up style that incorporates teasing specifically at the front and crown sections addresses thinning right where it’s usually most visible while keeping the rest of the style soft and natural looking. Backcomb the top section thoroughly before gathering it up and securing with a small elastic or a few bobby pins, leaving the rest of the hair down and curled loosely for added dimension throughout. A root lifting spray applied before teasing gives the technique more staying power, helping the volume last through several hours rather than falling flat within the first thirty minutes. This look works for both everyday wear and special occasions, and the combination of structured height up top with movement below creates a genuinely full, dynamic silhouette that a fully down or fully up style might not achieve on its own with thin hair specifically.
18. Angled Bob With Longer Front Pieces

An angled bob, shorter in the back and gradually longer toward the front, creates a dynamic shape that adds visual interest and the appearance of more hair overall. The shorter back section sits closer to the head, reducing the flat, thin look that can happen when longer hair hangs straight down without enough density to hold a shape. Style with a round brush blowout, curving the ends under for a polished, rounded finish that emphasizes the angled shape itself. This cut works well for those wanting to keep some length in the front while accepting a shorter, more manageable back section, and the angle itself draws the eye along a diagonal line rather than straight down, which is a simple trick that reads as fuller than a one length style would on the same amount of actual hair.
19. Braided Half Up With Volume
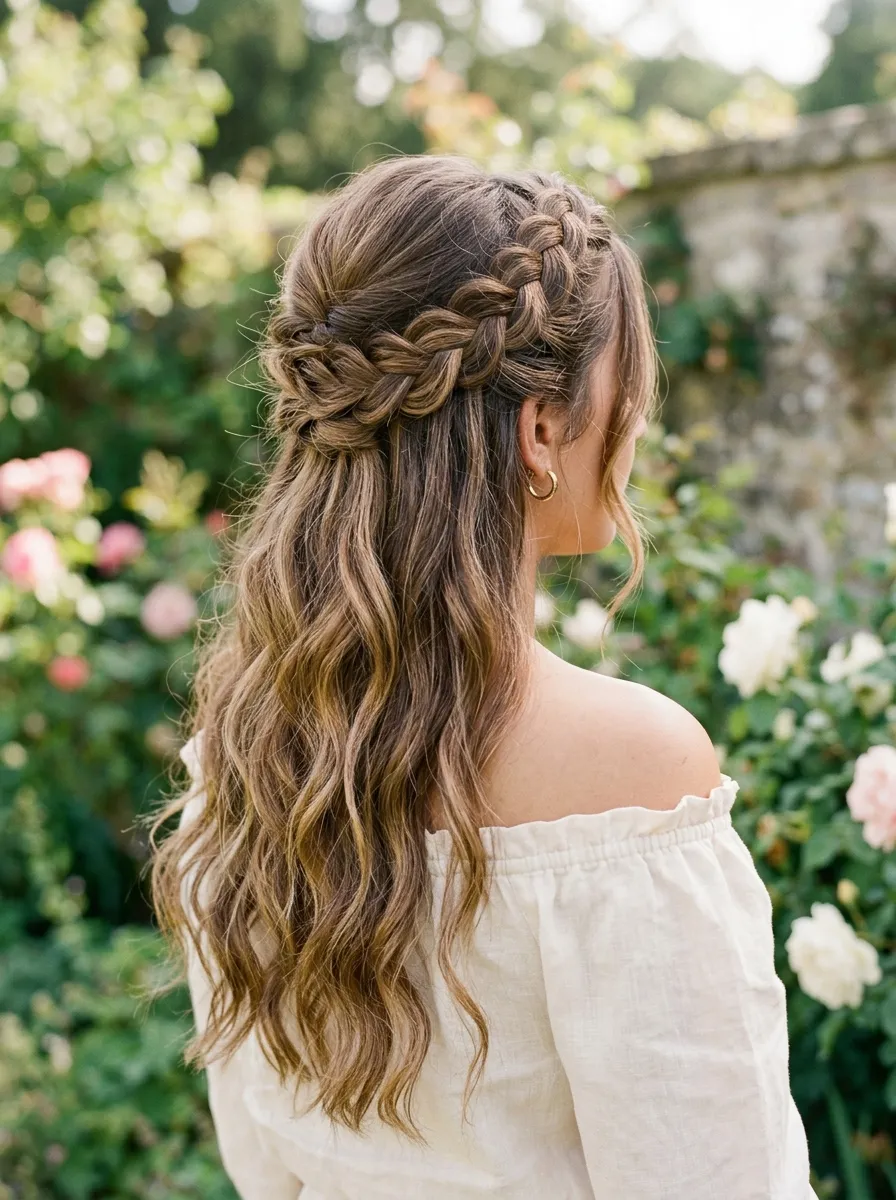
Small braids incorporated into a half up style add texture and a sense of density at the crown, an area that often needs the most help on thinning hair. Section the top of the hair, braid loosely on each side, then pull the braids back and secure together at the crown, leaving the rest of the hair down and styled with loose waves. Gently pull at the edges of each braid once secured to widen and soften the shape further. A texturizing spray applied beforehand helps the braids hold their loosened shape rather than slipping tight and flat. This style photographs particularly well thanks to the textural detail up top, and it works for both casual days and more polished occasions depending on how neatly or loosely you execute the braiding and the waves underneath.
20. Scalp Massage and Growth Serum Routine

While not a styling technique on its own, incorporating regular scalp massage alongside a consistent styling routine can support the overall health of existing hair and create better conditions for any new growth over time. Using fingertips rather than nails, massage the scalp in small circular motions for several minutes a few times a week, ideally while applying a lightweight scalp serum formulated for thinning hair. This practice helps distribute natural oils and may support circulation to hair follicles, complementing whatever styling technique you’re using on top. Pair this routine with gentle detangling using a wide tooth comb rather than a brush on wet hair, since wet strands are more prone to breakage that can compound thinning over time. Building this into your regular hair care routine, alongside any of the cutting or styling techniques on this list, supports the long term picture rather than just the daily styling result.
21. Voluminous Side Ponytail
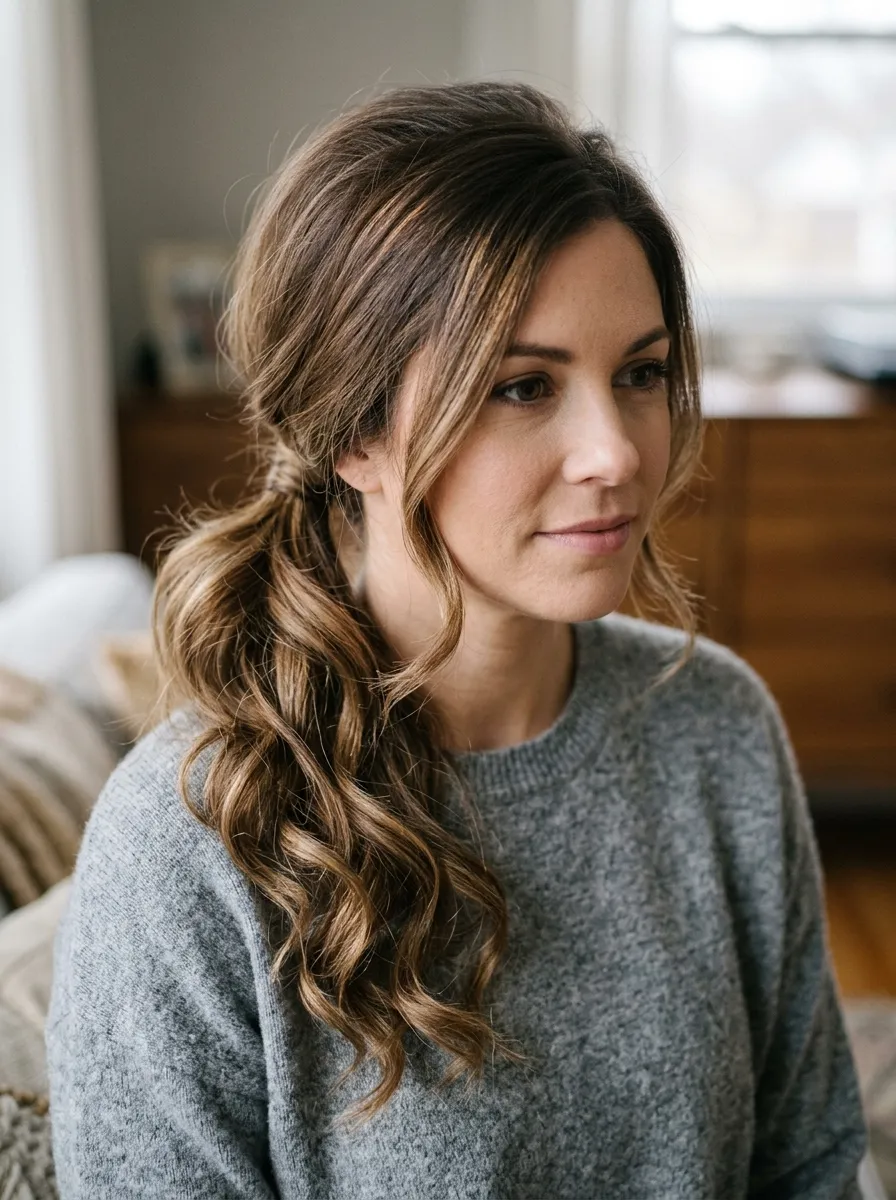
A side ponytail, gathered low near one ear rather than centered, offers an asymmetrical look that naturally draws more attention and reads as fuller than a perfectly centered style. Tease the crown lightly before gathering hair to one side, then curl the length of the ponytail itself with a wand for added texture and volume throughout. Secure with a thin elastic wrapped a few times, then cover it with a small section of hair pulled from underneath the ponytail. This style works well for both daytime and evening occasions and offers an easy way to add visual interest without requiring an elaborate updo. The asymmetry itself is doing a lot of the visual work here, breaking up the predictable, centered look that can sometimes emphasize exactly how much or how little hair is actually present when styled straight down the middle of the back.
22. Blunt Ends With Round Brush Styling
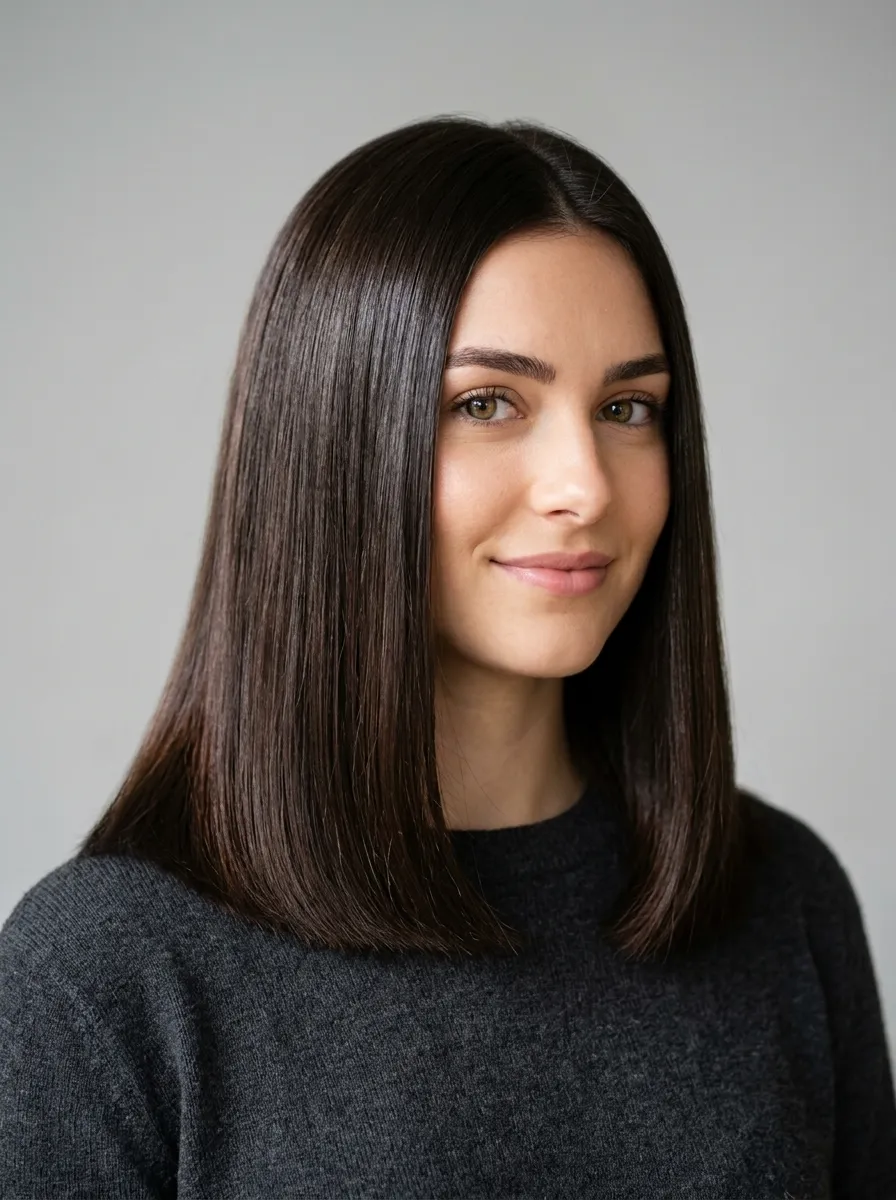
Contrary to the usual advice against blunt cuts, a shorter blunt cut paired with careful round brush styling can create a strong, graphic line that reads as thicker than a longer, more layered style might on thin hair. Keep the length around shoulder height or above, where the blunt line has less length to appear thin under its own weight. Style with a round brush blowout, curling the ends inward to create a curved, thick looking line at the bottom rather than leaving strands poker straight and separated. A light glossing serum on just the ends adds shine and cohesion without weighing down the roots. This approach works particularly well on hair with at least some natural body or a slight wave, which adds a bit of texture to keep the blunt line from looking too severe or artificially heavy.
23. Twisted Crown With Loose Ends
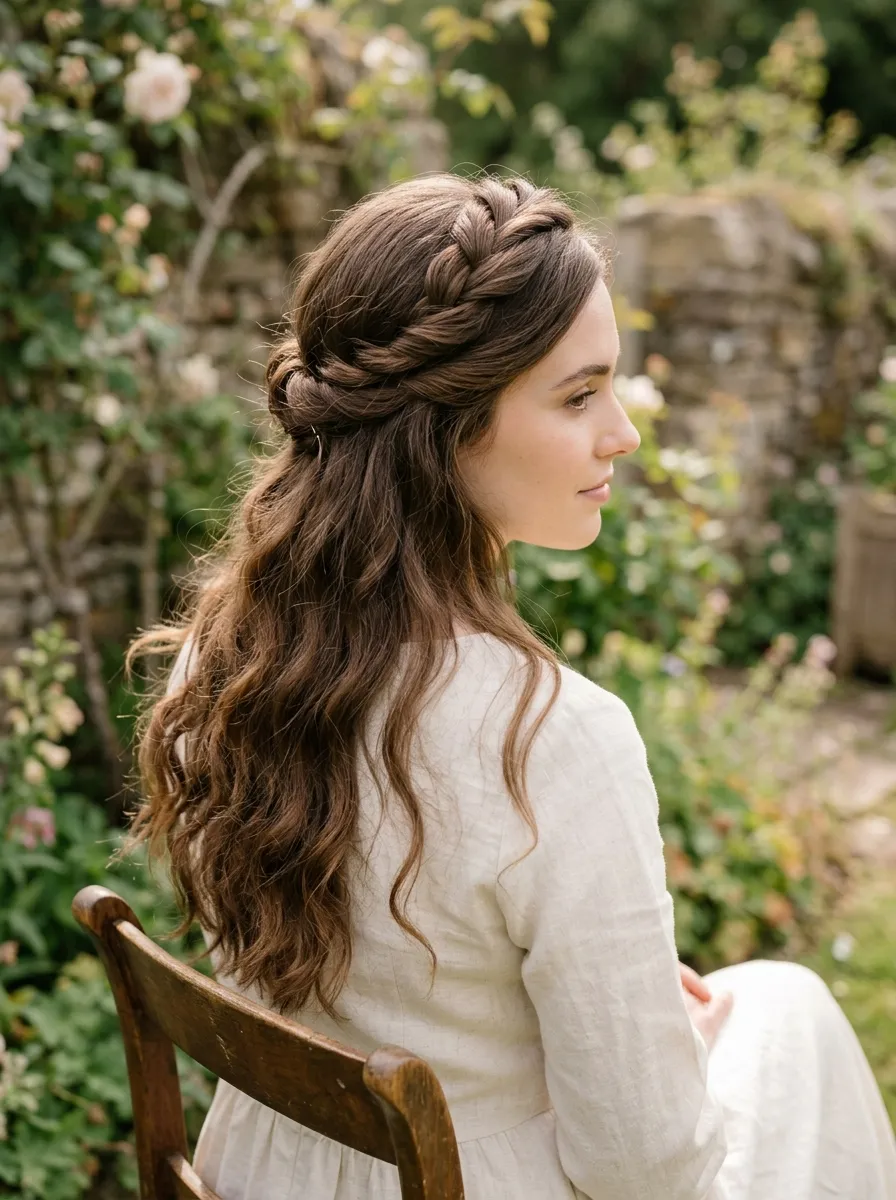
Small twists gathered and pinned across the crown add texture and structure right where thinning is often most noticeable, while the rest of the hair stays down for a soft, natural finish. Section hair at the temples on each side, twist loosely back toward the crown, and pin securely where the two twists meet, leaving the remaining hair down and curled for added volume throughout the length. A flexible hold spray keeps the twists from loosening throughout the day without leaving them stiff or crunchy. This look works for both casual and dressier settings, and the twisted detail up top offers genuine coverage and textural interest at the crown without requiring a full updo or teasing technique. It’s a relatively quick style to execute once you’re comfortable with the basic twisting motion, usually taking under ten minutes from start to finish.
24. Root Perm for Crown Volume

A root perm targets only the roots rather than the full length, creating lift and volume specifically at the crown while leaving the rest of the hair straight and smooth. This technique works particularly well for those whose thinning is concentrated at the part line or crown rather than throughout the entire head, since it directly addresses that specific area without changing the overall texture everywhere else. Your stylist wraps small perm rods only at the base of each section, processing just enough to create lasting root lift. Follow up with a strengthening conditioner treatment in the weeks after, since any perming process can leave hair more porous and in need of extra moisture. This option requires a shorter commitment than a full head perm and touch ups are needed less frequently, typically every few months, making it a more targeted and manageable choice for root specific thinning concerns.
25. Simple Air Dried Waves With Sea Salt Spray

For a genuinely low effort everyday option, a sea salt spray worked through damp hair before air drying adds texture and grip that thin, smooth strands typically lack on their own. Spray through the mid lengths and ends, scrunching gently with your hands rather than combing through, which would smooth out the texture the spray is meant to create. Let hair dry naturally rather than using heat, checking in periodically to scrunch again if needed for extra definition. A light volumizing powder at the roots once fully dry adds the final bit of lift and texture right where it’s needed most. This routine requires almost no active styling time and works well for those wanting a natural, undone look that still offers more visual density than perfectly smooth, straight strands would provide entirely on their own, making it a solid everyday fallback between more involved styling days.
Conclusion
Thin hair responds best to strategy rather than sheer effort, thinking about where hair is placed, how it catches light, and where a little added texture or teasing can do the most visible work. Whether you lean into a shorter cut that concentrates density, a smart parting trick that shifts coverage where you need it, or a styling routine built around root lift, there’s a real path here to hair that looks and feels fuller day to day. Try a few of these approaches, pay attention to which ones genuinely help your specific pattern of thinning, and build a routine around what actually works for you rather than what works in general.