
Long hair gives you so many bun options, but not every bun actually holds up through a full day. Some slip loose by lunch, some pull too tight and give you a headache, and some just look flat no matter how much hairspray you use. The good news is that with the right technique and a few small tools, you can build a bun that stays put through errands, workdays, workouts, or a night out. Below are 24 bun ideas made specifically for long hair, covering sleek looks, messy looks, braided looks, and everything in between. Each one comes with a simple way to keep it secure so you are not constantly re-pinning it. Grab your hair ties, bobby pins, and a little dry shampoo, and let’s get into it.
1. Classic Low Bun

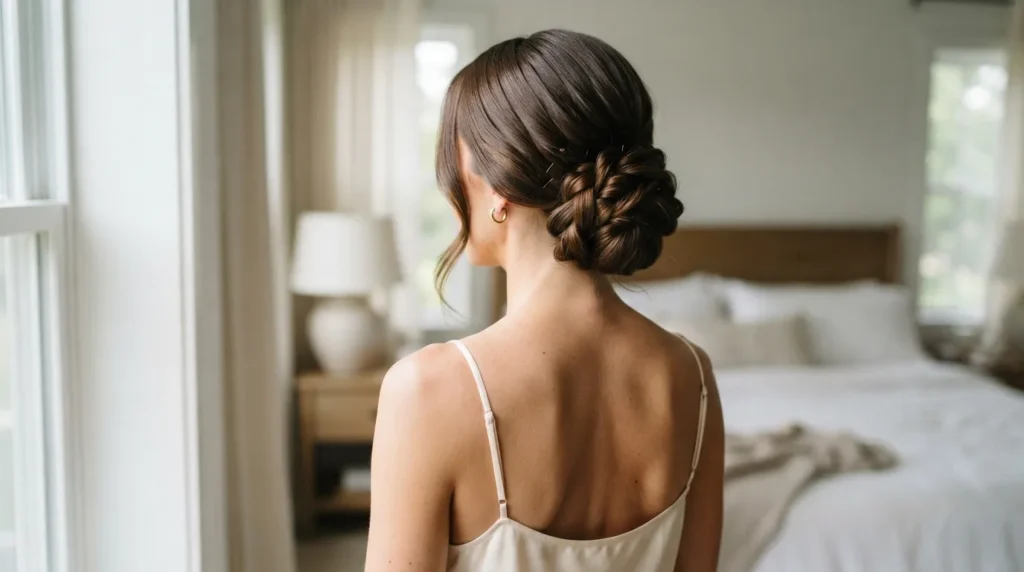
The classic low bun is the one style everyone with long hair should master first. Gather your hair at the nape of your neck, twist it into a rope, then wrap it around itself like a coil until it forms a smooth circle. Pin it in a few spots going in different directions so it does not shift as your hair moves. To keep it secure all day, use a hair donut or sock bun tool underneath if your hair is thin, since it gives the pins something firmer to grip. A light mist of hairspray on the surface before pinning also helps flyaways stay put. This bun works for the office, dinner, or even a wedding when you dress it up with a few pins that have small pearls or crystals on the ends. It is simple, it photographs well from every angle, and it takes under five minutes once you get the twist down.
2. Messy Top Knot

Among the most popular High Bun Hairstyle Ideas, the messy top knot is one of the quickest and easiest styles to create on a lazy morning or after a workout. Flip your head upside down, gather your hair into a high ponytail, then twist it around the base without smoothing it out. Instead of tucking every strand neatly, let a few pieces stick out to create that perfectly undone look. Secure the ponytail with a strong hair tie first, then wrap a second elastic around the twisted bun to keep it from unraveling. If you want it to look messy but still intentional, pull a few face-framing pieces loose after finishing and lightly curl them with a flat iron. This bun works best on second or third day hair because the natural oils help the texture hold better. It’s a five-minute hairstyle that feels effortless while still looking polished enough for running errands or meeting friends for coffee.
3. Braided Crown Bun

A braided crown bun takes a bit more time but looks far more polished than a plain twist. Start by braiding a section of hair from one side of your part, working it around the crown of your head like a headband, then blend the tail into the rest of your hair as you gather it into a low or mid bun. Pin the braid flat against your scalp as you go so it does not loosen throughout the day. This style is great for covering roots that need a touch up or for hiding a bad hair day underneath the braid’s texture. A texturizing spray before braiding gives you more grip, especially if your hair is naturally slippery or freshly washed. This bun holds beautifully for outdoor events, brunches, or any occasion where you want something that looks intentional without needing a stylist.
4. Double Braided Bun

Two braids instead of one give this bun extra texture and make it hold longer, since braided hair has more grip than a smooth twist. Part your hair down the middle, braid each side separately down to the ends, then cross the two braids over each other at the nape and wrap them into a bun. Pin where the braids meet first, then tuck any loose ends underneath and secure those too. This style is a favorite for long hair because the braids add visual interest even from the front, where you can see the crossed pattern near the neckline. It also holds up incredibly well through humid weather or a full day outdoors, since braids resist frizz better than a straight twist. Keep a small spray bottle with water and leave in conditioner nearby if your hair tends to be dry, since damp hair braids smoother and holds its shape longer once pinned.
5. Sleek High Bun

For a red carpet feel without red carpet effort, the sleek high bun is your go to. Brush your hair back with a boar bristle brush to smooth every strand, then secure a tight, high ponytail with a strong elastic. Twist the ponytail into a bun and pin around the base until it feels locked in place. The key to keeping this one sleek all day is a light layer of gel applied before brushing, plus a swipe of hairspray over an old toothbrush to tame baby hairs along the hairline. This bun pairs well with statement earrings since it keeps your neck and ears fully visible. It is a strong choice for job interviews, formal dinners, or any setting where you want to look sharp and collected with minimal daily upkeep.
6. Half Up Bun with Loose Waves

This style gives you the best of both worlds, a bun for structure and loose waves for softness. Section off the top half of your hair, twist it into a small bun at the crown, and leave the bottom half down. Curl the remaining hair with a curling wand in loose, beachy waves so the whole look feels romantic rather than severe. Secure the bun with bobby pins placed in an X pattern, which holds better than parallel pins. This is a great transitional style between a full updo and hair down, perfect for date nights or semi-formal events where you want movement without fully committing to an updo. It also works well for covering second day roots, since the bun conceals the crown while the waves distract from any oiliness further down.
7. Bubble Bun

The bubble bun is a fun twist on the classic ponytail bun, made by sectioning your ponytail into two or three small elastics before wrapping it into a bun shape. Start with a high or mid ponytail, add a second elastic a few inches down, then a third near the ends, creating small bubble sections. Once sectioned, coil the whole thing under itself and pin it flat to form a bun with visible bubble texture peeking through. This style photographs beautifully and adds dimension that a plain bun does not have. It works especially well on long hair because you have enough length to create multiple bubbles without the bun looking too small. Use clear silicone hair ties so they blend in and do not distract from the bubble effect, keeping the focus on the shape itself.
8. Twisted Rope Bun

A rope twist adds texture without the time commitment of a full braid, making it a great shortcut for a detailed looking bun. Take your ponytail, split it into two sections, twist each one individually in the same direction, then twist the two sections around each other in the opposite direction so they lock into a spiral rope. Coil the rope into a bun and pin it securely at the base. This works wonderfully for long hair since the extra length lets the rope wrap around several times, creating a fuller looking bun. It holds up well through long days because the twist itself creates friction that resists loosening. Try it with a shine serum applied lightly before twisting to give the rope a glossy, polished finish that catches the light nicely in photos.
9. Low Side Bun
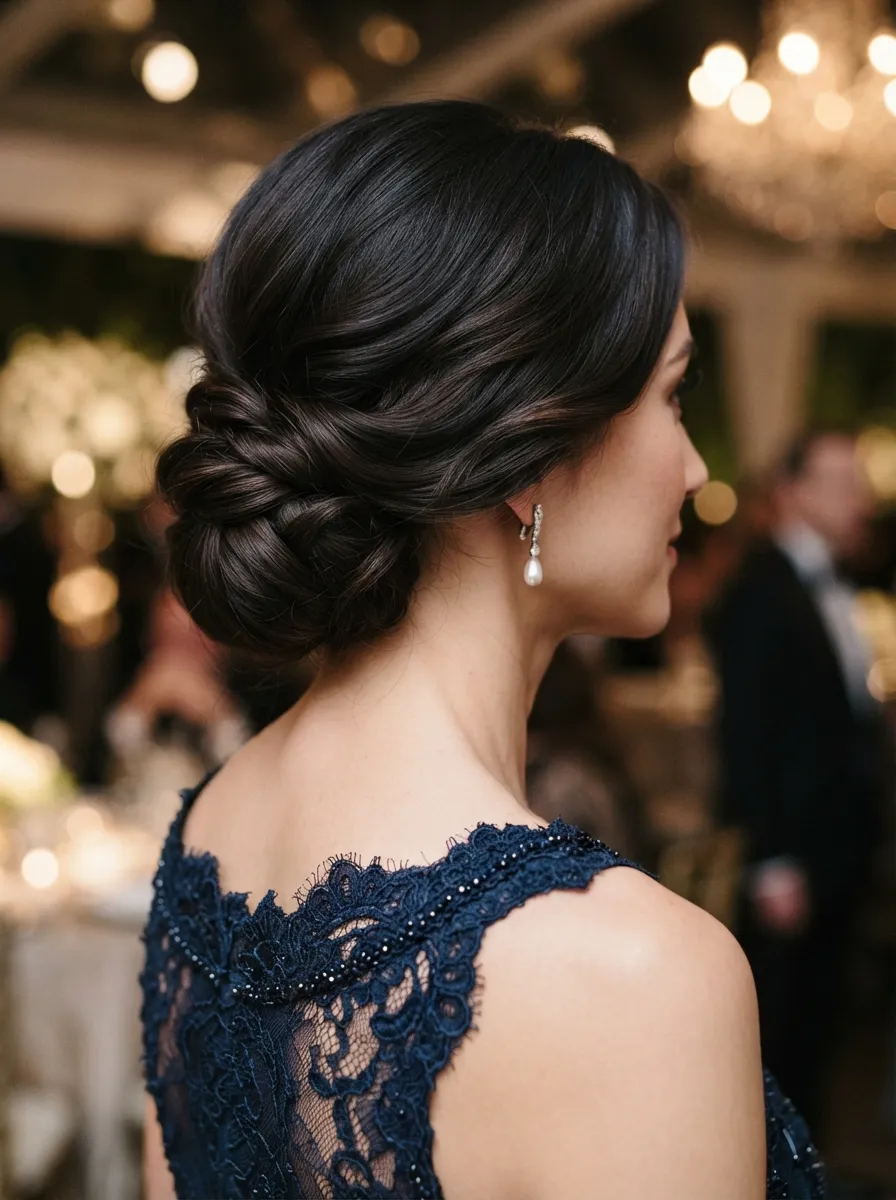
A low side bun brings an elegant, slightly vintage feel that works beautifully for long hair with layers or waves. Gather your hair to one side rather than centering it at the nape, twist it into a loose coil, and pin it just behind your ear. Leave a few soft pieces out near your face to frame it and soften the overall look. This style is a favorite for weddings and formal events since it draws attention to the neckline and shoulders. To keep the asymmetry from sliding back to center, use bobby pins angled toward the direction you want the bun to sit, essentially anchoring it against gravity. Pair it with a soft curl throughout your hair beforehand so the bun itself feels textured rather than flat, giving the whole style a finished, intentional appearance.
10. Space Buns
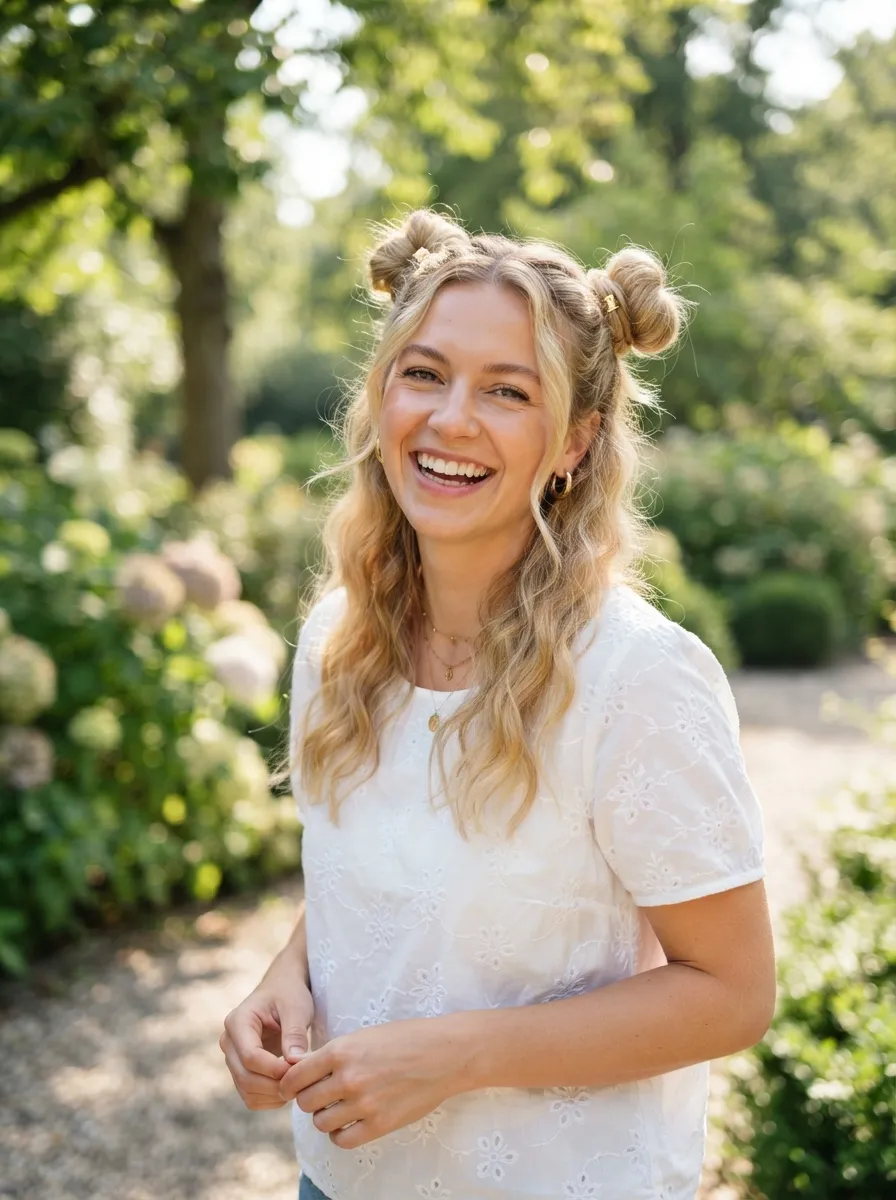
Space buns are a fun, youthful style that works surprisingly well on long hair, giving you two full, round buns instead of one. Part your hair down the middle, gather each side into its own ponytail, then twist and wrap each one into a bun, pinning as you go. Long hair gives you enough length to make each bun full and round rather than small and thin. This style is perfect for festivals, casual weekends, or workouts since both buns stay secure and off your neck. For extra hold, backcomb the base of each ponytail slightly before twisting, which adds grip and prevents slipping throughout the day. A bit of texturizing powder at the roots beforehand also helps the ponytails sit up rather than sagging, keeping the buns lifted and full looking from morning to night.
11. Braided Bun with Ribbon
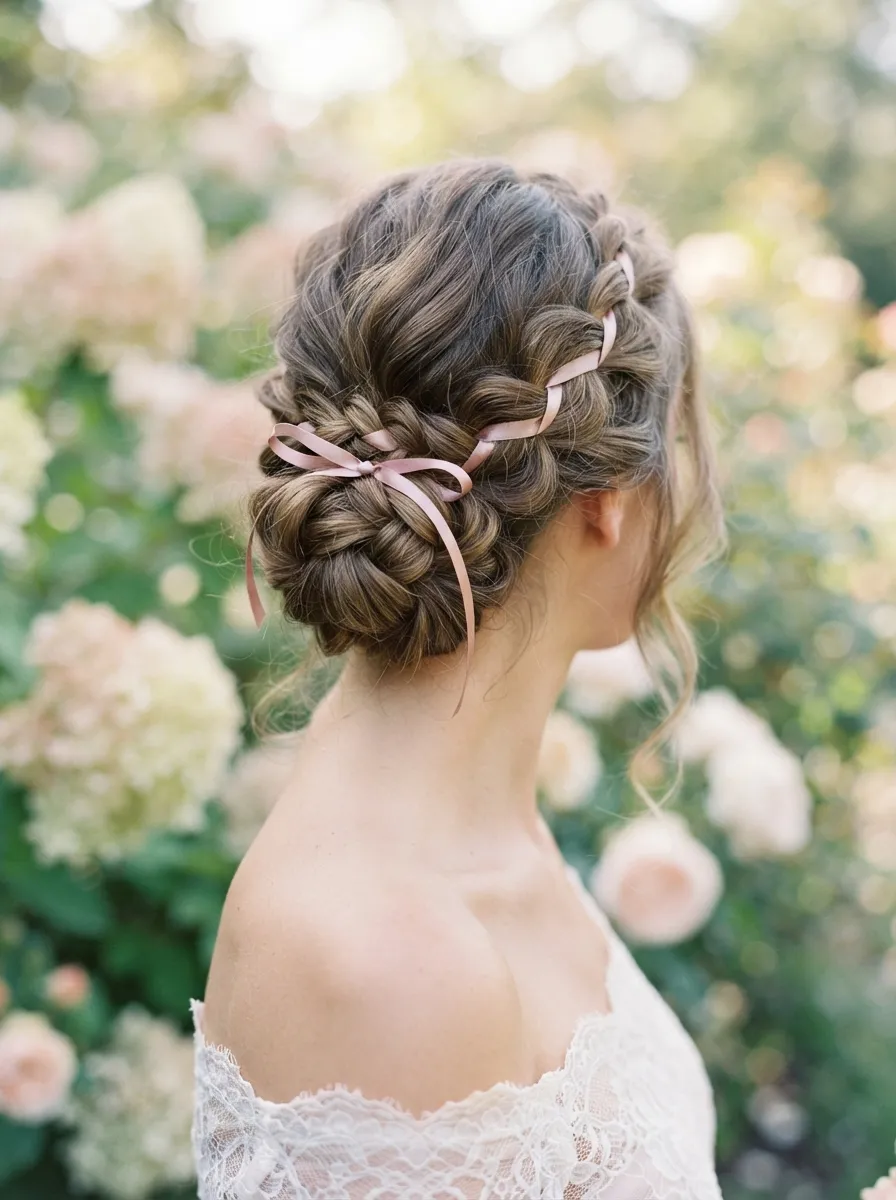
Adding a ribbon to a braided bun instantly elevates the whole look without any extra styling skill required. Braid your hair as you normally would, weaving a thin satin ribbon in alongside the strands from the very top of the braid. Once braided, coil it into a bun and pin it, letting a small tail of ribbon peek out or tie into a tiny bow at the base. This works especially well for long hair since you have plenty of length to braid all the way down before coiling. It is a lovely option for birthdays, garden parties, or any occasion where you want something feminine and a little different from a plain bun. Choose a ribbon color that contrasts gently with your hair color so it stands out just enough without overwhelming the style.
12. Chignon Bun

A chignon differs from a typical bun because instead of twisting the hair into a coil, you fold the ponytail up and pin it flat against the head, creating a smoother, more compact shape. Gather your hair low at the nape, fold the ponytail upward into itself, and pin the fold flat rather than letting it hang in a loop. This creates an elegant, almost architectural look that has been a formalwear favorite for decades. Long hair works beautifully here since the extra length gives the fold more substance instead of looking thin or flat. A light coat of flexible hold hairspray before folding helps the shape hold without feeling stiff. This style pairs perfectly with a fitted dress and simple jewelry, letting the neckline and the bun’s clean lines do all the visual work.
13. Braided Halo Bun

The braided halo bun combines a full crown braid with a small bun where the ends meet, creating a fairytale like effect that works wonderfully on long hair. Start a braid at one temple, work it around your entire head following your hairline, and once you reach the starting point, twist the remaining length into a small bun and pin it in place. This style requires enough length to wrap all the way around, which makes it ideal for long hair specifically. It looks gorgeous for outdoor weddings, garden photoshoots, or any occasion with a romantic, whimsical feel. Tuck small flowers or delicate hairpins along the braid for extra detail. Keep a few bobby pins matching your hair color on hand throughout the day in case any section near the crown starts to loosen from movement.
14. Textured Bun with Face Framing Pieces

Sometimes the simplest change, pulling out a few face framing pieces, makes a bun look far more intentional and soft. Create any basic bun style you like, then gently tug a few strands loose near your temples and in front of your ears. Curl those loose pieces lightly with a flat iron or curling wand so they frame your face instead of hanging flat. This small addition softens sharp jawlines and balances rounder face shapes, making the bun feel custom to your features rather than one size fits all. It works with almost any bun base, whether messy, sleek, or braided, and takes less than a minute to do. This is a great trick for long hair especially, since you have enough length in those pieces to actually see and style the curl once they are pulled loose.
15. Bun with Bandana Wrap

Wrapping a bandana around the base of your bun adds color, pattern, and a bit of retro charm to an otherwise simple style. Create a low or high bun as usual, then fold a bandana into a thin strip and tie it around the base, hiding the elastic and any visible pins underneath the fabric. This works particularly well for long hair since a bigger bun gives the bandana more surface area to wrap around neatly. It is a fantastic option for hiding second or third day hair, since the bandana draws the eye and distracts from any oiliness near the roots. Pair it with hoop earrings and a simple outfit for an effortless, put together weekend look. Try rotating a few bandana colors and patterns throughout the week to keep the same bun style feeling fresh and different each time.
16. Twisted Updo Bun
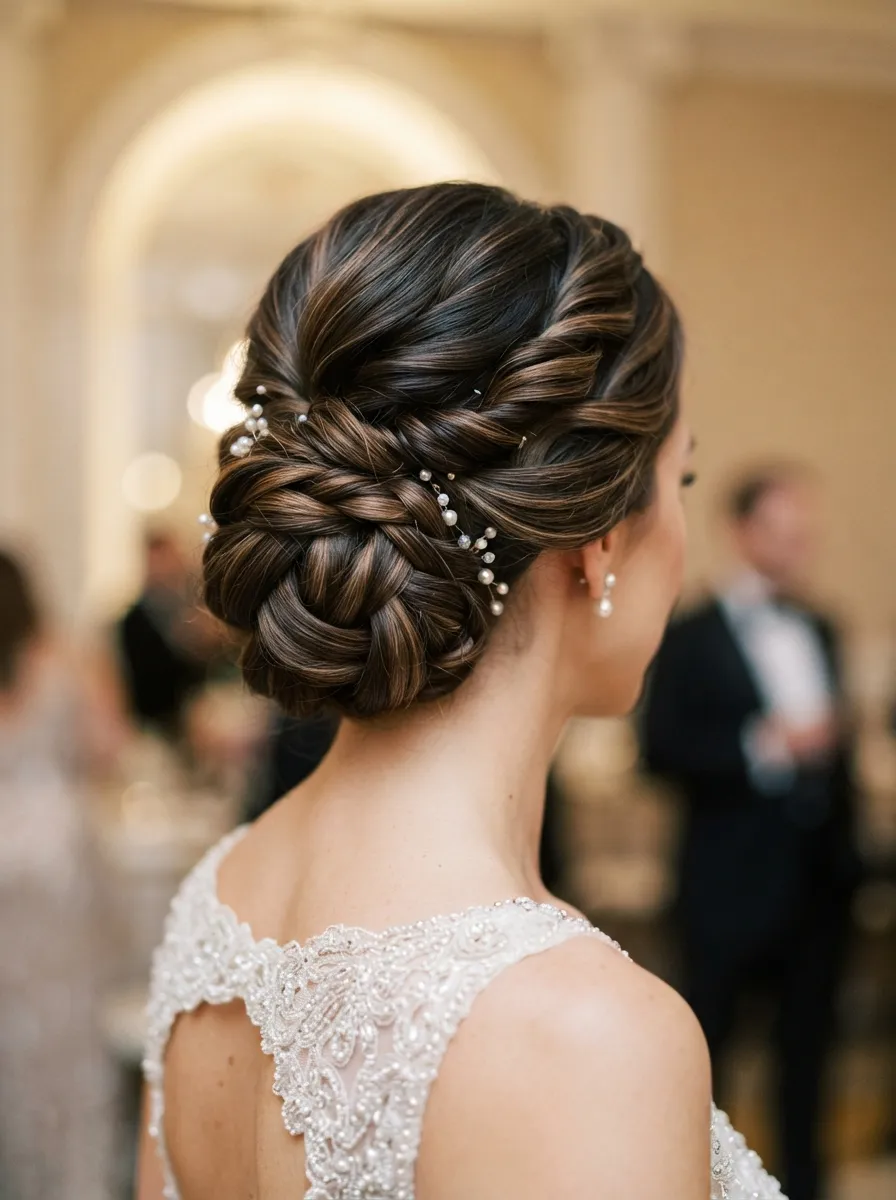
A twisted updo bun involves sectioning your hair into a few pieces, twisting each one individually, and then gathering all the twists together into one larger bun at the crown or nape. This creates more texture and dimension than a single twist bun and holds exceptionally well because each section is anchored on its own before joining the rest. Long hair is ideal for this style since you need enough length in each section to twist properly without it feeling too short or thin. Secure each twist with a small pin before combining them, then wrap the group into a bun and pin the whole thing together. This look is elegant enough for formal events but detailed enough to stand out in photos. A shine spray at the end gives the twists a polished, glossy finish that catches light beautifully.
17. Low Bun with Bangs

If you have bangs, a low bun is one of the most flattering pairings since it keeps all the attention on your face without competing for it. Pull the rest of your hair back into a smooth low bun, leaving your bangs completely untouched so they frame your forehead and eyes. Use a small amount of flat iron heat on your bangs beforehand to smooth or curve them exactly how you like, since this is the main visual focus of the whole look. The bun itself should stay simple and neat so it does not distract from the bangs. This combination works beautifully for everyday wear, since it is quick to do and keeps hair off your neck while still looking styled. It is also a great option for hiding a bad hair day everywhere except the front, which bangs conveniently cover anyway.
18. Braided Ponytail Bun Combo

This combo style starts as a regular ponytail, transitions into a braid partway down, and finishes as a small bun at the very end, giving you three textures in one style. Secure a ponytail at your desired height, braid the bottom half or two thirds of the length, then coil that braided section into a small bun and pin it against the base of the ponytail. This works particularly well for long hair since you need enough length to comfortably do all three steps without the final bun looking too small. It is a great option when you want something more detailed than a plain bun but do not want a full braided updo. Try a fishtail braid instead of a regular three strand braid for an even more elevated finish that still holds securely through a full day.
19. Bun with Curly Texture

Curly hair creates a completely different bun texture than straight hair, giving you a fuller, more voluminous shape with almost no extra effort. Gather your curls into a ponytail at your desired height, then twist and wrap them into a bun without overly smoothing the curls down, letting the natural texture show through the shape. A curl defining cream applied before gathering helps keep the pattern intact rather than turning frizzy once pulled back. This bun works beautifully for curly haired long hair since the volume naturally fills out the bun without needing extra teasing or backcombing. It holds well through humidity too, since curls tend to grip against each other better than straight strands. This is a fantastic low effort, high impact style for days when you want your curls to shine without a full wash and style routine.
20. Bun with Hair Accessories

Sometimes the fastest way to elevate a plain bun is simply adding a few decorative pieces rather than changing the technique at all. Create your usual bun, whether messy, sleek, or twisted, then add a scattering of small decorative hairpins or one statement clip near the base or side. This works for literally any bun style and instantly makes it feel dressed up enough for a party or event without requiring any new skills. Long hair gives you a bigger surface area to place pins across, so you can create a scattered constellation effect if you want something extra special. Gold or pearl toned pins tend to photograph the best under both natural and indoor lighting. This is the easiest style on this entire list to execute, since the real work is just accessorizing something you likely already know how to do.
21. Braided Fishtail Bun

A fishtail braid coiled into a bun gives you a much more intricate, detailed look than a standard three strand braid without requiring significantly more time once you know the technique. Braid your ponytail into a fishtail all the way down, then coil the finished braid into a bun shape and pin it securely at the base. The tighter weave of a fishtail braid makes the coiled bun look almost lace like once it is wrapped and pinned. Long hair is ideal here since you need enough length to see the fishtail pattern clearly before it disappears into the coil. This style is a showstopper for weddings, proms, or any event where photos matter. Practice the fishtail technique a few times beforehand if you are new to it, since a looser braid will not hold its shape as well once wrapped into the bun.
22. Bun with Volume at the Crown
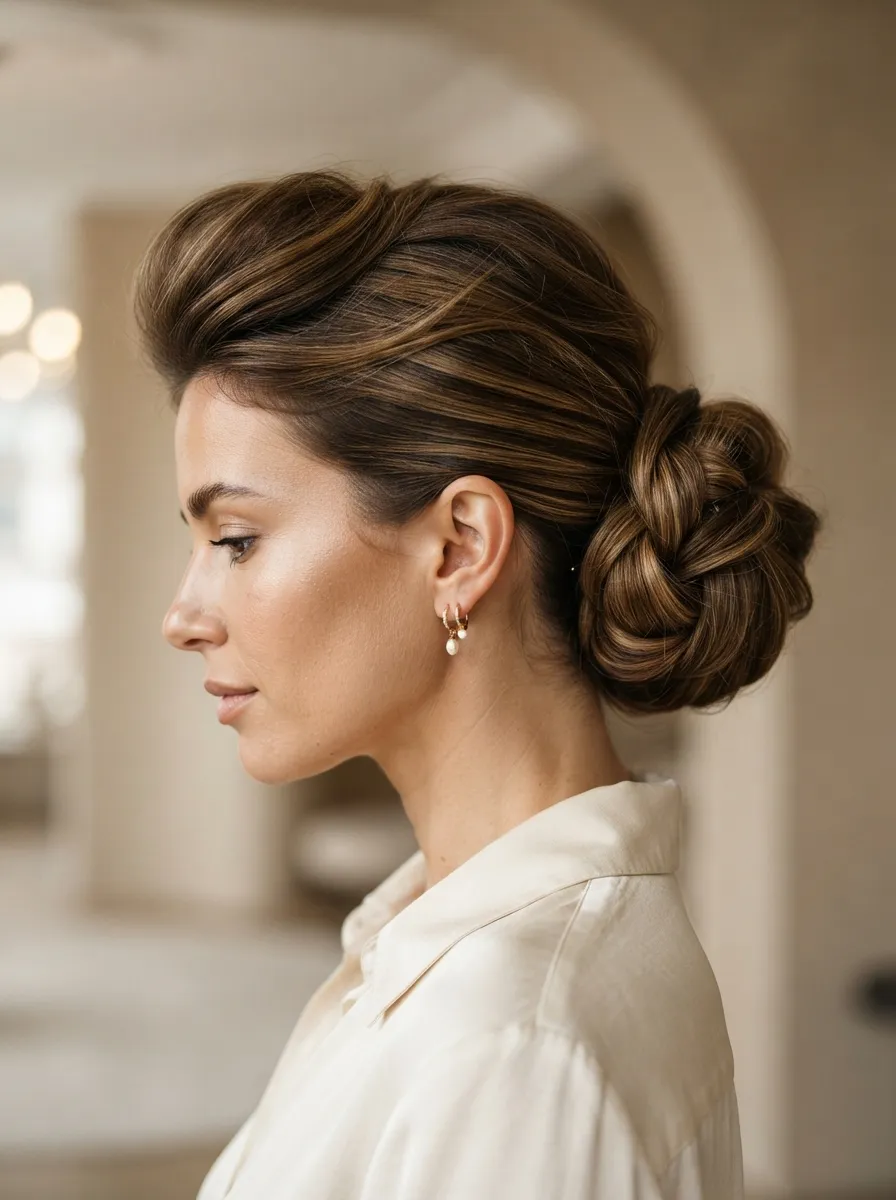
Adding volume at the crown before pulling your hair into a bun changes the entire silhouette of the style, making it look fuller and more dramatic. Backcomb a small section at the crown with a teasing comb, smooth the top layer over it gently, then gather the rest of your hair into your usual bun style. This trick works on any bun type, whether sleek, messy, or braided, and instantly adds height that flatters most face shapes. Long hair holds this volume well since the weight of the length below balances out the lift at the top. This is a popular technique for bridal buns and formal event styling since it photographs beautifully from the side profile. Finish with a light hold hairspray at the crown specifically, since this is the section most likely to flatten out first as the day goes on.
23. Low Bun with Middle Part

A middle part paired with a low bun creates one of the most timeless, minimalist looks for long hair, favored for its clean symmetry. Part your hair precisely down the middle using a fine tooth comb, smooth both sides back without any bumps, then gather everything into a low bun at the nape. This style requires a bit more precision than a messy bun, since any unevenness in the part is very visible with hair pulled back this smoothly. It suits oval and heart shaped faces particularly well, since the straight center part balances the overall proportions. This look works for professional settings, minimalist aesthetics, or any time you want your bun to feel deliberate and polished rather than casual. Take an extra minute to check your part in a mirror from the front before finishing the bun, since small parting mistakes are hard to fix once the bun is pinned.
24. Bun with Face Framing Curls
This final style takes any bun base and adds soft curled pieces around the face for a romantic, finished look perfect for special occasions. Create your bun of choice first, then pull two or three small sections loose near your temples and curl them individually with a small barrel curling iron. Let the curls cool completely before touching them so they hold their shape rather than falling flat immediately. This works wonderfully for long hair since you have enough length in those face framing pieces to create a proper curl rather than just a slight bend. It softens the overall silhouette of the bun and adds a bridal or prom appropriate touch without much extra effort. Finish with a light mist of hairspray on just the curled pieces to help them last through hours of dancing, hugging, or photos.
Conclusion
Long hair opens up so many bun possibilities, from quick five minute messy knots to detailed braided updos worthy of a wedding. The trick to keeping any of these styles secure all day comes down to a few basics, proper sectioning, the right pins, and a little texture spray or hairspray at the base. Try a few of these looks throughout the week and see which ones fit your routine and hair type best, then keep the tools that work for you close by so your next bun comes together even faster.