

Bangs feel like a big commitment, especially when you love your current length and don’t want to lose it. The good news is you don’t have to choose between change and length. There are dozens of ways to add bangs, fake them, or style your existing hair to look like you have them, all without a dramatic chop. Whether you have thick hair, fine hair, curls, or a blunt bob, there’s a version of bangs that works with what you already have. This list walks through low commitment, low risk options so you can experiment with a fresh look and still keep the length you worked hard to grow.
1. Curtain Bangs Grown From Your Front Layers
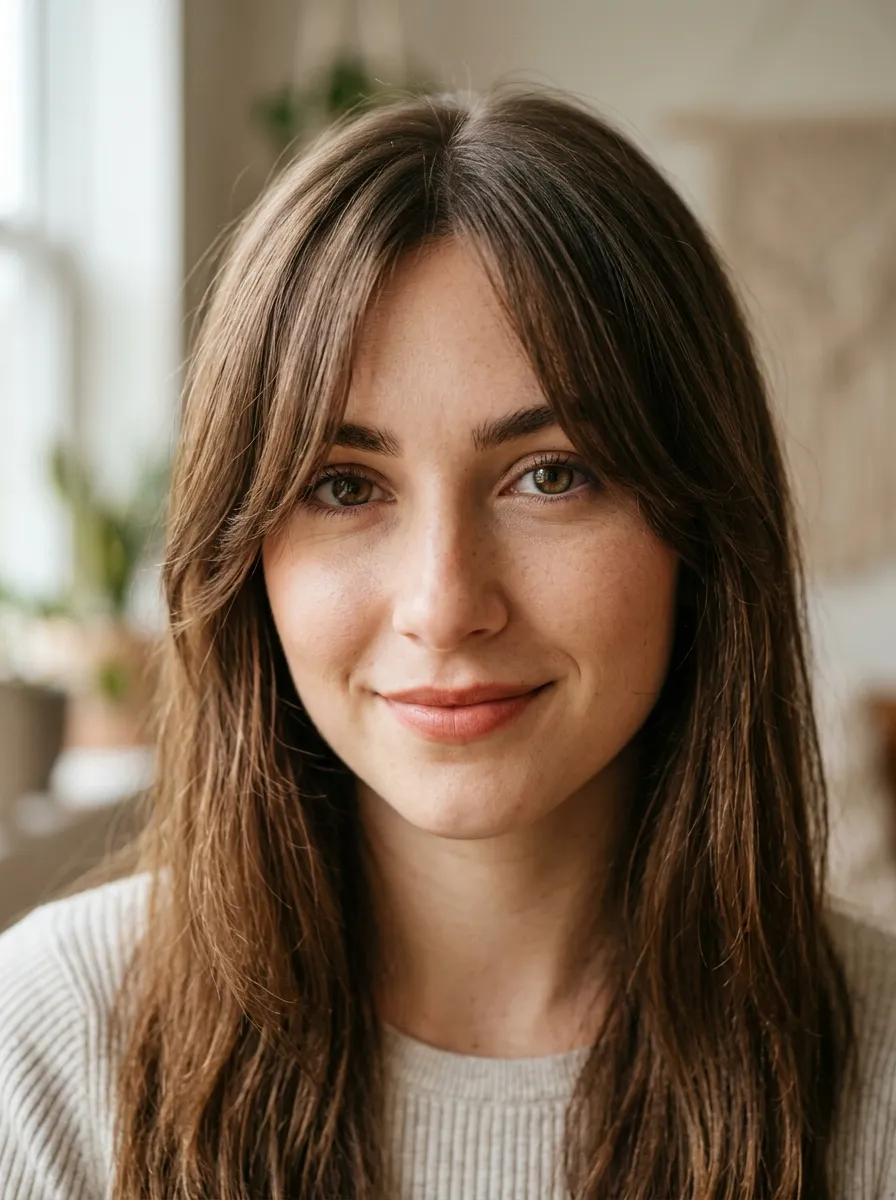
Curtain bangs are the easiest bang style to grow into without a chop because your stylist simply cuts your front layers on an angle instead of cutting straight across. They part naturally down the middle and sweep to either side, blending into the rest of your length within a few inches. This works on almost every face shape because the layers frame rather than cover. If you want to test it first, grab a round brush and blow dry your front pieces outward while pulling them slightly forward. A little texturizing spray on damp hair helps them hold the curve. Curtain bangs also grow out gracefully, so if you decide bangs aren’t for you, you can simply tuck them behind your ears or clip them back while they blend in. Ask your stylist for a soft, face framing cut rather than a blunt one, and request that the shortest point stay at cheekbone length so you never lose more than a few inches of your overall style.
2. Clip In Bangs For A Trial Run

If you’re not ready to cut anything, clip-in bangs let you test the look for a night out or a weekend before committing. They come pre-cut in wispy, blunt, or curtain shapes and clip flat against your scalp with a small comb attachment. While they’re great for any age, they’re especially useful if you’re exploring Bang Hairstyle Ideas for Women Over 40 and want to experiment with different fringe styles before making a permanent cut. Match the color to your natural shade using a swatch photo in daylight, since indoor lighting can throw off the tone. To blend the seam, backcomb your natural hair slightly at the crown before clipping them in, then smooth a few of your own front pieces over the top edge. A drop of hair serum on the clip-in piece keeps it from looking flat or synthetic. This option is especially good for special occasions like weddings or photo shoots where you want the drama of bangs without any permanent change. Store them on a small wig stand so they keep their shape between uses, and wash them gently every few wears with lukewarm water and a mild shampoo.
3. Side Swept Bangs For Oval And Heart Faces
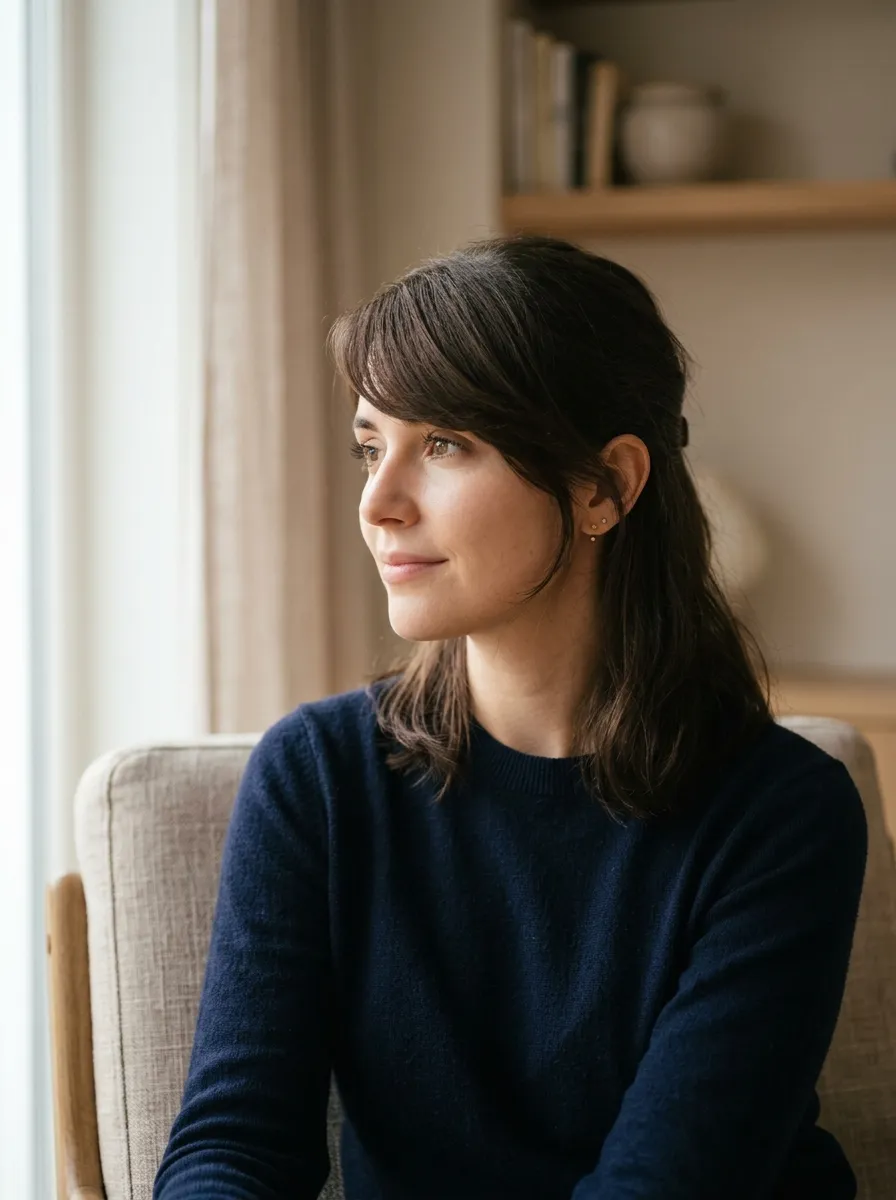
Side swept bangs are cut longer and angled to one side rather than straight across, which means your stylist only trims your existing front section rather than creating a brand new one. They work beautifully on oval and heart shaped faces because they soften a wider forehead or a pointed chin without shortening the rest of your hair. Ask for the bangs to end around your cheekbone so they can tuck behind your ear on low maintenance days. Style them with a small round brush, sweeping the section across your forehead while directing warm air from the opposite side. A light hold mousse applied to damp hair before drying helps the sweep hold through humidity. Because the length graduates gradually into your layers, there’s no harsh line to grow out, and you can adjust the part at any time to shift how much forehead shows. This is a great low risk option if you’re bang curious but still attached to your length.
4. Wispy Micro Bangs Using Only Front Layers

Wispy bangs are thin, feathered, and never blunt, which makes them one of the gentlest ways to add a bang without sacrificing bulk from your length. Your stylist point cuts only a small section from your front layers, leaving the rest of your hair completely untouched. This works especially well if you have naturally fine or medium density hair, since a thick blunt fringe can feel heavy, while wispy strands stay airy and soft. To style, blow dry with a small round brush pulling the pieces slightly forward, then finish with a flat iron on the lowest heat setting to add a gentle bend. A dab of texturizing paste rubbed between your fingertips and pressed through the ends keeps them piecey rather than flat. Because so little hair is involved, these bangs grow out in a matter of weeks if you change your mind, and in the meantime they can be tucked to the side or pinned back with a small clip.
5. Bangs Created With A Deep Side Part

You don’t always need scissors to get the visual effect of bangs. Shifting your part from the center to a deep side position pulls a section of hair forward and down across your forehead, mimicking the look of a side swept fringe. This is a completely reversible styling trick, perfect for anyone who wants to preview the effect before committing to a cut. Use a fine tail comb to create the part exactly where you want it, then blow dry the front section forward and slightly down using a paddle brush. A light mist of flexible hold hairspray keeps the strands in place without stiffness. This works particularly well if you already have long layers around your face, since they’ll fall naturally into a fringe shape once redirected. It’s also a great option for second or third day hair, since a deep part can hide oil at the roots while giving you a whole new silhouette without touching your length at all.
6. Blunt Fringe Trimmed Only At The Very Tips
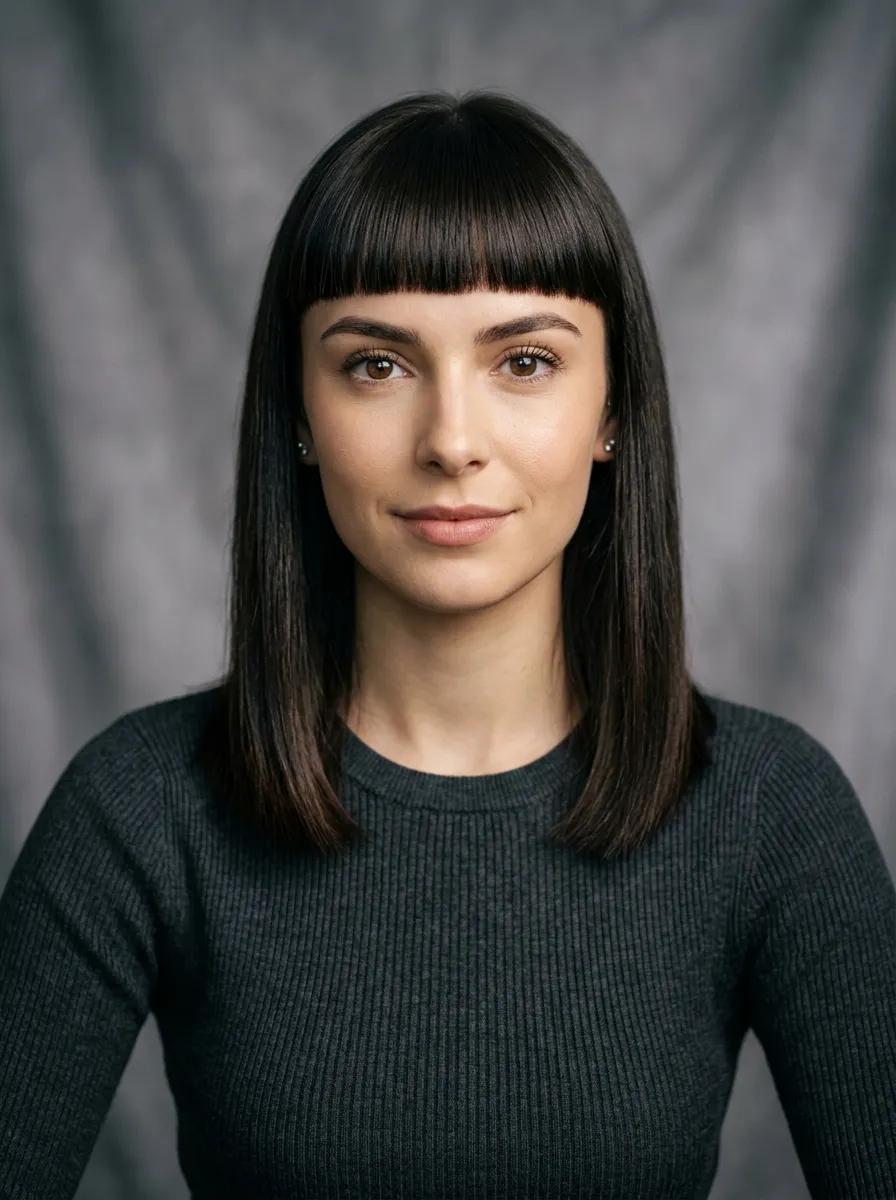
If you love the bold look of a full blunt fringe but are nervous about commitment, ask your stylist to cut it long at first, resting just above your eyebrows rather than mid forehead. This gives you the graphic, statement look of blunt bangs while using a smaller section of hair, so your overall length barely changes. Blunt fringes work best on straight or lightly wavy hair since the line reads cleanest when hair lies flat. To maintain the sharp shape, blow dry the section straight down using a flat paddle brush, then run a flat iron over it briefly to smooth any flyaways. A tiny bit of smoothing serum rubbed onto your palms and pressed over the surface keeps frizz away. Because blunt bangs grow quickly, plan on trimming just the fringe every three to four weeks using small hair scissors at home, snipping tiny amounts at a time so you never take off more than a few millimeters.
7. Bangs Made From A Ponytail Front Section

When you wear your hair in a ponytail or bun, leaving a small triangular section at the front loose gives you the same visual payoff as bangs, minus any cutting at all. Section off a piece from the crown to just above each eyebrow before pulling the rest back, then style that leftover piece forward with a round brush and a blast of warm air. This works especially well for special events since it photographs like a full fringe. A pea sized amount of pomade smoothed through the ends keeps the section from looking wild. This trick is ideal for anyone who wants variety without permanence, since you can put your hair back the very next day and there’s no fringe to grow out or manage. It also works with braids, low buns, or half up styles, giving you multiple bang looks throughout the week using the same length of hair you already have.
8. Curly Bangs For Naturally Textured Hair
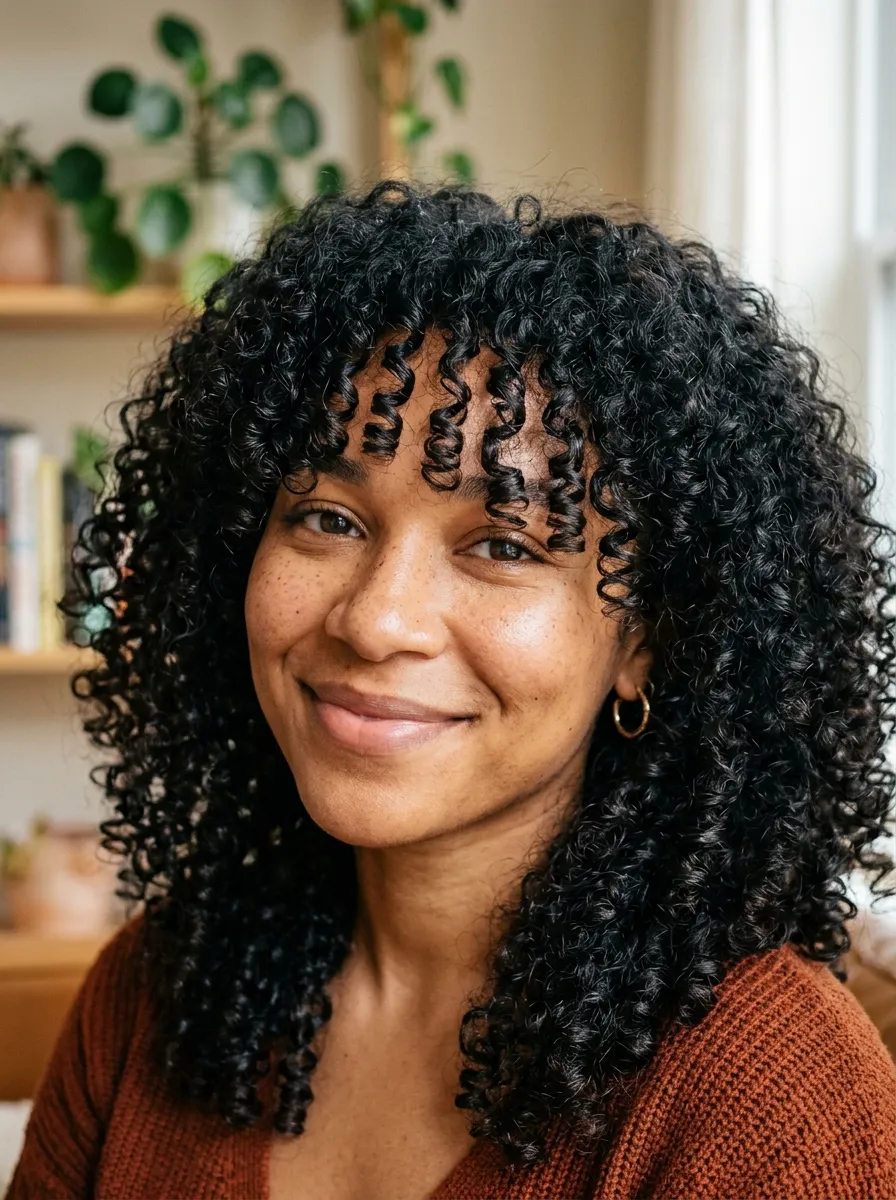
Curly hair shrinks significantly when it dries, so bangs on curly texture should always be cut noticeably longer than you think you need. Your stylist will typically cut the front section while your hair is dry and in its natural curl pattern, taking off only what’s necessary to frame your face once it springs up. This means the length lost from the rest of your hair is minimal since curly bangs use a small section relative to blunt straight fringes. To style, apply a curl defining cream to soaking wet hair and either air dry or diffuse on low heat, scrunching gently upward. Avoid brushing curly bangs when dry, since this creates frizz rather than definition. If you’re unsure about committing, ask for a trial cut that leaves the pieces long enough to tuck behind your ears, and you can always visit your stylist again in a few weeks to shape them shorter once you’re confident in the look.
9. French Bangs For A Soft Parisian Effect

French bangs sit a little longer and messier than a classic blunt fringe, landing just above the eyes with slightly uneven ends for a lived in look. Because they’re intentionally imperfect, your stylist can create them using minimal length from your front section, point cutting rather than cutting a hard line. This makes them one of the more forgiving bang styles if you’re worried about a dramatic change. Style them by air drying with a light sea salt spray scrunched through damp hair, letting the natural texture do the work. On humid days, a small amount of dry texturizing powder at the roots keeps them from falling flat. French bangs pair beautifully with second day hair and don’t require a lot of daily maintenance, which makes them a low effort way to change your whole look. As they grow, the uneven ends blend naturally into face framing layers rather than creating an awkward in between stage.
10. Bangs Styled With A Velcro Roller For Volume
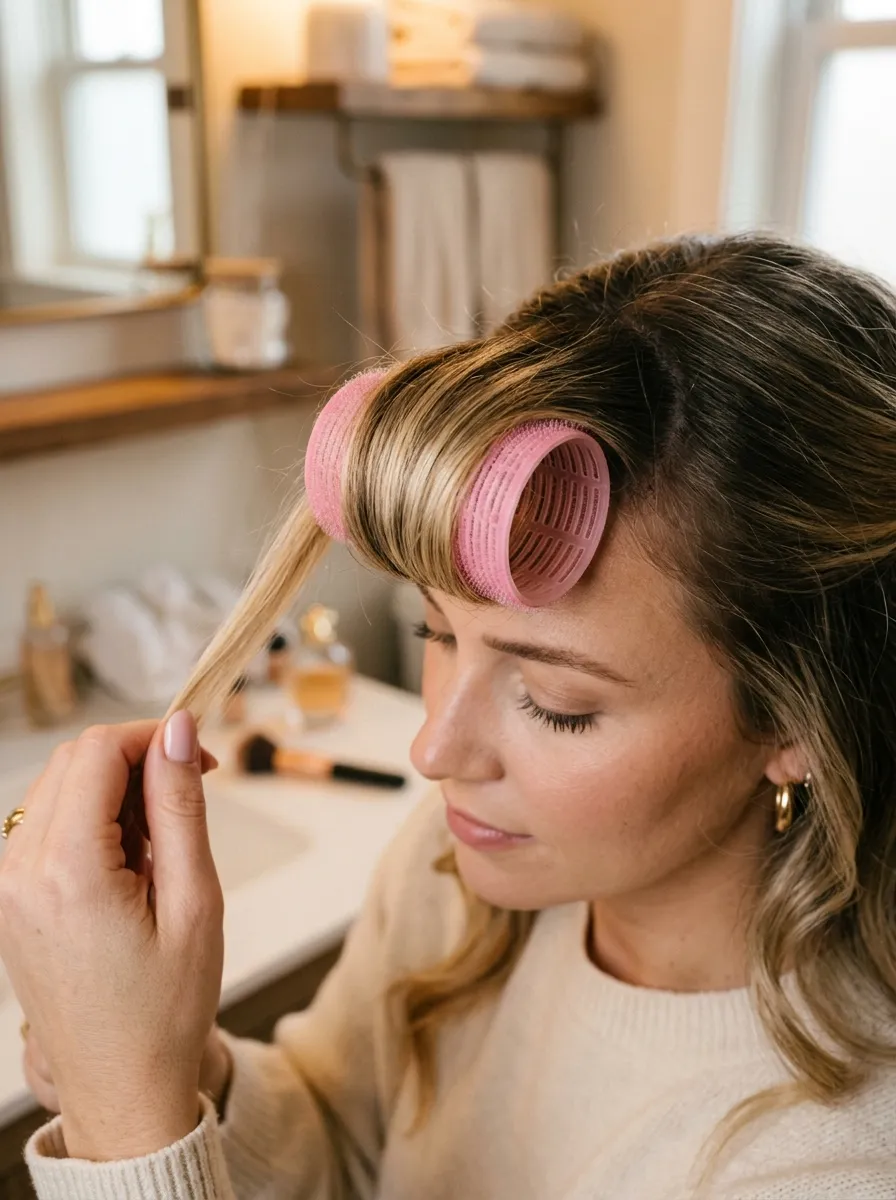
If you already have short front layers but they don’t quite behave like bangs, a large velcro roller can train them into place without any cutting at all. Spray the section with a light heat protectant, roll it away from your face, and let it sit for ten to fifteen minutes while you finish the rest of your routine. When you remove the roller, the section will have a soft outward bend that mimics the look of styled curtain bangs. This is a great trick for growing out bangs gracefully, since it gives you the visual effect during the awkward stage without needing scissors. It also works well before events, giving your front section extra lift and movement. Repeat this styling method a few times a week and your hair will start to hold a soft memory of the shape even without the roller, making your morning routine faster over time.
11. Bottleneck Bangs For A Modern Face Frame
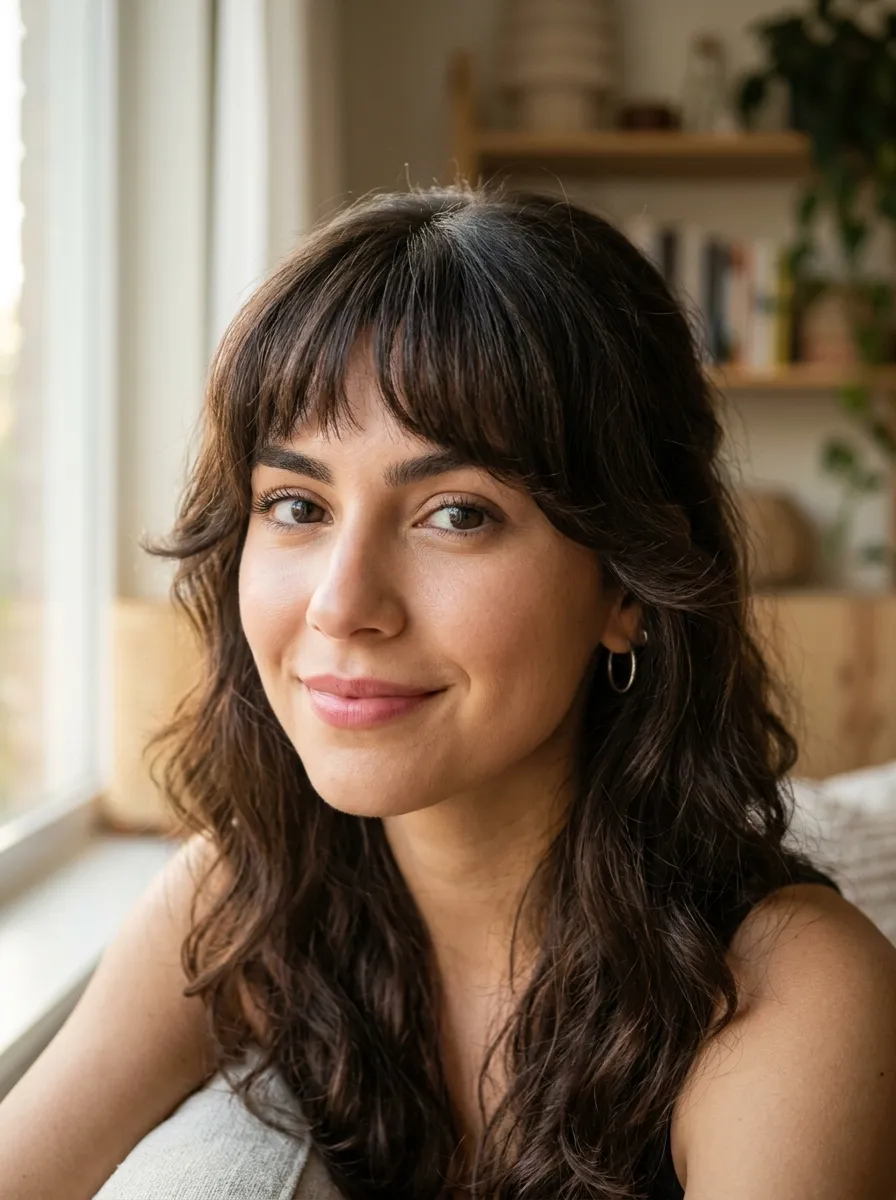
Bottleneck bangs are shaped like the neck of a bottle, narrower near the center part and flaring out toward the temples. Your stylist only needs to work with the pieces directly framing your face, leaving the majority of your length completely untouched. This shape flatters nearly every face type because it draws the eye inward and softens the hairline gradually rather than abruptly. To style, part your hair down the middle and use a curling iron to bend the ends of each piece slightly inward toward your cheeks. A small amount of shine spray finishes the look without weighing the strands down. Because bottleneck bangs are essentially enhanced face framing layers, they require very little upkeep and grow out with almost no visible in between stage. This makes them one of the most beginner friendly bang styles if you’re hesitant about maintenance or worried about needing frequent trims to keep the shape looking intentional.
12. Bangs Achieved Through A Braided Crown
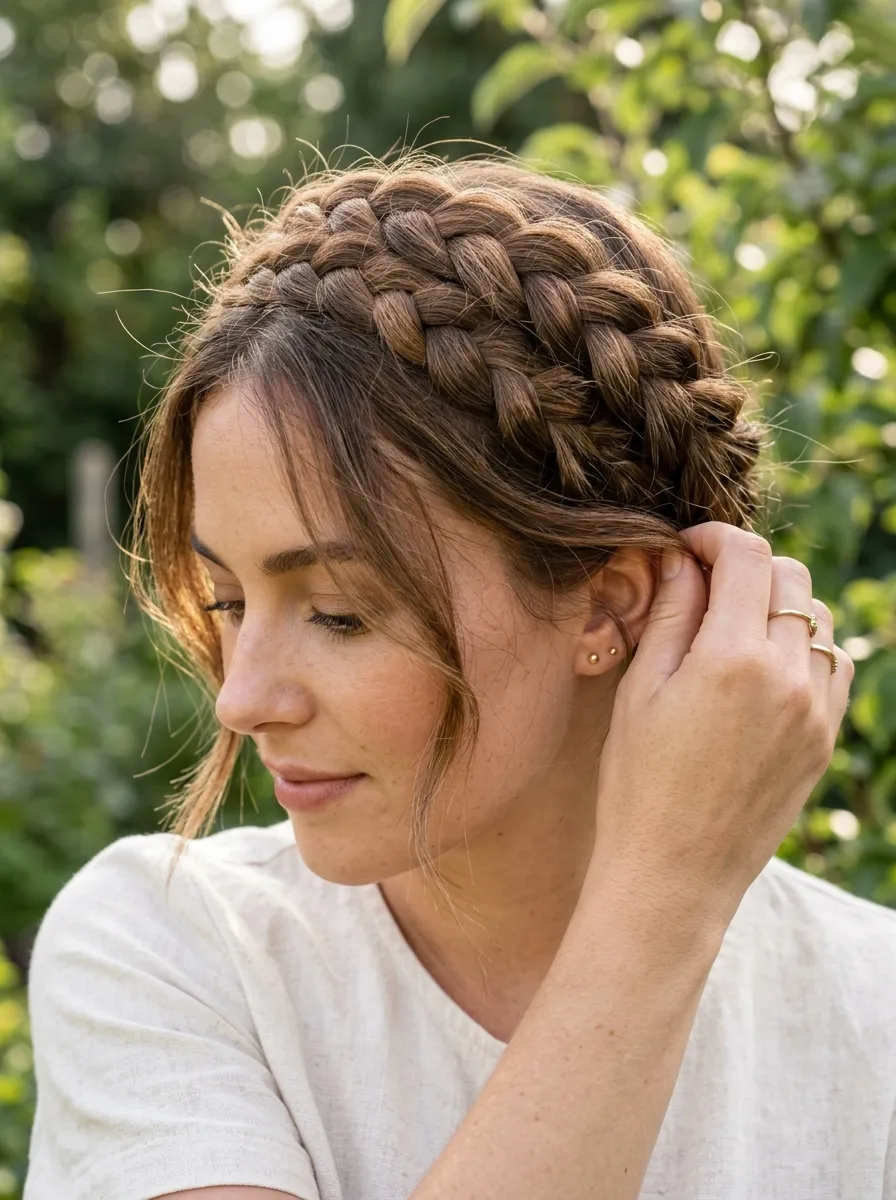
A braided crown pulls hair back and away from your hairline while leaving a few soft pieces loose around your face, which reads visually similar to wispy bangs. Take two small sections from either side of your part, braid them loosely, and cross them over the top of your head, pinning them in place. Leave a few short strands out near your temples to soften the style. This is a completely temporary, no cut way to test whether a face framing fringe suits you before making a permanent choice. Finish with a bit of edge control gel along your hairline to smooth any flyaways from the braid. Because nothing is cut, you can undo the style entirely and go back to your regular look the next day. This option is especially useful for anyone attending an event who wants a bang inspired look without any commitment or upkeep afterward.
13. Bangs For Square Face Shapes Using Soft Layers
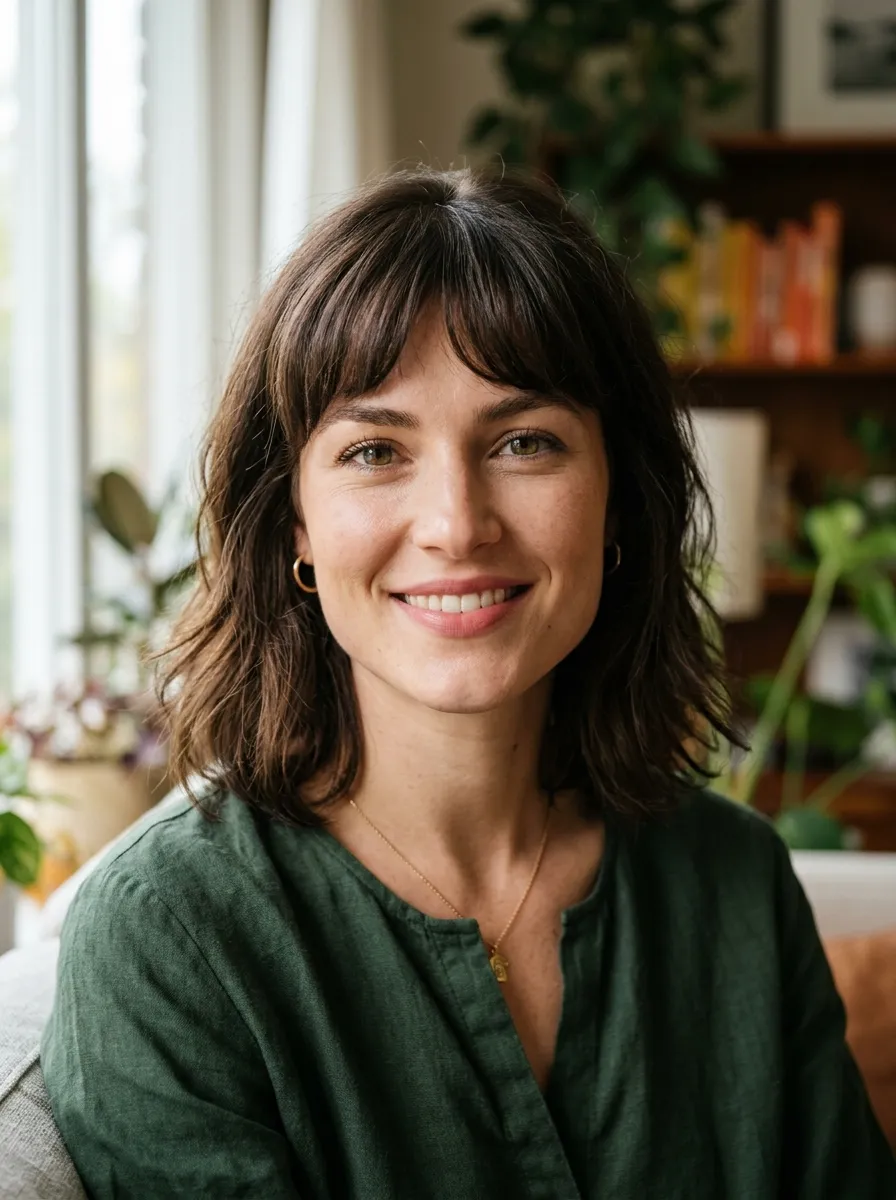
Square face shapes often benefit from bangs that curve rather than cut straight, since a soft rounded line balances a strong jawline without adding harsh angles. Ask your stylist to point cut the ends of your front section into a gentle arch, keeping the center slightly longer than the sides. This uses a small, controlled section of hair, meaning your overall length stays largely intact. Style with a round brush, rolling the ends under slightly as you dry to encourage the curve. A light coat of flexible hairspray holds the shape through the day without stiffness. This bang style works well paired with long layers throughout the rest of your hair, creating a cohesive, face softening silhouette. If your jawline is your main concern, ask your stylist to keep the bangs slightly longer on the sides so they draw attention upward and inward rather than emphasizing the width of your face.
14. Half Bangs For A Subtle Transitional Look
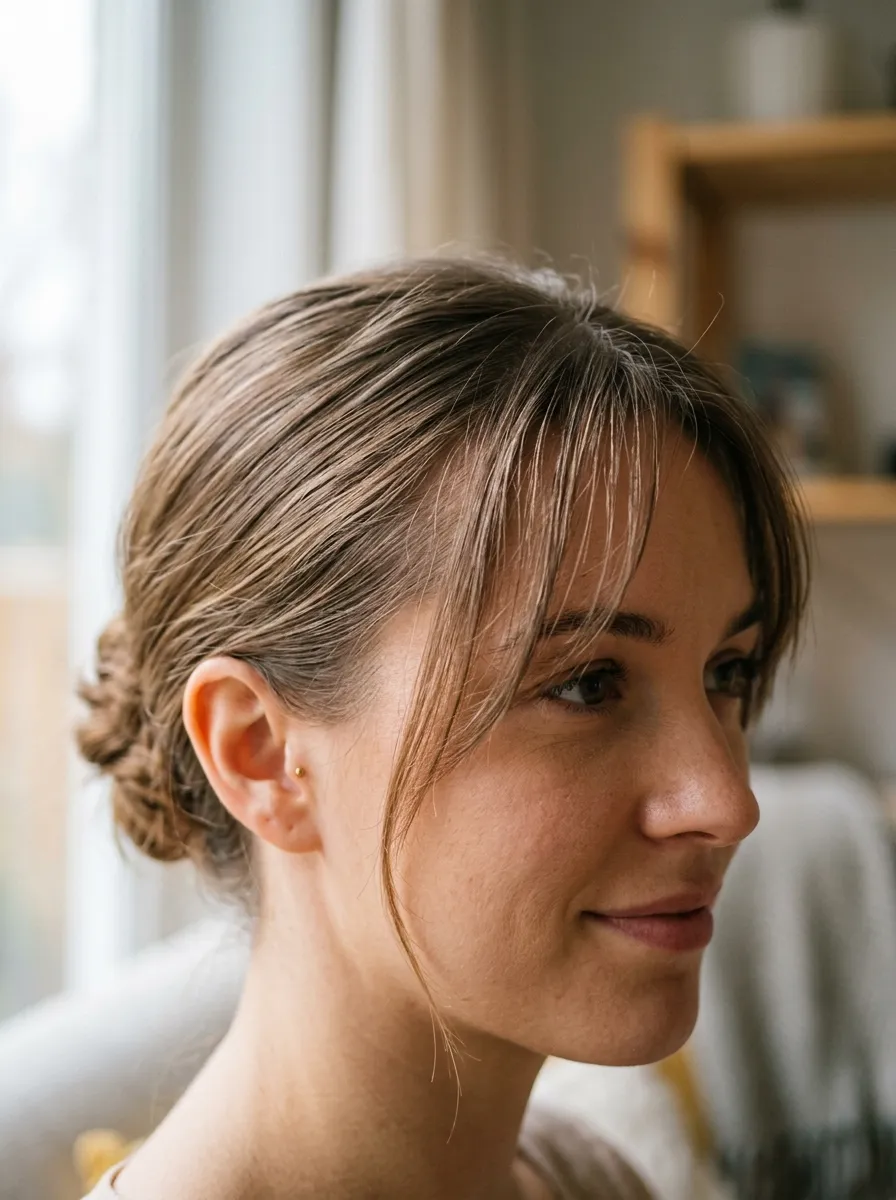
Half bangs use only a portion of your front hairline, giving you a hint of fringe without fully committing your whole front section. Your stylist sections off a narrow piece, usually just wide enough to sit between your eyebrows, and cuts it while leaving the rest of your part untouched. This is ideal for anyone who wants to dip a toe into bangs before deciding whether to go bigger. Style the piece forward with a flat iron for a sleek look, or scrunch in a little texture cream for a softer, undone finish. Because the section is narrow, it blends easily with the rest of your hair when pushed to the side, meaning you always have the option to hide it on days you’re not feeling it. This makes half bangs one of the most flexible entry points into the fringe world, especially if you’re still deciding on a face framing commitment.
15. Bangs Paired With A Long Bob For Balance

If you’re growing out a longer style but still want to try bangs, pairing them with a long bob length keeps your overall silhouette balanced. Curtain or side swept bangs work particularly well here since they echo the angles already present in a lob cut. Your stylist can shape the front pieces to blend seamlessly with your existing layers, meaning very little extra hair is sacrificed. Style with a one inch curling iron, bending the ends of the bangs away from your face to open up your features, then finish with a light anti frizz oil for shine. This pairing works for both straight and wavy textures and photographs well from every angle, since the fringe and the length move together rather than competing. If you decide later that you want to grow your bangs out fully, they’ll blend into the lob shape gradually without leaving an awkward gap.
16. Bangs Using A Round Brush Blowout Only
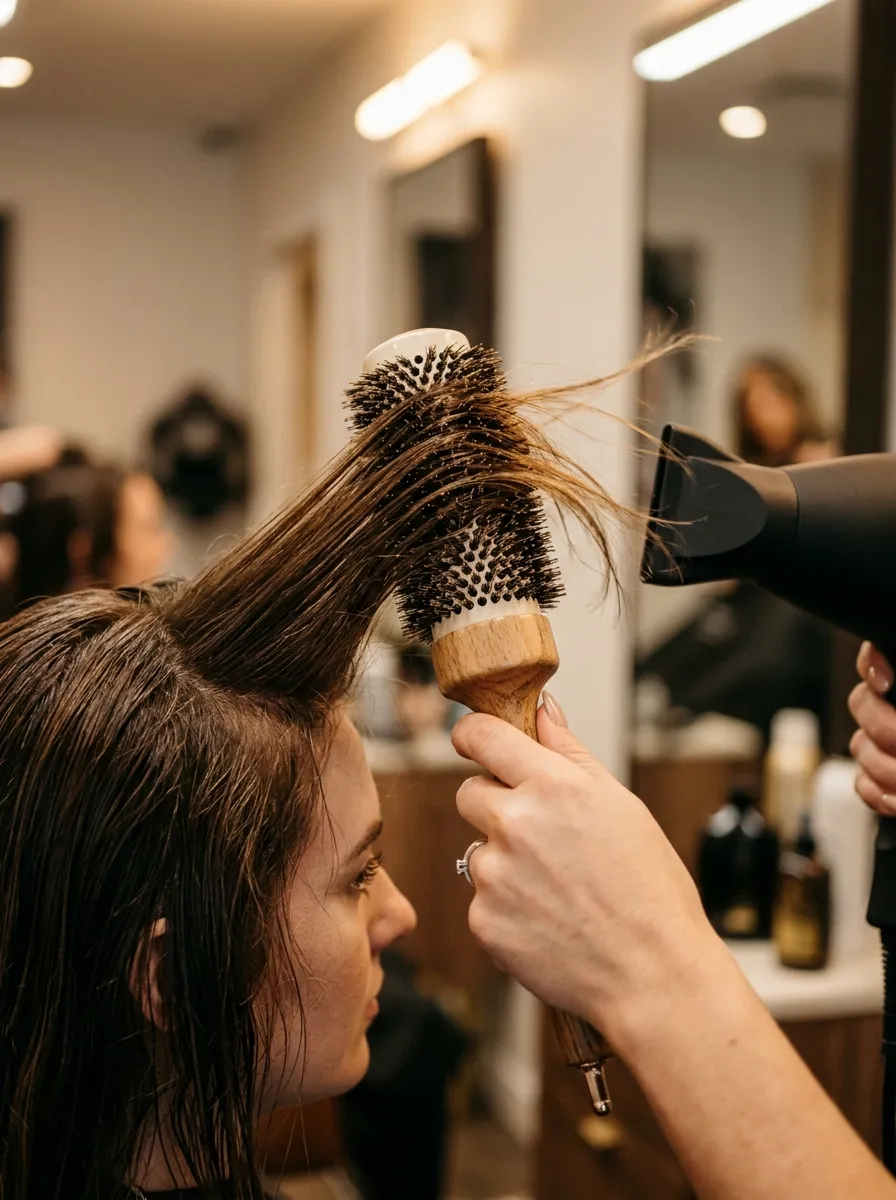
If your hair already has some layering near the front, you may be able to create a bang effect purely through blow drying technique, no scissors required. Section off the hair framing your forehead, spray it with a heat protectant, and wrap it around a medium round brush while directing warm air downward from the roots to the ends. Hold the shape for a few seconds with cool air before releasing. This trains the section to sit forward and curve inward like a soft fringe. It works best on hair with some existing shorter layers near the crown, since freshly cut blunt ends have nothing to shape. Repeat the technique daily or every few days depending on how long you want the effect to last, and finish with a light hold spray to keep humidity from reversing your work. This is the ultimate zero commitment option if you’re testing the waters.
17. Bangs With Face Framing Balayage
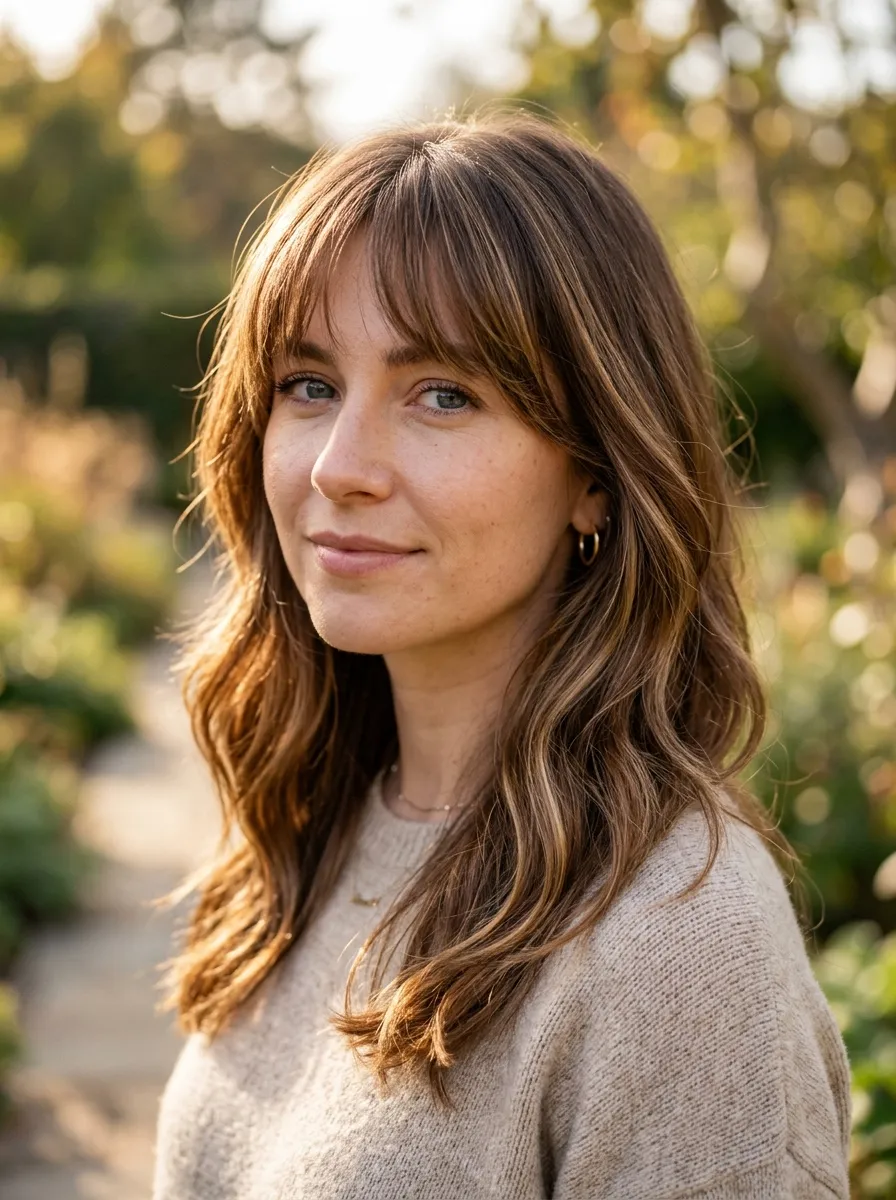
Adding a few subtly lightened pieces to your new bangs can make the change feel more intentional and put together, even if you’re only cutting a small amount of hair. Ask your colorist for two or three fine face framing highlights that start slightly below the root, so the color grows out softly rather than leaving a harsh line. This works particularly well with curtain or side swept bangs, since the highlighted pieces catch the light as they move. Use a color safe purple shampoo once a week if your highlights are blonde toned, to keep them from turning brassy. This combination gives the appearance of a much bigger transformation than what actually happened, since the eye is drawn to the contrast in tone rather than the amount of hair that was cut. It’s a great option if you want your bangs to feel like a statement without sacrificing more length than necessary.
18. Bangs Designed For Round Face Shapes
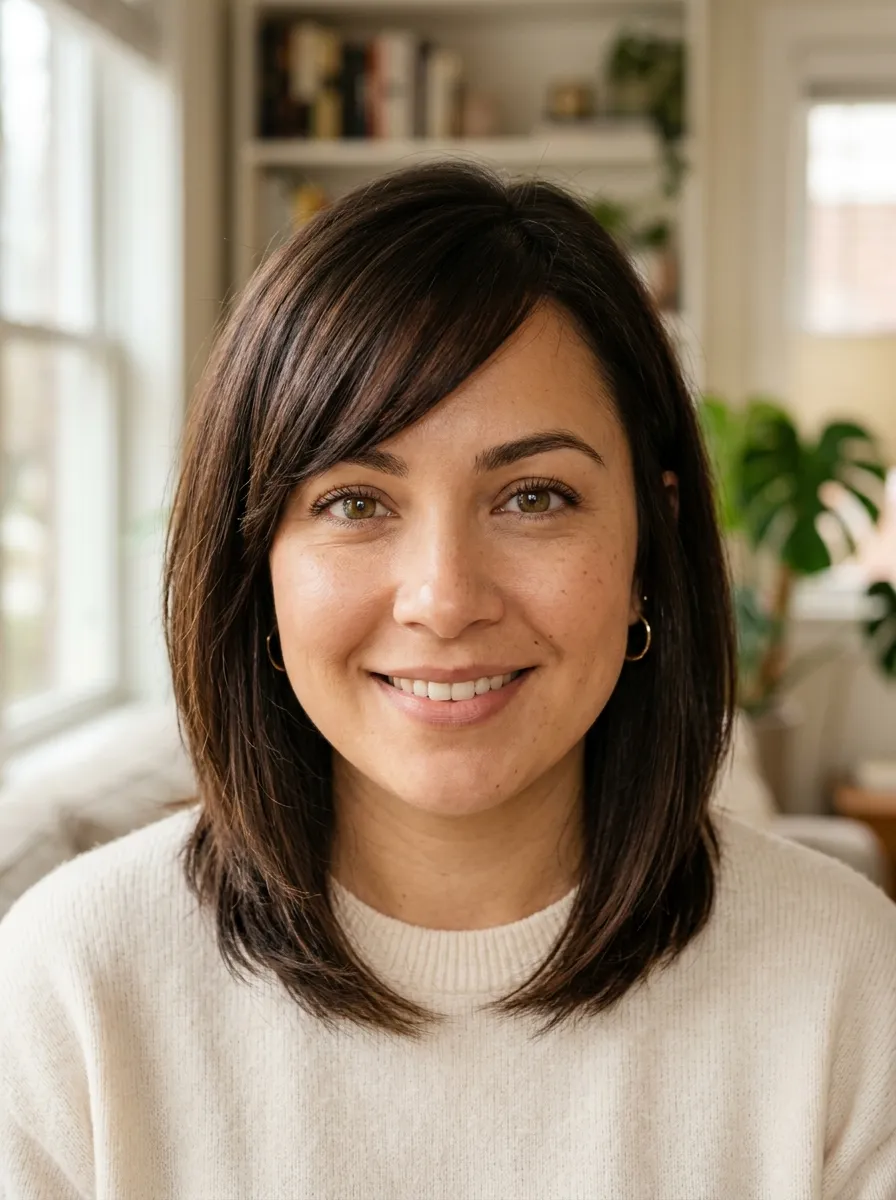
Round face shapes generally look best with bangs that have some length and angle rather than a short blunt line, since added length helps elongate the face. Ask your stylist for side swept or angled bangs that graze your cheekbone, using only the front section of your hair so the rest of your length stays put. Style by blow drying the section on a diagonal, sweeping it across your forehead rather than straight down. A volumizing mousse applied at the root before drying adds lift without bulk. This bang shape draws the eye diagonally rather than horizontally, which softens roundness without hiding your features. Because the cut is angled rather than blunt, it also grows out more gracefully, blending into longer layers over time instead of creating a noticeable line. If you want a change without fully committing to short bangs, this angled approach offers a nice middle ground.
19. Bangs For Thick Hair Using Point Cutting
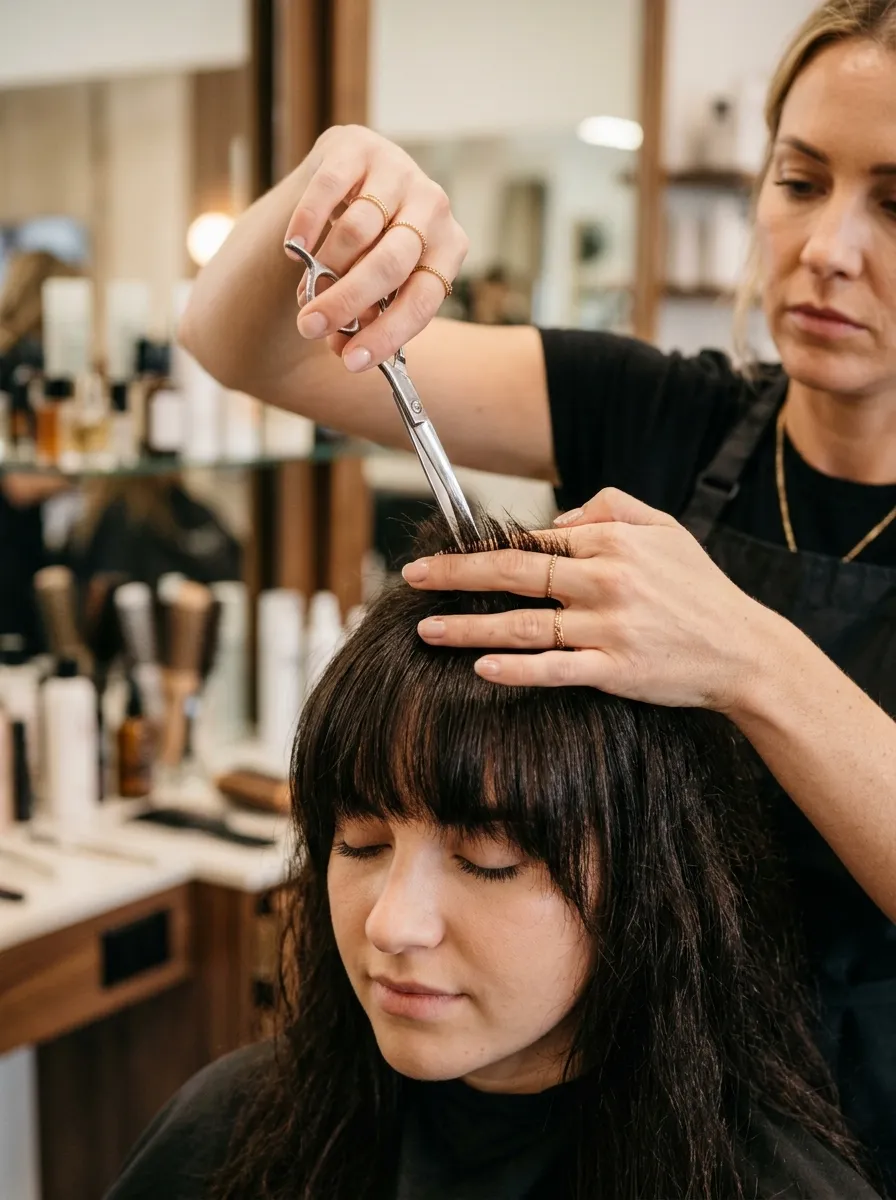
Thick hair can make blunt bangs feel heavy and hard to style, so point cutting is often the better approach if you want fringe without a bulky look. Your stylist holds the shears vertically and snips upward into the ends of your front section rather than cutting straight across, removing weight without shortening the overall length dramatically. This technique also makes the bangs easier to blend with the rest of your thick hair, since there’s no harsh line separating the two sections. At home, maintain the texture with a lightweight detangling spray to prevent the ends from clumping together. Style with a diffuser or round brush depending on your natural texture, focusing airflow at the roots to prevent flatness. Because point cutting removes bulk gradually, your stylist can always take a little more later if you want them thinner, giving you full control over the pace of change.
20. Bangs Combined With A Middle Part Refresh

Switching to a precise middle part alongside new curtain bangs creates a symmetrical, polished look that photographs well and requires minimal daily styling once set. Your stylist cuts the front pieces to fall evenly on both sides of the part, using layers rather than a solid blunt cut, so very little length is lost overall. To style, use a fine comb to set the part exactly where you want it while hair is damp, then blow dry each side outward using a round brush. A touch of root lifting spray near the part keeps things from looking flat. This combination works especially well on straight or lightly wavy hair, since the part holds its place more easily than on very curly textures. If you ever want to switch back to a side part, the bangs will simply shift with you, since curtain shapes are designed to move fluidly between part positions without looking off.
21. Bangs Styled Sleek And Straight For A Polished Look
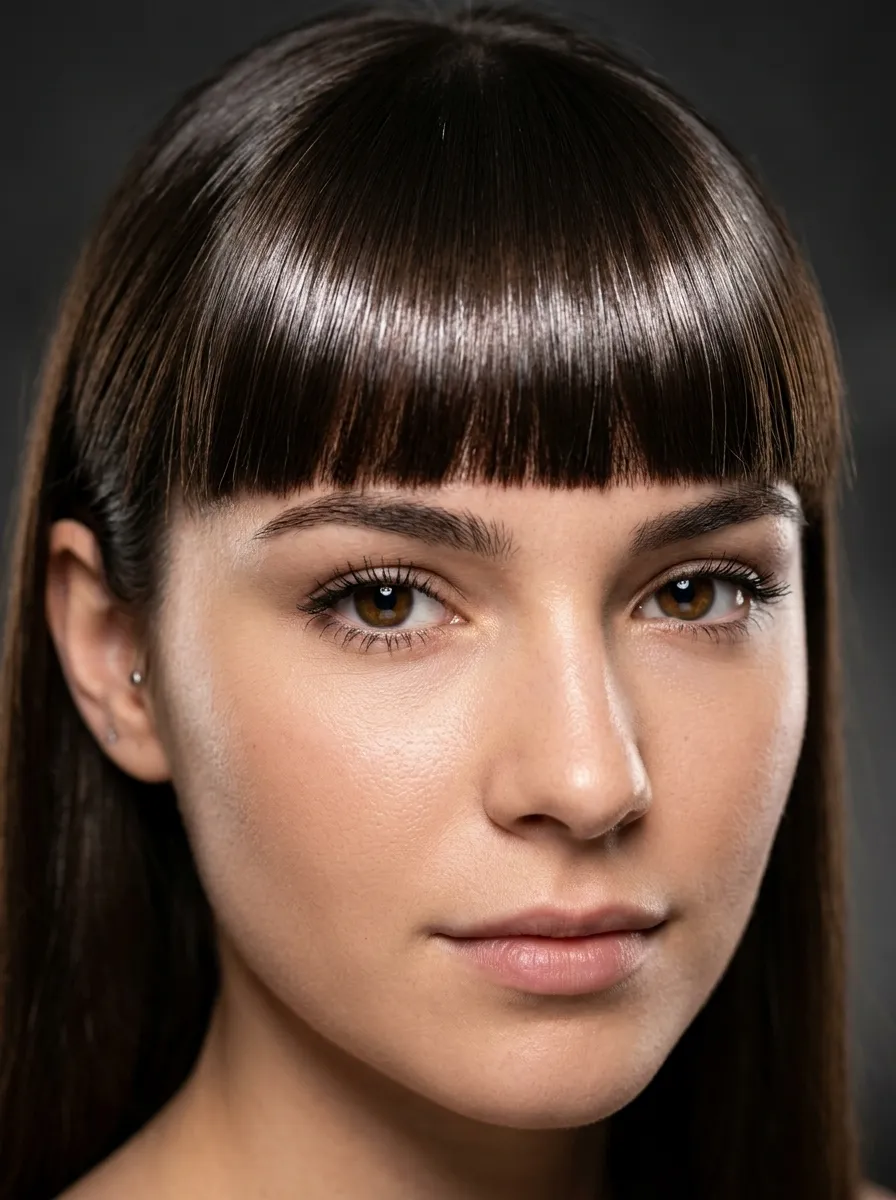
For a more polished, editorial finish, straightening your bangs completely flat creates a sleek line that looks intentional and put together. After washing, apply a small amount of smoothing cream to damp bangs, blow dry them straight down using a paddle brush, then follow with a flat iron for extra shine. This works with almost any bang shape, whether blunt, curtain, or wispy, and it’s a great option for professional settings or formal events where you want a crisp appearance. Finish with a light mist of shine spray held several inches away to avoid weighing the hair down. Because this is purely a styling choice rather than a cutting decision, you can alternate between sleek and textured looks throughout the week using the same length of bangs, giving you variety without ever picking up a pair of scissors beyond your regular trim schedule.
22. Bangs With A Tousled Beachy Finish

If sleek and straight isn’t your style, the same bangs can be worn with a relaxed, tousled texture using little more than a sea salt spray and your fingers. Spritz texturizing spray onto damp or dry bangs and scrunch gently upward, allowing natural waves or a light curl to form. This finish suits curtain and French bangs especially well, since their longer, softer shape has more room to move. A small amount of texturizing paste worked through the ends afterward keeps flyaways controlled while preserving the undone look. This styling method also hides second day oil better than a sleek finish, since a bit of texture reads as intentional rather than unwashed. Switching between sleek and tousled styling gives your bangs two completely different personalities throughout the week, which is a simple way to keep your look feeling fresh without any additional cutting or commitment.
23. Bangs For Fine Hair Using Minimal Thinning
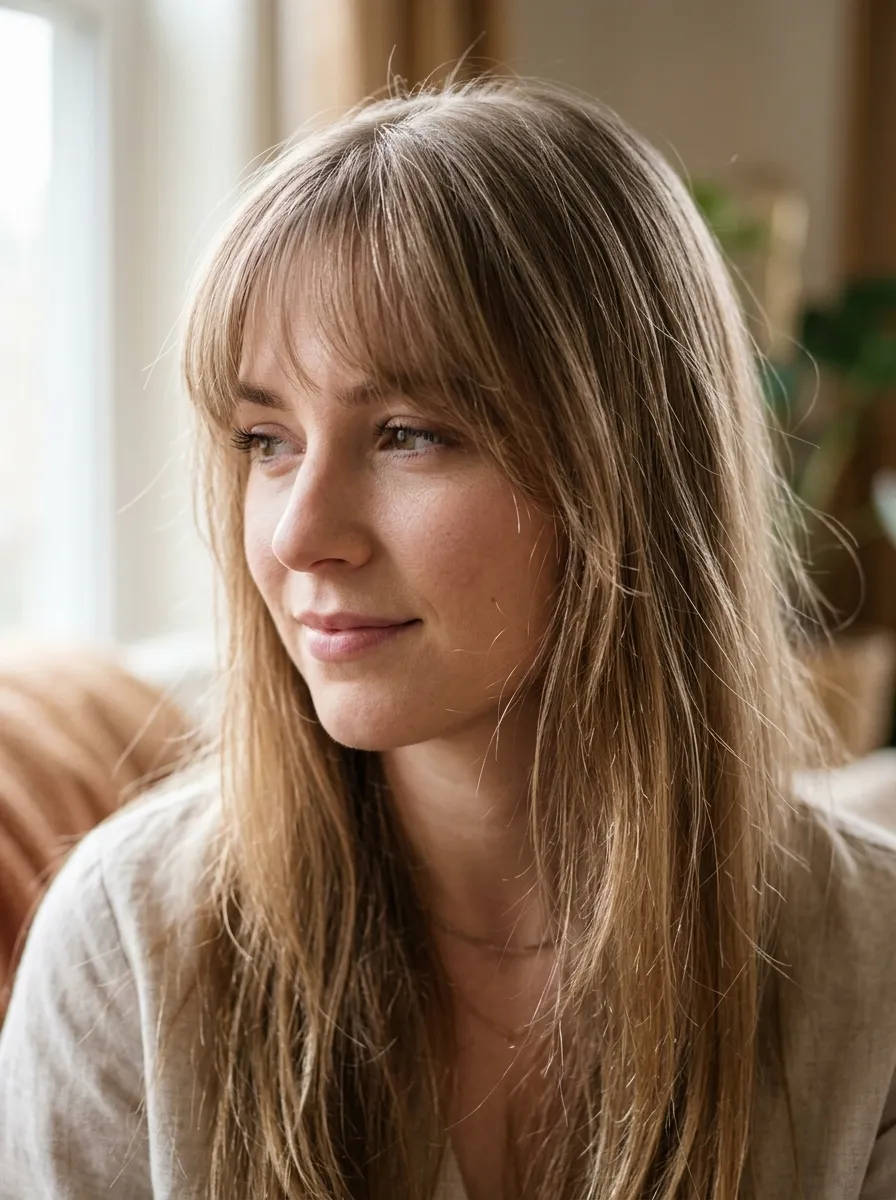
Fine hair needs a gentler approach to bangs since too much thinning can leave them looking sparse or wispy in an unintentional way. Ask your stylist to avoid heavy layering within the fringe itself and instead cut a soft, slightly rounded shape that relies on length rather than thinning shears for movement. This preserves as much density as possible while still giving you the visual impact of a fringe. At home, use a volumizing spray at the root of the bang section before blow drying to prevent them from looking flat against your forehead. A boar bristle round brush also helps add lift without pulling out too much natural texture. Because fine hair bangs are cut conservatively, they tend to grow out with minimal awkwardness, and your stylist can always thin them slightly more later once you see how they settle into your daily routine.
24. Bangs Incorporated Into A Half Up Style
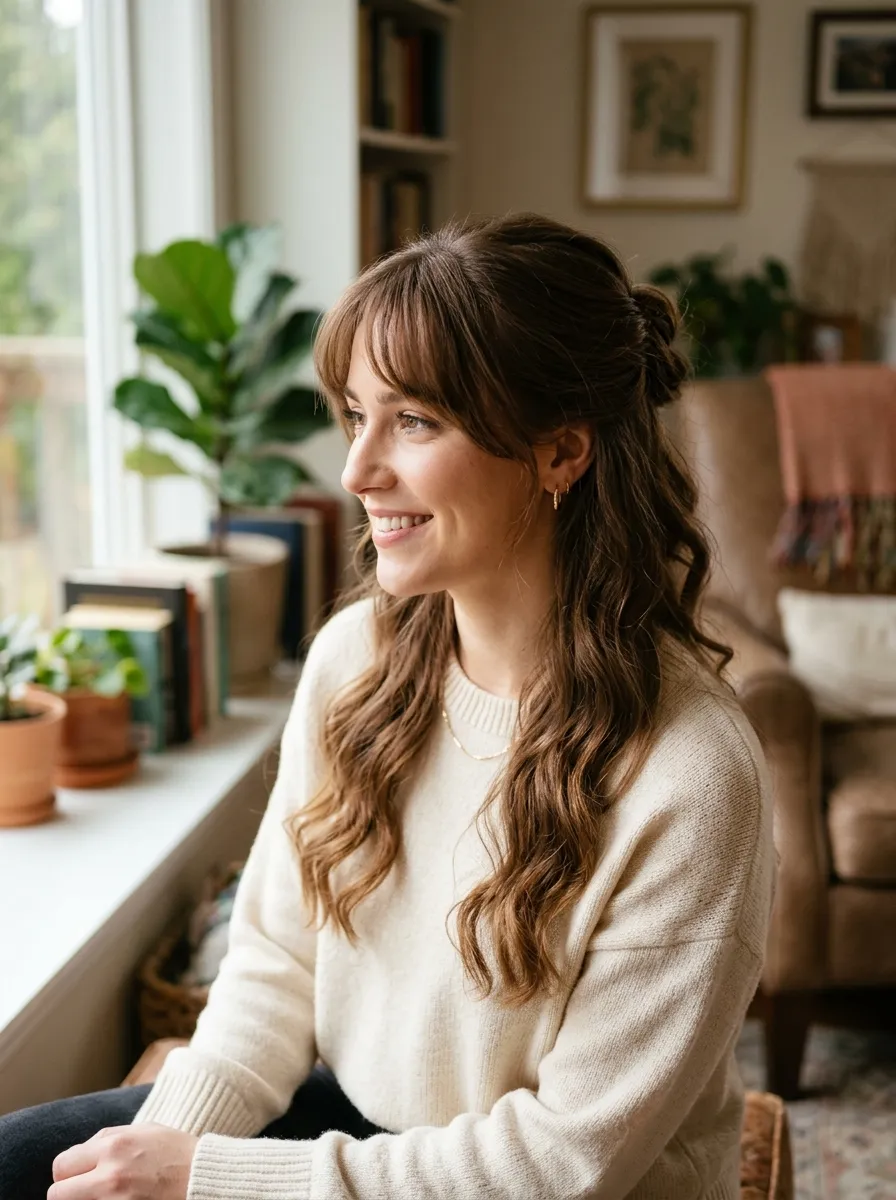
Bangs pair especially well with half up hairstyles since the fringe stays visible and framing while the rest of your length is showcased pulled back. Gather the top section of your hair, leaving your fringe loose in front, and secure it with a small clear elastic or a decorative clip. Curl the ends of your bangs slightly inward for a softer finish, then set with a light hold spray. This style works for both casual days and dressier occasions, since it highlights your face while still showing off your length. A dab of shine serum on the pulled back section adds polish without looking greasy. If you’re still deciding whether bangs suit your lifestyle, this style is a good test since it shows you exactly how the fringe interacts with updos and half styles you already wear regularly.
25. Bangs Trimmed At Home Between Salon Visits
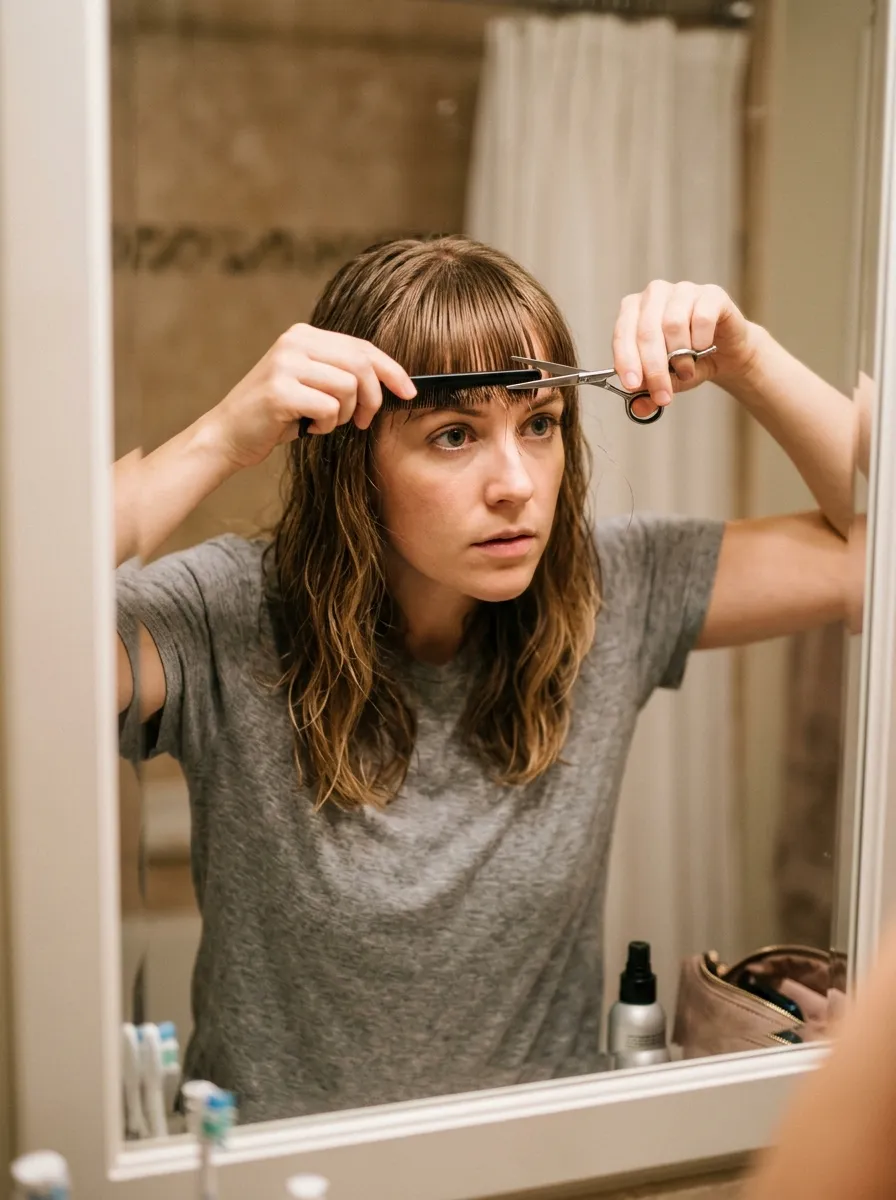
Once you have bangs, keeping them at a length you love between salon visits sometimes means a small at home trim. Use small, sharp hair cutting scissors rather than household scissors, and always cut on completely dry, styled hair so you can see exactly where the line falls. Take a small vertical section at a time, angling the scissors upward and snipping tiny amounts rather than cutting straight across, which mimics point cutting and avoids a blunt mistake. A fine tooth comb helps keep the section even as you work. Only trim a few millimeters at a time, checking in the mirror after each pass, since you can always take off more but can’t put length back. This skill is especially useful for wispy or curtain bangs, which need more frequent light trims than blunt styles, and mastering it at home saves you extra salon trips between full cuts.
26. Bangs For Wavy Hair Using Diffused Drying
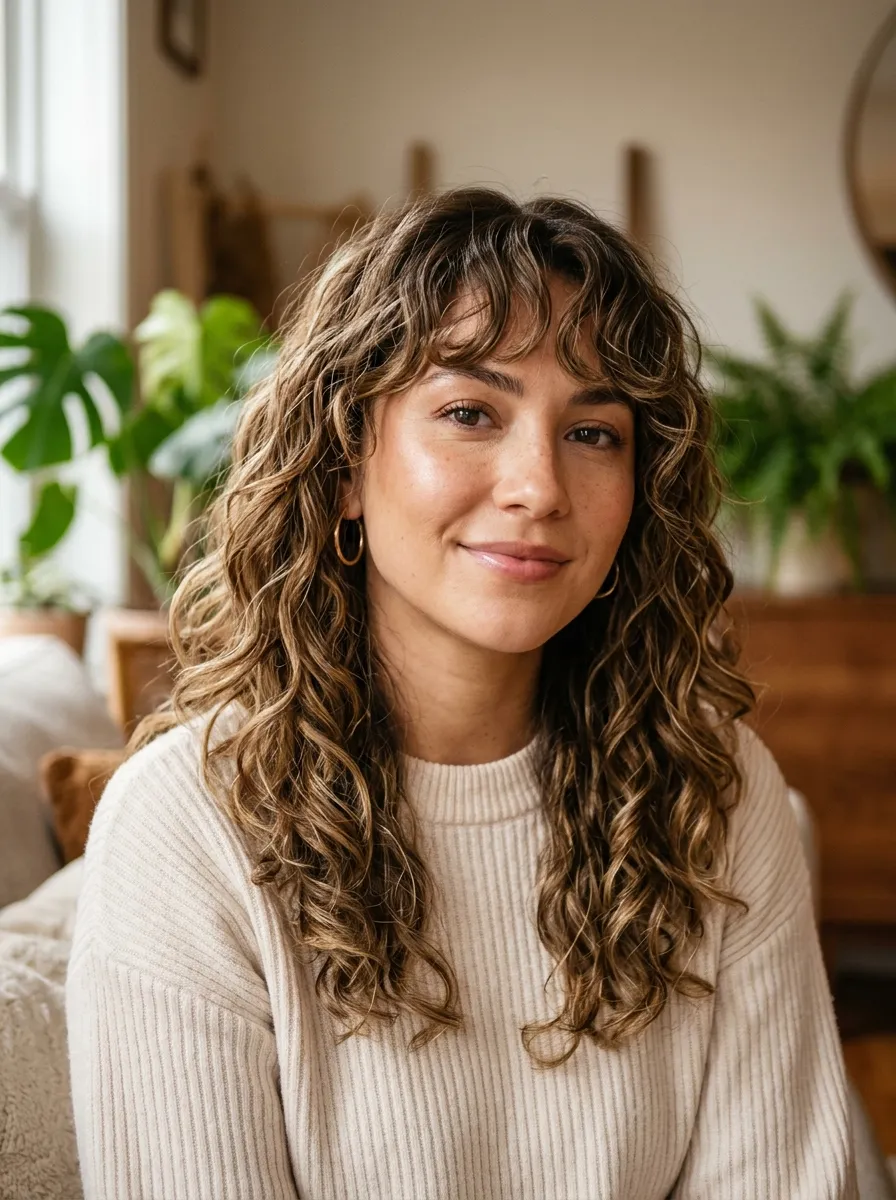
Wavy hair bangs look best when they’re allowed to keep their natural bend rather than being forced pin straight, since fighting the texture daily leads to frizz and extra styling time. After washing, apply a lightweight curl cream to damp bangs and diffuse on low heat, cupping the ends gently to encourage the wave pattern to form. Avoid touching the bangs too much while they dry, since wavy hair is prone to frizz when disturbed mid dry. This approach works well with curtain or French bang shapes, both of which are designed to move rather than sit flat. On day two, refresh with a small spritz of water and a pea sized amount of curl cream scrunched through the front section. Embracing your natural wave rather than fighting it also means less heat damage over time, keeping both your bangs and the rest of your length healthier in the long run.
27. Bangs Paired With Face Framing Money Pieces
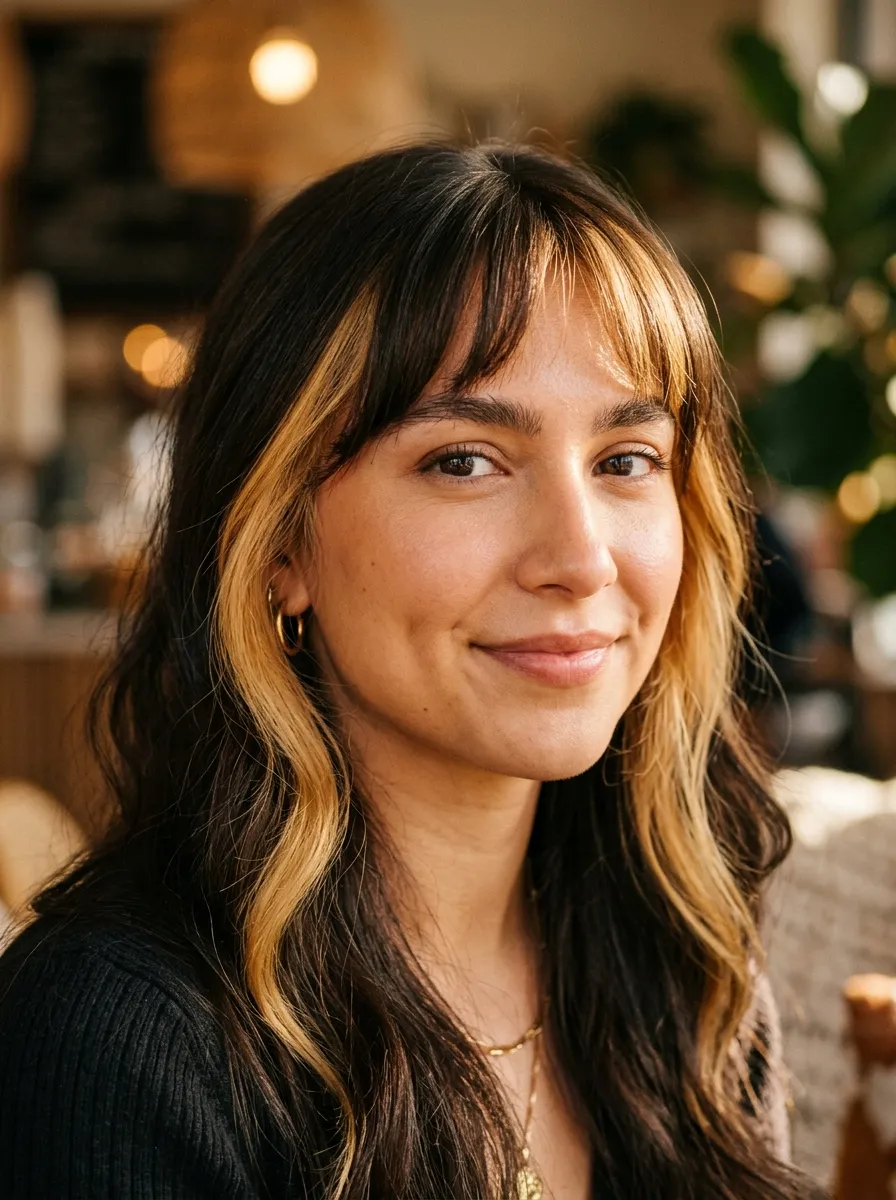
Money pieces, the lightened strands framing your face near your temples, pair naturally with bangs since both techniques already draw attention to the same area. If you’re getting bangs cut, ask your colorist about adding a few subtle lightened pieces just outside the fringe to enhance the framing effect without a full head of highlights. This keeps the change simple and affordable while making the bangs feel like part of a bigger, more intentional style update. Maintain the color with a bond building conditioner to keep the lightened sections healthy, since they’ll be styled and heat treated often alongside your bangs. This combination works on both straight and wavy textures and looks natural whether your base color is dark or light. Because only a small number of pieces are lightened, touch ups are needed less frequently than with a full color service, making it a low maintenance way to elevate your fringe.
28. Bangs For Special Occasions Using Hot Rollers
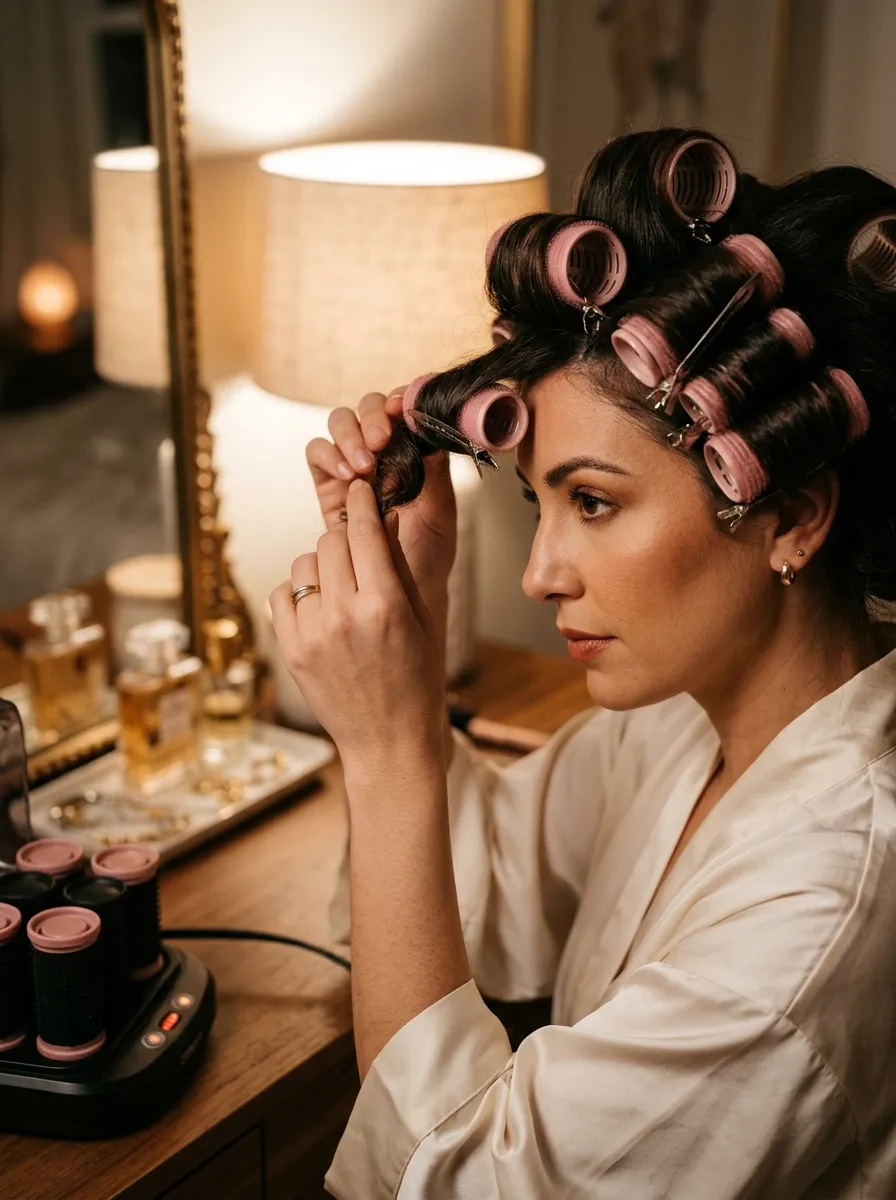
For events where you want your bangs to look extra polished, hot rollers create smooth, bouncy movement that lasts longer than a quick blow dry. Section your bangs, spray with heat protectant, and wrap them around a small hot roller, rolling away from your face. Let the roller cool completely before removing it, which locks in the curve for hours. This technique works for any bang length, from short blunt fringes to longer curtain styles, and gives a soft, glamorous finish appropriate for weddings, parties, or photos. Finish by gently combing through with your fingers rather than a brush to keep the shape soft rather than stiff. Hot rollers are also gentler on your hair than repeated flat iron passes, making them a good option if you’re styling your bangs frequently for a string of events without wanting to cause heat damage to your fringe.
29. Bangs That Grow Into Layers Without An Awkward Stage

If you’re worried about the growing out process, choose a bang style designed to blend into layers from the very beginning rather than one that ends in a hard line. Curtain, bottleneck, and side swept bangs are all cut with this in mind, using graduated layers that lengthen gradually into the rest of your hair. Ask your stylist specifically for this approach if avoiding an awkward stage is your main concern. During the growing out phase, use bobby pins to twist and pin the front pieces back, or rely on the deep side part trick to keep them out of your eyes. A little texturizing spray helps blend shorter pieces into your ponytail or bun on days you want them fully out of the way. Choosing a growth friendly bang shape from the start means you’ll always have styling options, whether you decide to keep your bangs forever or let them grow back into your original length.
Conclusion
Bangs don’t have to mean sacrificing the length you’ve spent months or years growing. From temporary styling tricks like deep parts and hot rollers to gentle cuts like wispy, curtain, and bottleneck bangs, there’s an option here for every hair type, face shape, and comfort level. Start small if you’re unsure, lean on your stylist for a shape that grows out gracefully, and remember that the best bang style is one that fits your daily routine as easily as it fits your face. If you’re ready to try one of these looks, bring a few photos to your next salon visit and talk through which option keeps the most length while still giving you that fresh, face framing change you’re after.