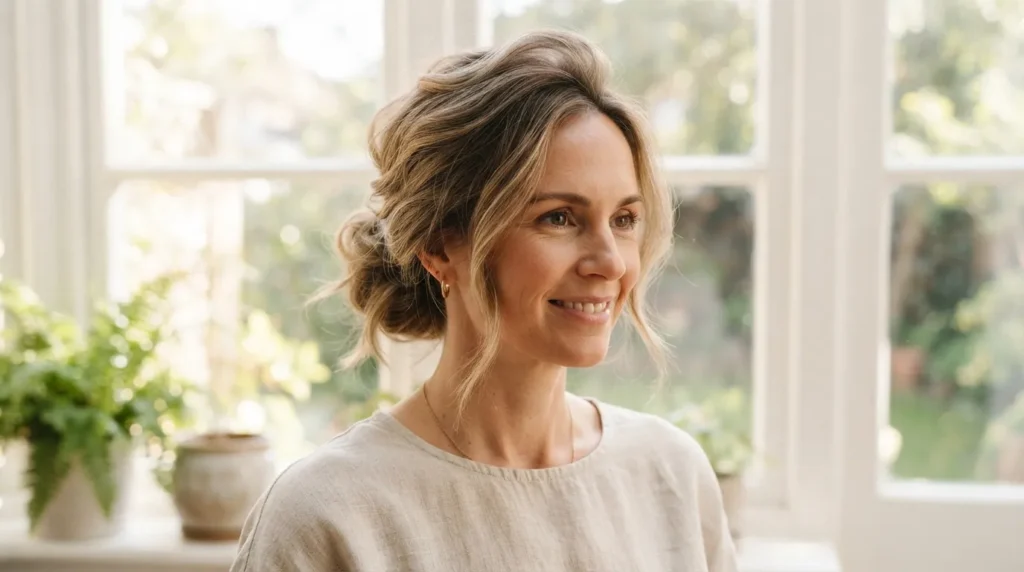

Thin hair can feel impossible to work with some mornings, especially when every bun ends up flat and stringy by noon. The good news is that a bun does not have to mean tight and sad looking. With the right technique, a few small tools, and a little backcombing know how, you can turn fine strands into a bun that actually looks full. This list walks through twenty five bun styles built specifically for thin hair, from quick everyday knots to dressed up updos for special occasions. Each one focuses on adding shape and lift instead of letting your hair disappear into itself. Grab your bobby pins and let’s get into it.
1. Textured Top Knot with Backcombing
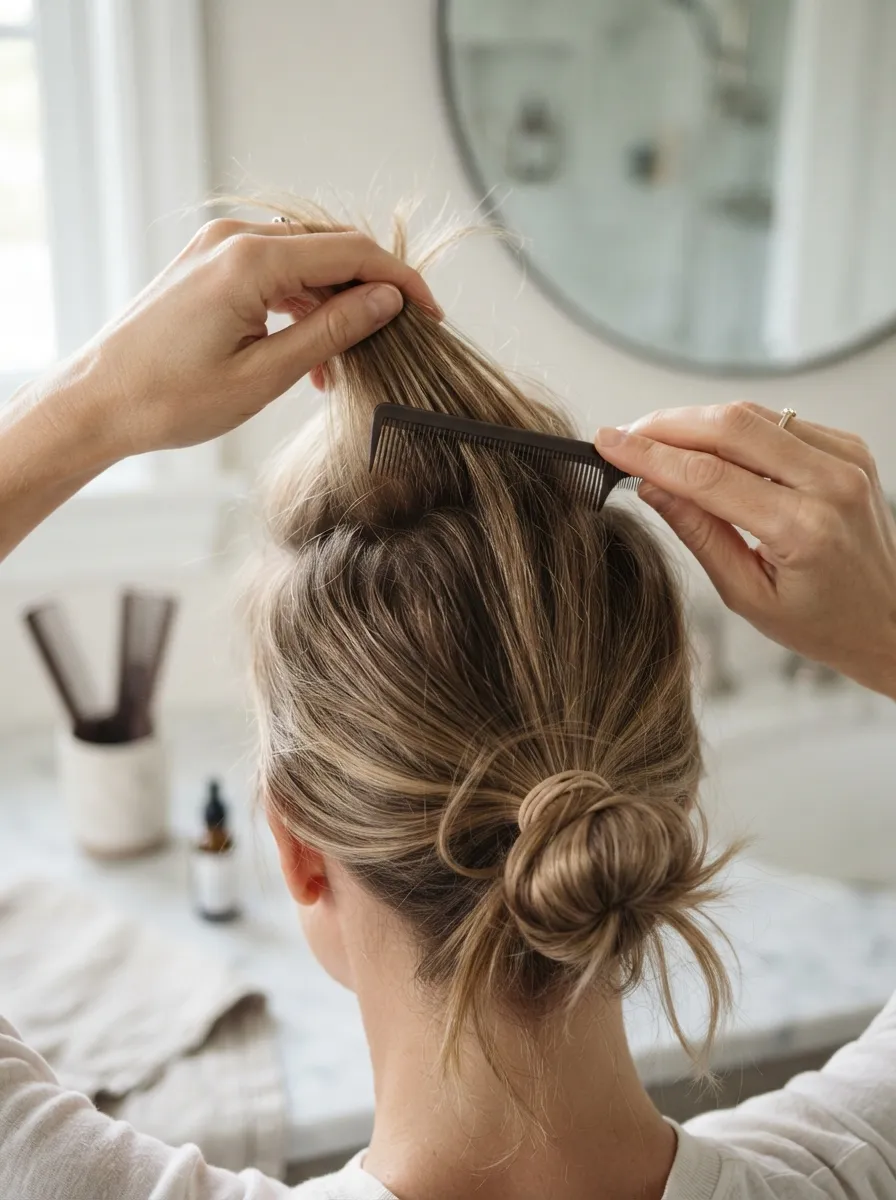
A textured top knot is one of the easiest ways to fake density on fine hair. Start by sectioning off the top two inches of hair at the crown and backcombing it gently with a fine tooth comb. This little bit of teasing creates a base that holds volume without needing extra product. Once you have that lift, gather all your hair up into a high ponytail and twist it around itself into a knot, letting a few loose ends stick out for texture. Secure it with two crisscrossed bobby pins instead of just one, since thin hair slips out of a single pin fast. A tiny bit of texturizing spray on the ponytail before you twist helps the knot grip itself better. This style takes under five minutes and works well for gym days, errands, or a casual coffee run. If your bun looks too smooth, pull a few pieces loose around your face for a softer finish.
2. Low Bun with a Bubble Wrap Technique
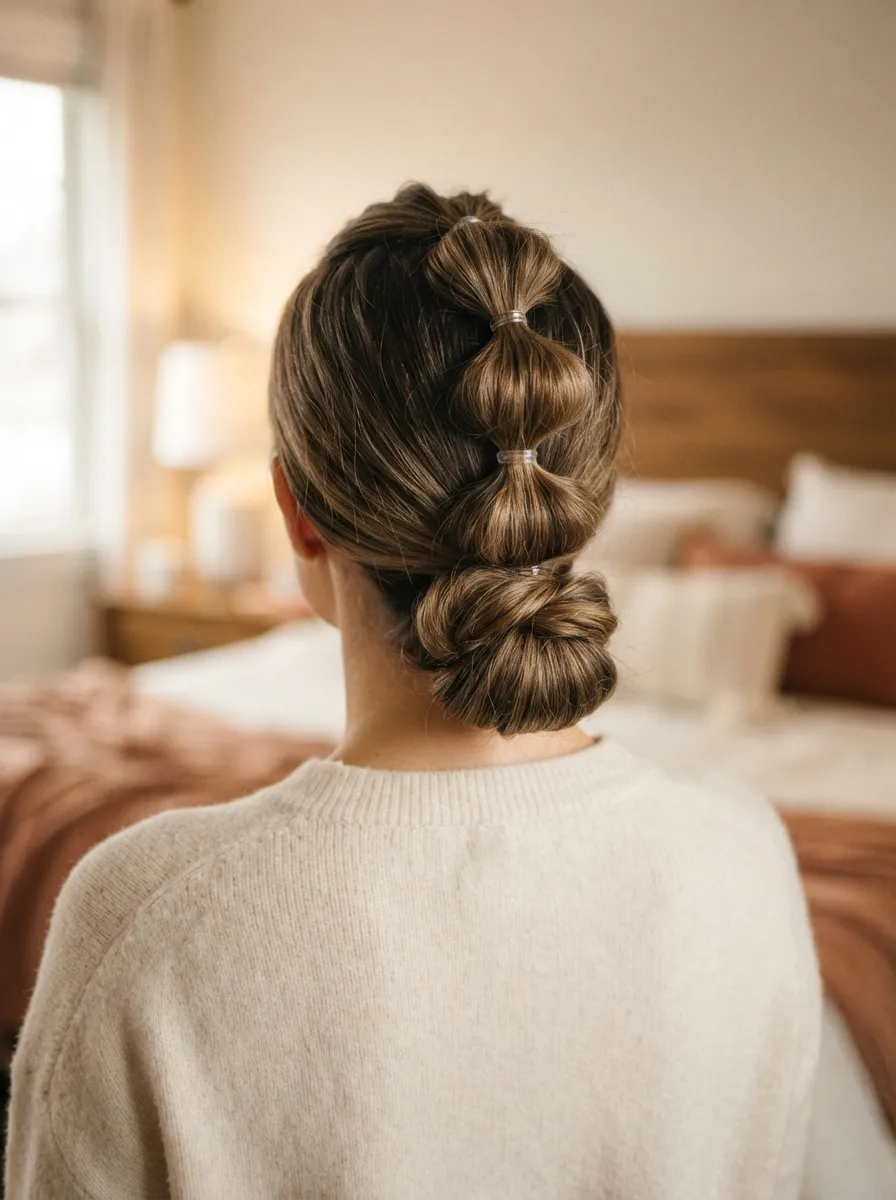
The bubble technique is a clever trick that makes thin ponytails look thicker without any teasing at all. Gather your hair into a low ponytail at the nape of your neck, then add small clear elastics every inch and a half down the length, gently pulling each section outward to create a bubble shape. Once you reach the ends, coil the whole bubbled tail around the base and pin it flat to form a bun. The segmented sections trick the eye into seeing more hair than you actually have. This works especially well with second or third day hair since the slight grease helps the elastics stay put. If you are looking for elegant Vacation Hairstyle Ideas, this bubble bun is a practical choice because it is easy to create, stays secure throughout the day, and looks polished with minimal effort. A light shine spray at the end keeps flyaways under control without weighing the bun down.
3. Braided Crown Bun for Extra Fullness
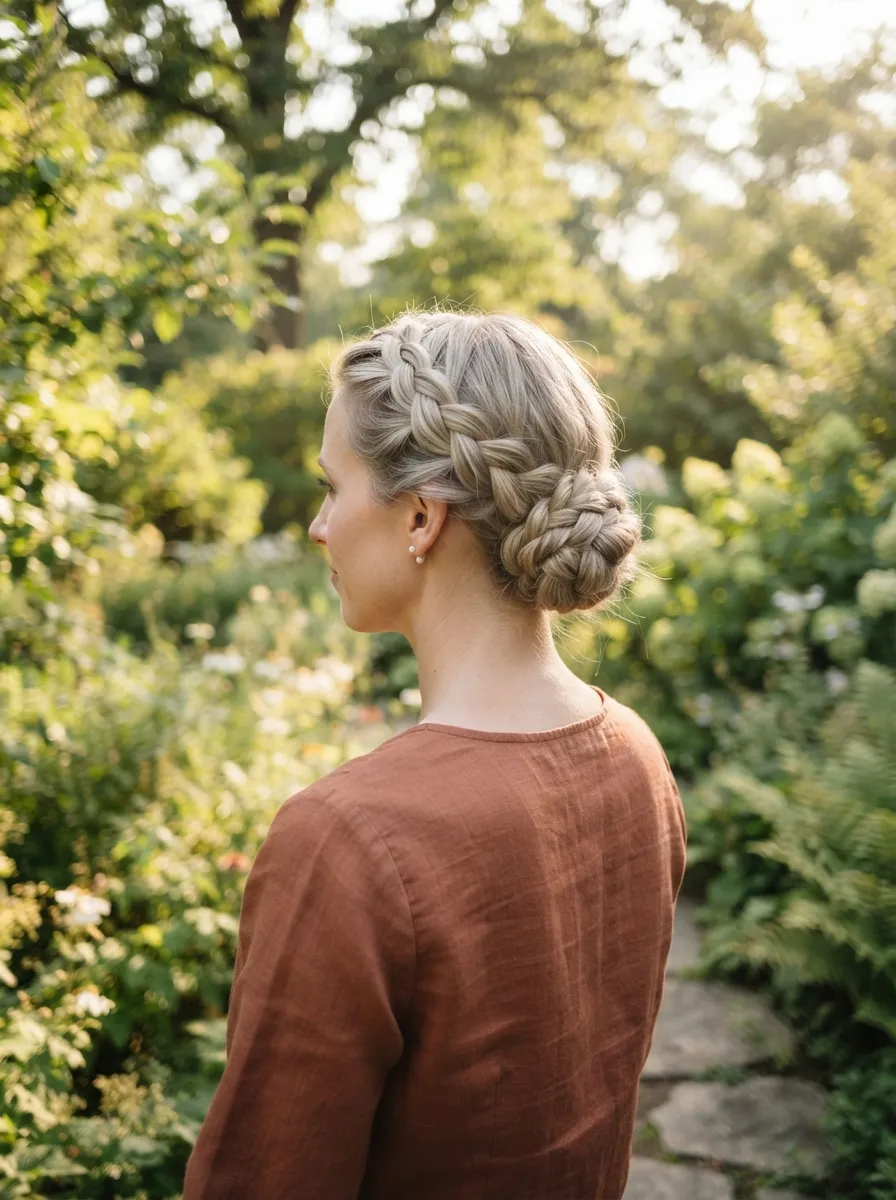
Braids are your best friend when your hair lacks natural body. For this style, take a section of hair from your part and create a simple three strand braid running along your hairline like a crown, pinning it back as you go. Once the braid meets the rest of your hair at the back, gather everything into a low bun and tuck the braid’s tail into the base to hide the end. Braided strands naturally have more texture and width than smooth hair, so this instantly reads as fuller. It also keeps shorter face framing pieces out of your eyes, which is a nice bonus. This look is great for a weekend brunch or a casual date since it feels a little more done up than a plain bun. If your hair is prone to slipping, a dab of dry wax on the braid before you start helps it hold shape all day.
4. Messy Bun with Velcro Rollers First
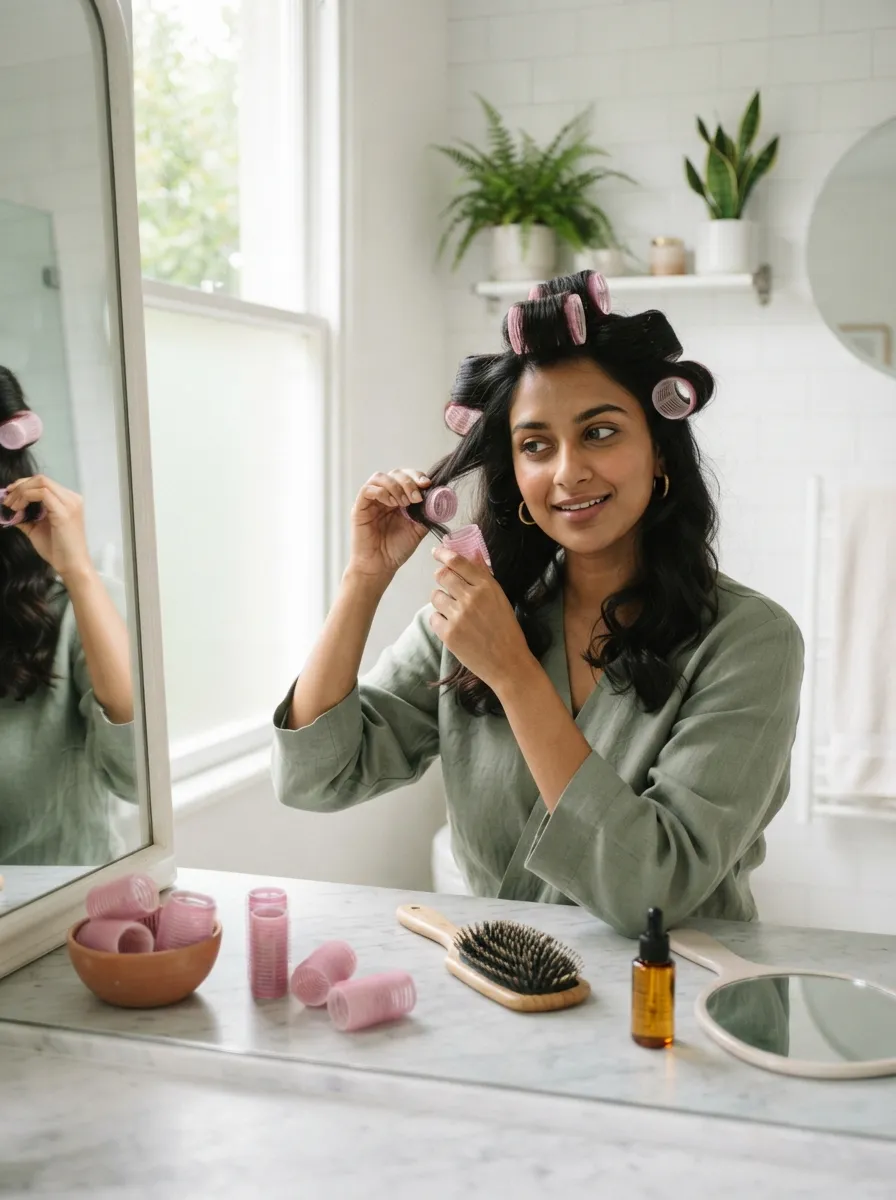
If you have a few extra minutes, velcro rollers can completely change how your bun looks. Set two or three rollers at your crown and roll your hair away from your face, leave them in for about ten minutes while you get dressed or do your makeup, then remove them and brush through gently. This lifts the roots just enough that your bun sits higher and looks rounder instead of flat against your head. Once the rollers are out, gather your hair into a ponytail and twist it into your usual bun shape. The volume from the roots carries through the whole style. This is a great trick before a job interview or a photo heavy event where you want your hair to hold up for hours. Keep a small can of dry shampoo nearby to spray at the roots before rolling, since it adds grip and texture that helps the volume last longer.
5. Double Bubble Bun for a Youthful Look
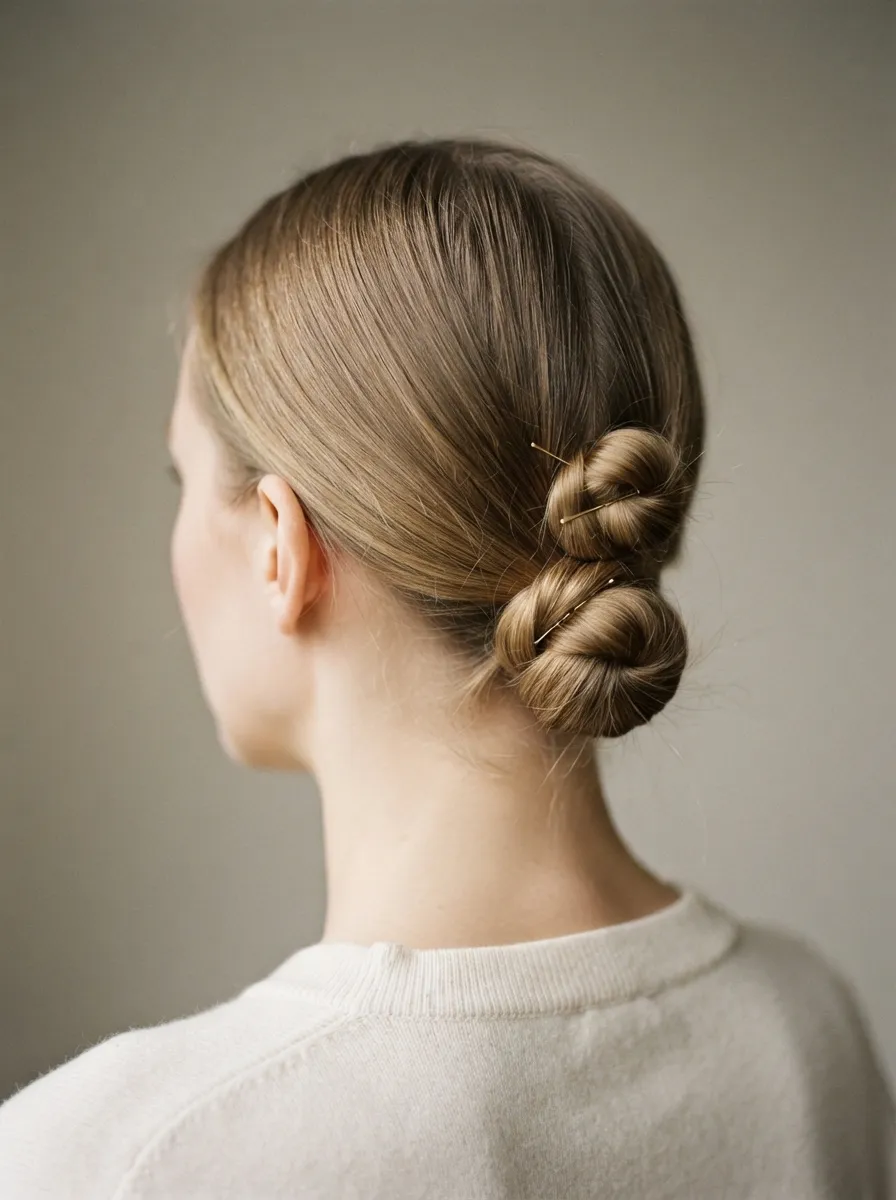
Splitting your hair into two buns instead of one is an underrated trick for thin strands. Part your hair horizontally at the crown, securing the top half into a small bun first, then gather the bottom half into a second bun just beneath it. Stacking two smaller buns creates more visual dimension than cramming all your hair into a single knot, which can look sparse on fine hair. This style works particularly well for second day hair with a bit of natural texture already built in. It also feels a little more playful, so it is a nice option for a casual outing with friends or a laid back weekend. Use small clear elastics for each section since thicker elastics tend to slide off thin hair. Finish with a light mist of texturizing spray on both buns to soften the shape and reduce shine.
6. Slicked Back Bun with Gel for Sleek Volume
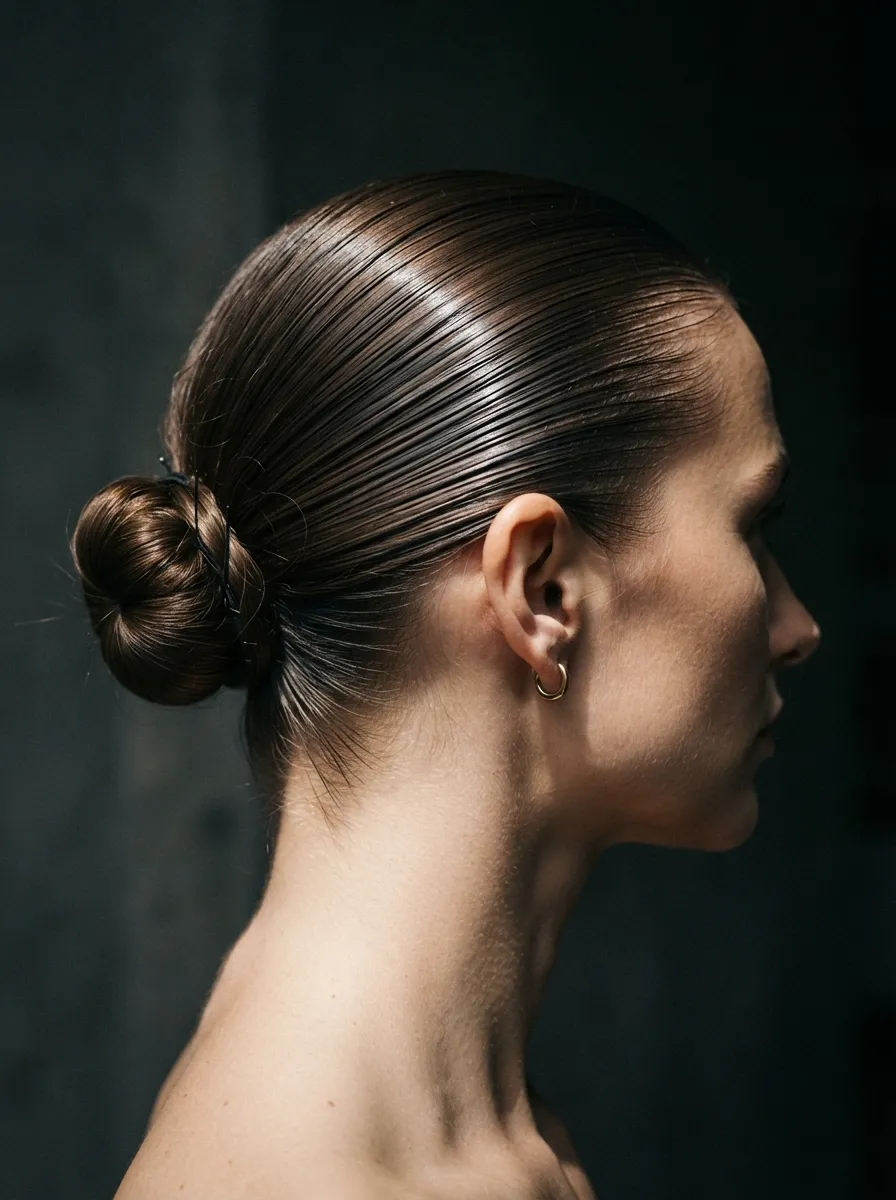
Sometimes the best move for thin hair is to lean into sleekness instead of fighting for volume everywhere. Apply a small amount of strong hold gel to damp hair and comb it straight back from your face, smoothing out any bumps along the part. Gather everything into a high ponytail, then wrap it into a tight bun and pin securely. The trick to making this look intentional rather than flat is adding a few loose strands near the temples that you curl slightly with a small iron for softness. This style photographs beautifully and works well for professional settings like interviews or client meetings. It also holds up through humidity better than looser styles since the gel keeps everything locked in place. A boar bristle brush helps distribute the gel evenly without clumping.
7. Half Up Bun with Face Framing Layers

A half up bun is forgiving for thin hair because you are only working with a portion of your strands, which naturally looks denser than trying to gather everything at once. Take the top section of your hair, about the width of your part, and twist or tease it slightly before securing it into a small bun at the crown. Leave the rest of your hair down, letting your natural layers frame your face. This style balances structure and softness, making it a great option for running errands or a casual work day where you still want some shape. If your ends look thin or wispy, a light curl with a one inch wand adds just enough texture to the bottom half to match the fullness up top. Keep the bun itself small and rounded rather than stretched, since a tiny tight bun tends to look fuller on fine hair than a large loose one.
8. Twisted Rope Bun for Added Texture
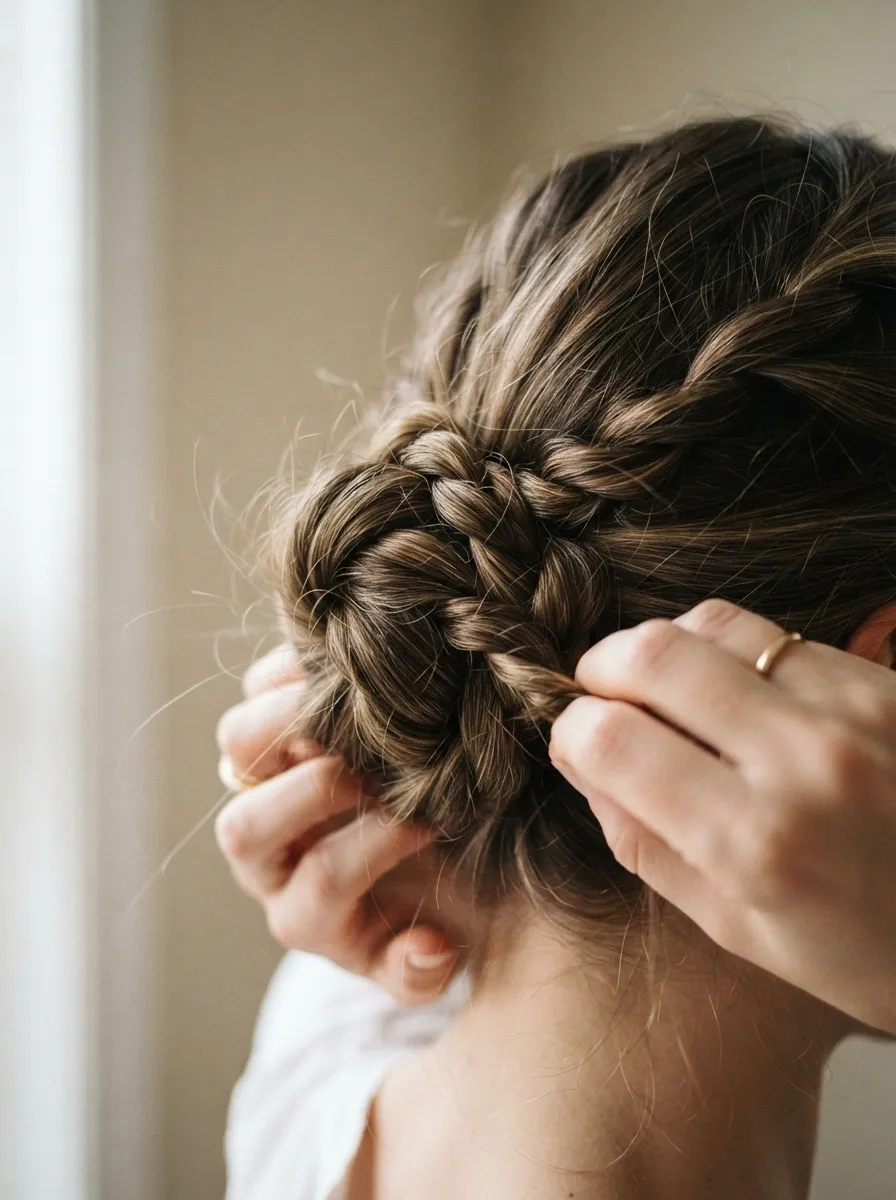
Rope twists create natural texture that plain hair often lacks. Split your ponytail into two sections, twist each one individually in the same direction until it starts to kink, then twist the two sections around each other in the opposite direction. This rope effect adds ridges and dimension that catches the light differently than a smooth bun would. Once twisted, coil the rope around the base of your ponytail and pin it down securely. This style holds up surprisingly well through a full day since the twisted structure resists slipping compared to a simple wrap. It is a good pick for a casual work shift or a long day of travel when you need something that will not need constant fixing. A small amount of texturizing paste on your palms before you twist helps the strands grip each other better.
9. High Bun with Poufed Crown for Volume
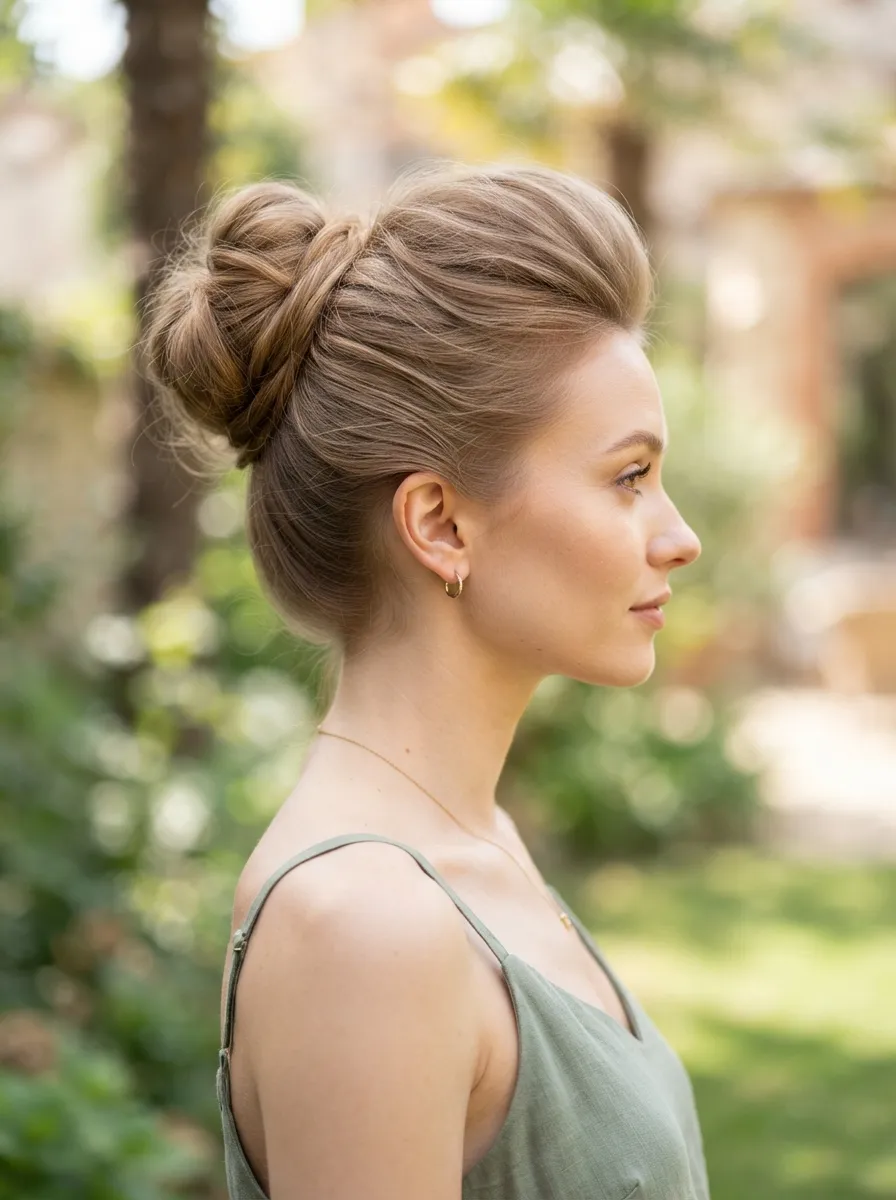
A poufed crown is one of the simplest fixes for a bun that looks deflated. Before gathering your hair up, use your fingers or a rat tail comb to gently push the roots at your crown upward, creating a small pouf, then mist it lightly with hairspray to hold the shape. Smooth your hand over the surface just enough to keep it looking neat rather than teased, then pull the rest of your hair into a high ponytail and twist it into a bun. The pouf gives the illusion of a much thicker base even though the actual bun stays small. This works great for nights out or events where you want your hair to look polished from every angle. If you are worried about the pouf collapsing, a bit of dry shampoo at the roots beforehand gives it extra grip and staying power.
10. Low Twisted Bun for Office Days

For a workday look that stays neat without feeling severe, a low twisted bun is a reliable choice. Gather your hair at the nape of your neck, twist the ponytail tightly, and wrap it around itself into a low knot, pinning it flat against your head. The tight twist gives fine hair a bit of texture and grip that a plain wrap does not, helping the bun hold its shape through hours of meetings or desk work. This style also tends to stay put better than looser buns since there is less bulk to shift around. Pair it with a simple headband or a few bobby pins tucked along your part for a slightly more finished look. It takes only a couple of minutes, which makes it ideal for rushed mornings before work when you still want to look put together.
11. Curly Bun Using a Curling Wand First
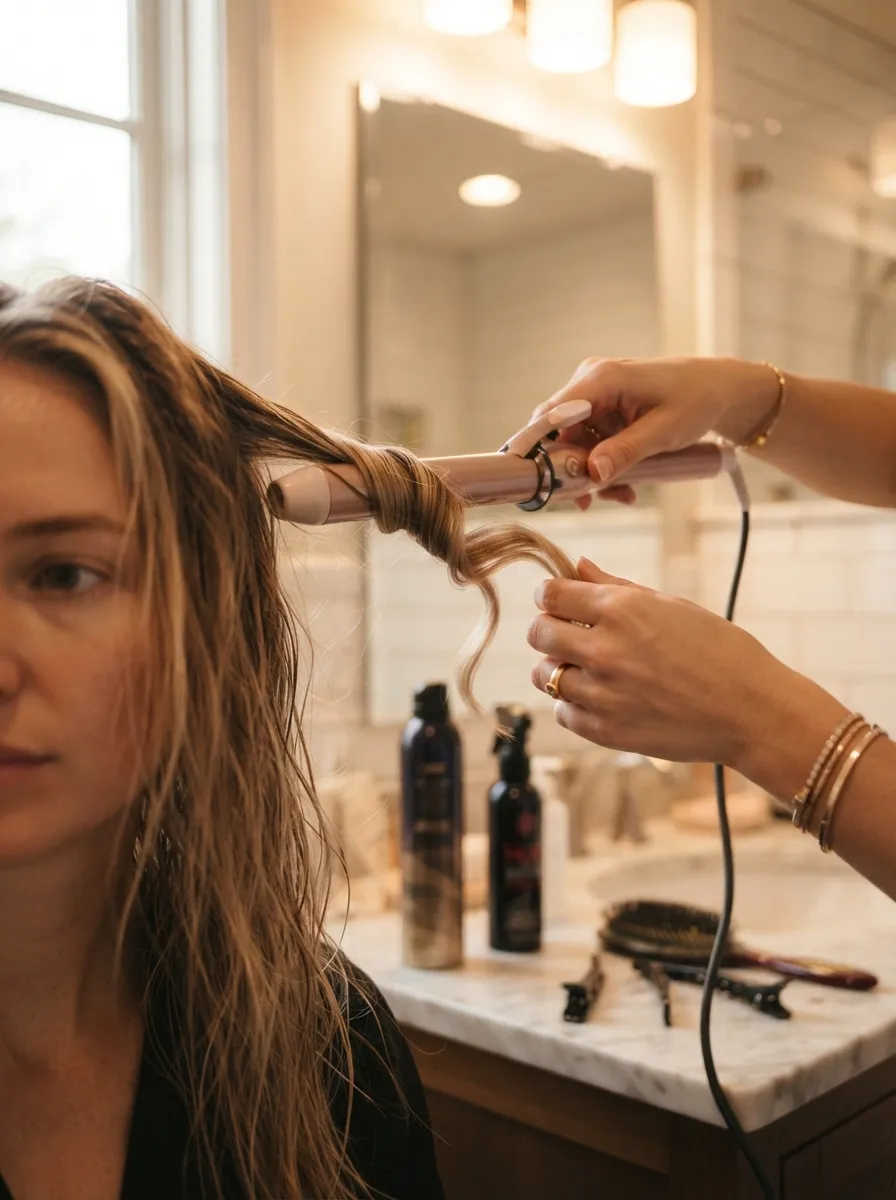
Curling your hair before putting it up sounds like an extra step, but it makes a real difference in how full your bun looks. Run a one inch wand through your hair in loose sections, letting the curls cool completely before you touch them. Once cooled, gather your hair into a ponytail and twist it into a bun as usual. The curled strands take up more physical space than straight hair, so your bun ends up looking noticeably rounder and thicker. This trick works especially well for special occasions like weddings or parties where you want extra polish. It also means any loose pieces that fall out during the day will still have shape instead of hanging flat. A light hold hairspray on the curls before styling helps them keep their texture even after being wrapped into the bun.
12. Bandana Wrapped Bun for a Boho Touch
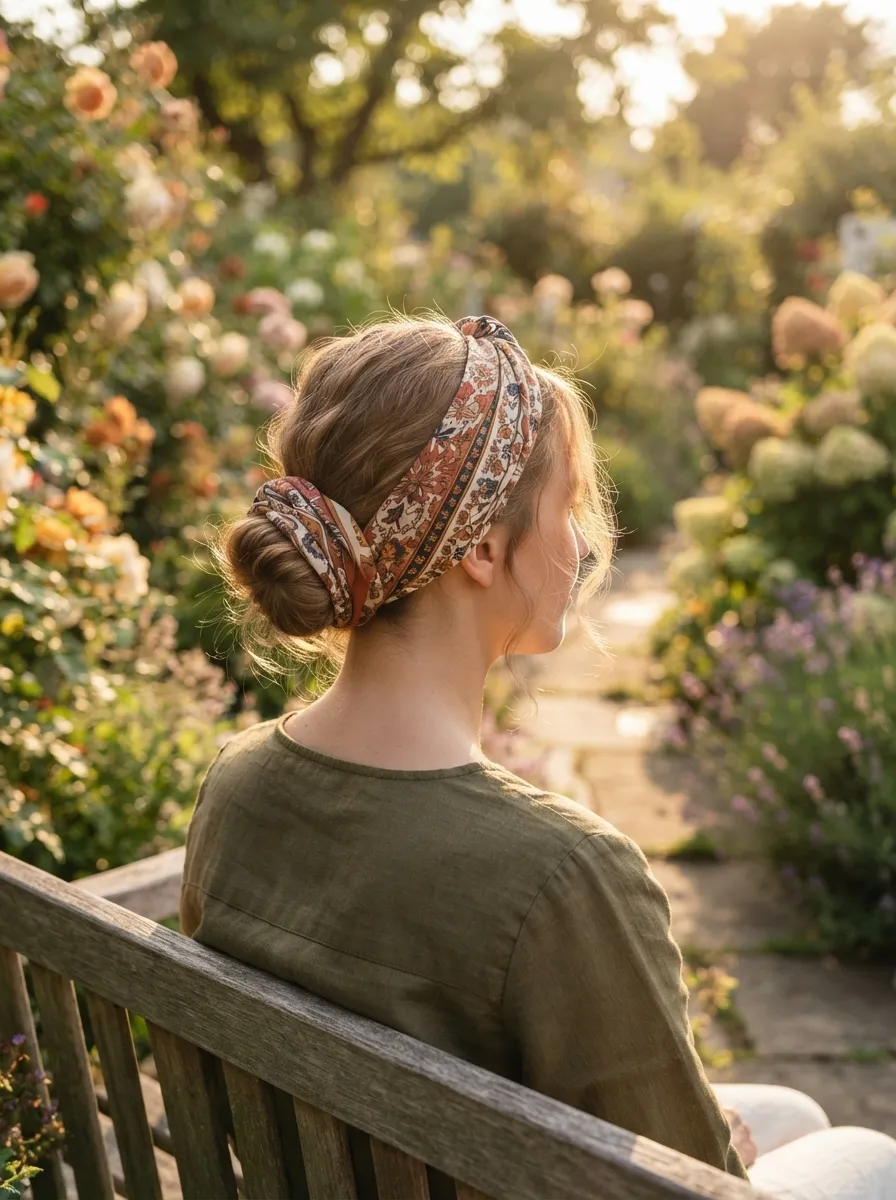
A bandana adds instant personality and visual fullness to a simple bun. Twist your hair into a low bun as you normally would, then fold a bandana into a strip and wrap it around the base, tying it in a small knot or bow. The fabric covers any thin spots at the base of the bun and adds color and pattern that draws the eye away from sparse areas. This style is perfect for a summer outing, a festival, or just a fun weekend look that feels a little different from your usual routine. It also doubles as a practical fix for second or third day hair since the bandana hides roots that might otherwise look greasy. Try coordinating the bandana with your outfit for a pulled together feel without much extra effort.
13. Chignon Bun for Formal Occasions
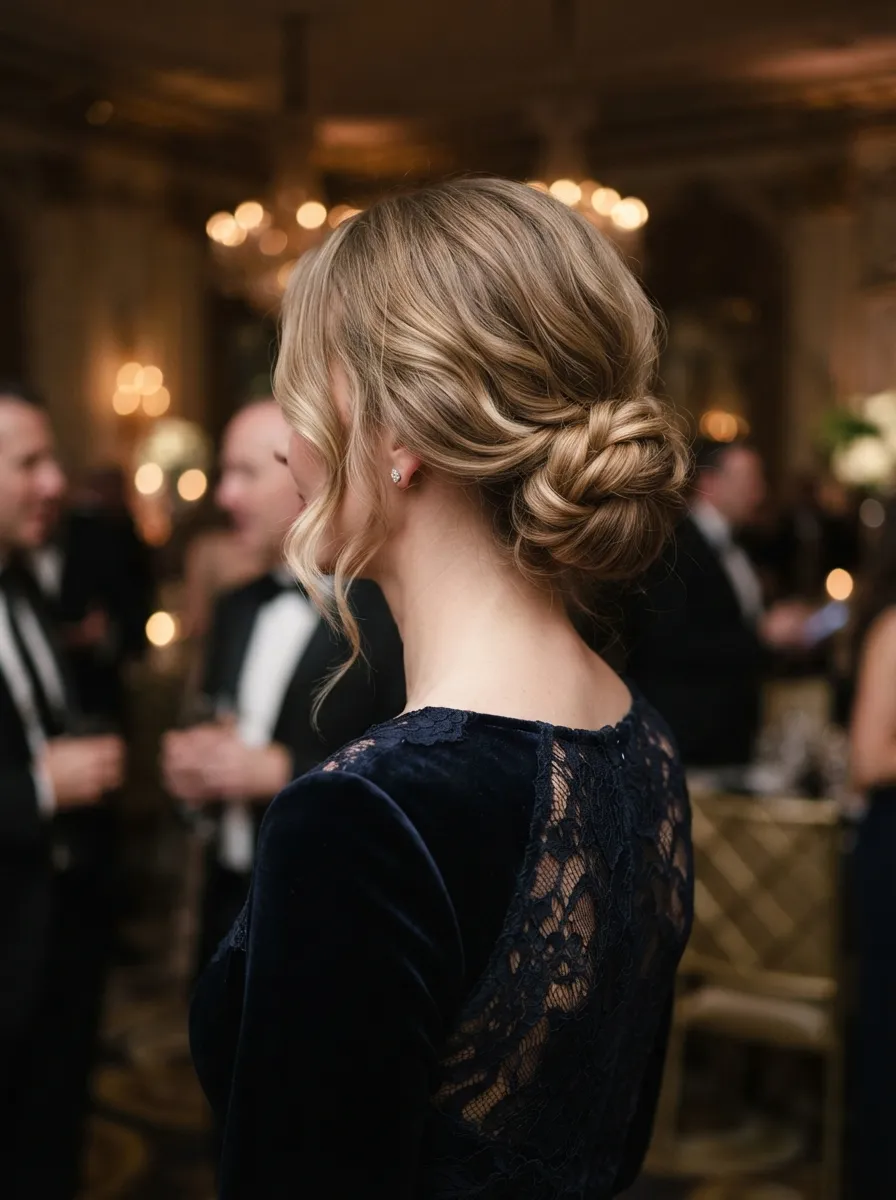
A chignon is a classic choice when you want something elegant without overcomplicating your styling routine. Smooth your hair back into a low ponytail, then fold the ponytail upward into itself rather than wrapping it around, tucking the ends under and pinning them in place. This creates a flatter, more sculpted shape than a typical round bun, which tends to photograph better and suits formal outfits like dresses or blazers. Because the style relies on smoothness rather than volume, it is naturally forgiving for thin hair that does not hold texture well. Use a smoothing serum before you start to control flyaways, and finish with a strong hold spray so it stays intact through a long event. This is a dependable pick for weddings, dinners, or any occasion where you want a refined look that does not require much maintenance once it is set.
14. Space Buns for a Playful Everyday Look
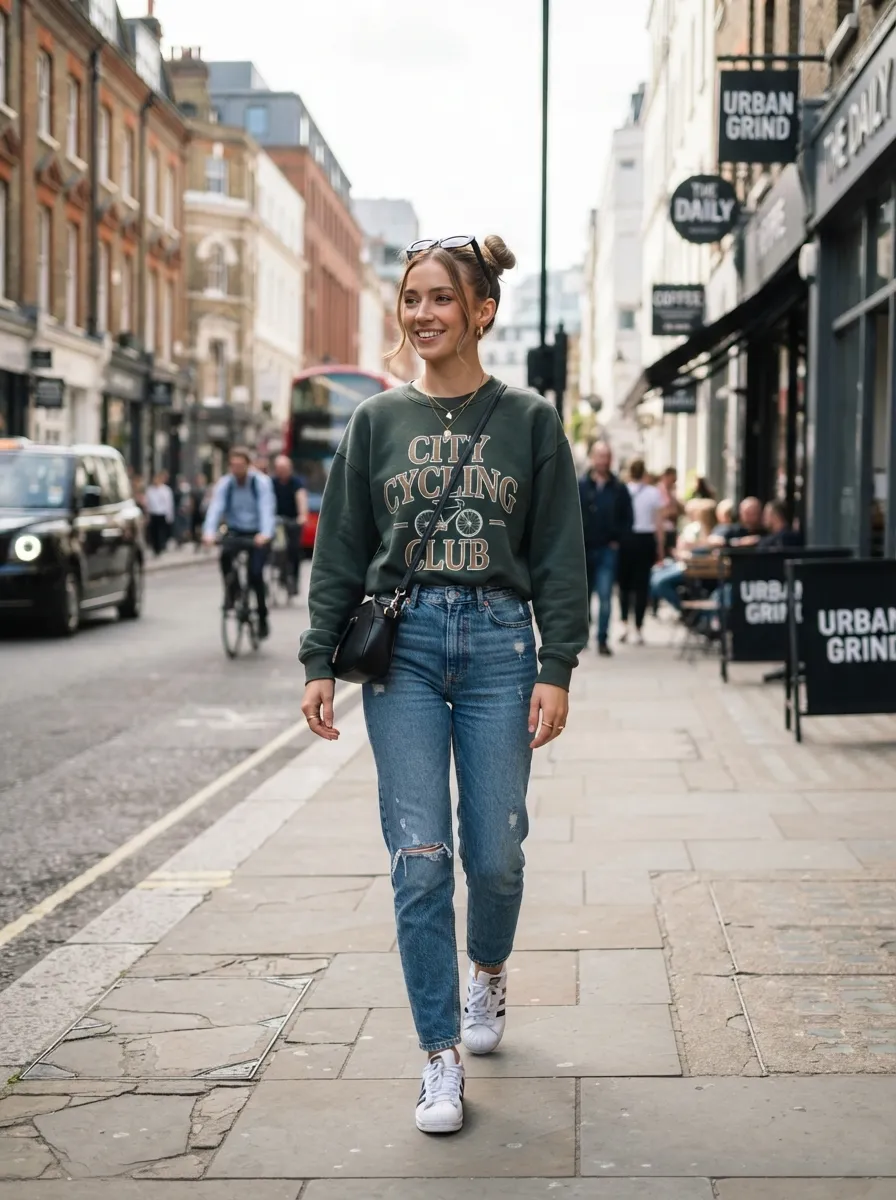
Space buns bring a fun, youthful energy to thin hair while also making it look fuller through the simple trick of dividing your hair into two sections instead of one. Part your hair down the middle, gather each side into its own ponytail, and twist each into a small round bun. Because each bun only has to hold half your hair, they naturally look denser than a single large bun would with the same amount of hair. This style works well for casual days, workouts, or even music festivals where you want something low maintenance but still eye catching. If your buns feel too smooth, backcomb each ponytail slightly before twisting for a bit more texture. Securing each bun with a small elastic first and then pins on top keeps them from sagging throughout the day.
15. Sock Bun Method for Instant Fullness
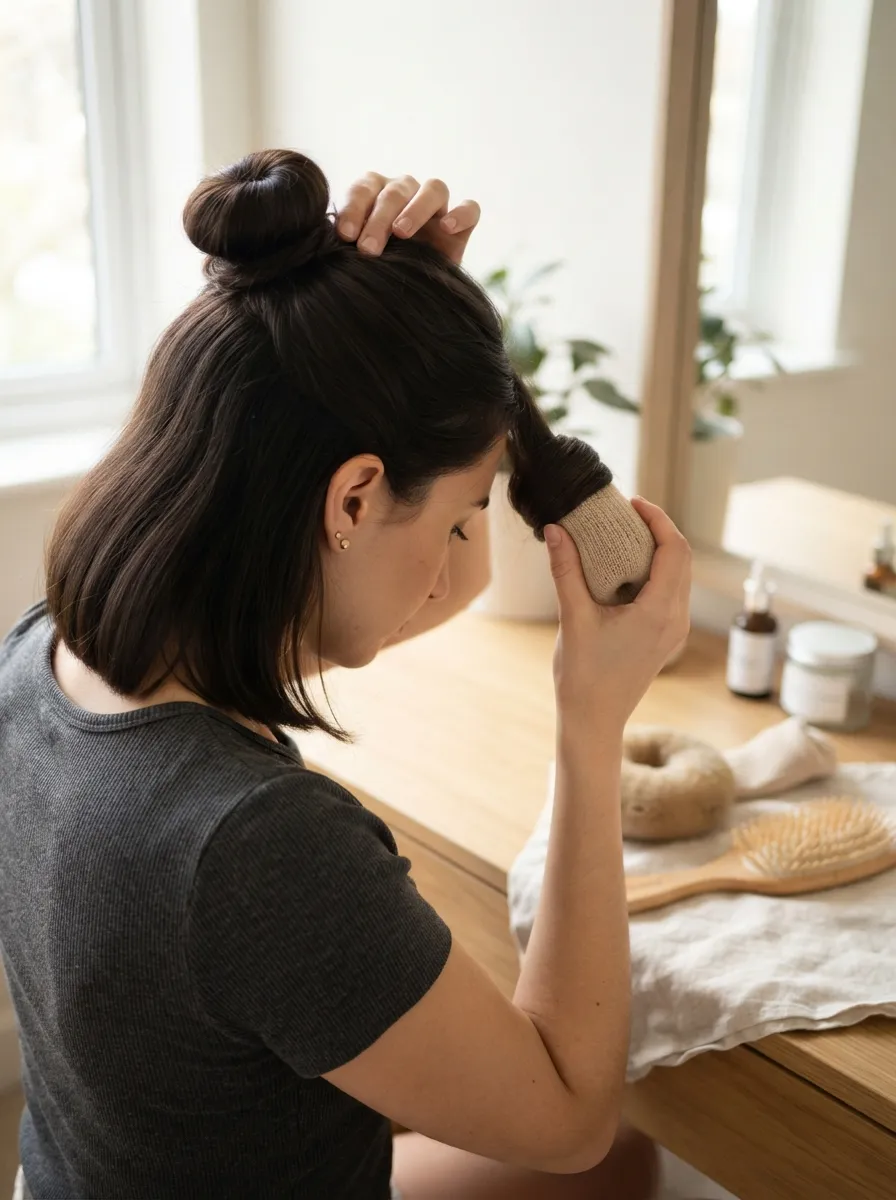
The sock bun trick, using either an actual sock or a foam hair donut, is one of the most effective ways to add fake volume for thin hair. Pull your hair into a ponytail, thread it through the donut, and spread your hair evenly around the foam ring, tucking and pinning the ends as you go. The donut acts as a base that fills out the bun from the inside, so even fine hair looks full and round on the outside. This method takes a little practice but once you get the motion down, it becomes a quick five minute routine. It is especially useful for special occasions or photos where you want a bun that looks noticeably fuller than your natural hair would allow. Look for a donut that matches your hair color so any small gaps are less noticeable.
16. Bun with Face Framing Curls Left Out
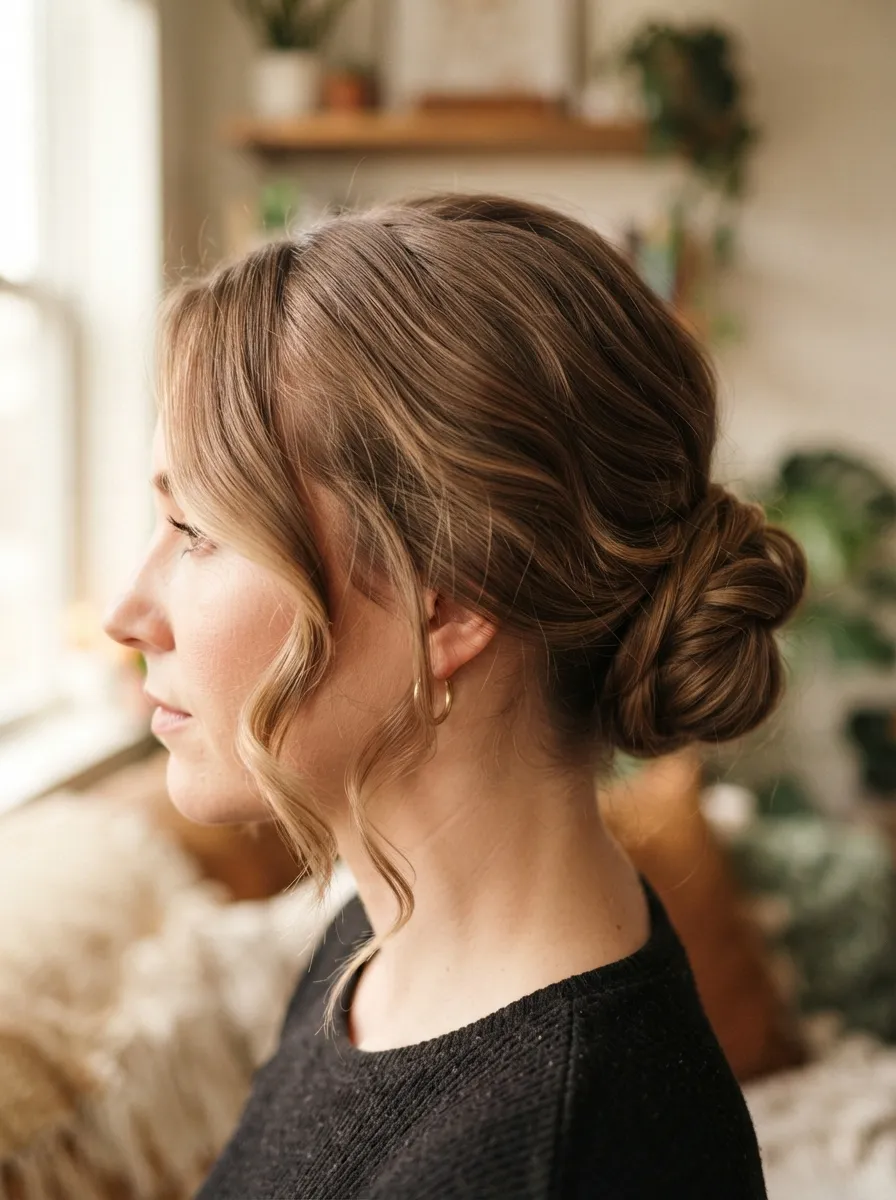
Leaving a few pieces out around your face is a small change that makes a big visual difference. Before gathering your hair into a bun, pull out two thin sections near your temples and set them aside. Style the rest of your hair into your usual bun, then curl the face framing pieces with a small wand for soft waves that fall naturally along your jawline. This softens the overall look and draws attention to your face rather than the thinness of your bun. It works well for date nights or casual dinners where you want a bit of romance without a fully done hairstyle. A dab of light hold cream on the curled pieces keeps them from going flat or frizzy as the evening goes on.
17. Wrapped Ponytail Bun with Ribbon
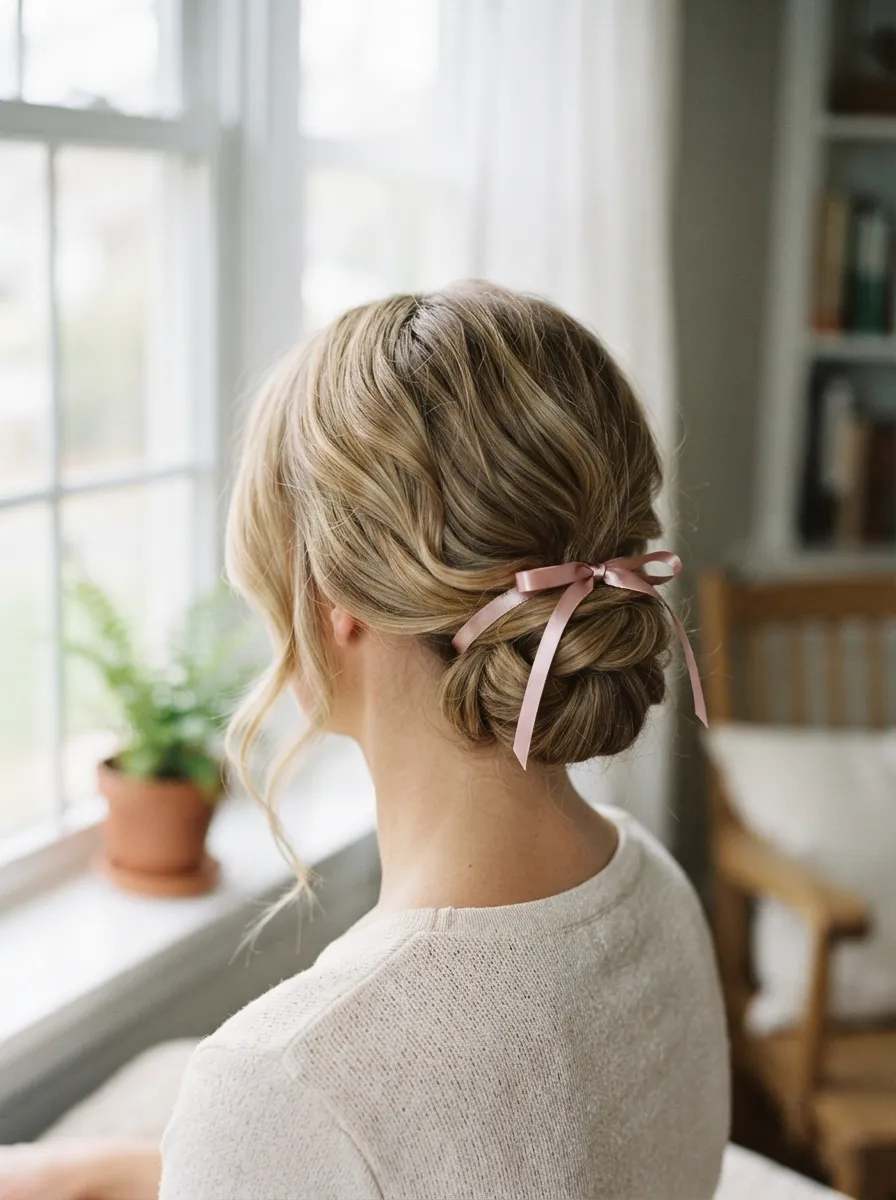
A ribbon wrapped around the base of your bun is a simple styling trick that adds color, texture, and a bit of visual weight to thin hair. After twisting your hair into a bun and securing it with pins, wrap a thin satin ribbon around the base several times, tying it into a small bow or knot at the end. The ribbon covers any sparse areas at the base while adding a decorative touch that feels a little more special than a plain bun. This look is popular for birthdays, brunches, or any occasion with a slightly dressed up feel. Choose a ribbon color that complements your outfit for a coordinated finish. It is also a great trick for kids or teens with thin hair since it adds personality without requiring complicated technique.
18. Loose Bun with Waves for Beach Days
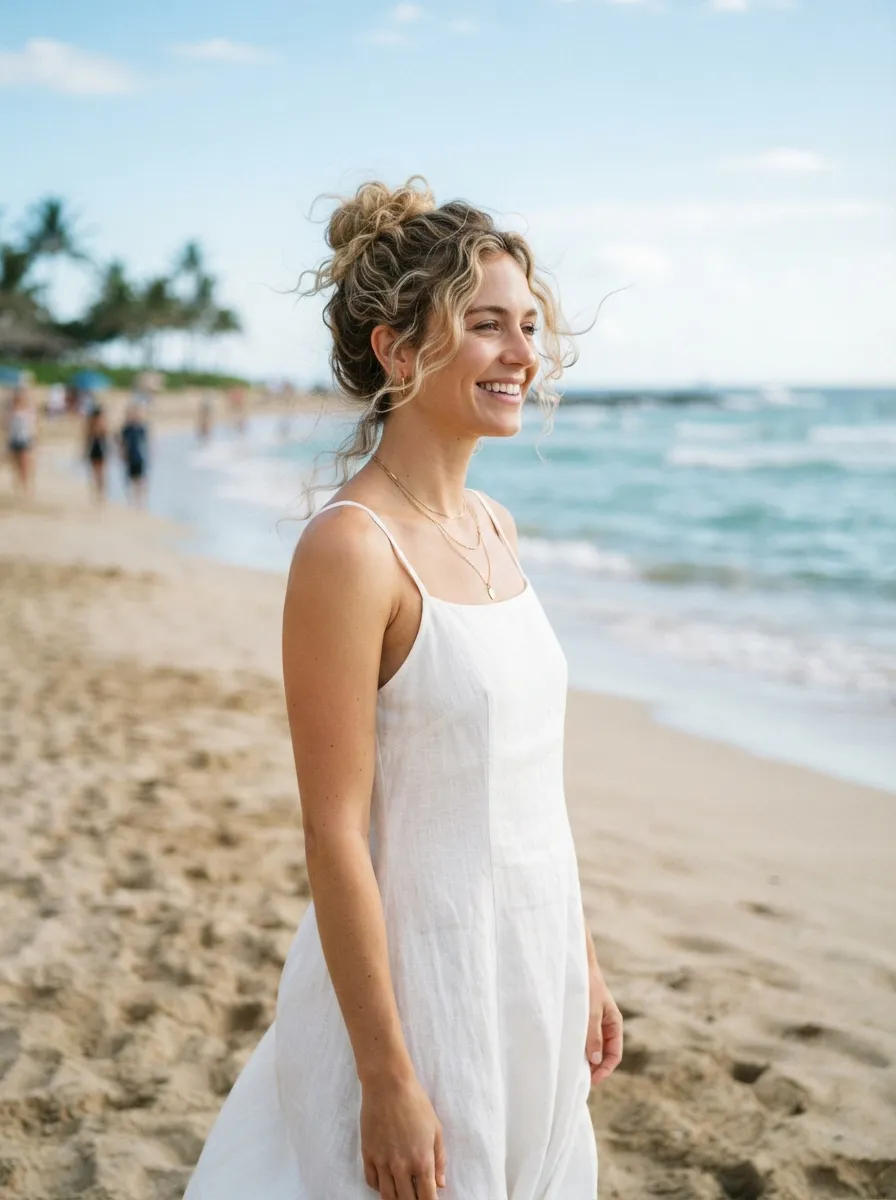
For a relaxed, undone look, a loose bun paired with beachy waves works beautifully on thin hair. Apply a texturizing sea salt spray to damp hair and let it air dry or scrunch it lightly for natural wave, then gather your hair loosely at the back and twist it into a soft bun without pulling too tight. Leave a few strands hanging loose around your face for that effortless, just came from the beach feel. Because the waves add texture throughout, the bun looks fuller and more relaxed than a tightly pulled version would. This style is ideal for vacations, pool days, or casual summer outings where a polished updo would feel out of place. A little bit of salt spray on the bun itself once it is secured helps hold the slightly undone texture through humidity and wind.
19. Bun with a Deep Side Part for Drama
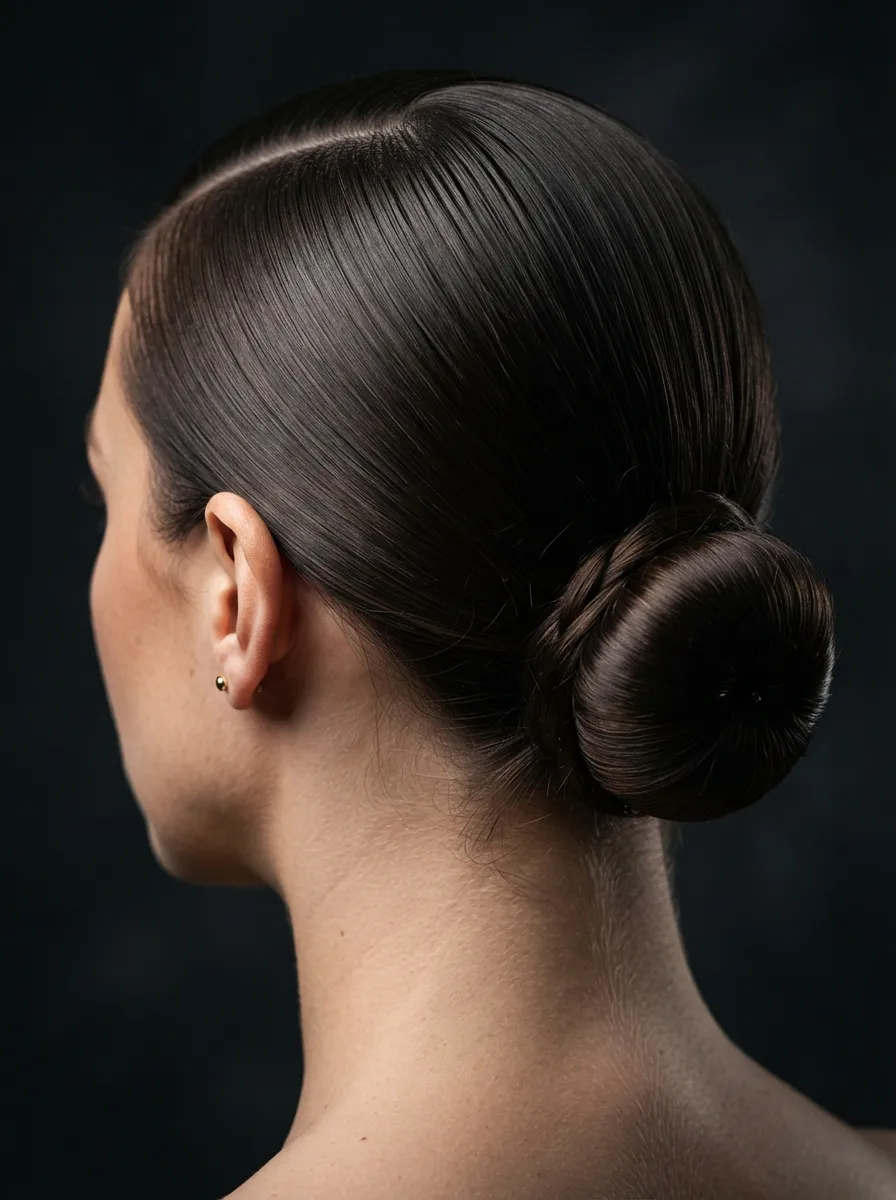
Changing your part can completely shift how full your bun appears. A deep side part creates more visible root lift on one side, which reads as extra volume even without any teasing or product. Part your hair deeply to one side using a fine tooth comb, smooth the shorter side back, and gather everything into your usual low or high bun. The asymmetry draws the eye and adds a bit of drama that a centered part does not offer. This style works particularly well for evening looks or professional headshots where you want your hairstyle to feel a little more intentional. A small clip pinning back the deep part side helps keep it in place if your hair tends to slide back to its natural part throughout the day.
20. Bun with Hair Extensions Clipped In
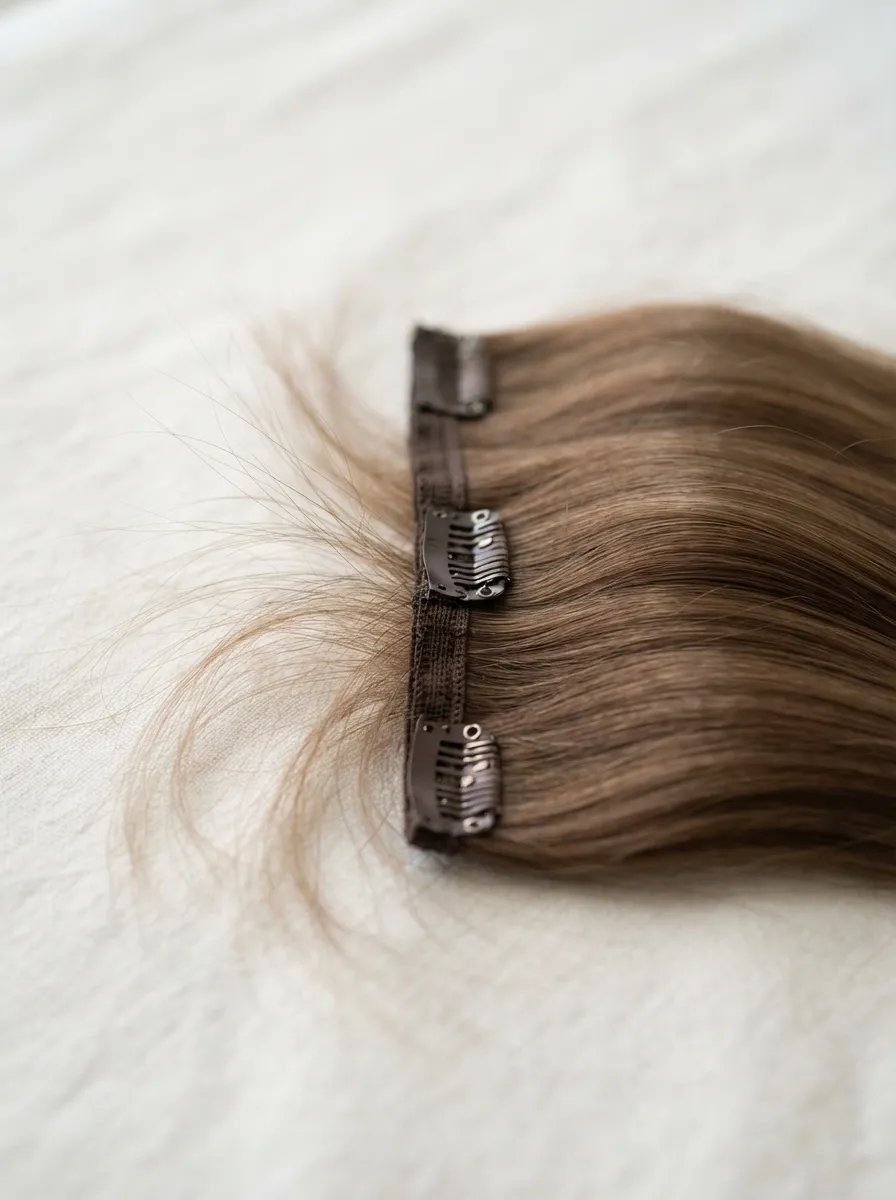
If you want maximum fullness for a special event, clip in extensions can transform a thin bun into something that looks naturally thick. Clip a few wefts into the crown and back sections of your hair before styling, blending them with your natural strands using a brush. Once blended, gather everything into a ponytail and style your bun as usual, whether that is a top knot, chignon, or twisted style. The extensions add both length and width, giving you far more to work with when shaping the bun. This is a great option for weddings, proms, or photoshoots where you want dramatic volume that lasts the whole event. Look for clip ins that match your hair color closely and always blend the seams with a comb so the transition looks seamless.
21. Bun Secured with Multiple Small Elastics
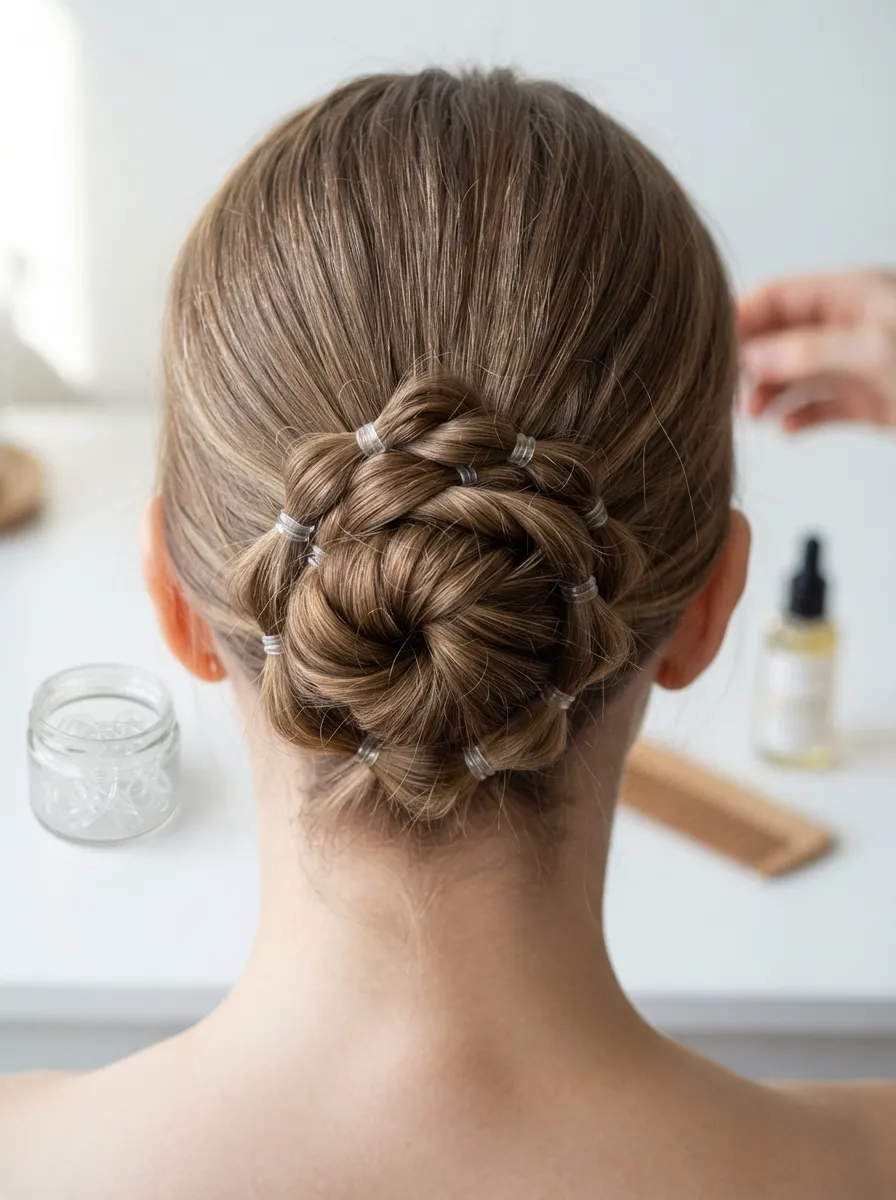
Sometimes the simplest fix for a thin bun is using more than one elastic. Instead of relying on a single hair tie to hold your ponytail and then another to secure the bun shape, wrap two or three small clear elastics around the base of your ponytail before twisting it up. This creates a firmer, more stable foundation that keeps your bun looking rounded rather than collapsing flat within an hour. Twist the ponytail into your bun shape as usual, then pin it down for extra security. This trick works for almost any bun style on this list and takes only a few extra seconds. It is especially helpful if you have naturally slippery or silky thin hair that tends to slide out of a single elastic no matter how tight you make it.
22. Bun with Volumizing Powder at the Roots
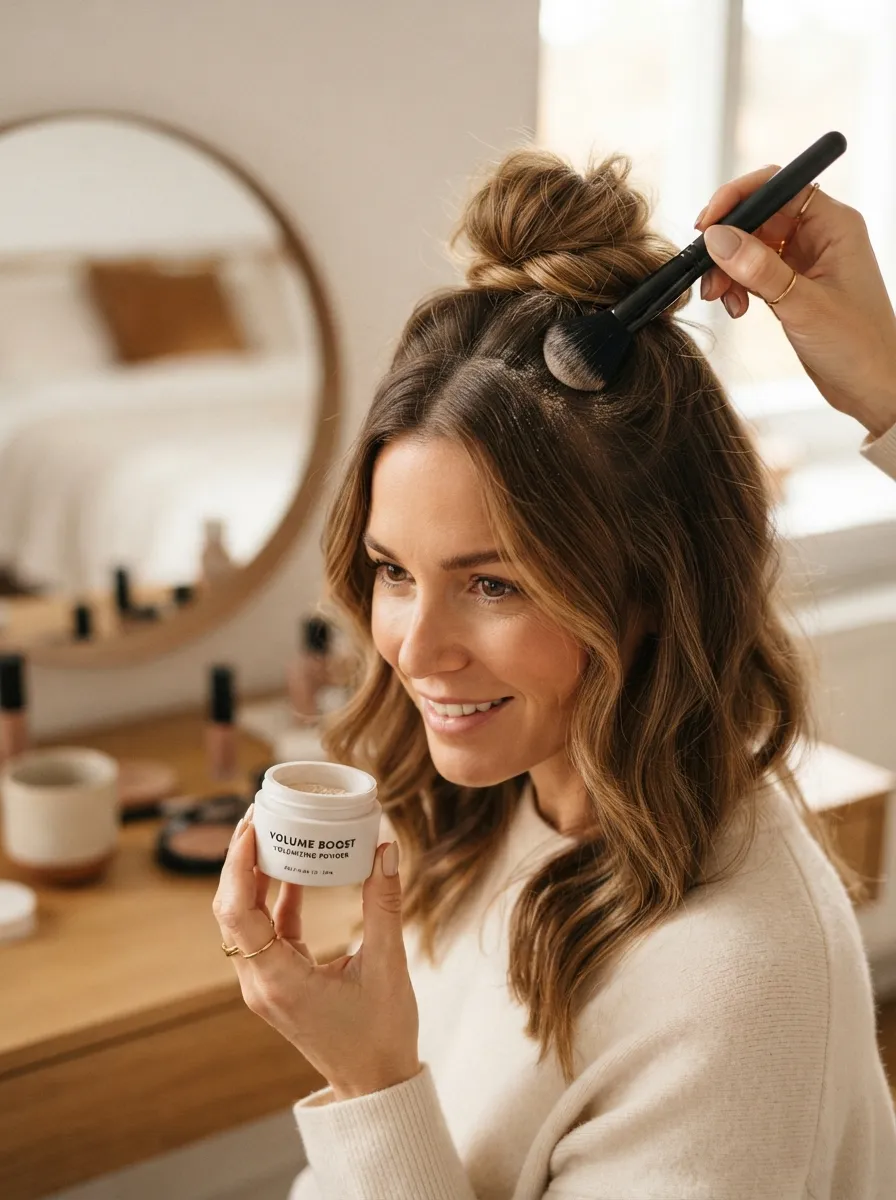
Volumizing powder is a small product that makes a noticeable difference for thin hair buns. Before styling, sprinkle a small amount at your roots and rub it in gently with your fingertips, focusing on the crown area where volume matters most. The powder grips individual strands and adds texture, making it easier to backcomb or pouf your hair without it falling flat right away. Once the roots have some grip, style your bun as you normally would, whether that is a top knot or a low twist. This trick is especially useful on days when your hair feels freshly washed and extra slippery, since clean hair can be harder to hold in place. A little goes a long way, so start with a small pinch and add more only if needed.
23. Bun with a Statement Hair Claw
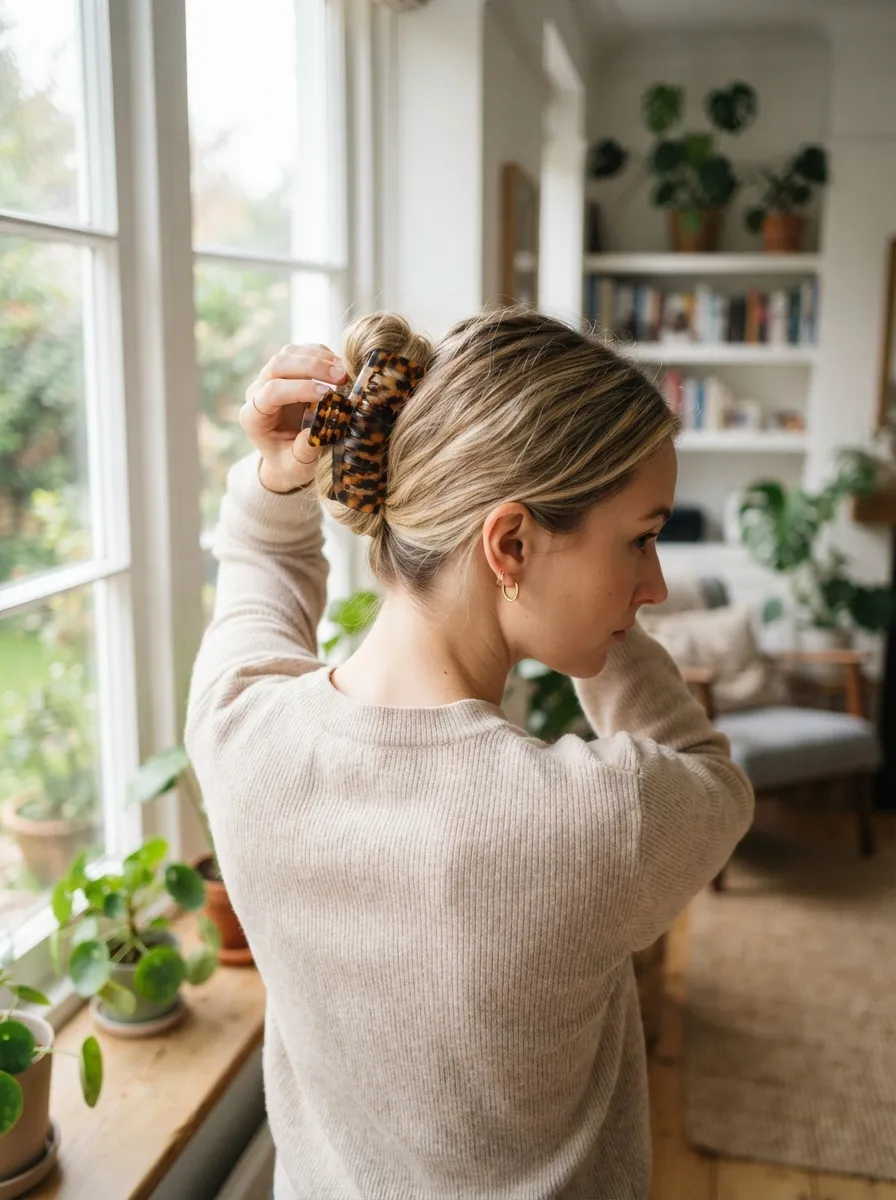
A large hair claw clip can create a bun shape almost instantly while also adding visual bulk that thin hair often lacks. Gather your hair loosely at the back, twist it upward, and clamp a large claw clip horizontally or vertically to hold the twist in place. The clip itself becomes part of the style, adding width and a decorative element that a plain elastic cannot offer. This is one of the fastest options on this list, taking under a minute once you get the twisting motion down. It works well for running errands, school pickups, or any day when you need a quick styling solution that still looks put together. Choose a claw clip in a color that stands out against your hair for a bit of extra visual interest.
24. Bun with Crimped Roots for Texture
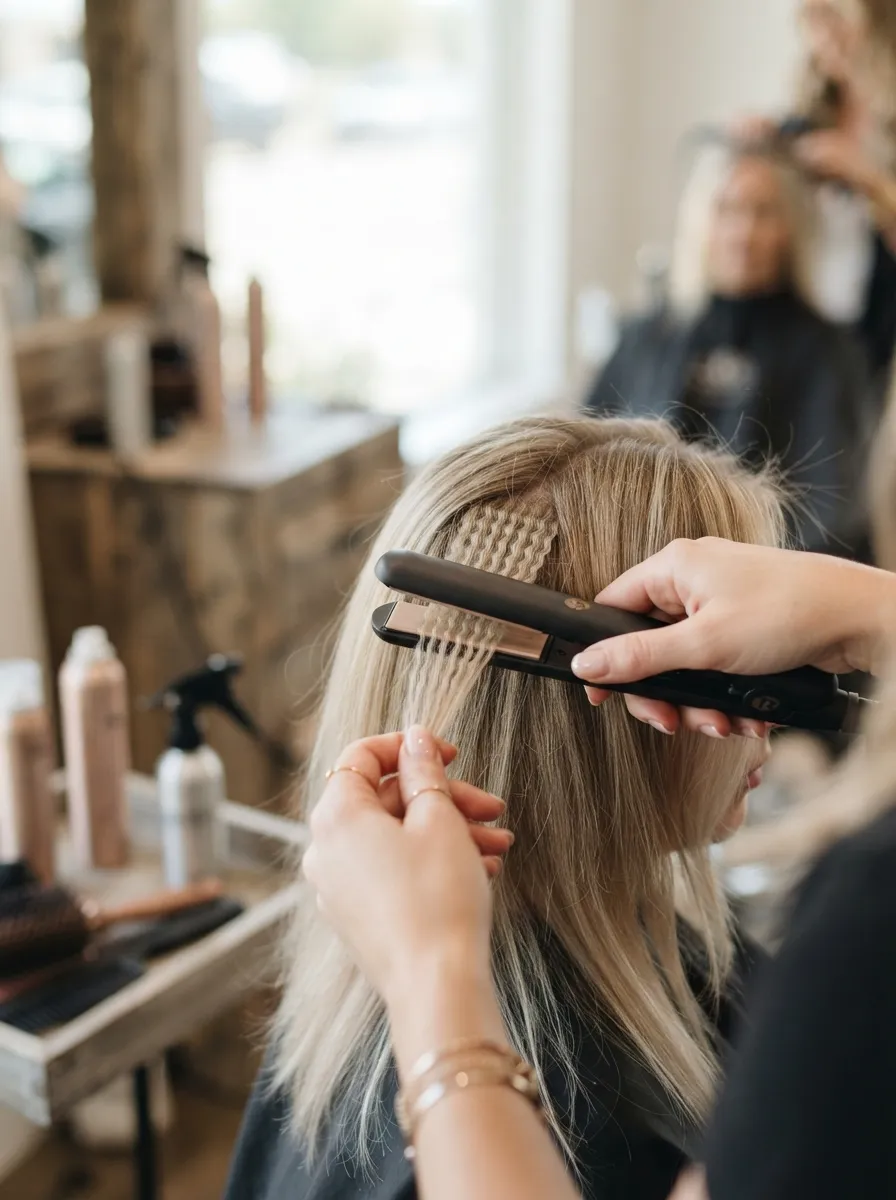
Crimping might feel like a throwback technique, but it works wonders for adding grip and volume to fine hair. Take small sections at your roots and crimp just the first inch or two closest to your scalp, leaving the rest of your hair smooth. This hidden texture at the base gives your bun something to hold onto, preventing it from looking flat once it is pulled up. Gather your hair as usual into a bun after crimping, and the zigzag texture underneath will keep pushing the style outward for extra fullness. Nobody will see the crimped sections once your bun is styled, but you will notice the difference in how full it looks. This trick is great for special occasions when you want your updo to hold its shape for many hours without drooping.
25. Bun with a Middle Part and Soft Waves

A middle part paired with soft waves creates a balanced, romantic look that suits thin hair well. Part your hair evenly down the middle, then curl it in loose waves using a one inch wand before gathering it into a bun. The waves add texture along the length of your hair, which fills out the bun more than straight strands would. This style pairs nicely with soft makeup and flowy outfits, making it a popular choice for garden parties, engagement photos, or casual weddings as a guest. Leave a few wavy strands loose near your face for extra softness. A light hold spray on the waves before styling keeps the texture intact even after twisting everything into the bun shape.
Conclusion
Thin hair does not have to mean giving up on buns that actually look full and intentional. With a mix of backcombing, texturizing sprays, clever tools like sock buns or claw clips, and small changes like a deep side part or crimped roots, you can build a bun that suits any occasion from a rushed weekday morning to a formal event. Try a few of these styles and see which technique works best with your hair’s natural texture, then keep it in your back pocket for whenever you need a reliable, voluminous look in just a few minutes.