
1. Classic Low Bun
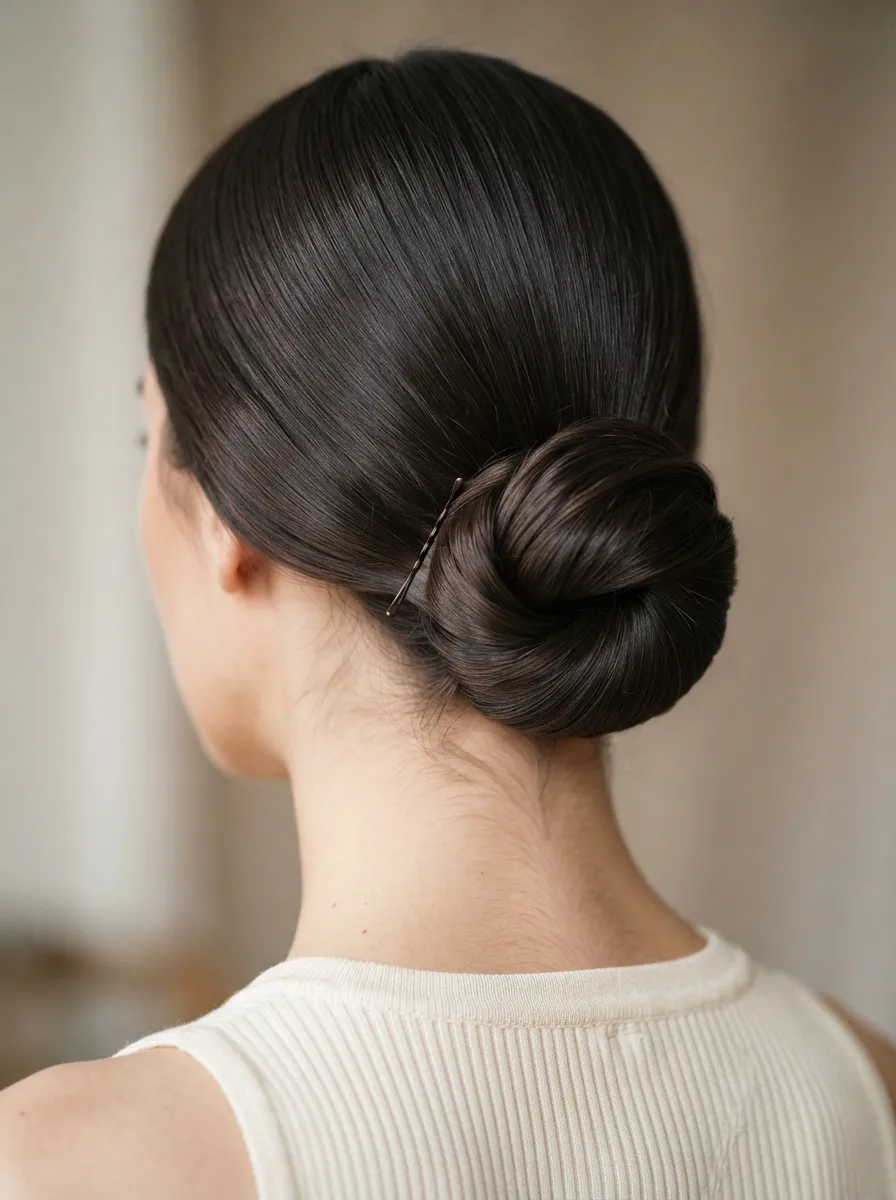
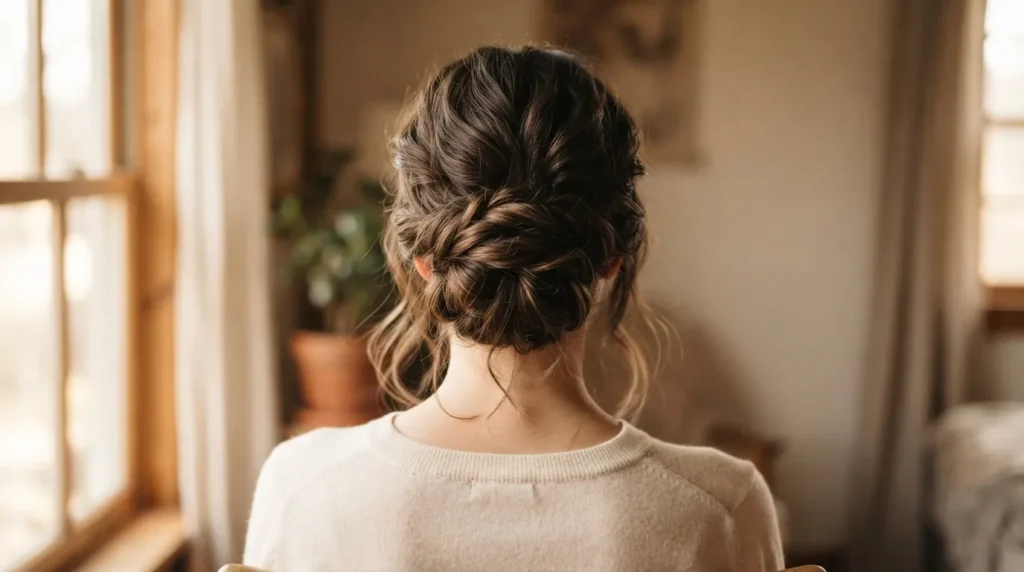
The low bun is the safest bet when you want to look neat without trying too hard. Gather your hair at the base of your neck. Twist it once. Wrap it around itself and pin it down. That’s it.
This style works for office days, dinners, or errands. It hides second-day hair well too. If your strands feel greasy, a bit of dry shampoo at the roots gives you extra grip and volume.
Budget tip: skip the fancy hair ties. A simple elastic and three or four bobby pins from the dollar store do the job. For a DIY upgrade, wrap a thin scarf around the base of the bun for a pop of color without buying new accessories.
If your hair is fine or slippery, spritz a little hairspray before twisting. It keeps the bun from loosening by mid-afternoon. This look also works great under hats or headbands during colder months, so it stretches across seasons and outfits.
2. Textured Messy Bun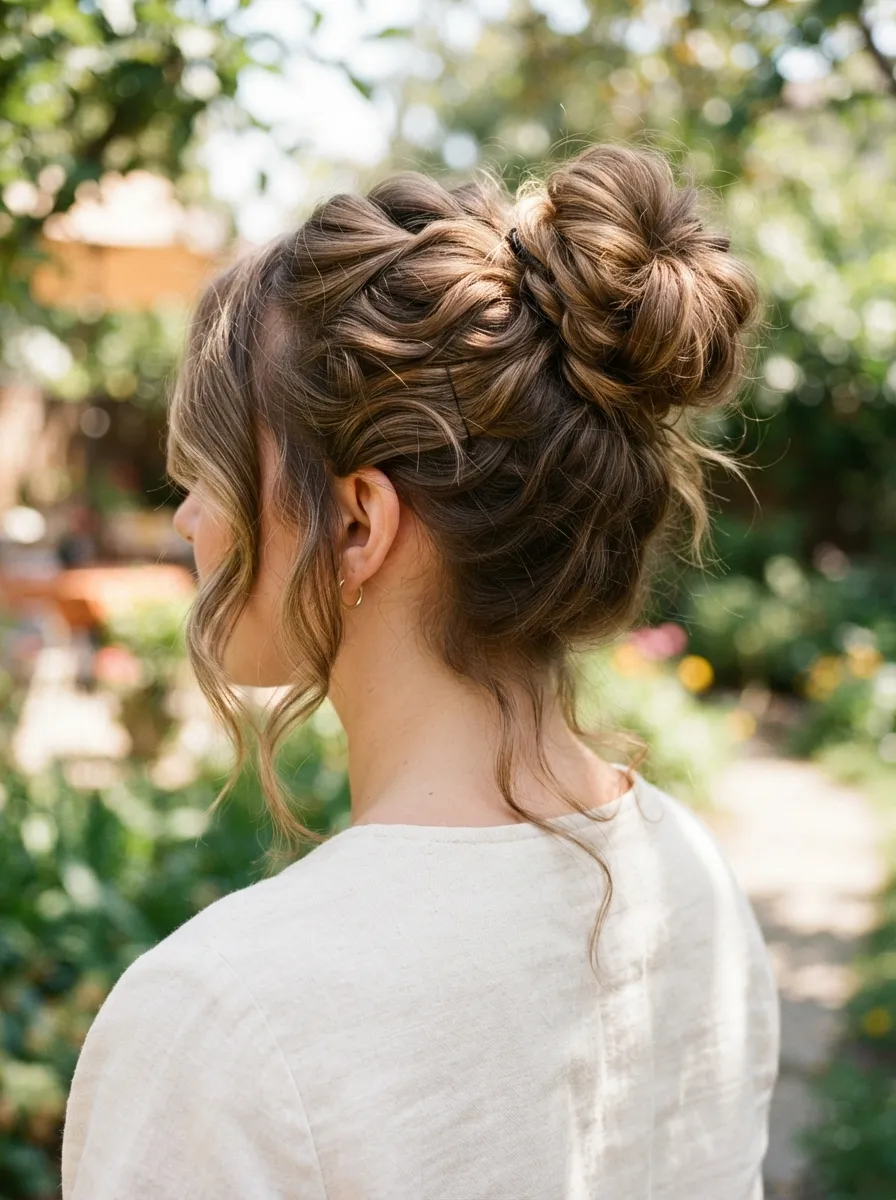 The messy bun looks effortless, but a little structure makes it hold up better. Start with second-day hair if you have it. Clean hair is often too slippery for this style.
Pull your hair into a loose ponytail. Twist it halfway, then let the ends fall out naturally before pinning. Pull a few pieces loose around your face for softness.
This style works well for weekend brunches, casual meetings, or a quick school run. It also hides a bad hair day better than almost any other style on this list.
Budget tip: use a texturizing spray instead of paying for a salon blowout. A cheap sea salt spray from the drugstore gives your hair grip and a beachy finish. DIY version: spray water mixed with a pinch of salt in a spray bottle for a homemade texturizer.
Add a claw clip instead of pins if you’re short on time. It takes ten seconds and still looks intentional.
3. Sleek High Ponytail Twisted Into a Bun
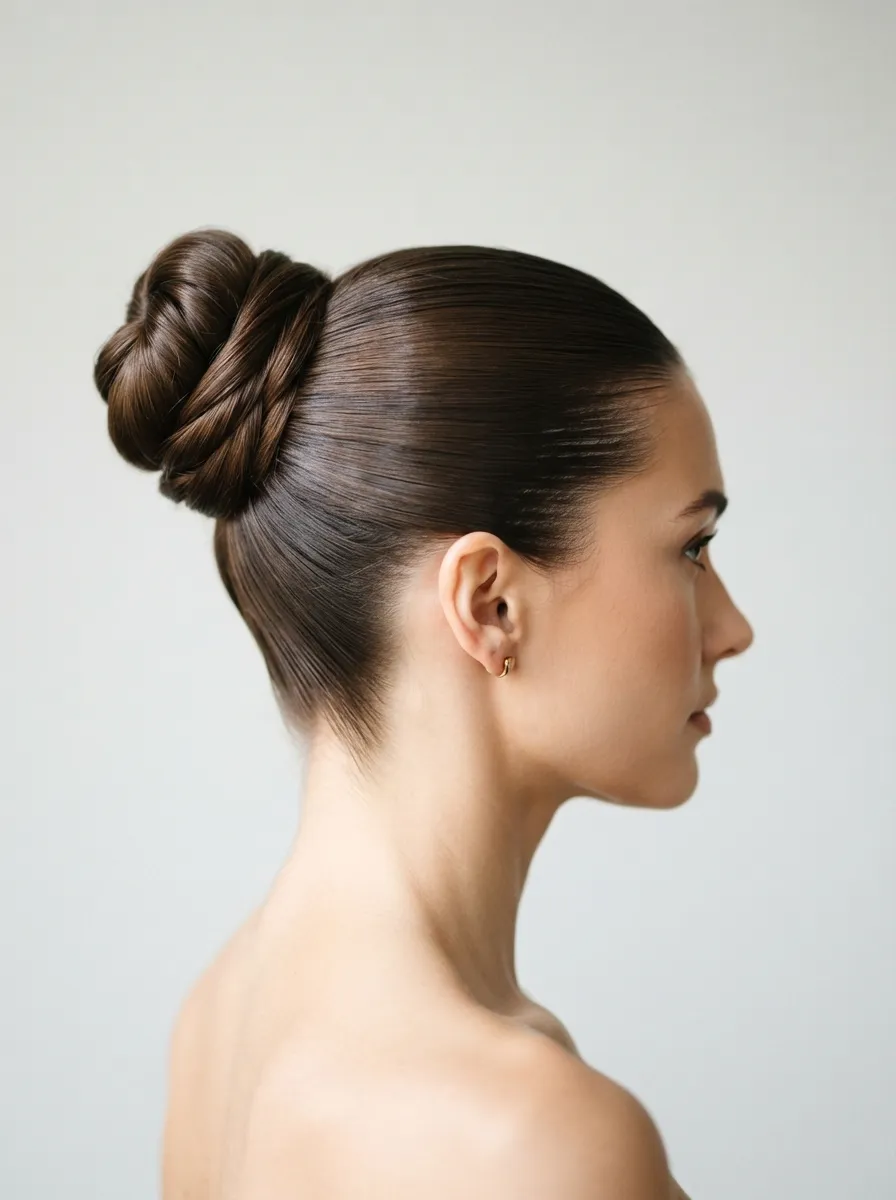
This one reads as polished and a little glamorous. Brush your hair back tightly into a high ponytail. Smooth down any flyaways with a bit of gel or edge control.
Twist the ponytail around its base like a cinnamon roll. Pin it flat. The result is sharp, sleek, and photo-ready.
This style suits formal events, presentations, or date nights. It also works if your hair is thinning at the crown, since the height adds fullness.
Budget tip: a toothbrush with a dab of gel works just as well as pricey edge brushes for smoothing baby hairs. DIY shine spray: mix a few drops of any lightweight oil with water in a spray bottle and mist lightly over the finished style.
Avoid using too much product near your scalp, since it can look greasy under bright lights. A light hand goes a long way with this one.
4. Braided Crown Updo
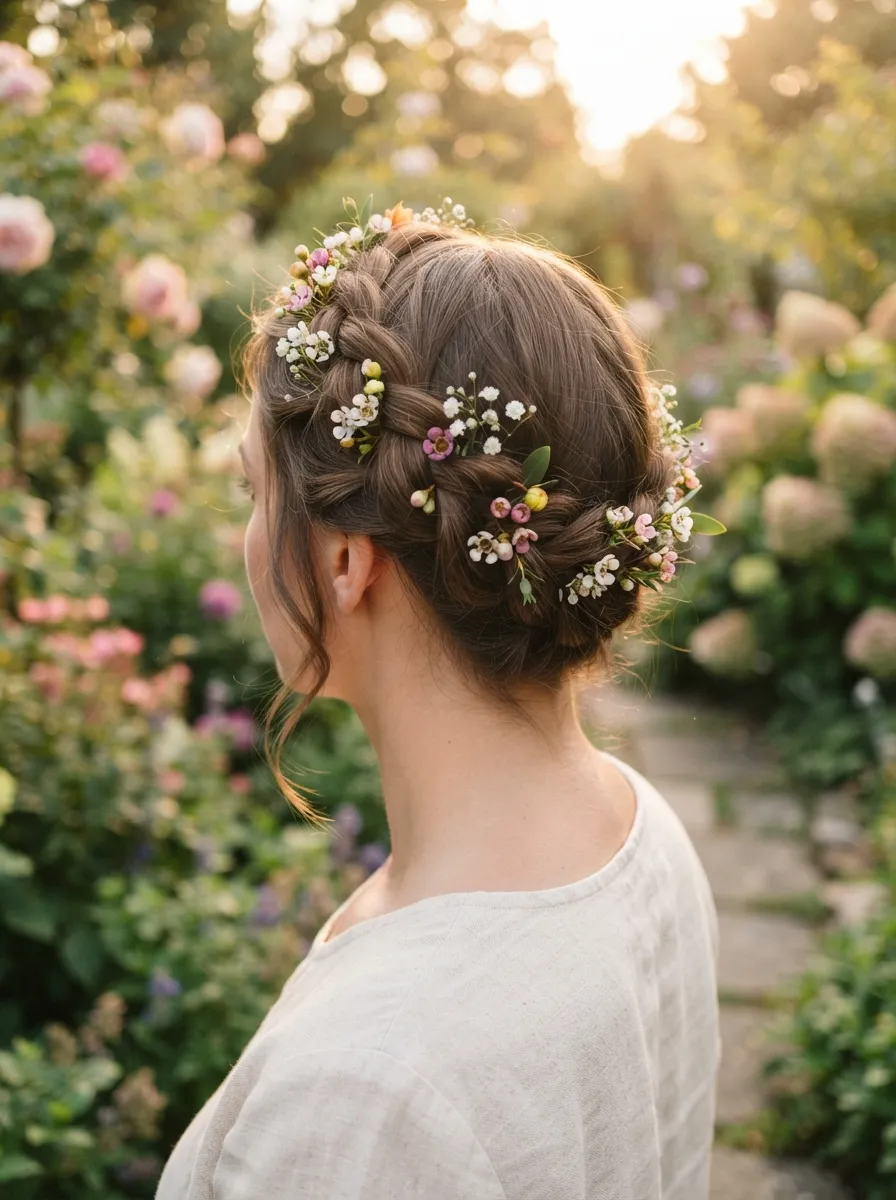
The braided crown feels romantic without much effort. Section your hair into two parts. Braid each side loosely, then cross them over the top of your head like a halo.
Pin the ends underneath so they stay hidden. This works beautifully for spring or summer occasions, especially outdoor events.
Budget tip: you don’t need real flowers or expensive pins. Small fabric flower clips from a craft store cost very little and clip right into the braid. DIY touch: use bobby pins with tiny pearl or rhinestone tops instead of buying a hair accessory set.
This style also holds up well through long days, since braids tend to stay put better than loose curls. If your hair is short, use braided extensions clipped in at the sides to fake the look. It’s a forgiving style for beginners since small mistakes blend into the braid pattern anyway.
5. Half Up Twisted Updo
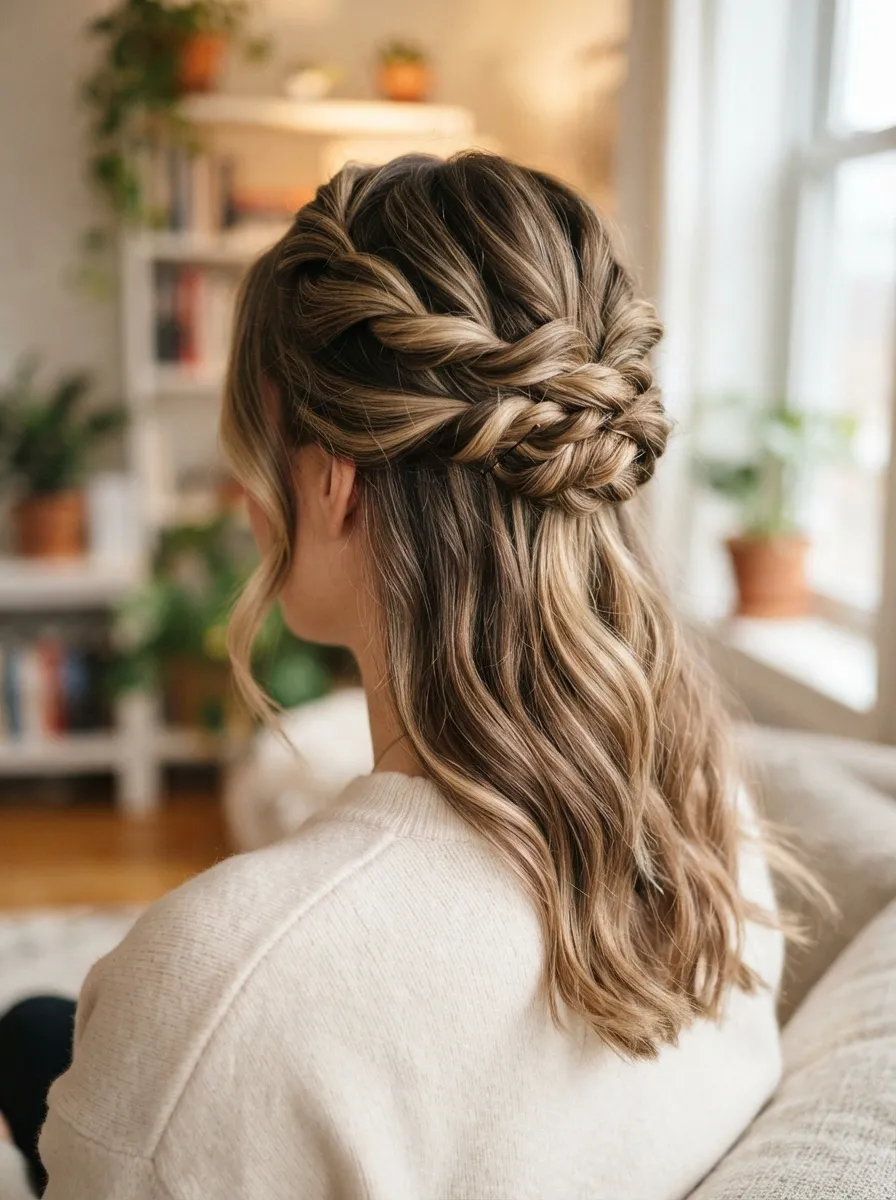
Half up styles give you the ease of wearing your hair down with a little more shape. Take two sections from the front of your hair. Twist each one back and pin them together at the crown.
Leave the rest of your hair loose. This works for casual days when you still want your face framed nicely.
Budget tip: use small elastics instead of pins if twisting feels tricky at first. They’re cheaper and more forgiving for beginners. DIY curl boost: twist small sections of the loose hair around a warm butter knife handle for two minutes each to add soft waves without a curling iron.
This style is quick, usually under five minutes, which makes it a good option on busy mornings. It also grows out gracefully, so you won’t need to redo it if you’re heading straight into a long day.
6. Chignon with Side Part
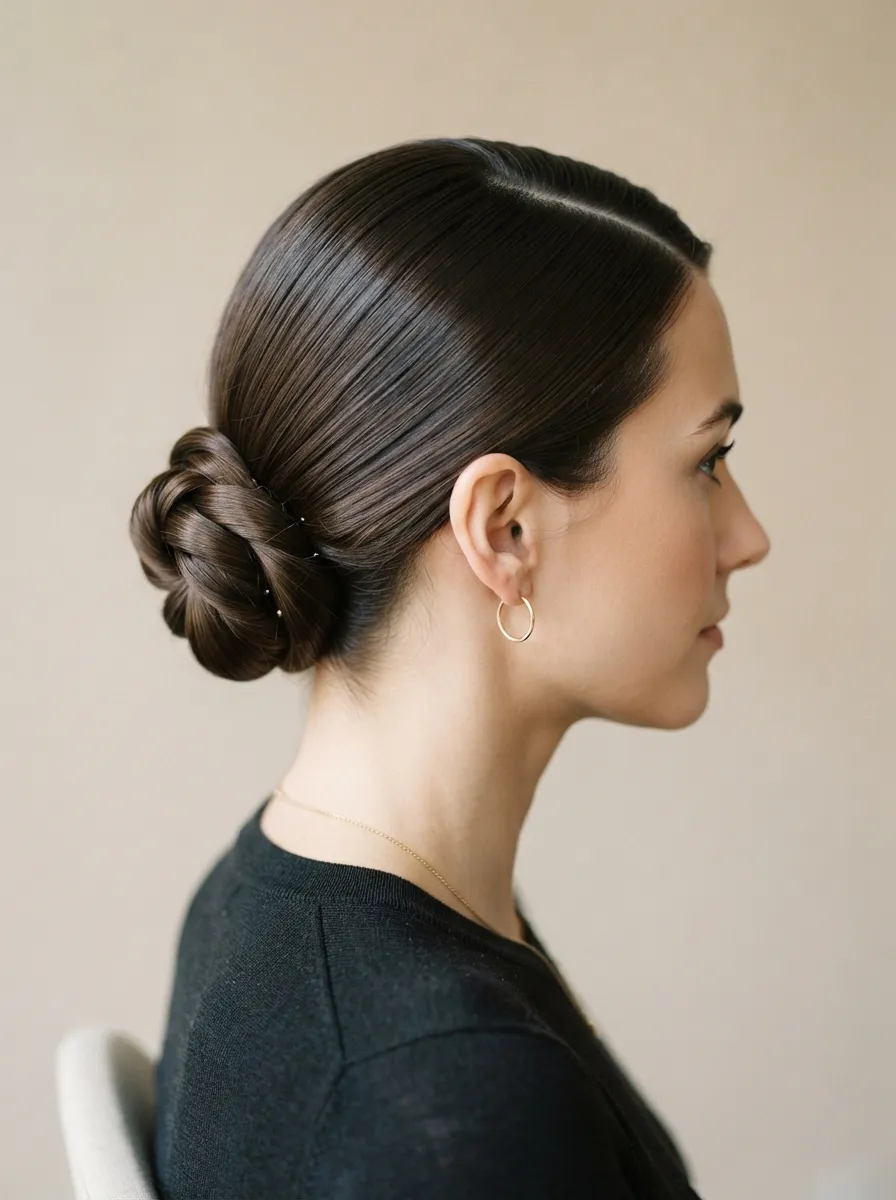
A chignon feels formal without being fussy. Part your hair deeply to one side. Gather it low near your neck and twist it into a knot, tucking the ends under.
This style flatters most face shapes because the deep side part softens sharp features. It suits weddings, interviews, or any event where you want to look thoughtful about your appearance.
Budget tip: use a hair donut or foam ring instead of buying a chignon-specific tool. Even a rolled-up sock works as a substitute. DIY shine: apply a tiny bit of coconut oil to your palms and smooth over the finished knot for a soft glow.
If your hair won’t stay flat near the part, use a fine-tooth comb dipped in water to press it down before styling. This small step prevents flyaways from ruining the sleek line through the day.
7. Bridal Rose Bun
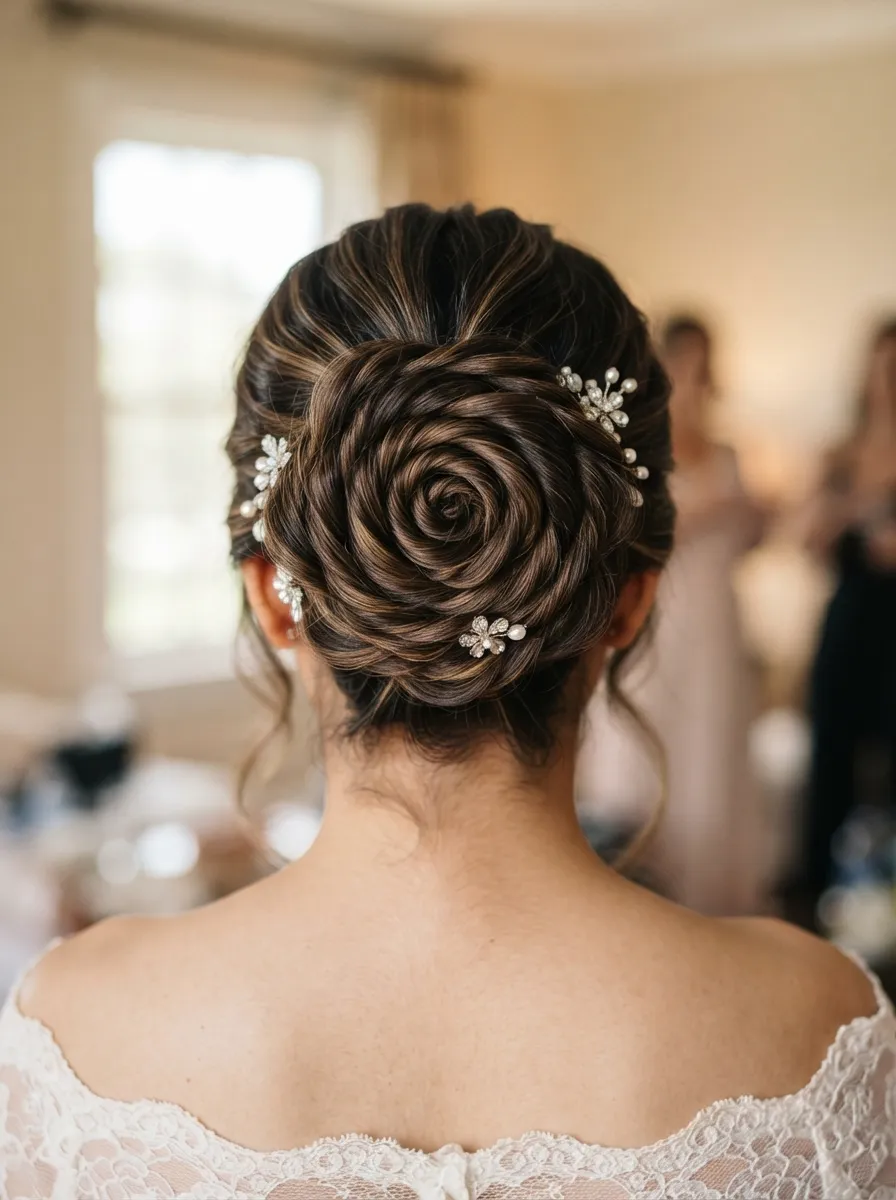
This bun is shaped to look like a rose, and it’s easier to create than it looks. Twist small sections of hair one at a time, wrapping each around the last to build a spiral shape.
Pin as you go so the shape holds. The finished look resembles layered petals, which makes it a favorite for weddings and formal parties.
Budget tip: practice the twist-and-wrap technique on a doll head or even a friend before your event day. It saves time and stress later. DIY pin trick: use U-shaped pins instead of straight bobby pins since they hold curved shapes better.
This style takes longer than others on this list, usually fifteen to twenty minutes, so plan ahead. It holds well through long receptions and photos, which makes the extra time worth it for special occasions.
8. French Twist
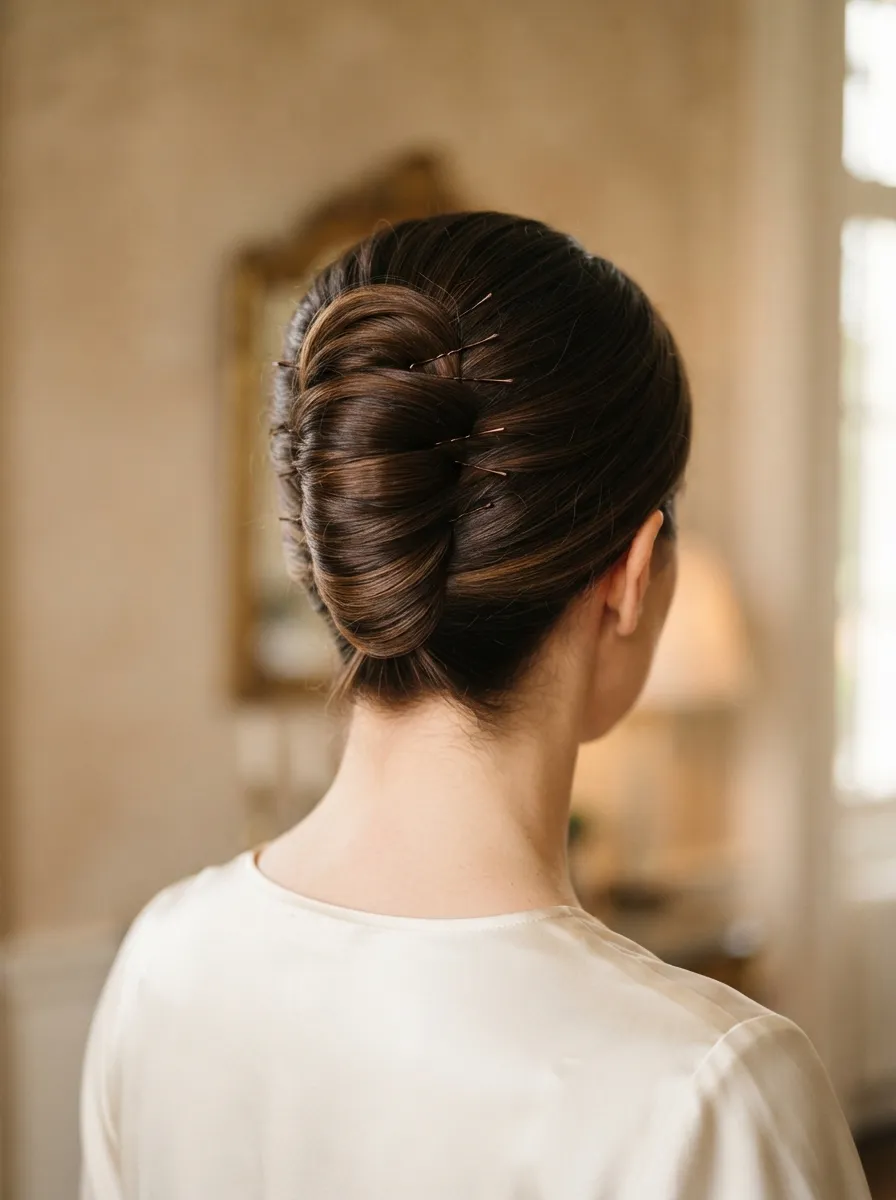
The French twist has been a go-to formal style for decades, and it still looks sharp today. Gather your hair at the back, twist it upward into a vertical roll, then pin along the seam.
This works for black-tie events, work galas, or any occasion calling for a classic look. It also keeps hair fully off your neck, which is helpful in warm weather.
Budget tip: hairpins are cheaper in bulk from a craft store than in small packs from a drugstore. Stock up once and reuse them for years. DIY hold booster: mist a light layer of hairspray halfway through pinning, not just at the end, so the twist holds from the inside out.
If you’re new to this style, practice a few times before the actual event. The twist takes some hand coordination, but once you get it, it becomes a fast five-minute style.
9. Space Buns
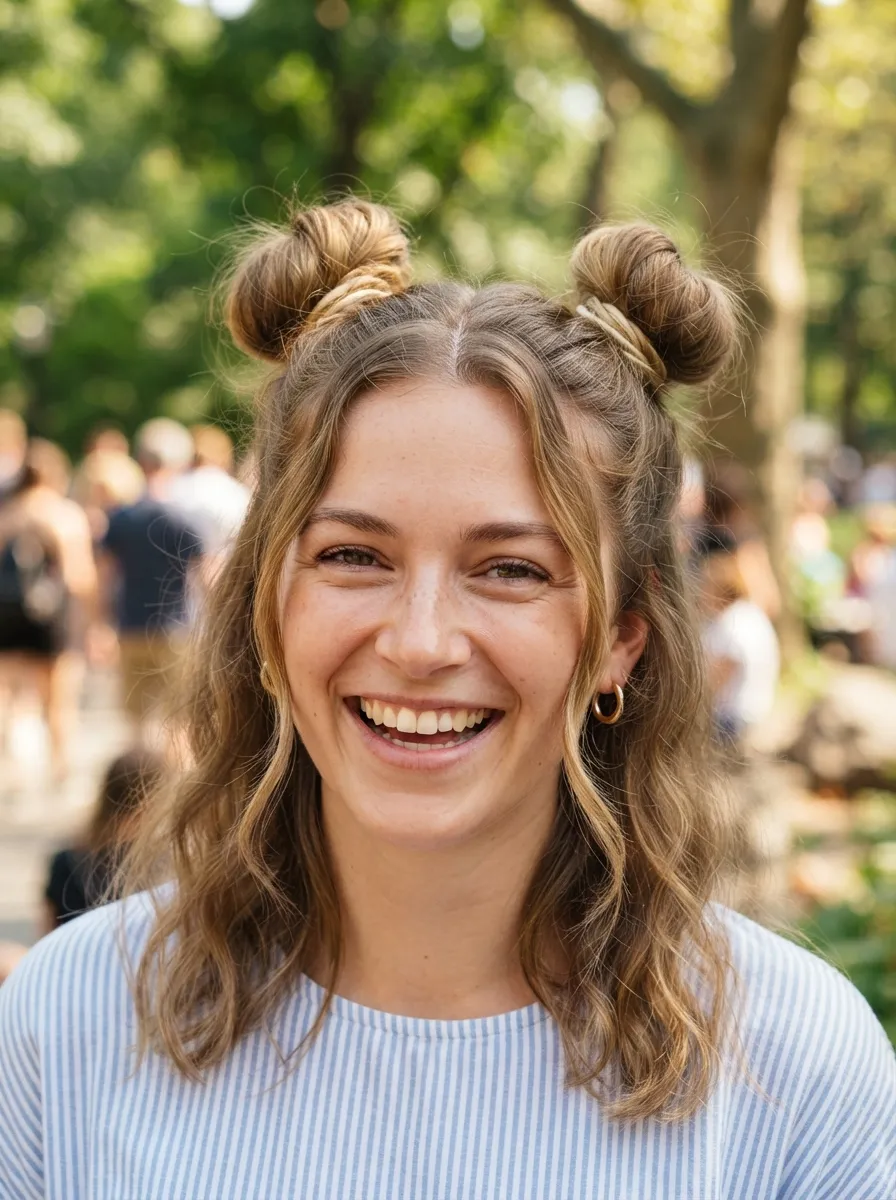
Space buns bring a younger, playful energy to an updo list full of classic styles. Part your hair down the middle. Section each half into a high ponytail, then twist and wrap each one into a bun.
This style suits festivals, casual outings, or days when you want something a little different. It’s quick and doesn’t require much precision.
Budget tip: use two matching elastics from a multipack instead of buying specialty hair ties. Symmetry matters more than fancy tools here. DIY variation: braid each ponytail before wrapping it into a bun for added texture without extra cost.
This look also works on second or third-day hair since some grip actually helps the buns stay compact. If your hair is very fine, tease the ponytails slightly at the base before wrapping to add fullness to each bun.
10. Braided Bun Combo
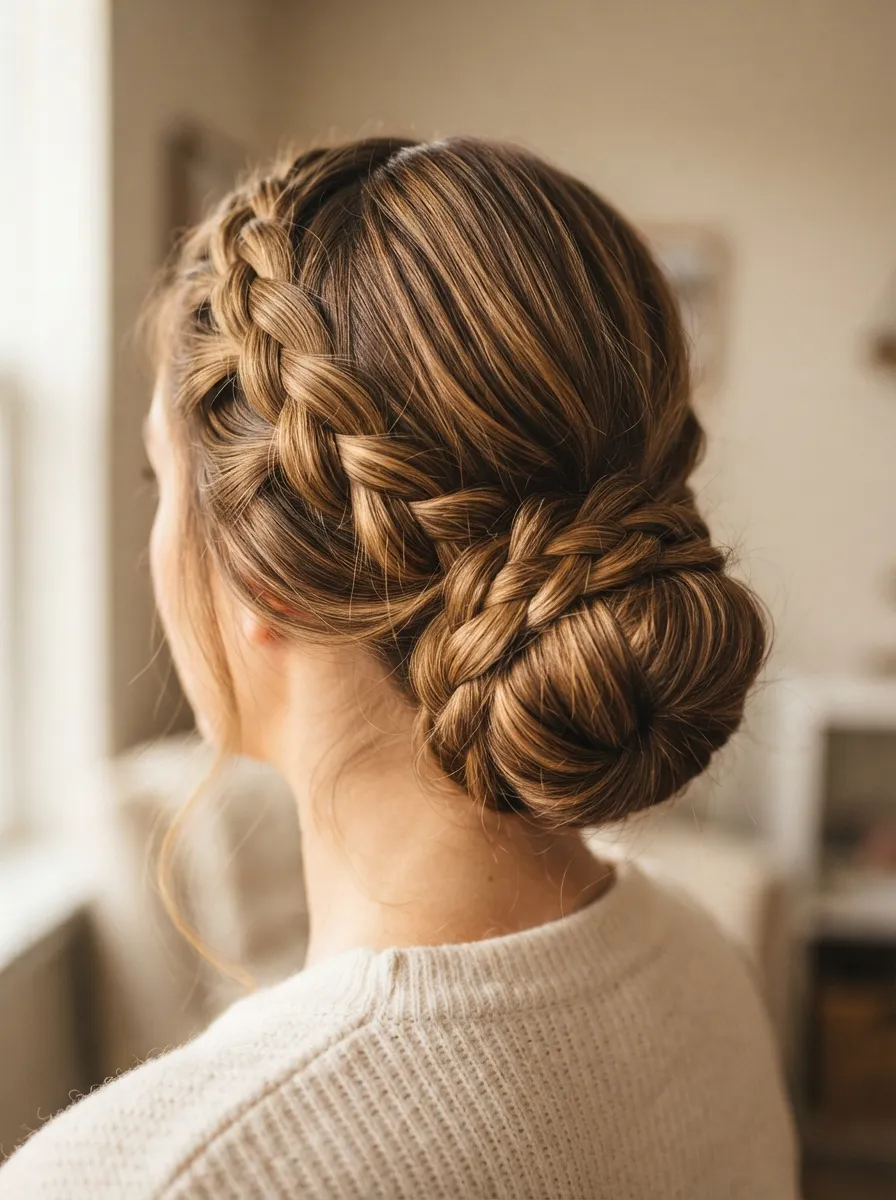
Combining a braid with a bun gives you two textures in one style. Braid a small section near your hairline. Gather the rest of your hair into a low bun, then wrap the braid around the base to hide the elastic.
This works well for both casual and semi-formal settings. It also adds interest to an otherwise plain bun without much extra effort.
Budget tip: practice a simple three-strand braid before attempting this combo, since a steady braid makes the whole style look cleaner. DIY texture: spritz a texturizing spray on the braid section only, so it holds shape better against the smoother bun.
If pinning feels tricky, bobby pins placed in an X shape hold the braid more securely than single pins. This style takes about ten minutes once you’re comfortable with the steps, making it realistic for weekday mornings too.
11. Twisted Updo with Face-Framing Pieces
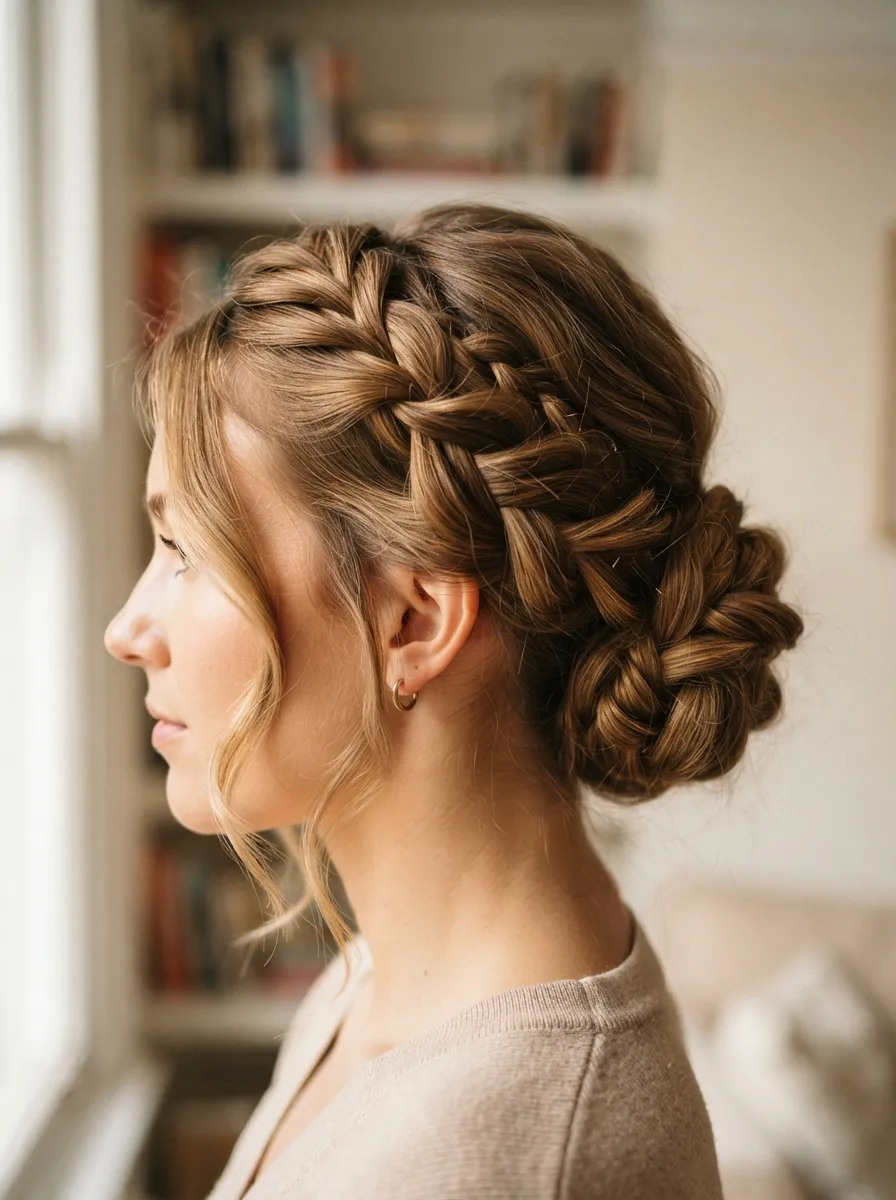
Leaving a few pieces out around your face softens any updo, no matter how sleek. Pull most of your hair back into a twisted bun or knot. Leave two thin sections loose at your temples.
Curl those pieces lightly with a wand or straightener for a soft frame around your face. This works for almost any occasion since it balances polish with softness.
Budget tip: you don’t need a curling wand specifically for this. A flat iron can create loose waves just as easily by twisting the hair as you pull it through the plates. DIY hold spray: a light mist of sugar water works as a homemade texture spray for these small pieces.
This small addition takes less than two minutes but changes the entire feel of a style. It’s a good trick when a straight updo feels too severe for your face shape or the occasion.
12. Vintage Finger Wave Updo
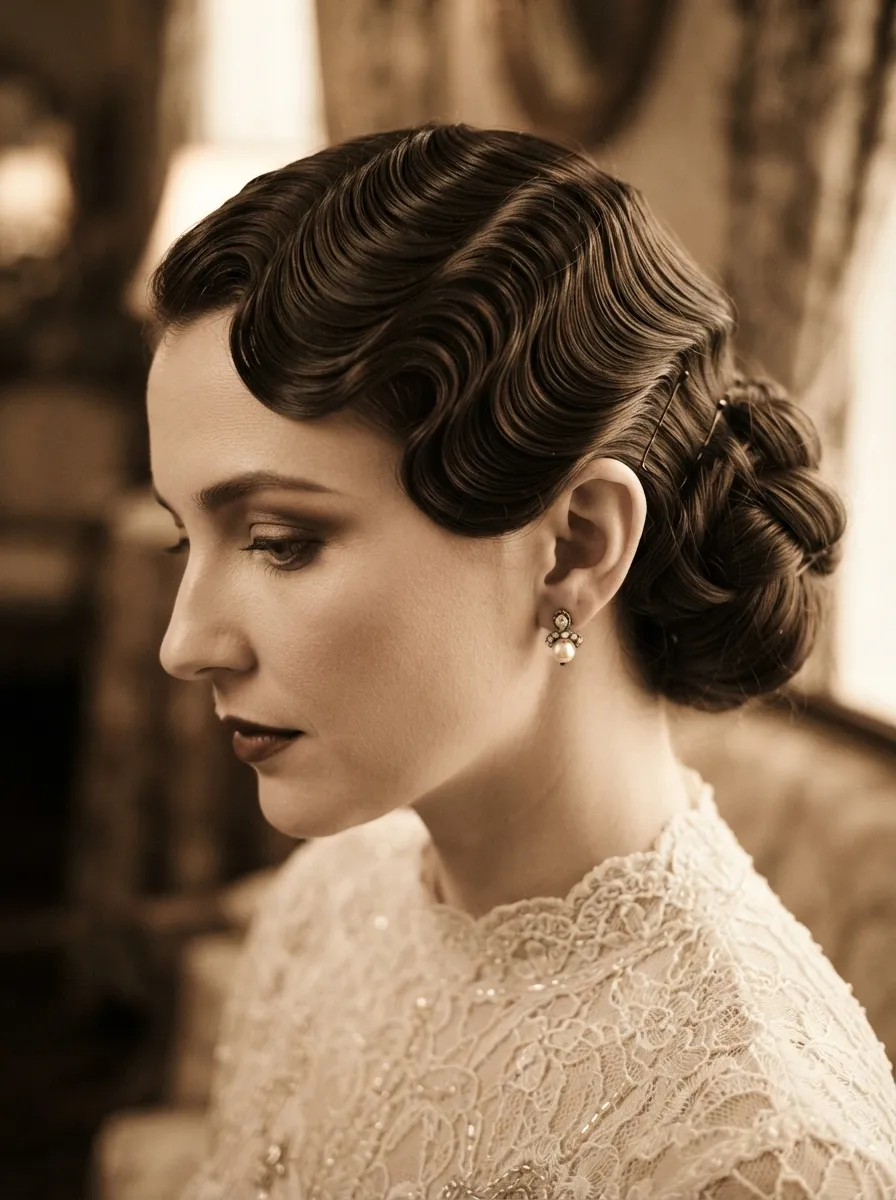
Finger waves bring old Hollywood glamour to a modern updo. Use a fine-tooth comb and gel to shape S-patterns near your hairline, pinning each wave flat while it sets.
Once dry, pull the rest of your hair into a low bun or twist. This combo works for themed parties, photoshoots, or anyone who loves a vintage look.
Budget tip: any strong-hold gel from the drugstore works fine here. You don’t need salon-branded products for waves to set properly. DIY setting tool: flat wave clips are inexpensive online and reusable for years, making this a one-time investment for a repeatable style.
This style takes practice, so try it a few times on a non-event day first. Once you get the pattern down, it becomes a quick fifteen-minute style that photographs beautifully, especially in black and white shots.
13. Top Knot
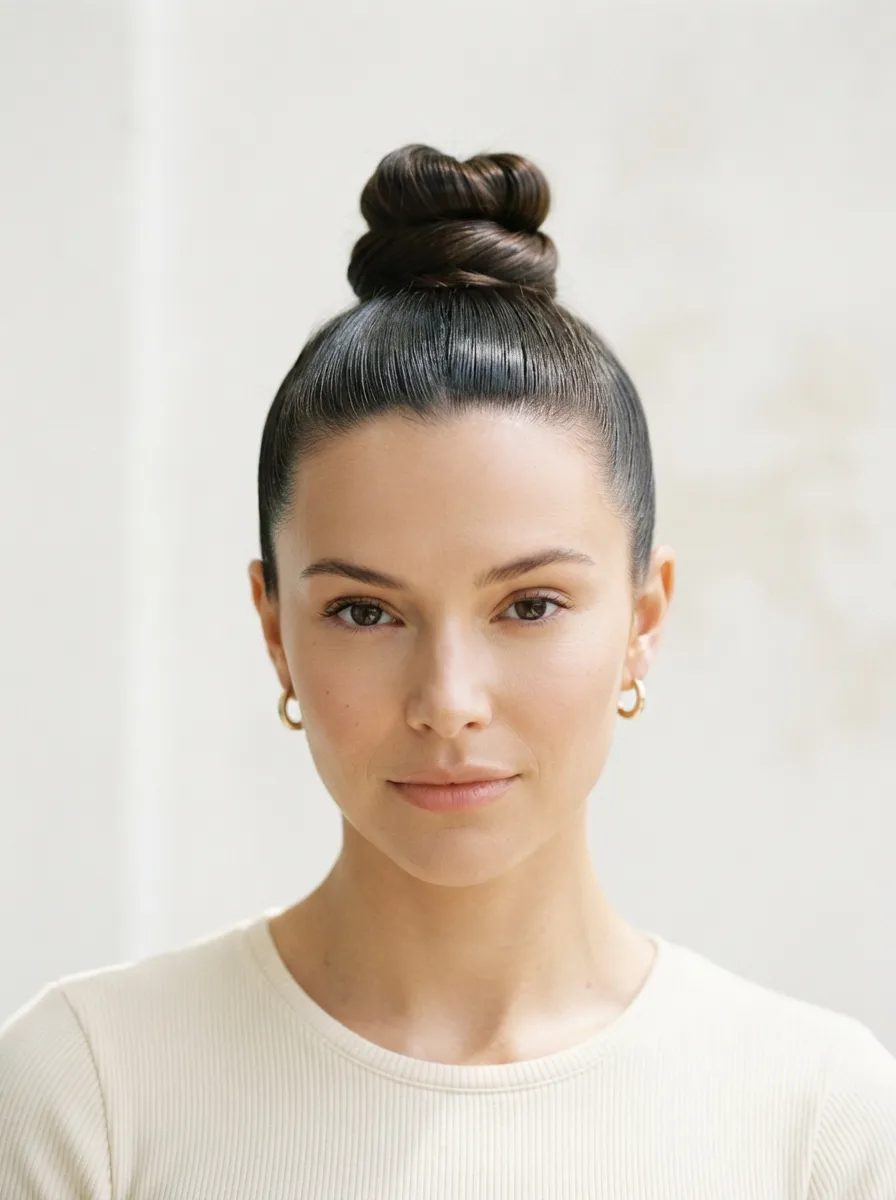
The top knot might be the fastest updo on this entire list. Pull your hair straight up into a high ponytail. Twist it around itself and secure with pins or an elastic.
This works for gym days, errands, or lazy mornings when you still want to look intentional. It also gives the illusion of height, which some people love.
Budget tip: a spiral hair tie holds this style without creating a dent, and they cost about the same as regular elastics. DIY volume trick: back-comb the ponytail slightly at the base with a fine comb before twisting for a fuller-looking knot.
This style works on both clean and dirty hair, since a bit of grease actually helps it hold shape longer. It’s one of the easiest styles to teach kids or teens too, since the steps are simple and forgiving.
14. Fishtail Braid Updo
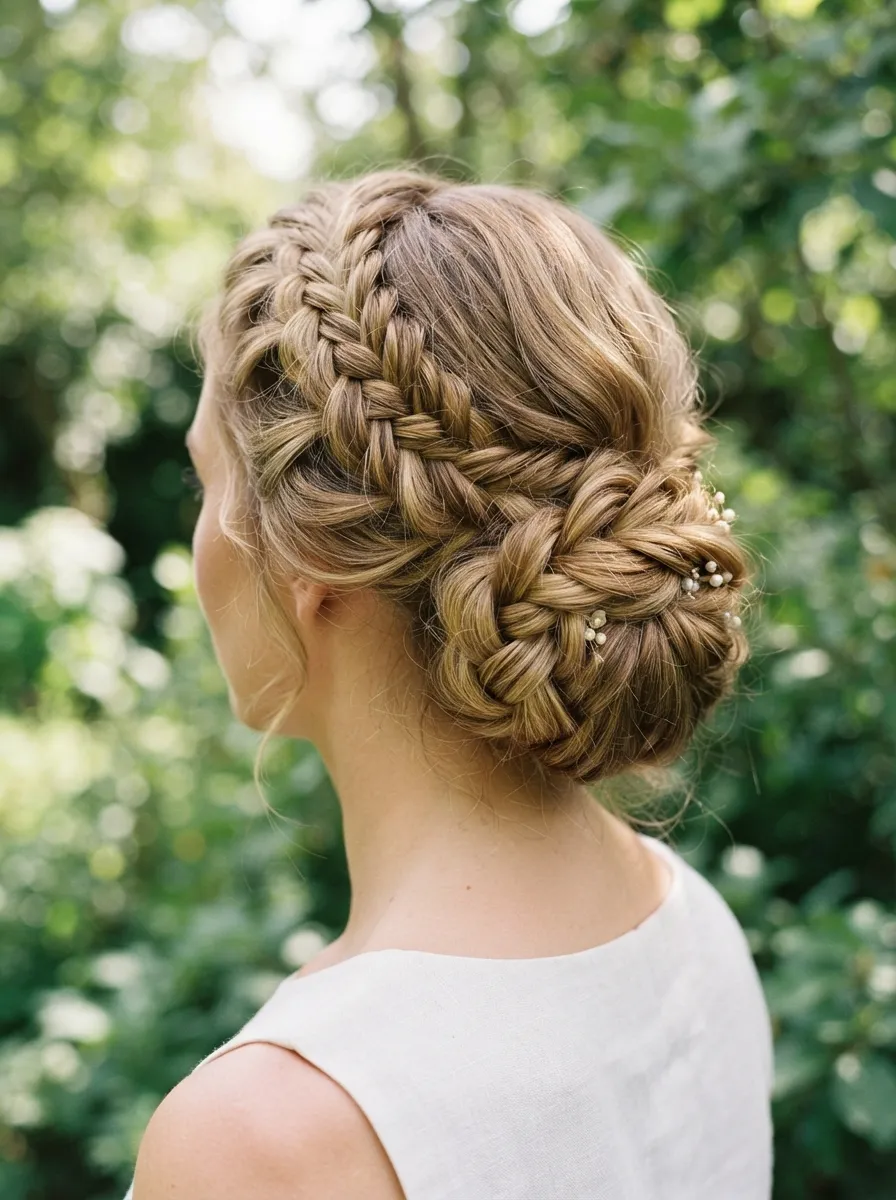
Fishtail braids look complicated but only use two sections instead of three. Cross small pieces from each side over the other repeatedly until you reach the ends. Then coil the braid into a bun and pin it down.
This style suits weddings, garden parties, or any warm-weather event. The texture reads as more detailed than a standard braid, even though it’s not harder to make.
Budget tip: practice fishtail braiding on a ponytail extension you already own before trying it on your full head. It saves frustration on styling day. DIY tip: rubber bands from the kitchen drawer work fine to secure the braid before coiling it, since they’ll be hidden under pins anyway.
This look holds especially well through humidity and wind, making it a smart pick for outdoor events where sleeker styles might fall flat by midday.
15. Waterfall Braid into Bun
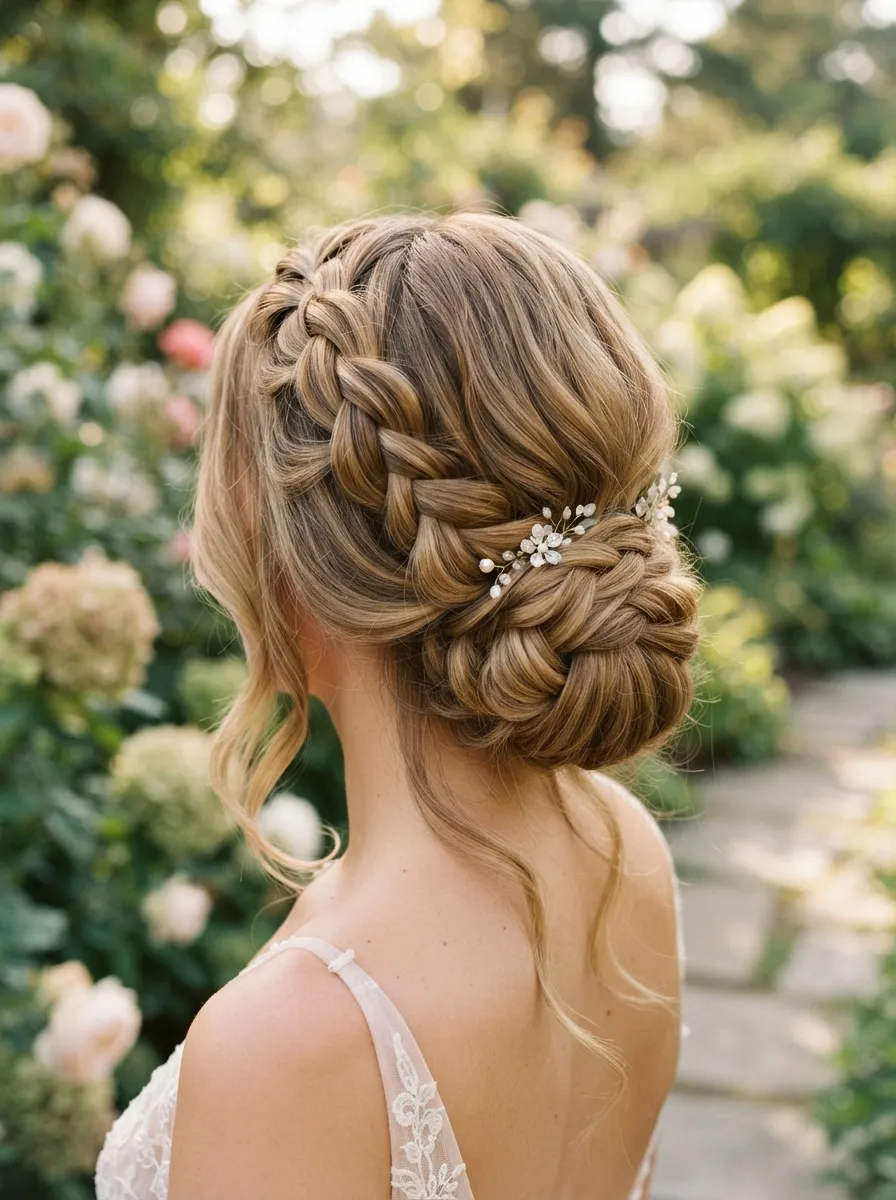
The waterfall braid lets strands “fall” out as you braid, creating a soft cascading effect before ending in a bun. Start a basic braid near your temple, dropping one strand each time you cross over, letting it fall loose.
Gather the remaining hair into a low bun once you reach the back of your head. This works well for weddings, brunches, or photos where softness matters.
Budget tip: this style needs no extra tools beyond what’s already in your hair kit, just bobby pins and a small elastic. DIY curl finish: curl the loose “waterfall” strands with a flat iron for extra movement in photos.
This braid takes patience at first, but once you understand the drop-and-cross pattern, it becomes a repeatable ten-minute style. It’s especially flattering on hair with layers, since the loose strands catch the light nicely.
16. Sock Bun
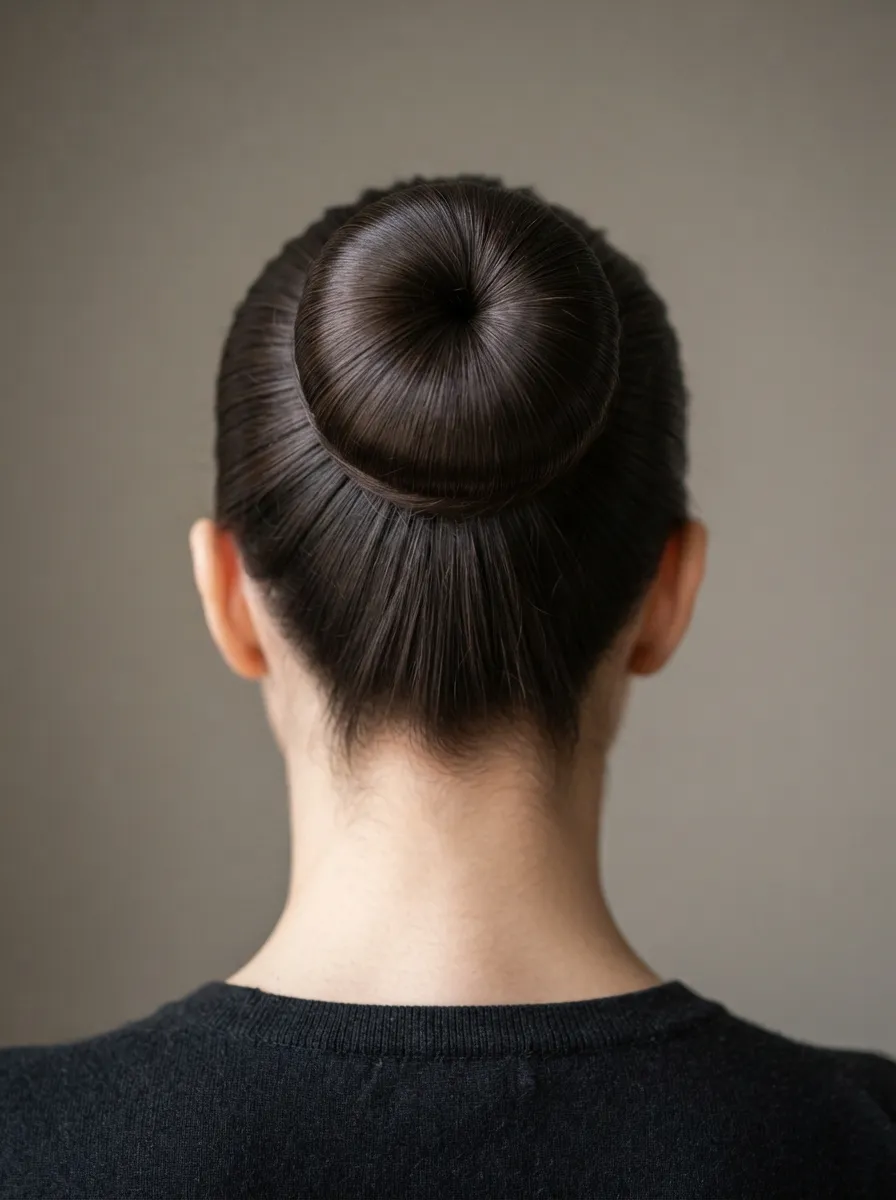
The sock bun trick has been around for years because it works. Cut the toe off an old sock and roll it into a donut shape. Pull your ponytail through the hole, then roll the sock down while tucking your hair around it.
This creates a full, rounded bun in under five minutes. It’s a favorite for dance recitals, work days, or anyone who wants volume without teasing their hair.
Budget tip: this is about as cheap as updos get since it reuses something you already own instead of buying a foam donut. DIY color match: pick an old sock close to your hair color so any peeking edges blend in naturally.
Secure the edges with bobby pins placed in a circle around the base. This style holds all day and works on straight or wavy hair equally well, making it one of the most reliable options here.
17. Pinned Curls Updo
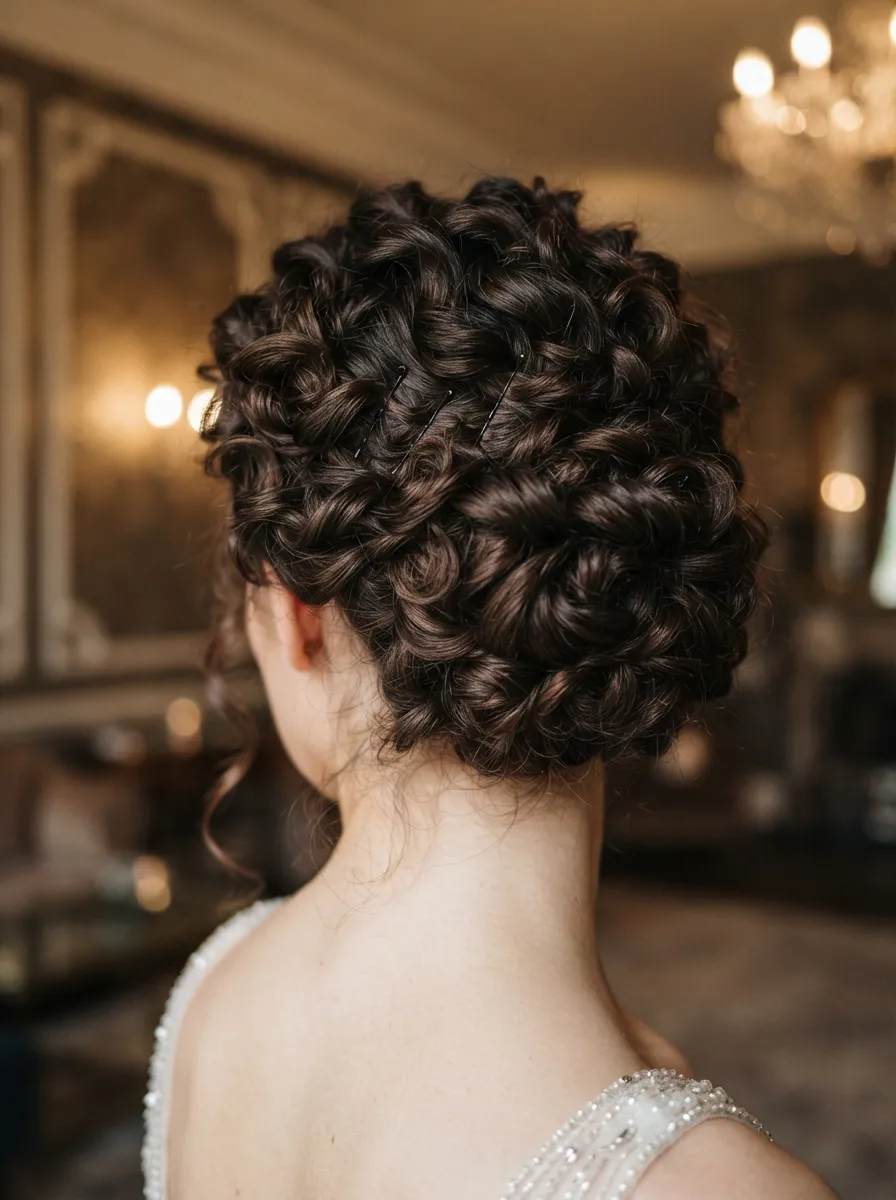
This style works best if your hair already has some curl or wave. Curl small sections with a wand, then pin each curl up toward your crown in a scattered pattern, letting some pieces overlap.
The result looks soft and undone but stays controlled. This suits parties, dinners, or events where you want something a little different from a smooth bun.
Budget tip: you can skip the curling wand entirely by using overnight braids or twists to create natural waves before pinning. DIY pin hack: use small hair clips in your hair color to hold curls temporarily while you check the placement before committing to bobby pins.
This style takes some trial and error to arrange evenly, so give yourself extra time the first few attempts. Once arranged, mist lightly with hairspray to lock the curls in place for the rest of the day or evening.
18. Double Braided Bun
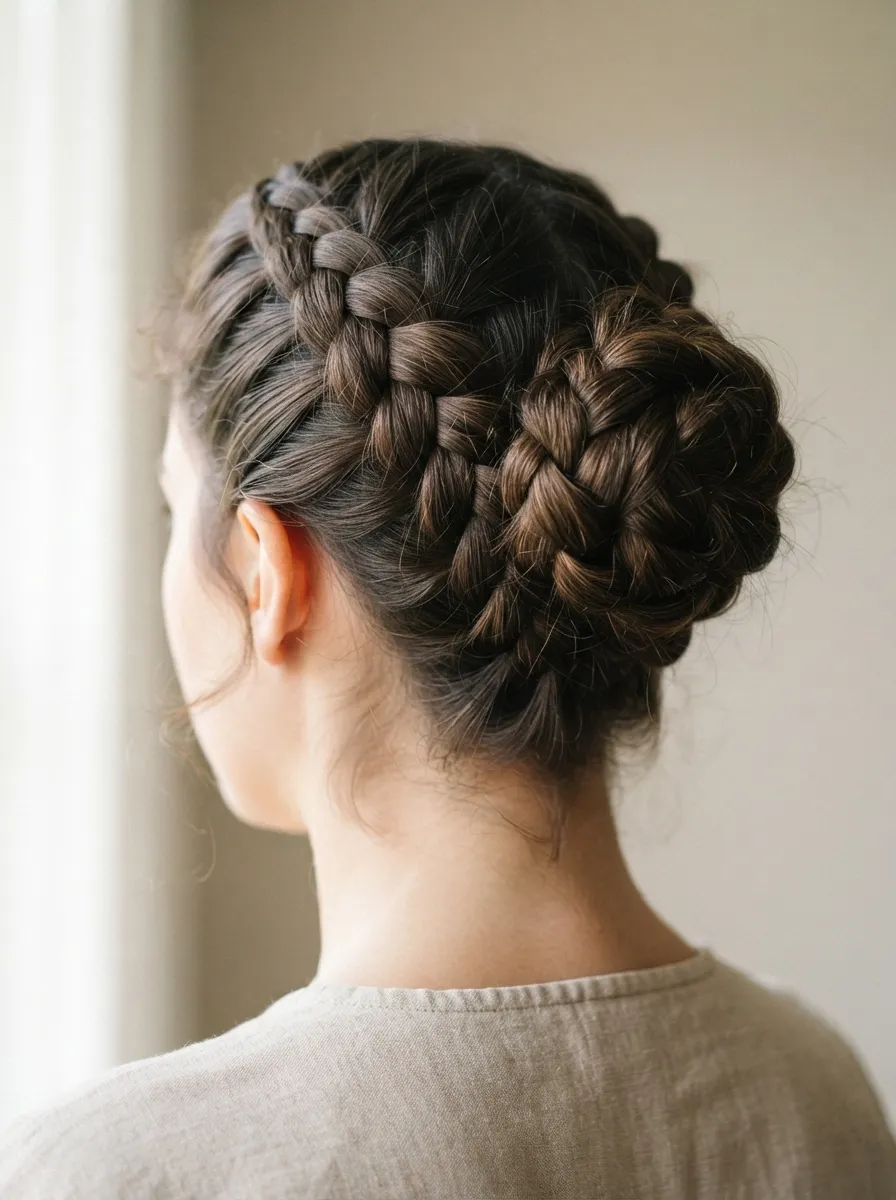
Two braids instead of one add extra texture to a simple bun. Split your hair into two sections. Braid each one separately, then twist both braids together and pin them into a bun shape at the back or crown.
This works for both casual days and slightly dressier occasions. It also holds particularly well since braids resist loosening better than plain twists.
Budget tip: uneven braids still look fine once wrapped together, so don’t stress over perfect symmetry. This is a forgiving style for beginners. DIY texture spray: brew a weak cup of black tea, let it cool, and mist it lightly on dry hair before braiding for subtle grip without buying product.
This style takes about ten minutes with practice. It’s a solid choice for active days, since the braided structure keeps hair secure through movement better than a single loose twist would.
19. Low Ponytail with Wrap
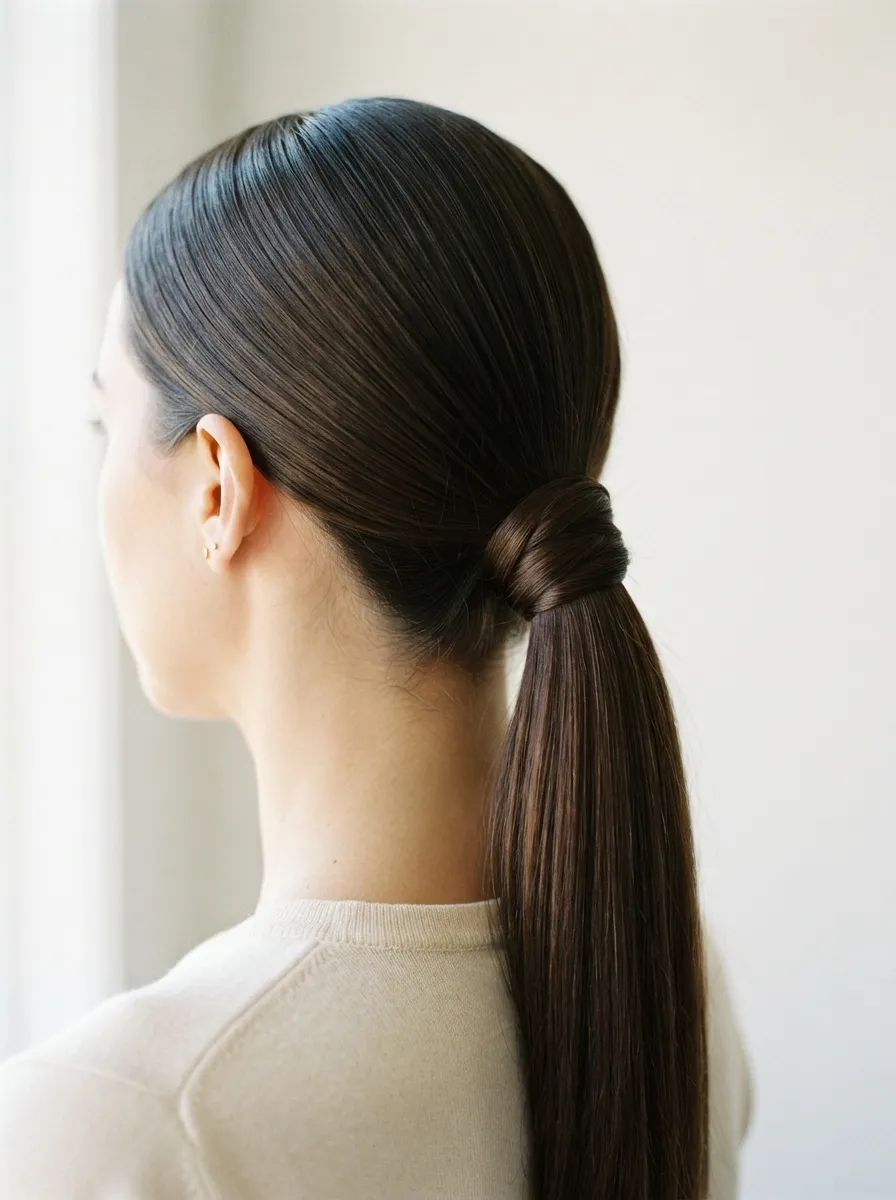
This is a small styling trick that makes a basic ponytail look far more finished. Pull your hair into a low ponytail as usual. Take a thin section from underneath, wrap it around the elastic, and pin the end underneath.
This hides the hair tie completely, giving a cleaner, more polished appearance. It works for meetings, errands, or dinners where you want something simple but neat.
Budget tip: this technique costs nothing extra since it only uses hair you already have and one bobby pin. DIY shine finish: smooth a drop of hand lotion over your palms and run them lightly over the ponytail for a glossy finish without buying hair serum.
This style takes under three minutes total, making it one of the fastest options on this list. It’s a good one to teach yourself first if updos feel intimidating, since the technique carries over into almost every other style here.
20. Side-Swept Updo
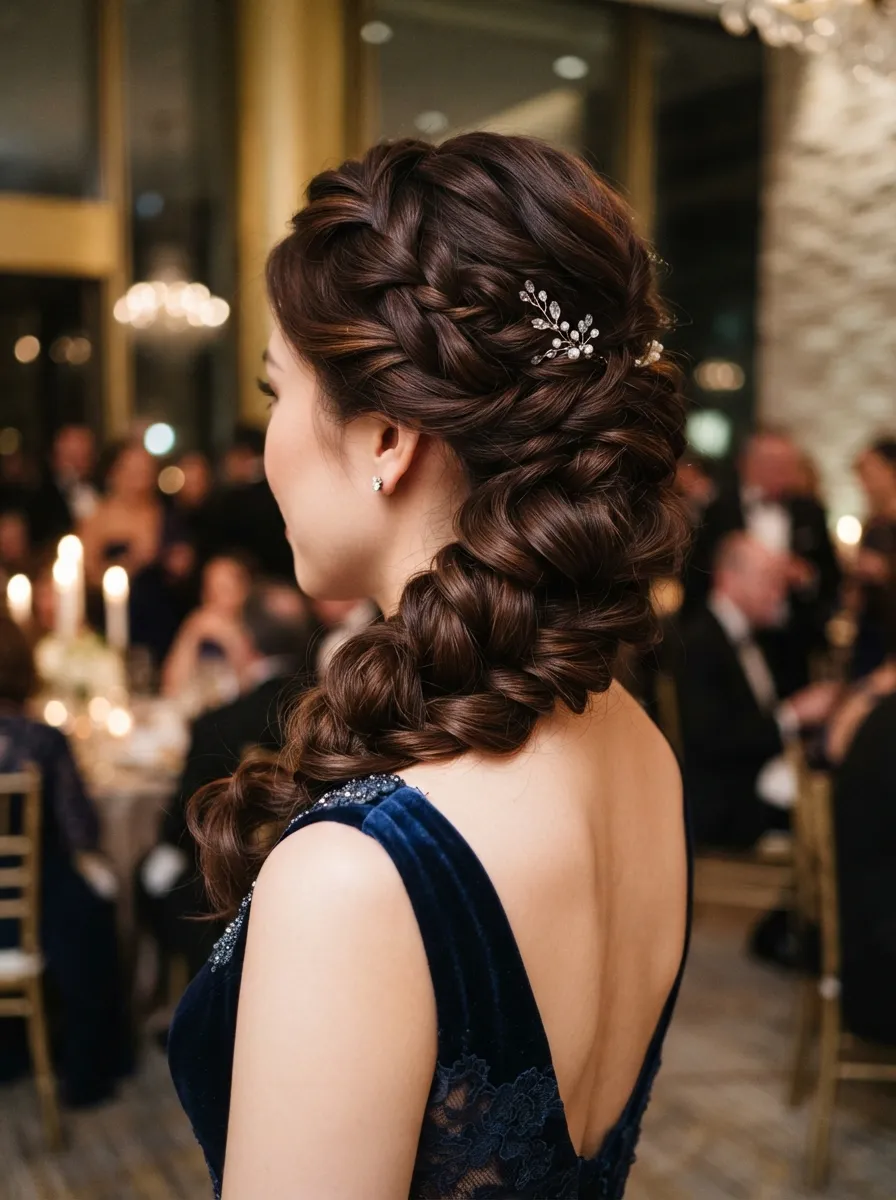
Side-swept styles pull all your hair to one shoulder or twist it toward one side of your head, creating an asymmetrical look. Gather your hair to one side, twist loosely, and pin it near your ear or behind your neck.
This works especially well for evening events, since it draws attention to your neckline and jaw. It also suits dresses with detailed necklines or off-shoulder cuts.
Budget tip: no special tools needed here beyond your usual pins and a small elastic. The asymmetry hides small imperfections better than a centered style would. DIY touch: tuck a small fabric flower or clip-in accessory near the twist for extra detail without buying a full hairpiece set.
This style takes about ten minutes and photographs well from most angles, which makes it a solid choice for events with a lot of picture-taking, like anniversaries or engagement parties.
21. Bubble Braid Updo
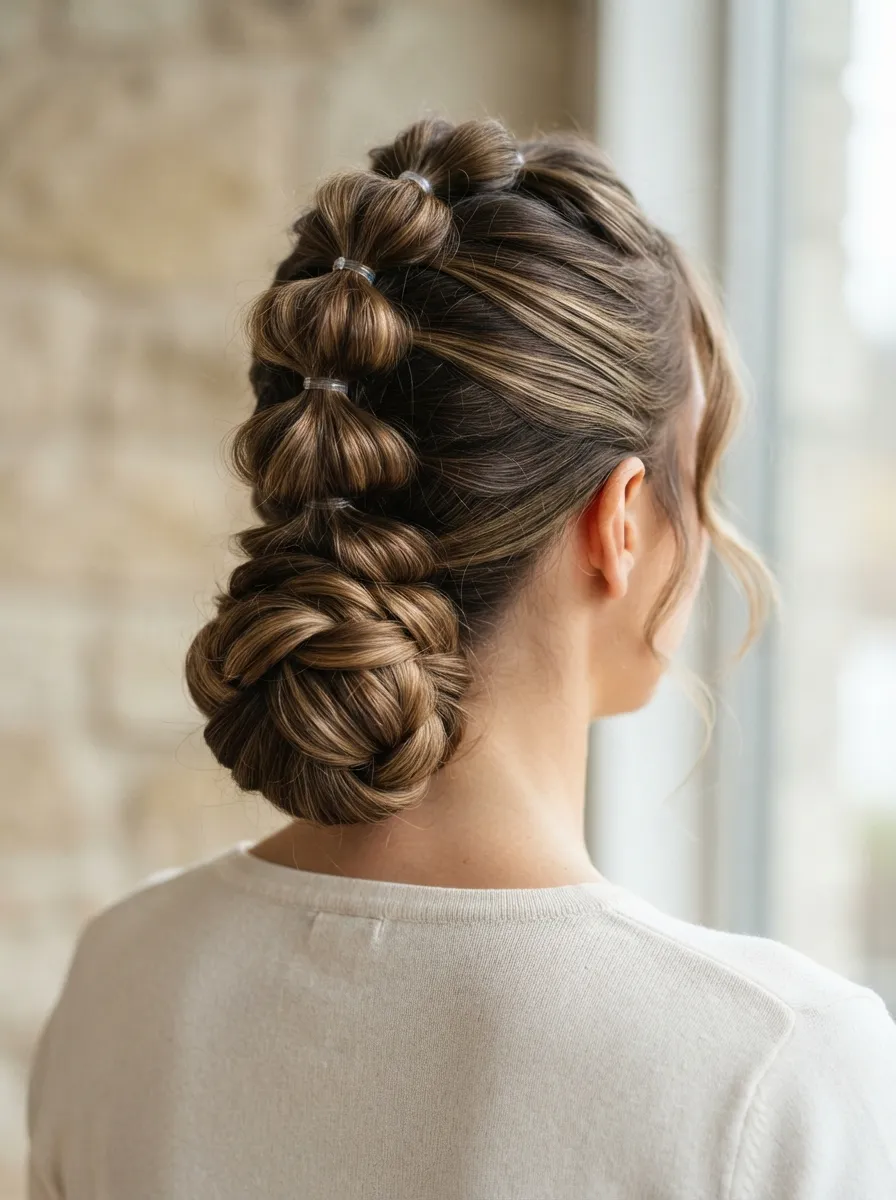
Bubble braids use small elastics placed evenly down a ponytail, then gently pulled apart to create rounded “bubble” sections. Once you reach the ends, coil the braid into a bun and pin it in place.
This style suits birthday parties, casual dates, or any day you want something playful but still tidy. It photographs well thanks to the repeating pattern.
Budget tip: small clear elastics from a multipack work perfectly and are barely visible once the bubbles are pulled apart. DIY volume tip: gently tug each section from the sides, not just the top, to make the bubbles look fuller and more even.
This style takes about ten minutes and doesn’t require any curling or heat styling. It’s a good option for kids’ hair too, since it’s simple, comfortable, and holds up well through active play.
22. Rope Braid Bun
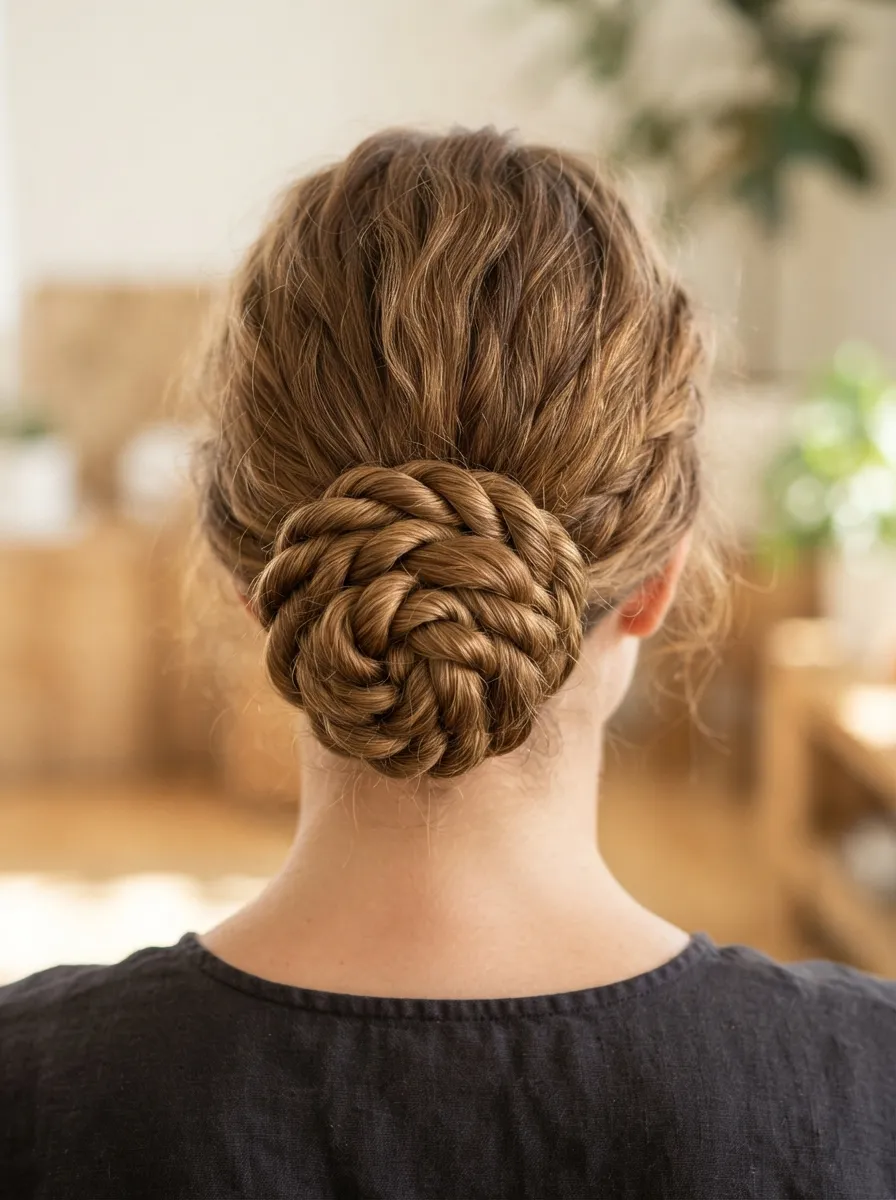
Rope braids are made by twisting two sections of hair around each other instead of the usual three-strand weave. Twist each section individually, then twist them together in the opposite direction before wrapping into a bun.
This creates a spiral, rope-like texture that looks more detailed than a plain twist. It works for both casual and dressier settings depending on how neat you make it.
Budget tip: this technique uses no extra products or tools, just your hands and a few pins. It’s one of the most cost-free styles on this list. DIY hold tip: twist each section a little tighter than feels natural, since rope braids relax slightly once you let go.
This style takes about seven minutes once you get comfortable with the twisting direction. It holds well through long days and works nicely on hair with some natural texture or wave already built in.
23. Pearl-Pinned Updo
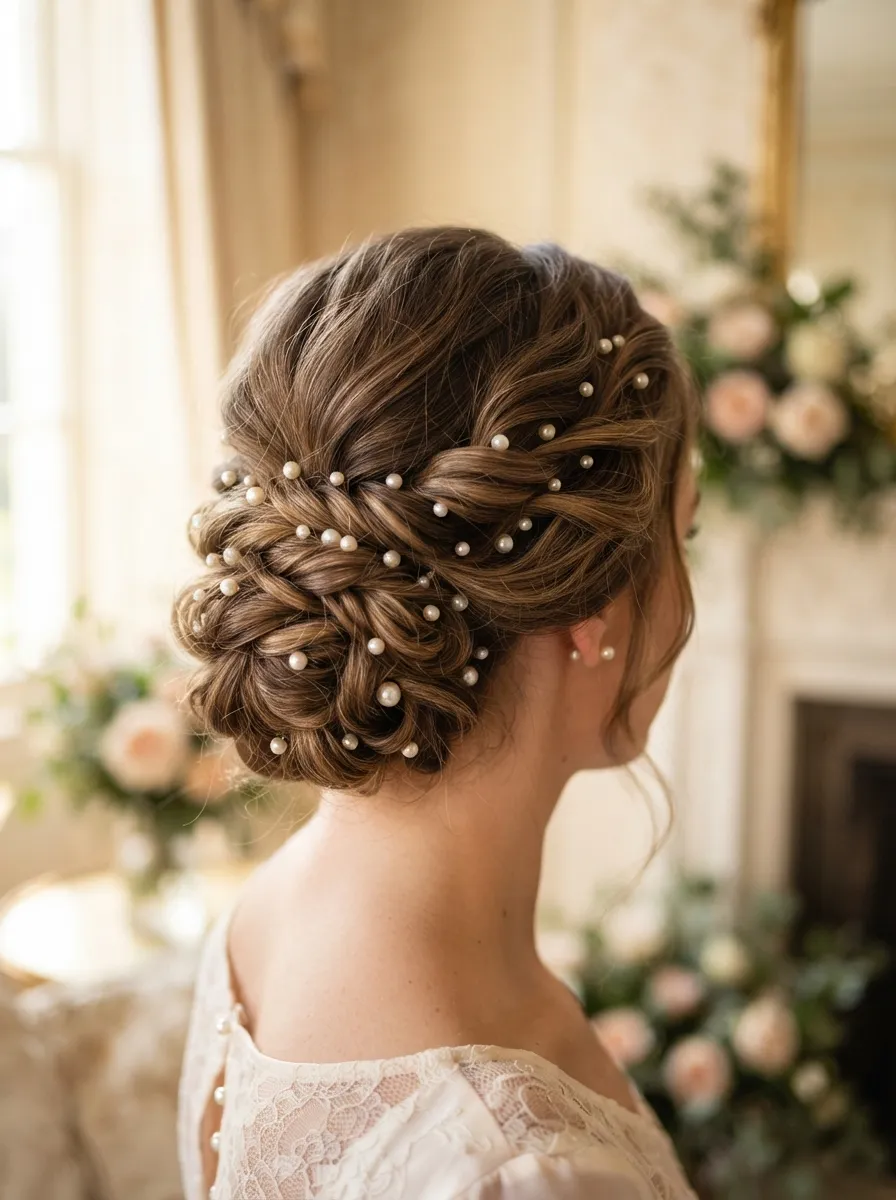
Small details can change how formal an updo feels. Create any simple twist or bun as your base, then scatter small pearl-topped pins throughout instead of plain bobby pins.
This works especially well for weddings, showers, or evening events where a little sparkle feels appropriate. The pins do the styling work for you.
Budget tip: pearl pins are inexpensive in bulk packs online, often costing less than a single hair accessory from a boutique. DIY alternative: thread small fake pearls onto plain bobby pins with craft glue for a custom version at a fraction of the price.
This is a good style to lean on when you want to dress up a hairstyle you already know how to do well. It takes almost no extra time, just a few extra minutes to place the pins evenly through the finished look.
24. Ballerina Bun
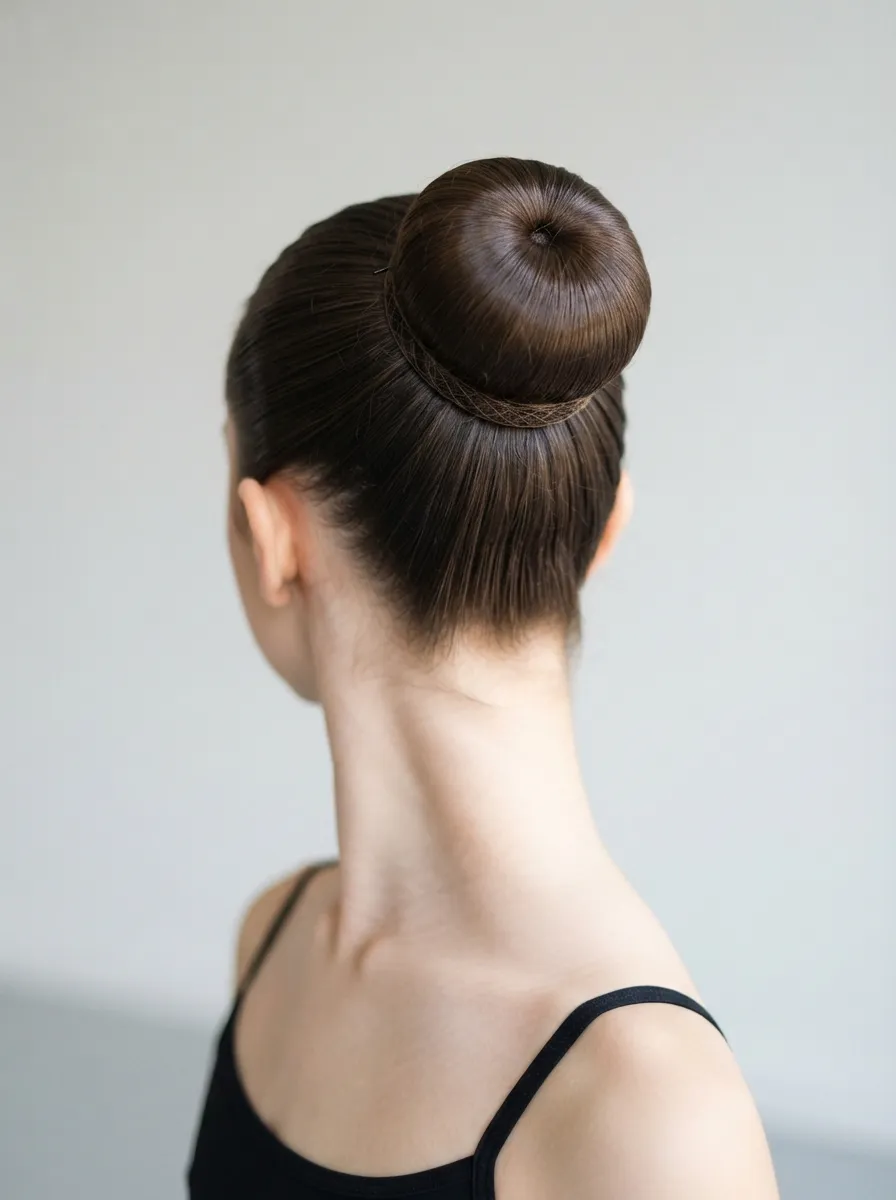
The ballerina bun is tight, high, and structured, built for staying in place through hours of movement. Slick your hair back into a high ponytail with gel. Twist it firmly and wrap it into a tight, flat bun.
This works for workouts, recitals, or formal events needing a controlled look. It’s one of the neatest styles on this list when done well.
Budget tip: a fine-tooth comb and a small amount of gel are all you need. Skip pricey edge control products in favor of basic drugstore gel. DIY hold tip: wrap a hairnet in your hair color around the finished bun to keep every strand locked in place through long days.
This style takes practice to get perfectly smooth, but once mastered, it becomes reliable for any occasion needing a clean, no-nonsense look that won’t budge no matter how active your day gets.
25. Braided Halo Updo
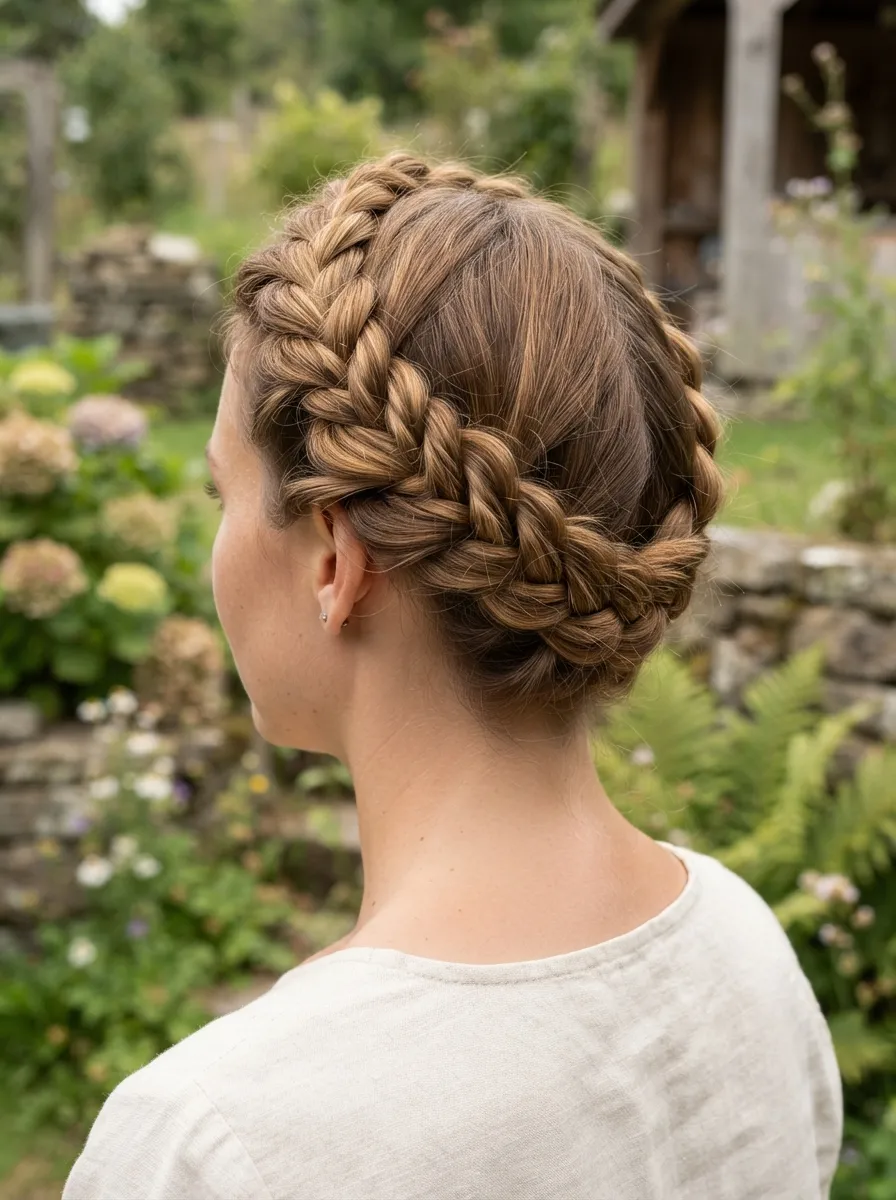
Similar to the braided crown but fuller, the halo braid wraps completely around your head using one long braid instead of two shorter ones. Braid from one side, wrapping it fully around your head, and pin the end where you started.
This works for outdoor weddings, festivals, or any occasion calling for a romantic look. It’s fuller and more dramatic than a standard crown braid.
Budget tip: this style requires no tools beyond pins and possibly a bit of texturizing spray for grip. It’s essentially a free style once you know the technique. DIY length trick: if your hair is shorter, clip in one braided extension piece to complete the halo without redoing your whole head.
This braid takes a bit longer, around fifteen minutes, since it wraps the entire head. It holds up especially well through long outdoor events, resisting wind and humidity better than looser styles.
26. Twisted Chignon with Accessories
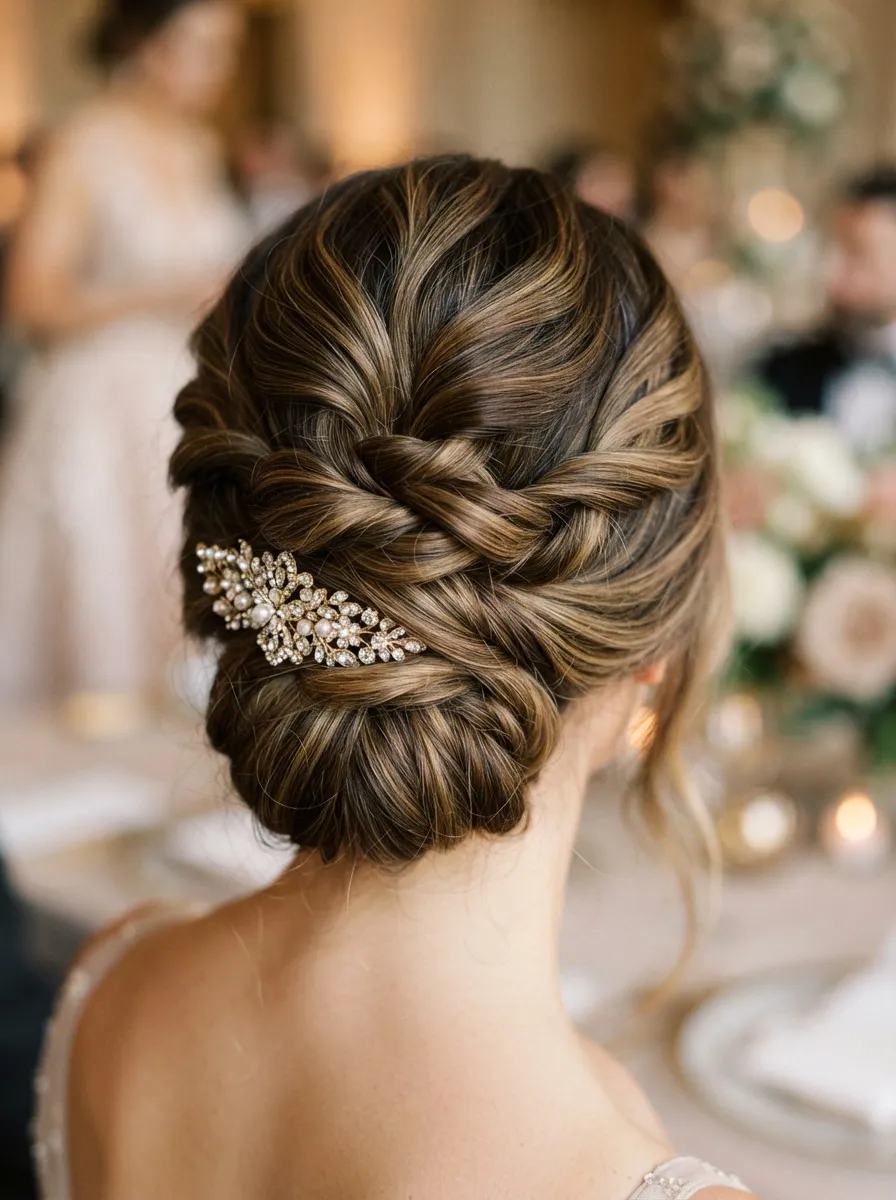
Adding one statement accessory to a plain twisted chignon changes the whole feel of the style. Create your usual low twisted bun, then slide a decorative comb or clip along one side of the twist.
This works for holiday parties, anniversaries, or any event where you want a bit of shine without much extra styling time. The accessory becomes the focal point.
Budget tip: one nice accessory can be reused across dozens of outfits and events, so it’s worth the small investment compared to buying new pieces each time. DIY version: wrap a strand of costume jewelry chain around the base of the bun and pin it discreetly for a custom, low-cost accessory.
This style takes the same time as a regular chignon, just a few extra seconds to place the accessory. It’s a smart trick for making a familiar style feel special for bigger occasions.
27. Messy Low Updo for Curly Hair
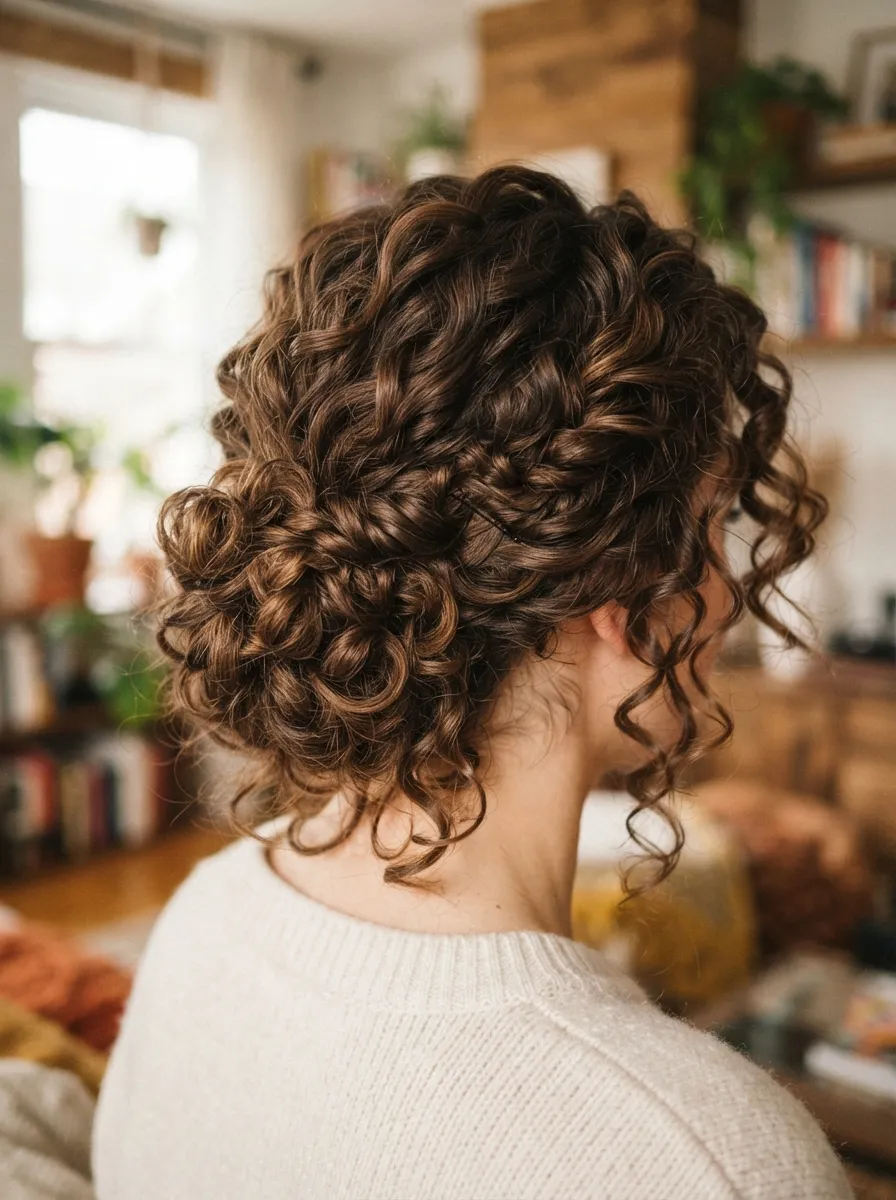
Curly hair holds shape differently than straight hair, so this style works with your curls instead of fighting them. Gather curls loosely at the nape of your neck. Twist gently, without smoothing, and pin in place, letting curls poke out around the edges.
This works well for everyday wear or casual outings, celebrating curl pattern rather than hiding it.
Budget tip: a curl-friendly leave-in conditioner from the drugstore helps curls hold shape in the bun without frizzing out by midday. DIY refresh trick: spritz a mix of water and a few drops of conditioner over the bun midday to refresh curls without restyling from scratch.
This style takes about five minutes since curly hair often needs less shaping to look intentional. It’s a good option for humid days when straight styles tend to frizz or fall flat quickly.
28. Sleek Ponytail Bun for Short Hair
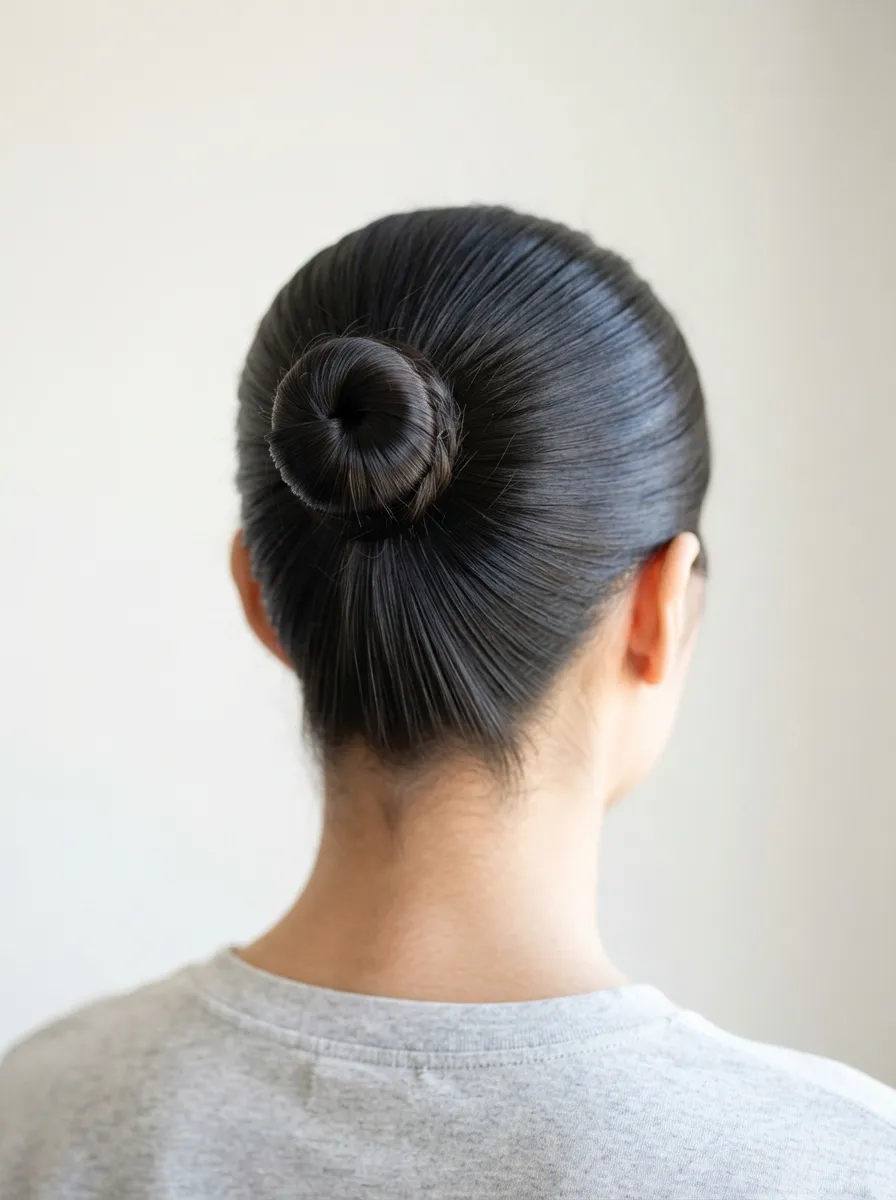
Short hair can still work into an updo with the right approach. Gather as much hair as possible into a small ponytail at the crown or nape, using gel to smooth flyaways.
Twist the ponytail into a tiny bun and pin it firmly. Any shorter pieces that won’t reach can be pinned flat against your head to blend in.
This works for work events, dinners, or any day you want short hair to look deliberately styled. It’s proof you don’t need long hair for a proper updo.
Budget tip: small clear elastics hold short ponytails better than thick ones, which can slip out. They’re inexpensive and easy to find in multipacks. DIY blending trick: use a small amount of gel on a toothbrush to press loose shorter pieces flat against your head so they blend into the bun smoothly.
This style takes under five minutes and proves that a polished updo is realistic no matter your hair length or texture.
Conclusion
You don’t need a stylist or a full salon budget to look polished. These 28 updo ideas show that a few pins, a cheap elastic, and a little practice can carry you through weddings, work days, and everything between. Start with the simplest styles, like the low bun or sock bun, then work your way toward braids and twists as your confidence grows. Keep a small kit of pins, clips, and a travel-size hairspray on hand so you’re always ready for a last-minute event or a bad hair day. The best part is that none of these looks require expensive tools or salon visits. Practice a couple of these at home this week, pick your two or three favorites, and you’ll always have a reliable, budget-friendly updo ready whenever you need one.