
1. Long Layers for Effortless Movement
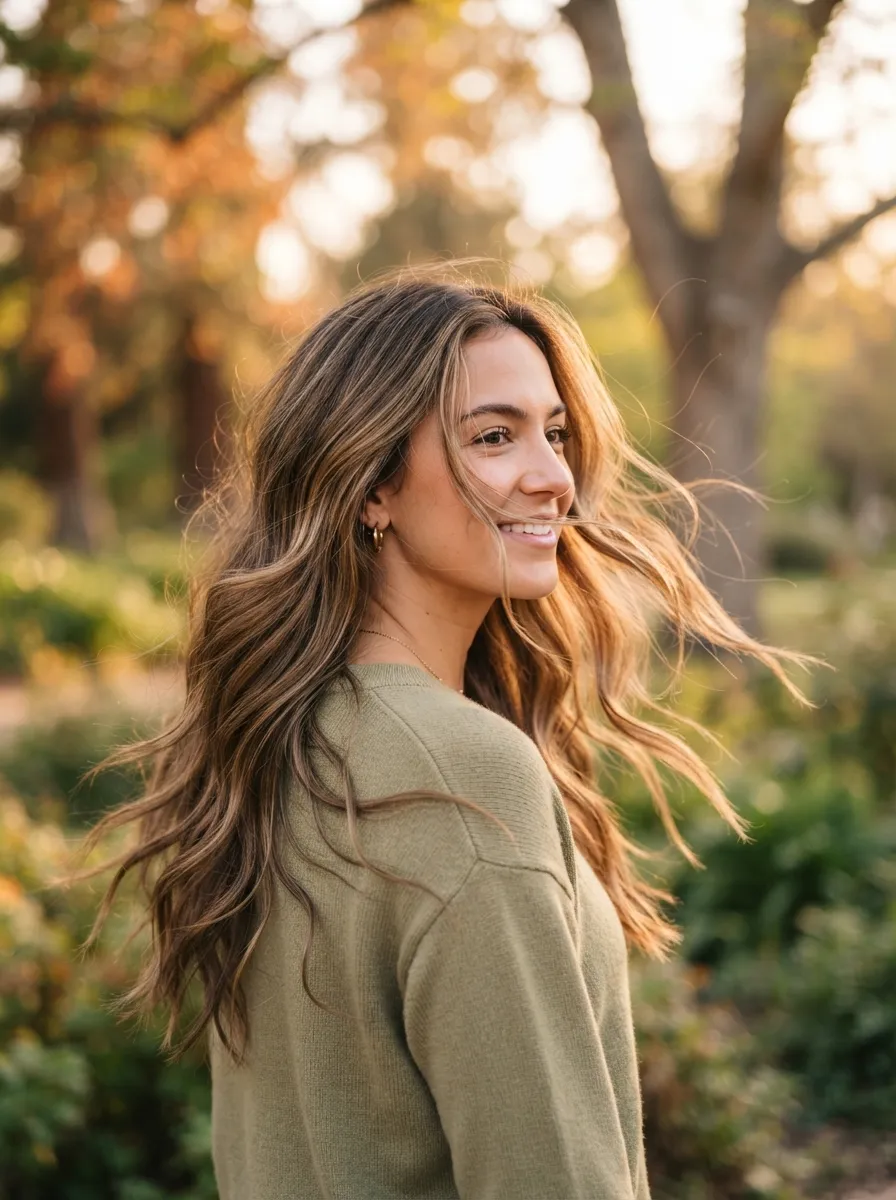
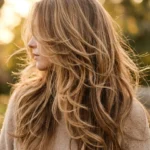
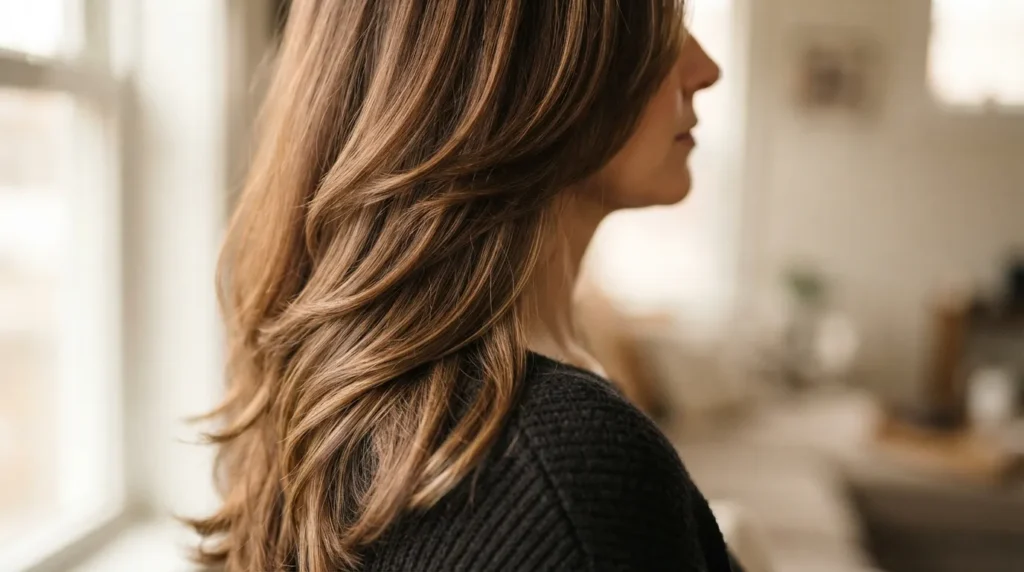
Long layers are the easiest way to add life to hair that hangs flat. The stylist cuts strands at different lengths starting around the chin and working down. This removes bulk without cutting off overall length. The result is hair that swings and bounces instead of sitting like a heavy curtain.
If you’re on a budget, ask your stylist for face framing pieces only, then let the rest grow out naturally. This cuts down on salon time and cost while still giving you movement near your face. At home, you can use thinning shears very lightly on the ends, just a few snips, to soften blunt lines between trims.
Long layers work well on straight and wavy hair alike. They also make blow drying faster since thinner sections dry quicker. Pair this cut with a light hydrating serum to keep ends from looking wispy. Ask for a “long layer trim” specifically, since some stylists interpret “layers” as shorter face framing pieces only.
2.Curtain Layers to Frame Your Face

Curtain layers part down the middle and sweep outward on both sides, framing the face like drapes. They’re grown out from a middle part and cut at an angle so they blend into the rest of your hair. This style softens sharp features and works on almost every face shape.
The budget friendly part here is that curtain layers grow out gracefully. You don’t need a trim every four weeks. A quick DIY trick is to use your fingers to twist the front sections and snip small angled cuts yourself between salon visits, just make sure your scissors are sharp fabric or hair shears, not kitchen scissors.
Style them with a round brush and blow dryer, curling the ends slightly away from your face. If you don’t own a round brush, wrap sections around a large barrel curling iron for two seconds per piece. Curtain layers pair naturally with middle parts, and they photograph well since they add soft shadow along the cheekbones without needing extra makeup contour.
3.Shag Layers for Instant Texture

Shag layers are choppy, uneven, and full of texture. The cut removes weight all over, not just at the ends, so hair looks piece y and full rather than smooth. This is the go to choice if your hair feels flat no matter what you do.
A shag cut costs about the same as a regular trim since it doesn’t require extra time, just a different cutting technique. Ask your stylist to point cut instead of blunt cut, which creates that broken up texture. At home, a texturizing spray with sea salt works well to enhance the choppy look between washes.
Shag layers suit thick and medium hair best since fine hair can look overly thin with this much layering. If your hair is fine, ask for shag layers only at the ends rather than throughout. Air drying with a texturizing cream scrunched into damp hair gives a lived in look without heat styling, saving both time and your hair’s health.
4.Wolf Cut Layers for Bold Volume
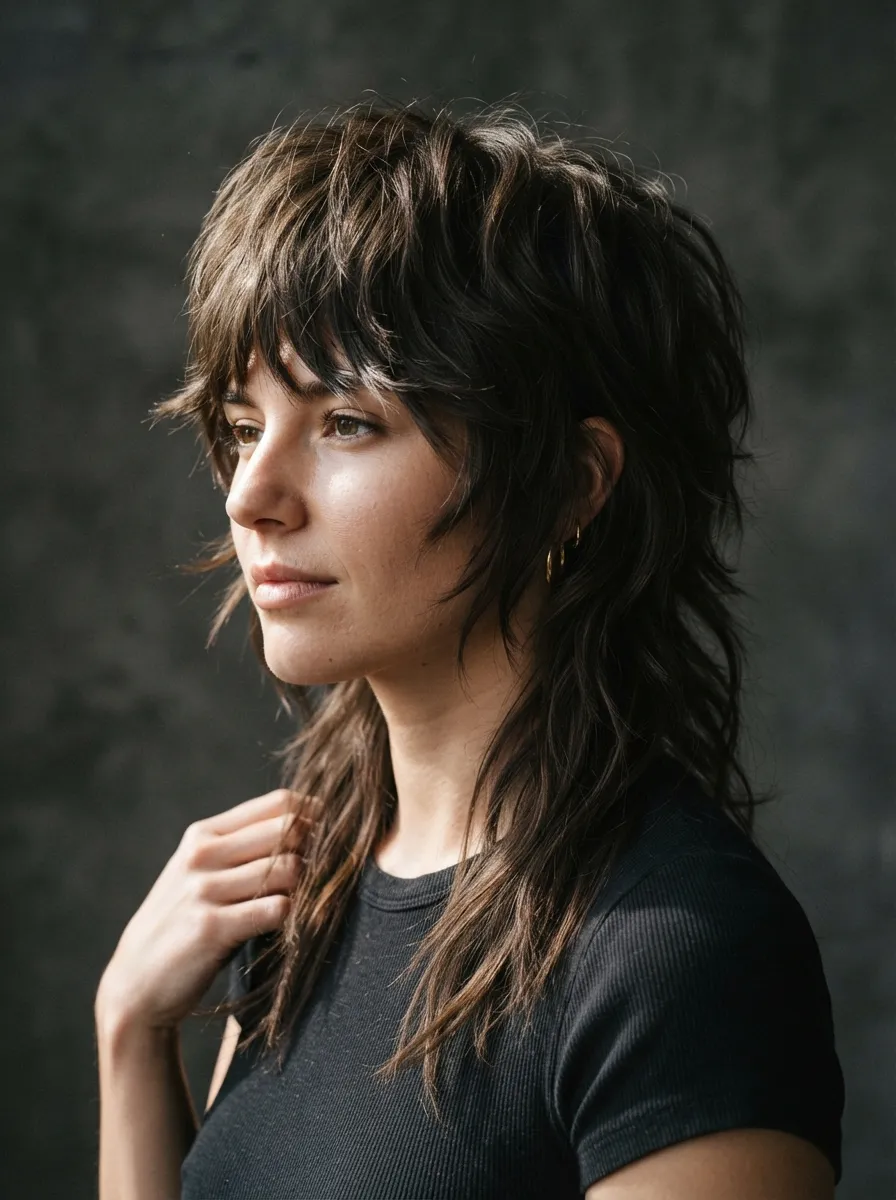
The wolf cut combines a shag with a mullet, creating heavy volume at the crown and shorter, choppier pieces near the face. It’s dramatic and works best on those wanting a bold change. Short layers up top mean less length to manage day to day.
Since this cut requires precision, it’s worth paying for a stylist who has done wolf cuts before rather than attempting it yourself. However, maintenance is budget friendly afterward since the choppy nature hides regrowth well between trims. You can stretch visits to every 8 to 10 weeks instead of every 6.
Style with a diffuser attachment on your blow dryer to enhance natural texture without flattening the crown volume. A small amount of mousse applied to damp roots before diffusing adds lift that lasts through the day. The wolf cut suits wavy and curly textures especially well since the natural bend adds to the layered shape.
5.Feathered Layers for Soft Waves

Feathered layers taper at the ends, creating a soft, wispy finish reminiscent of a bird’s feather. This technique works especially well for hair that’s naturally wavy since the layers follow the wave pattern instead of fighting it. The look is soft, romantic, and low maintenance.
This cut is budget friendly because it doesn’t require frequent salon visits. The feathered ends grow out softly rather than in a noticeable blunt line. A simple DIY method between trims involves twisting small one inch sections and snipping the very tips at an angle, removing minimal length while keeping the feathered effect.
To style, use a diffuser or simply scrunch a curl cream into damp hair and let it air dry. Avoid brushing feathered layers when dry since this can create frizz and disrupt the soft shape. This cut pairs beautifully with balayage since the color highlights each individual feathered piece as it catches light.
6.Butterfly Layers for Round Volume
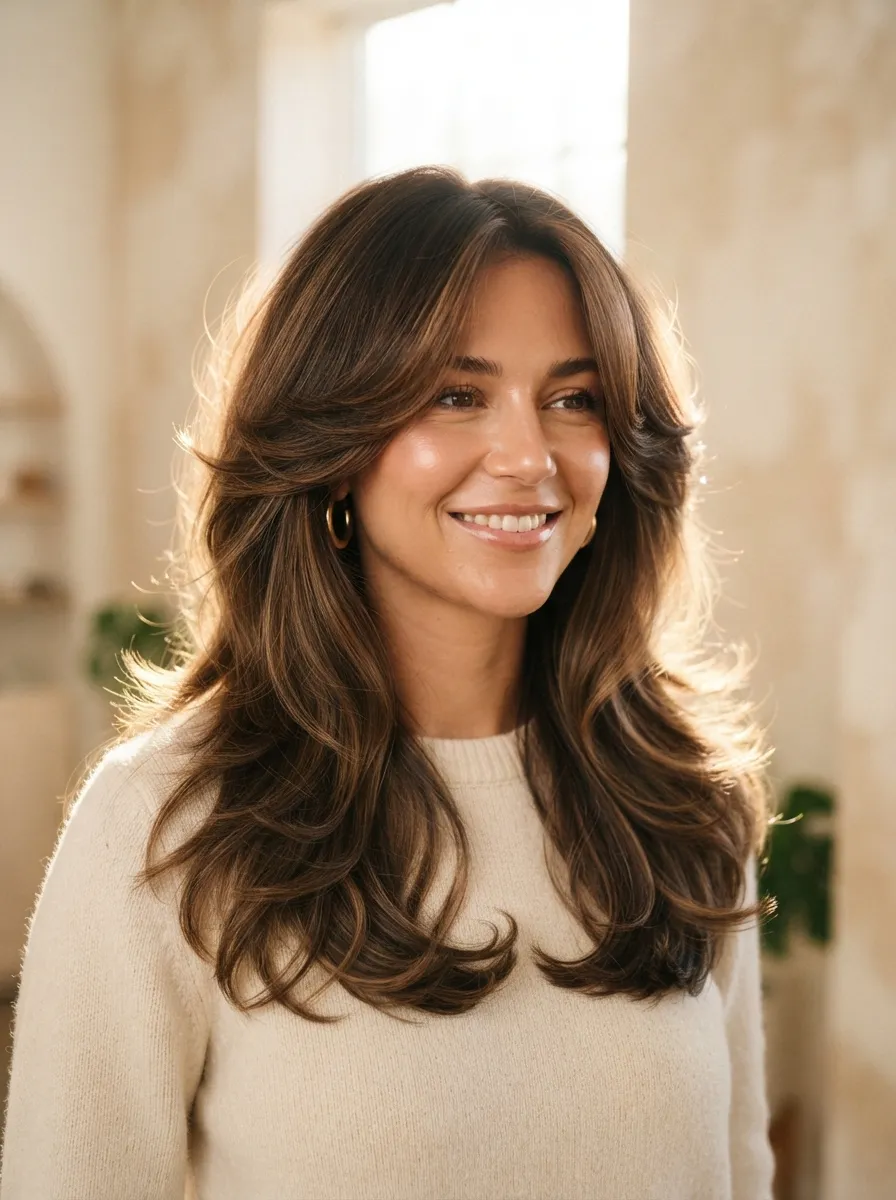
Butterfly layers are cut in rounded sections that fan out from the crown, creating a shape similar to butterfly wings when hair is pulled to the sides. This technique adds serious volume without removing much length overall. It’s a favorite for those who want dramatic body.
Because the technique focuses on shaping rather than heavy cutting, it can be more affordable than a full layer overhaul. Ask your stylist for “money piece butterfly layers” if you want the effect concentrated near your face only, which reduces the amount of hair that needs cutting.
At home, you can enhance the butterfly shape using a round brush while blow drying, rolling sections under and away from your face. A volumizing mousse applied at the roots before drying helps hold the rounded shape through the day. This cut looks especially full on hair that’s naturally straight or has a slight wave.
7.Choppy Layers for Edgy Texture
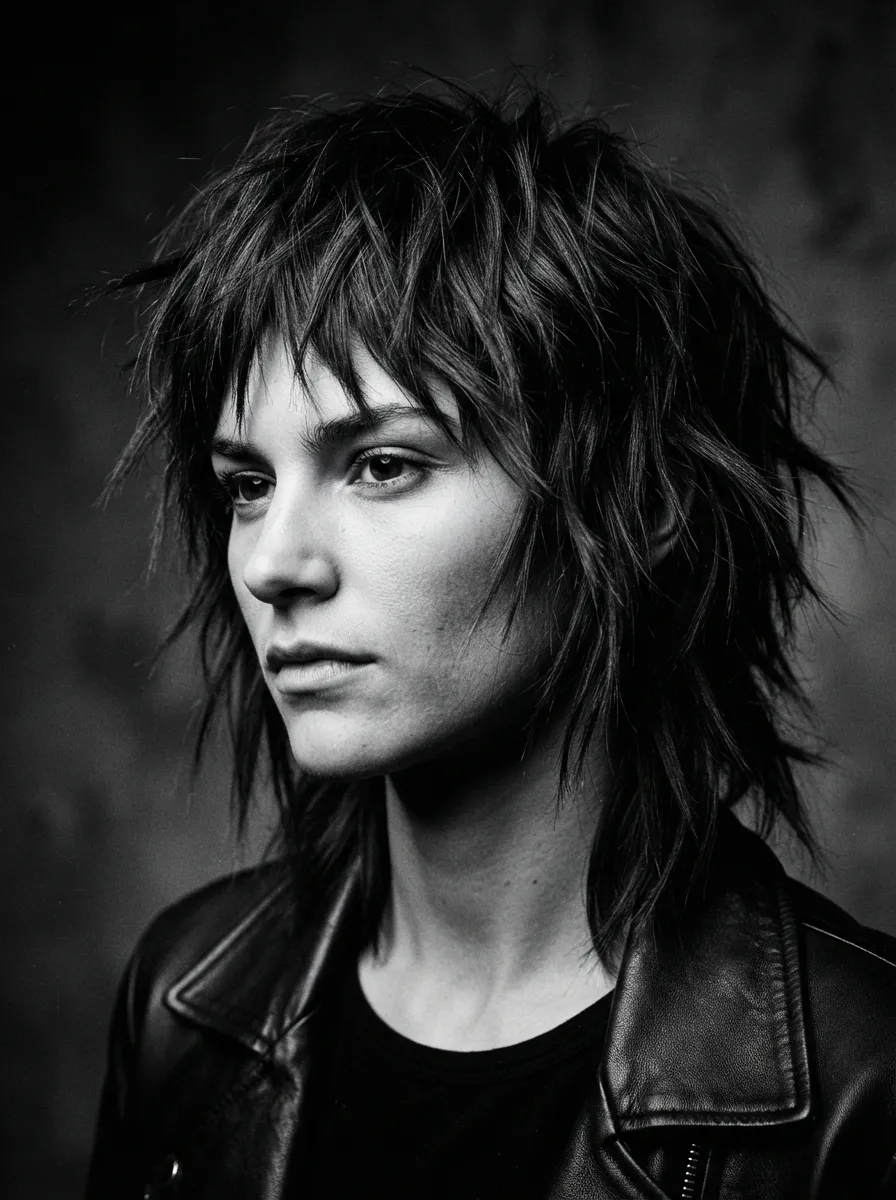
Choppy layers use sharp, jagged cutting techniques to remove weight and create an edgy, undone look. Unlike smooth layers, these are meant to look intentionally rough. This style suits anyone wanting a change from a polished, uniform haircut.
This cut is one of the more affordable options since it doesn’t require precision blending, just confident cutting. If you want to try a DIY refresh between salon visits, twist small sections tightly and snip straight across the twisted rope, this naturally creates choppy, uneven ends.
A texturizing paste or clay works best for styling, rubbed between palms and scrunched through dry hair. Avoid smoothing serums since they work against the choppy effect. This cut holds up well in humid weather since the broken ends disguise frizz rather than showing it, making it a practical choice for warmer climates.
8.Face Framing Layers for Fine Hair
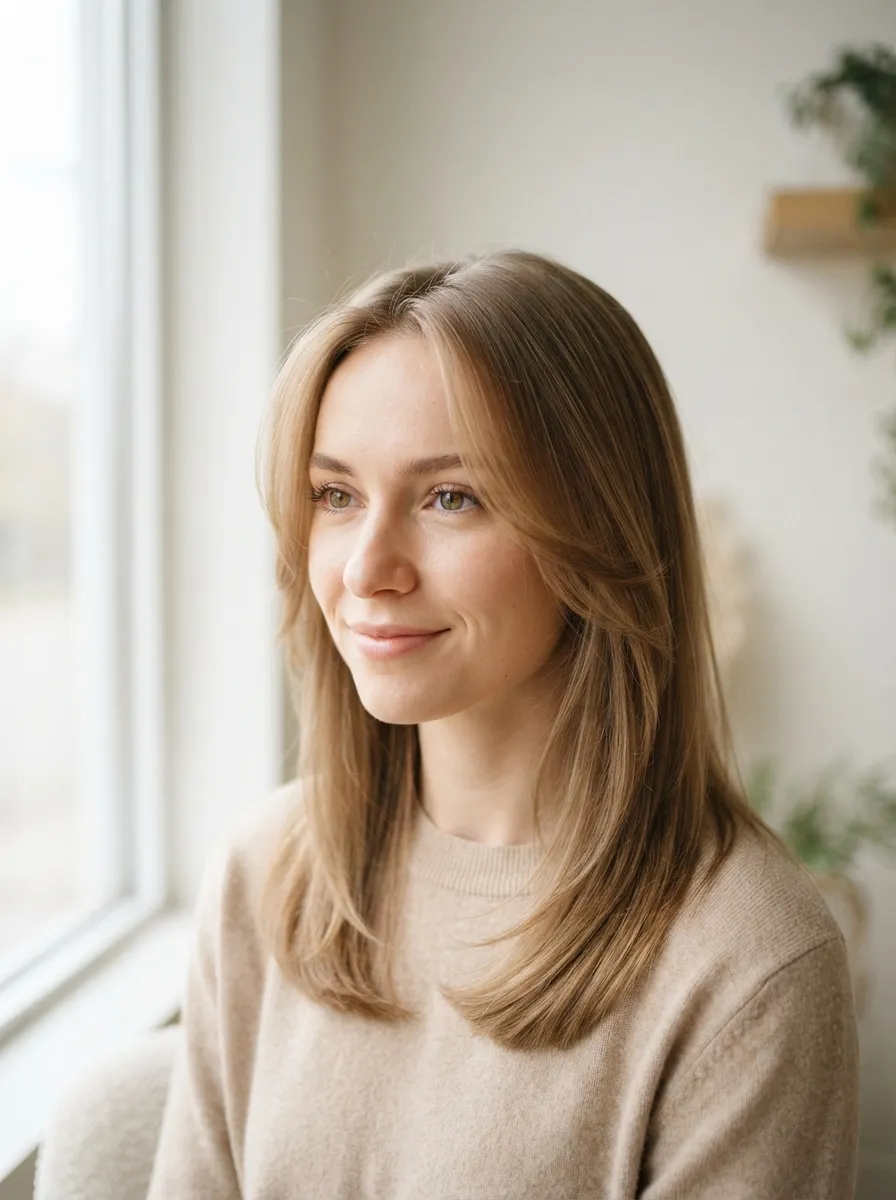
Fine hair can look thin and flat with too much layering, so face framing layers focus only on the pieces around your cheeks and chin. This adds shape and interest without removing density elsewhere. Less cutting means your hair keeps its fullness.
This is a low cost option since it only involves a small section of hair rather than a full head layer cut. Many stylists will do this as an add on to a regular trim at little to no extra charge. At home, you can twist the front two sections and trim just the very ends at a slight angle.
Style with a small round brush, curling just the framing pieces inward toward your face. A lightweight mousse works better than heavy creams for fine hair, since heavier products can weigh down the framing effect. This cut pairs well with a low maintenance routine since it only needs occasional touch ups every few months.
9.Long Bob with Layers
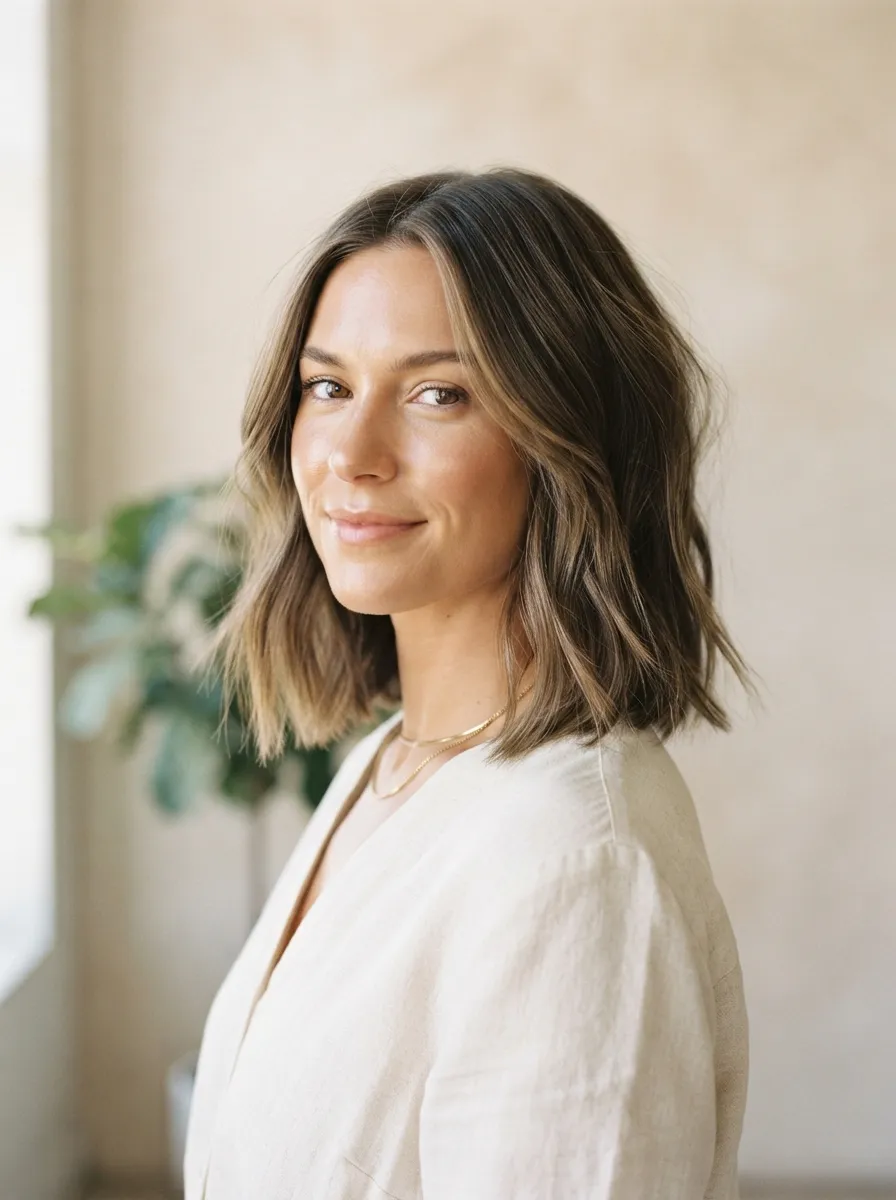
A long bob, often called a lob, gets extra dimension when layers are added underneath the surface. This keeps the outer line smooth while allowing movement and texture from beneath. It’s a versatile length that works for both casual and formal settings.
This cut is affordable to maintain since a lob only needs trimming every two to three months to keep its shape. Layers added underneath grow out slowly without disrupting the overall silhouette. If you want to try adding texture at home, use thinning shears very sparingly on the underlayer only, never on the top visible layer.
Style with a flat iron for a sleek look, or add loose waves with a curling wand for a softer finish. A texturizing spray at the roots adds lift for those with thinner hair. This cut suits nearly every hair type and works especially well for those transitioning from long hair to a shorter length gradually.
10.Layered Lob for Thick Hair
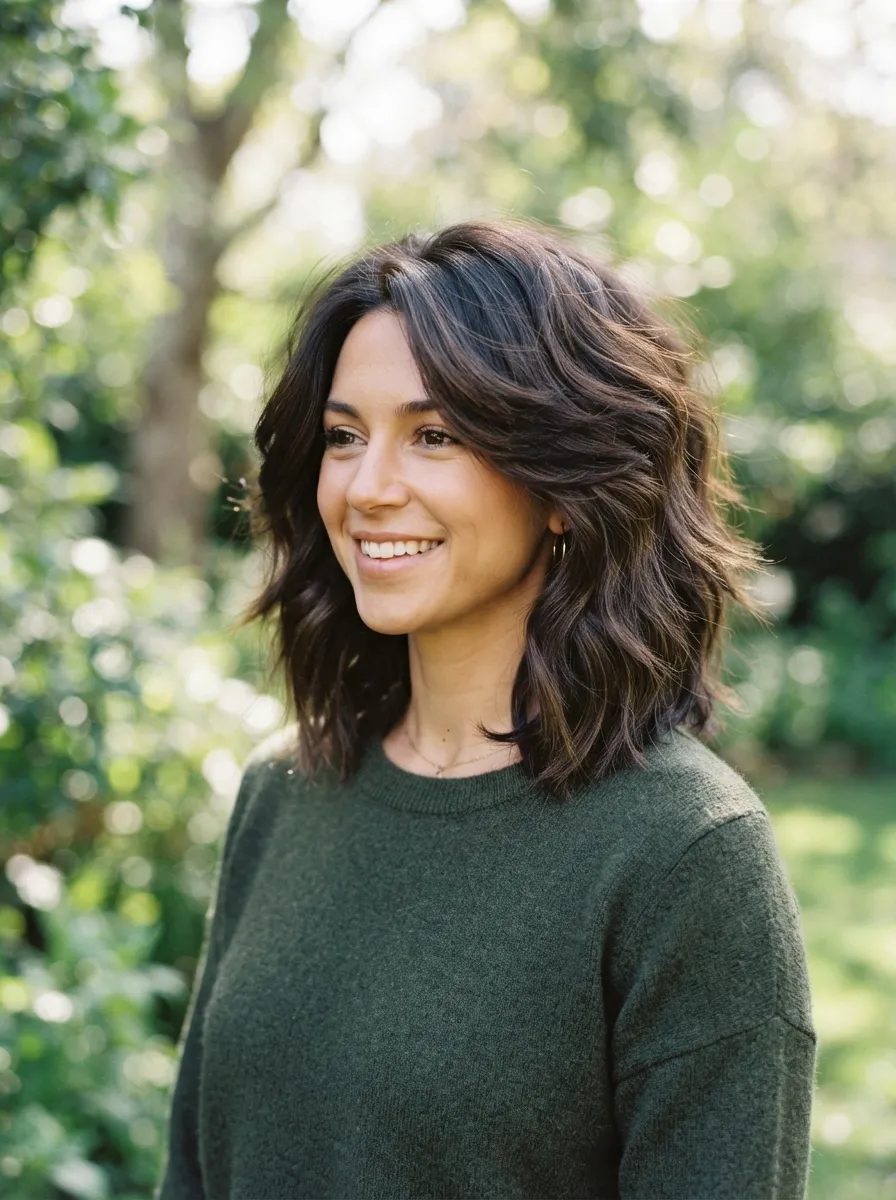
Thick hair often feels heavy and hard to style, so a layered lob removes bulk while keeping length just above the shoulders. Layers are cut throughout rather than just at the surface, thinning out density evenly. This makes thick hair easier to manage daily.
Since thick hair requires more cutting time, this style might cost slightly more at first, but it saves money long term by requiring less product to manage frizz and weight. A DIY tip between visits is to use a thinning shear on the underneath sections only, working in small one inch pieces.
Blow dry with a paddle brush to smooth the outer layer while leaving the underneath layers looser for texture. A lightweight oil applied to the ends prevents dryness without adding extra weight. This cut works particularly well for hair that’s prone to puffiness in humidity, since thinning out the density reduces overall bulk.
11.Curly Layers for Defined Curls
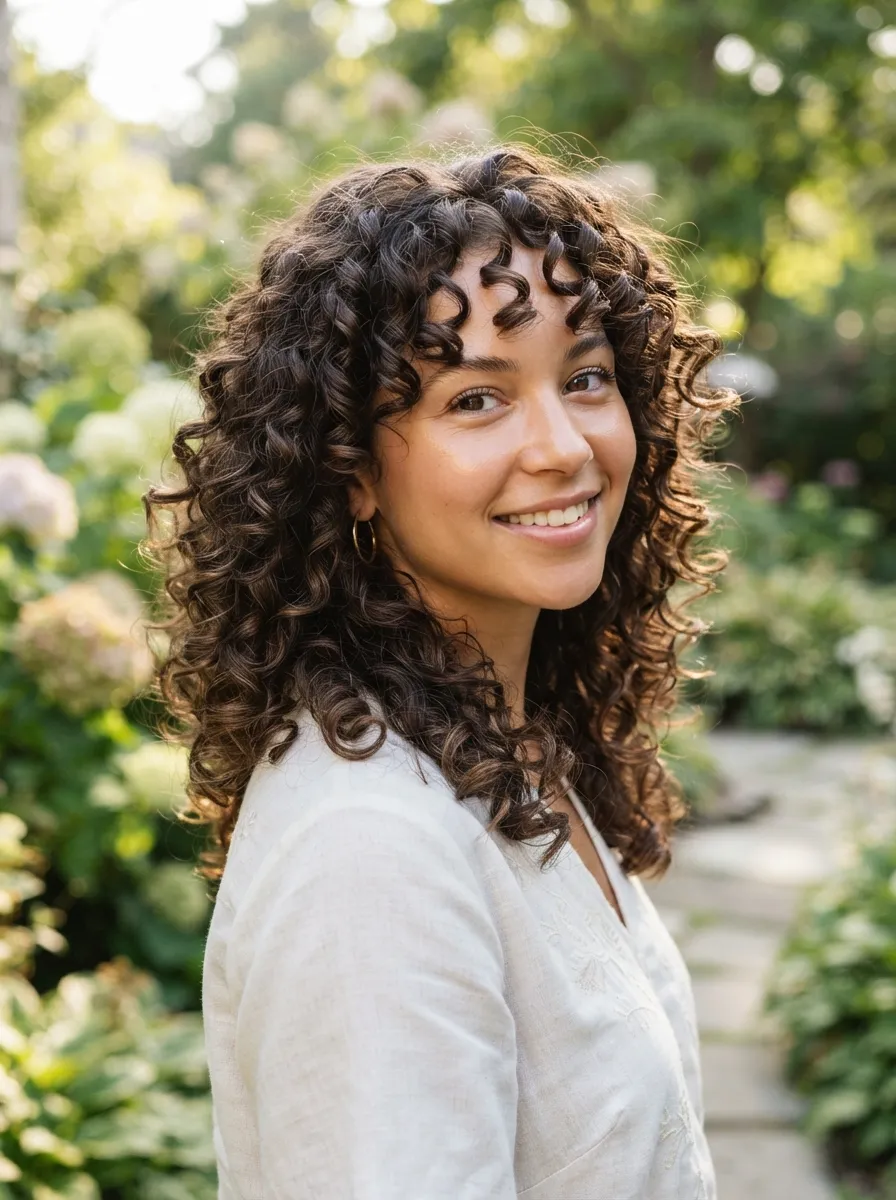
Curly hair needs layers cut specifically for its curl pattern, ideally while the hair is dry so the stylist can see exactly how each curl falls. This prevents the pyramid shape that can happen when curly hair is cut too blunt. Proper layering lets curls bounce instead of clump.
Look for a stylist who specializes in curly cuts, since this can be a worthwhile investment even if it costs slightly more than a standard trim. Between appointments, a budget friendly trick is a technique called curl by curl trimming, where you twist individual curls and snip only the very split ends.
Style with a leave in conditioner followed by a curl cream, then scrunch upward while the hair is soaking wet. Diffusing on low heat helps set the curl pattern without frizz. Avoid brushing curly layers when dry, since this breaks up the curl clumps and creates a puffier, less defined shape.
12.Blunt Layers with Soft Face Frame
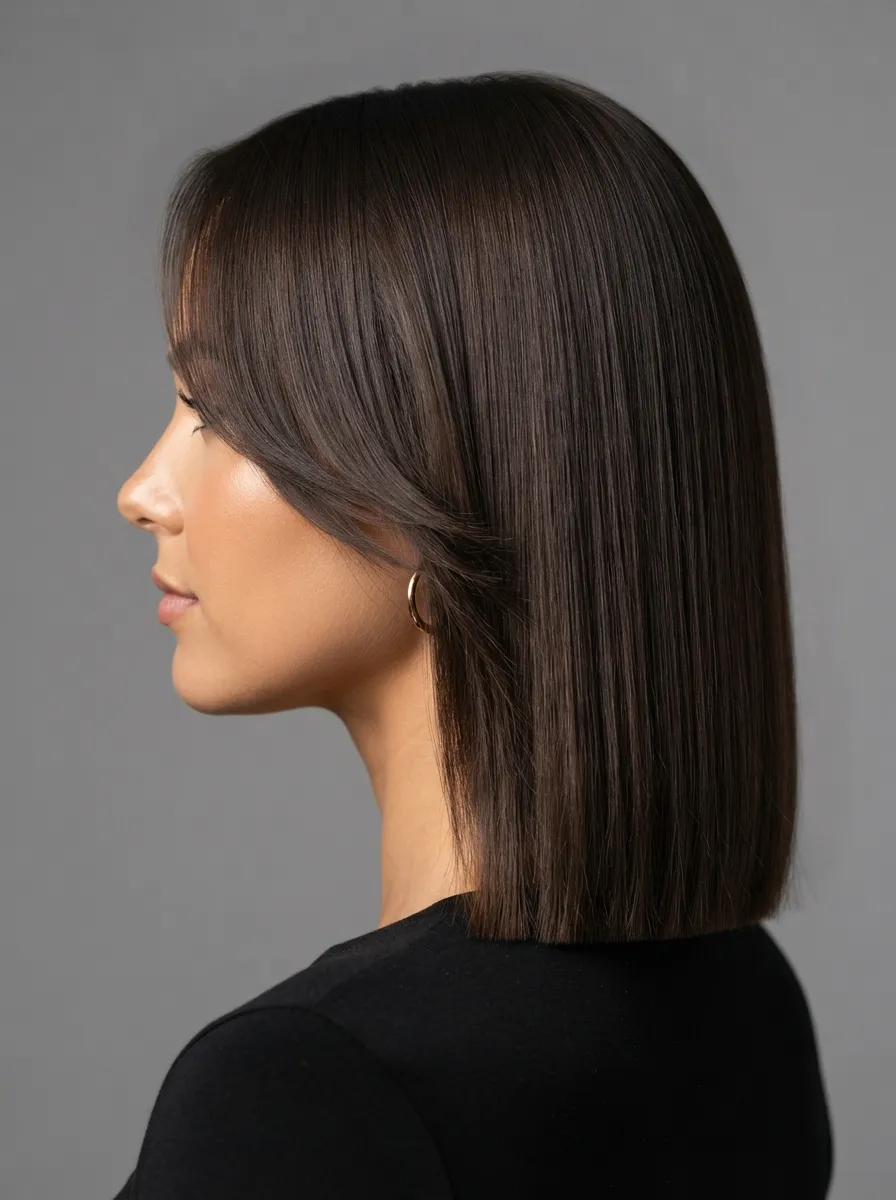
This style keeps the overall length blunt and heavy while adding just a few soft layers around the face. It’s a middle ground between a fully layered cut and a completely blunt one. You get shape near the face while keeping thickness everywhere else.
This is one of the more affordable layering options since only a small portion of hair needs cutting. Many salons charge the same price as a regular blunt trim for this add on. At home, you can create this effect by clipping back most of your hair and only trimming the two face framing sections at an angle.
Style with a flat iron for a sleek finish, curling just the framing pieces inward at the ends. This cut works especially well for those who want the appearance of layers without sacrificing the fullness that comes with a blunt cut, making it a popular choice for thicker or coarser hair types.
13.Layered Pixie for Short Hair
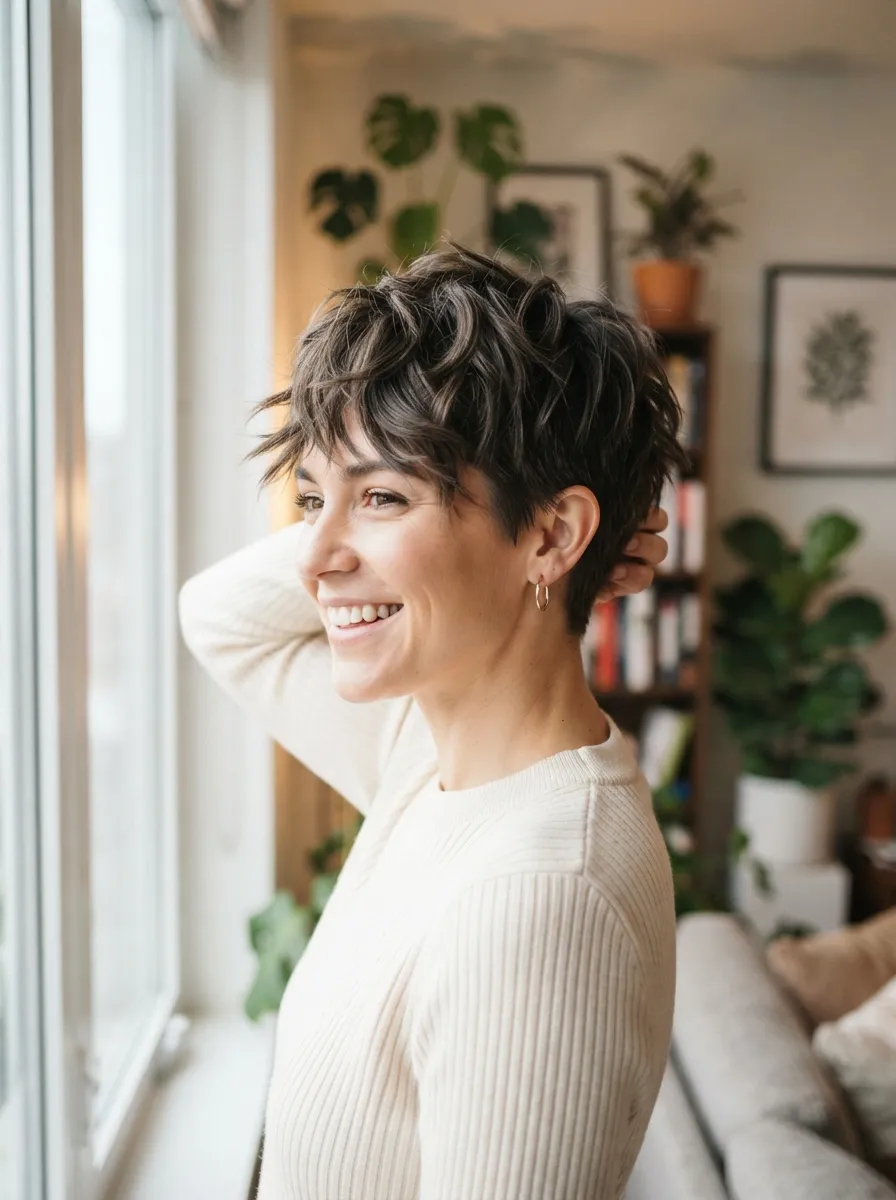
A layered pixie adds texture and movement to short hair instead of leaving it flat against the head. Layers are cut throughout the crown and sides, creating pieces that can be styled up or textured with product. This transforms a plain pixie into something with personality.
Short haircuts generally cost less over time since they use less product and take less time to wash and dry. A layered pixie needs trims every four to six weeks to maintain shape, but each visit tends to be quick and affordable compared to longer layered cuts.
Style with a small amount of pomade or wax worked through damp hair before drying, focusing on the crown for lift. A texturizing spray adds grip for those wanting a more piece y finish. This cut suits round and oval face shapes especially well since the layered crown adds height and balance.
14.V Cut Layers for Straight Hair
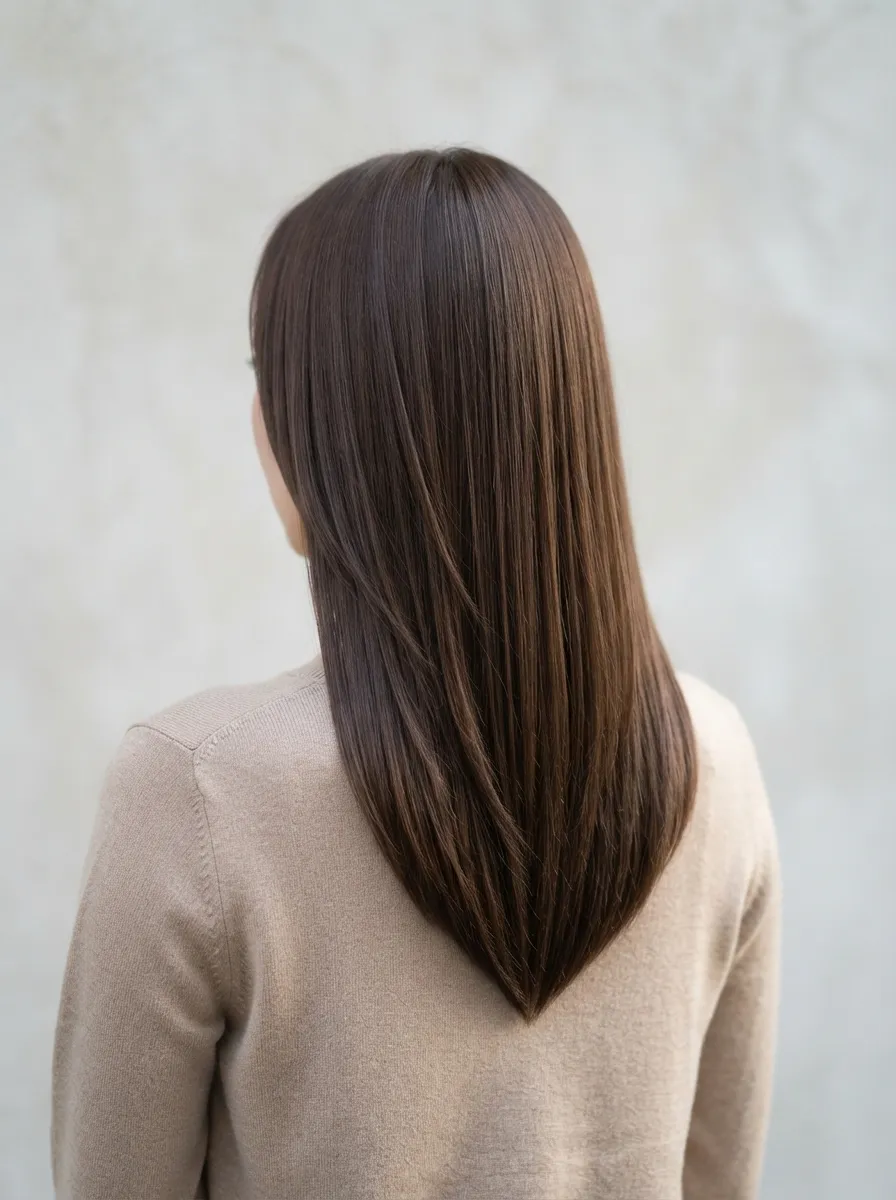
A V cut layers hair so the back forms a distinct V shape, with shorter layers framing the sides and longer length in the center back. This works particularly well on straight hair since the sharp lines are easy to see and maintain. It adds shape without heavy texture.
This cut is budget friendly since it requires standard trimming techniques rather than specialized texturizing tools. You can maintain the shape between visits by trimming just the very center point yourself, using a mirror behind you to check the angle before cutting a small amount.
Style with a flat iron to emphasize the sharp V line, or add loose waves for a softer take on the same shape. A shine serum applied to the ends highlights the clean lines of this cut. V cut layers work well on hair past shoulder length, since shorter hair doesn’t show the shape as clearly.
15.U Cut Layers for Wavy Hair
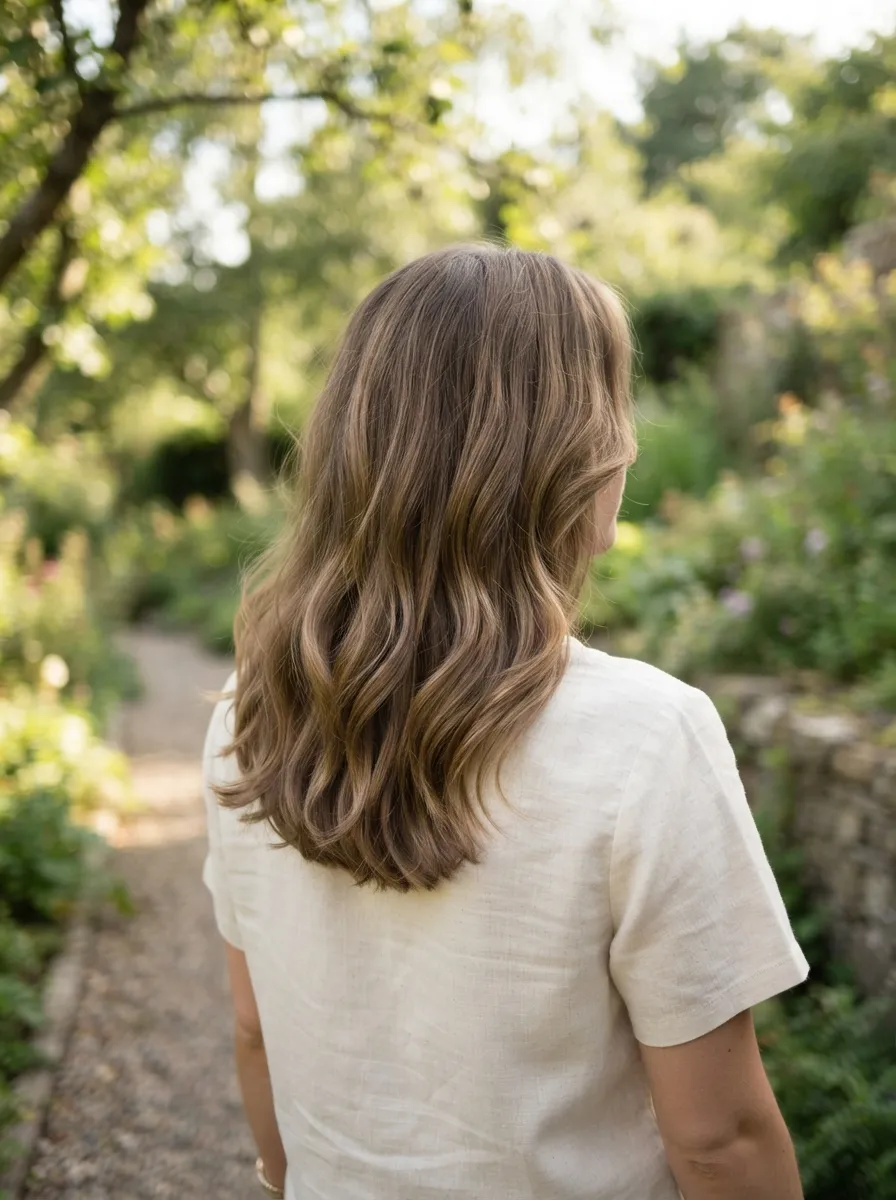
A U cut rounds off the back of the hair instead of cutting a sharp point, giving a softer silhouette than a V cut. This pairs naturally with wavy hair since the rounded shape follows the natural movement of waves. The result looks soft and effortless.
This cut is affordable since it’s a common technique most stylists can do quickly. Maintenance is also easy since the rounded shape hides regrowth better than a sharp angled cut, allowing you to stretch time between trims to around 10 to 12 weeks.
Style by scrunching a curl cream into damp hair and air drying, or use a curling wand on a medium barrel for loose waves if your hair is naturally straighter. A light hairspray helps hold the wave pattern through humid days. This cut suits medium to long lengths and works on nearly all face shapes.
16.Razor Cut Layers for Thin Hair
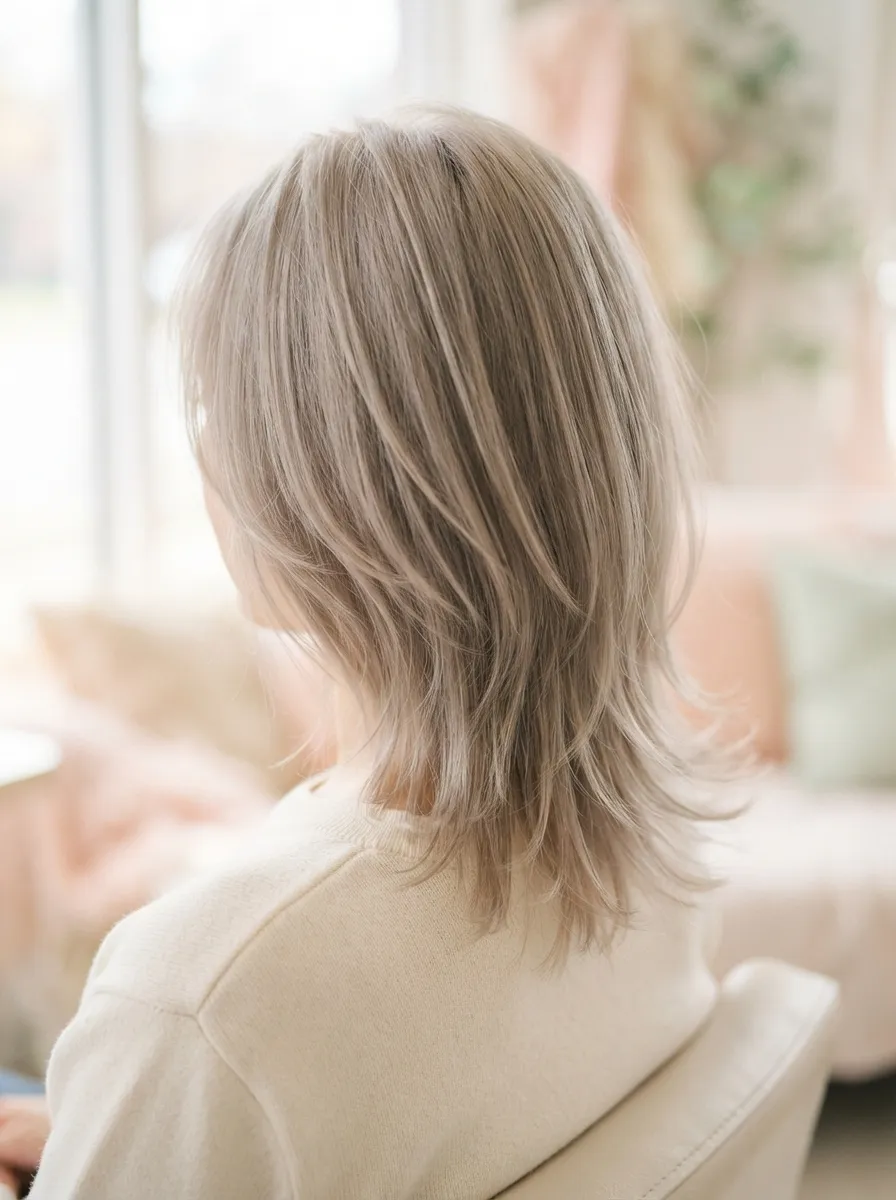
Razor cutting uses a blade instead of scissors to create soft, tapered ends rather than blunt lines. This technique works well on thin hair since it adds the appearance of texture without removing too much density. The ends look naturally soft rather than thinned out.
This service typically costs about the same as a regular haircut, making it a practical choice if you want texture without paying extra for specialized thinning treatments. It’s best left to a professional though, since razor cutting requires practice and the wrong technique can create split ends more quickly.
Style with a lightweight volumizing mousse at the roots, then blow dry upside down for extra lift. Avoid heavy oils on thin hair since they can flatten the texture this cut is meant to create. Regular trims every six to eight weeks help keep the razored ends looking soft rather than frayed.
17.Side Swept Layers for Round Face
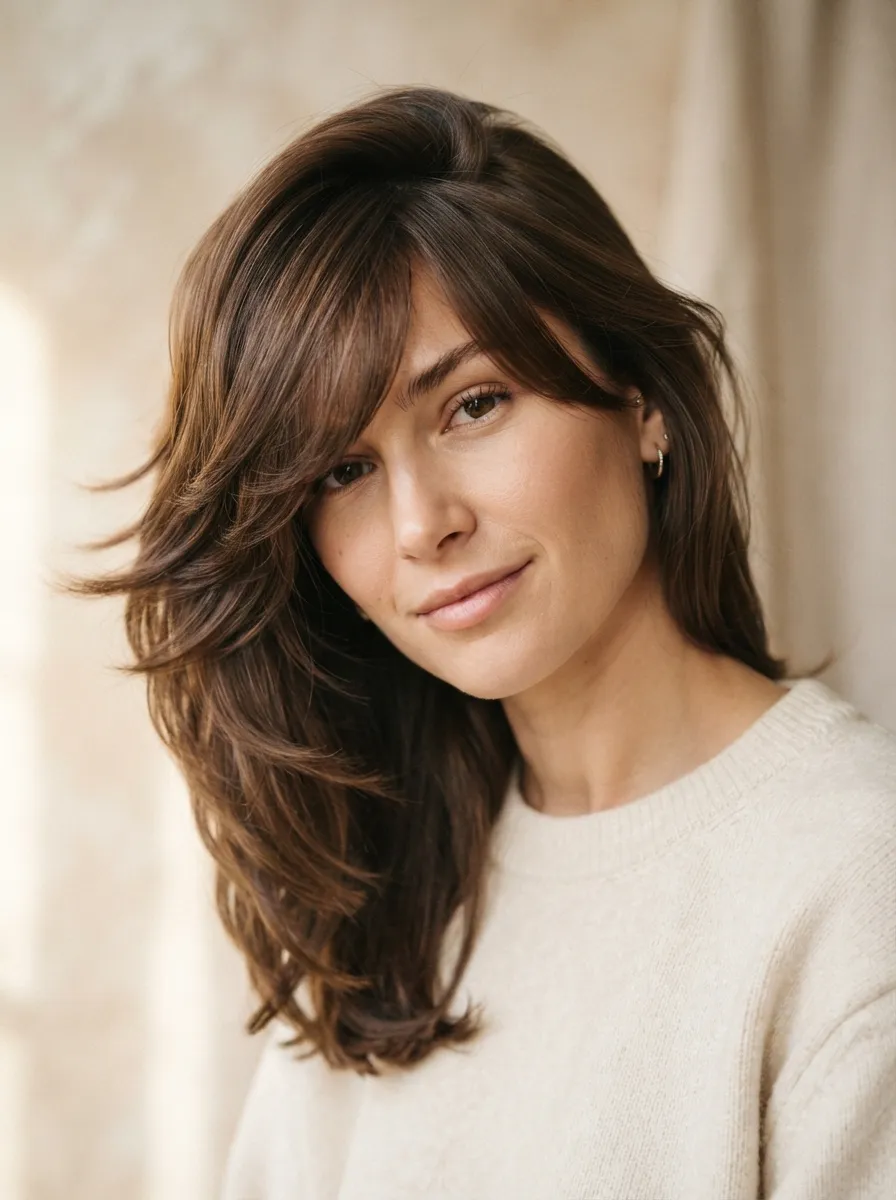
Side swept layers direct length and volume to one side of the face, creating a diagonal line that adds angles to a round face shape. This softens roundness by breaking up the symmetry. The style is flattering without needing a full haircut change.
This is an affordable option since it can often be achieved through styling alone rather than a new cut, though asking your stylist to add a deep side part with graduated layers makes the effect more permanent. At home, simply parting your hair deeply to one side creates an instant version of this look.
Use a round brush to sweep the longer side across your forehead while blow drying. A small amount of pomade helps keep flyaways controlled along the swept section. This style pairs well with curtain layers for those wanting an even softer, more blended face framing effect throughout the whole head.
18.Money Piece Layers for Highlights
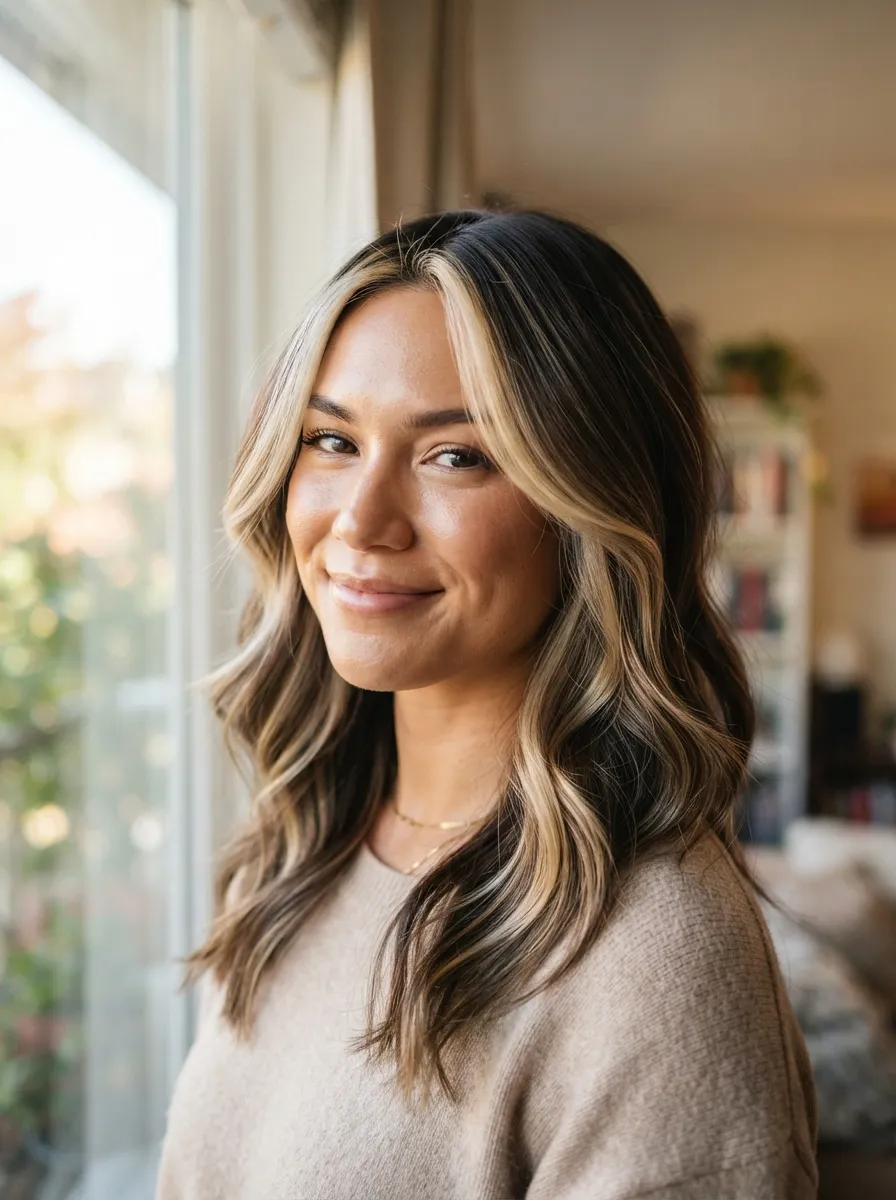
Money piece layers combine a haircut technique with a coloring technique, where the front face framing pieces are cut into layers and then highlighted lighter than the rest of the hair. This creates a bright, dimensional frame around the face. It’s a popular way to brighten your look without a full color change.
This is more of an investment upfront since it involves both cutting and coloring, but it’s more budget friendly than a full head of highlights since only two small sections need lightening. Many salons offer this as a standalone service specifically because of its lower cost compared to full highlights.
Maintain the color with a purple toning shampoo used once a week to keep brassiness away. Style the framing pieces by curling them away from your face for extra brightness near your features. This combination works on nearly every hair color, though it shows up most dramatically on medium to dark brown bases.
19.Layered Mullet for Retro Style

The modern mullet brings back a retro shape with an updated layering technique, keeping the top and sides shorter while the back stays longer. Heavy layering throughout softens the harsh contrast that made older mullets look dated. It’s a bold choice for those wanting a distinct style.
This cut can be more time consuming to create initially, so expect to pay slightly more for the first appointment. After that, maintenance is affordable since the layered shape disguises regrowth well between trims, and many people stretch appointments to every two to three months.
Style with a texturizing spray worked through damp hair, then air dry or diffuse for natural texture. Adding volume at the crown with a bit of backcombing enhances the shape further. This cut works particularly well on wavy or curly hair, since the natural texture adds to the layered, undone look this style is known for.
20.Long Layers with Bangs
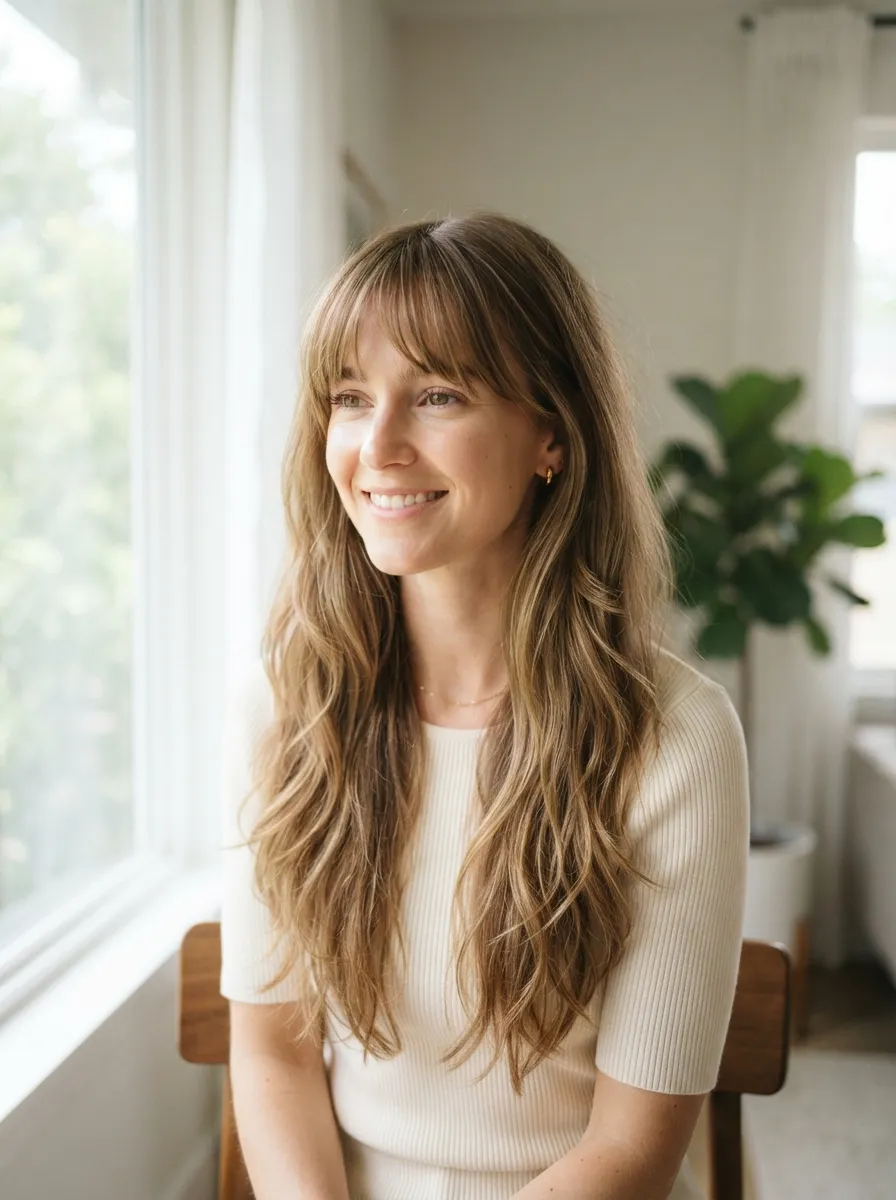
Adding bangs to a long layered cut changes the entire face shape instantly, softening the forehead while the rest of the length keeps its movement. Wispy, textured bangs blend more naturally into the layers than a thick, blunt fringe. This combination refreshes long hair without major length loss.
Bangs are a low cost addition to any existing cut, and most stylists will trim just the front section for free or a small fee between full appointments. At home, wispy bangs are fairly forgiving to trim yourself, just section off a small triangle at the crown and cut small amounts at a time.
Style bangs with a small round brush, blow drying them to the side or straight down depending on your preference. A light hairspray keeps them in place through the day. This combination works particularly well for those wanting to hide forehead wrinkles or a larger forehead without committing to a full new haircut.
21.Textured Layers for Square Face

Square face shapes benefit from layers that add softness around the jawline, breaking up sharp angles with rounded, textured pieces. Layers cut just below the chin draw attention away from a strong jaw. The right texture softens features without hiding them.
This is an affordable adjustment to request at your next regular trim, since it doesn’t require extra time beyond a standard haircut. Ask your stylist to focus layering around the jaw and chin area specifically rather than throughout the whole head, which keeps the cost the same as a basic trim.
Style with loose waves using a curling wand, focusing curls around the jawline to enhance the rounded, softening effect. A texturizing spray adds grip and prevents the waves from falling flat too quickly. This cut pairs well with side swept bangs for an added softening effect around strong facial features.
22.Layered Waves for Heart Face
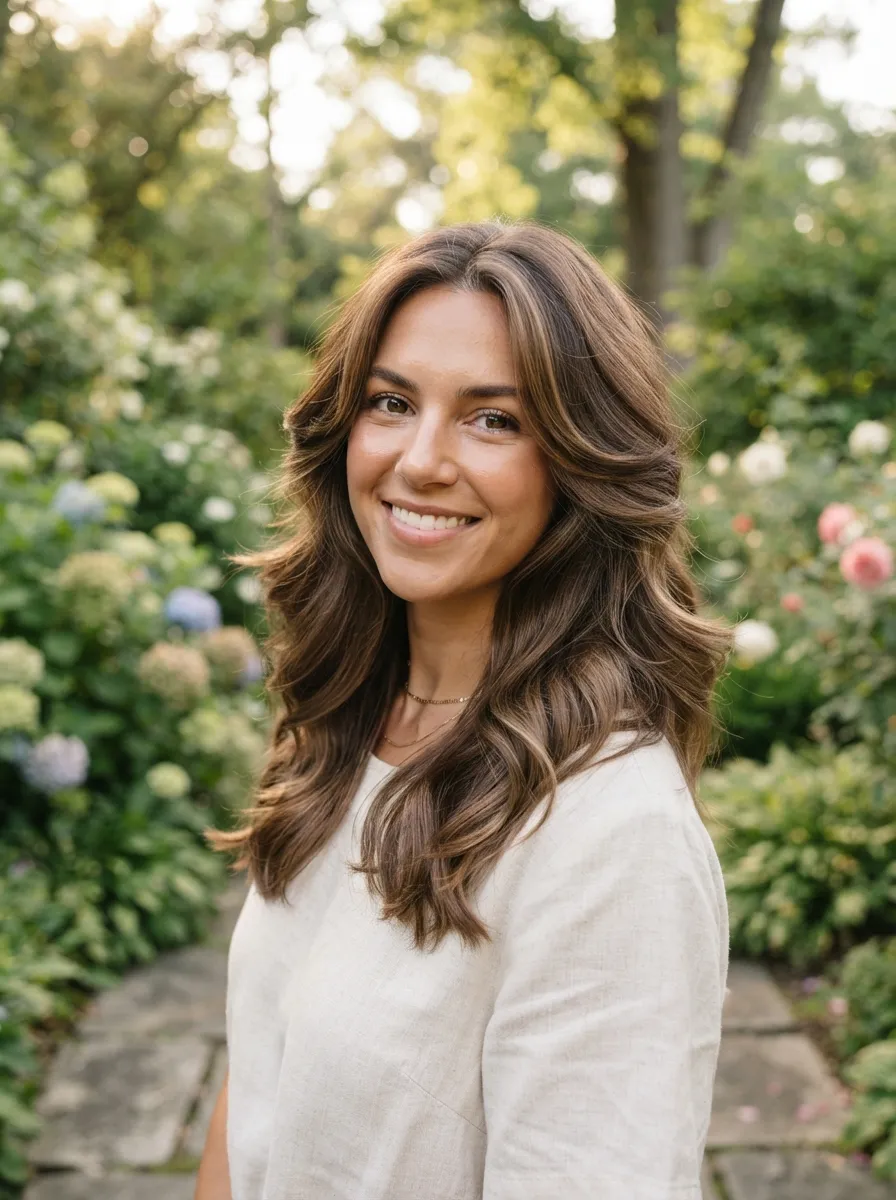
Heart shaped faces are wider at the forehead and narrower at the chin, so layers that add width near the jaw help balance proportions. Waves add natural fullness in this area without needing extra products. This creates visual balance across the whole face.
This is a low cost styling adjustment since it can be achieved with a standard trim plus a request for extra layering near the ends rather than the crown. At home, waves can be created affordably using a flat iron instead of a curling wand, simply clamping and twisting sections downward.
A sea salt spray applied to damp hair before waving helps the style hold longer without needing extra hairspray. This cut and style combination works especially well for medium length hair, since shorter styles may not have enough length near the jaw to create the fullness heart shaped faces benefit from.
23.Invisible Layers for Sleek Hair
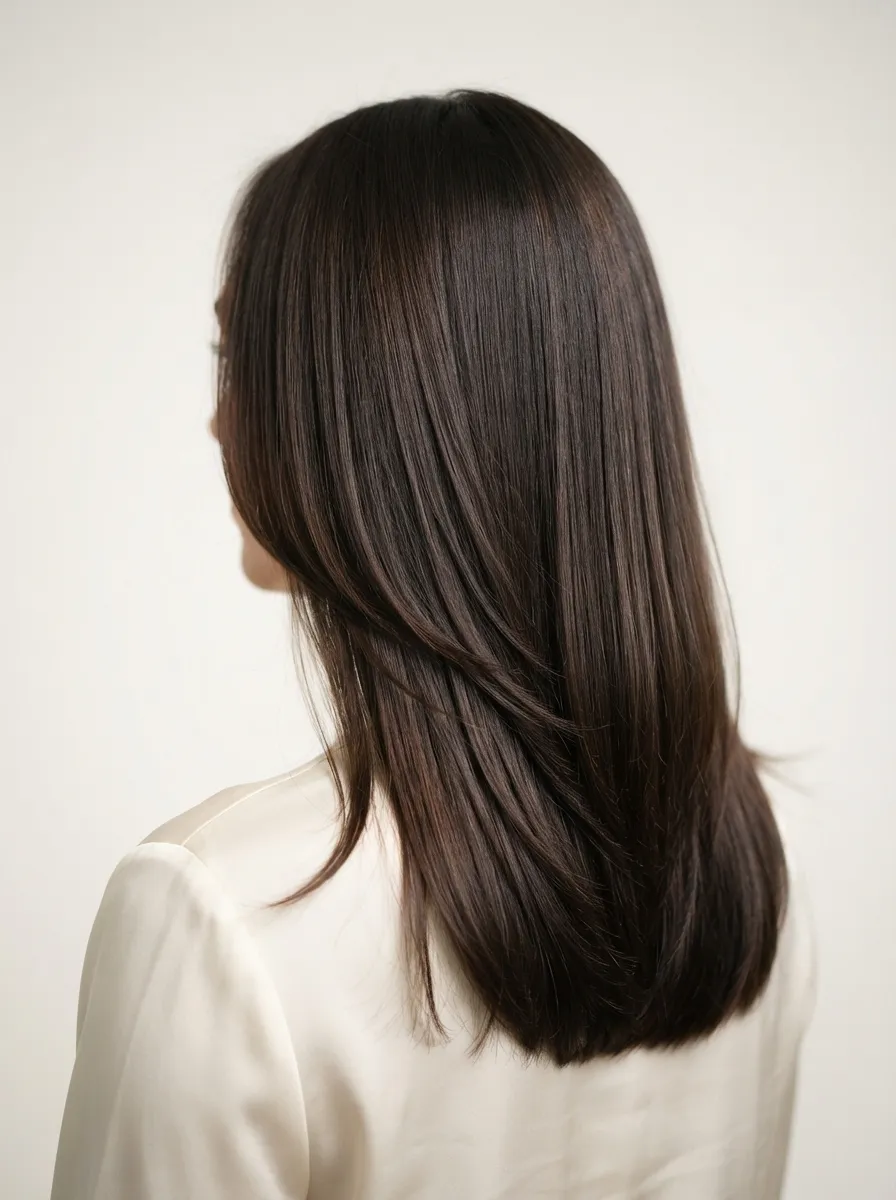
Invisible layers are cut underneath the top layer of hair, so the surface looks completely smooth while the underneath hair carries movement and lightness. This technique is popular for those who want the benefits of layering without any visible texture change. The hair looks sleek but feels lighter.
This cut works well for anyone wanting a subtle update rather than a dramatic change, and it typically costs the same as a regular trim since it uses standard cutting techniques just applied to different sections. It’s a good option to request if you’re unsure about visible layers but want less bulk.
Style with a flat iron for the smoothest finish, or simply air dry for natural movement from the underneath layers. This cut works on nearly all hair types and lengths, and it’s especially useful for anyone transitioning from a heavier one length cut into something lighter without a noticeable style change.
Conclusion
Layers are one of the simplest ways to change how your hair looks and feels without committing to a drastically different length. From soft curtain pieces to bold wolf cuts, there’s a layering style for every hair type, face shape, and budget. Bring a few of these ideas to your next appointment, or try the DIY tips between visits to keep your cut looking its best. Small changes like these can make a big difference in how your hair moves, catches light, and frames your face every day.