
1. Classic Three Strand Braid
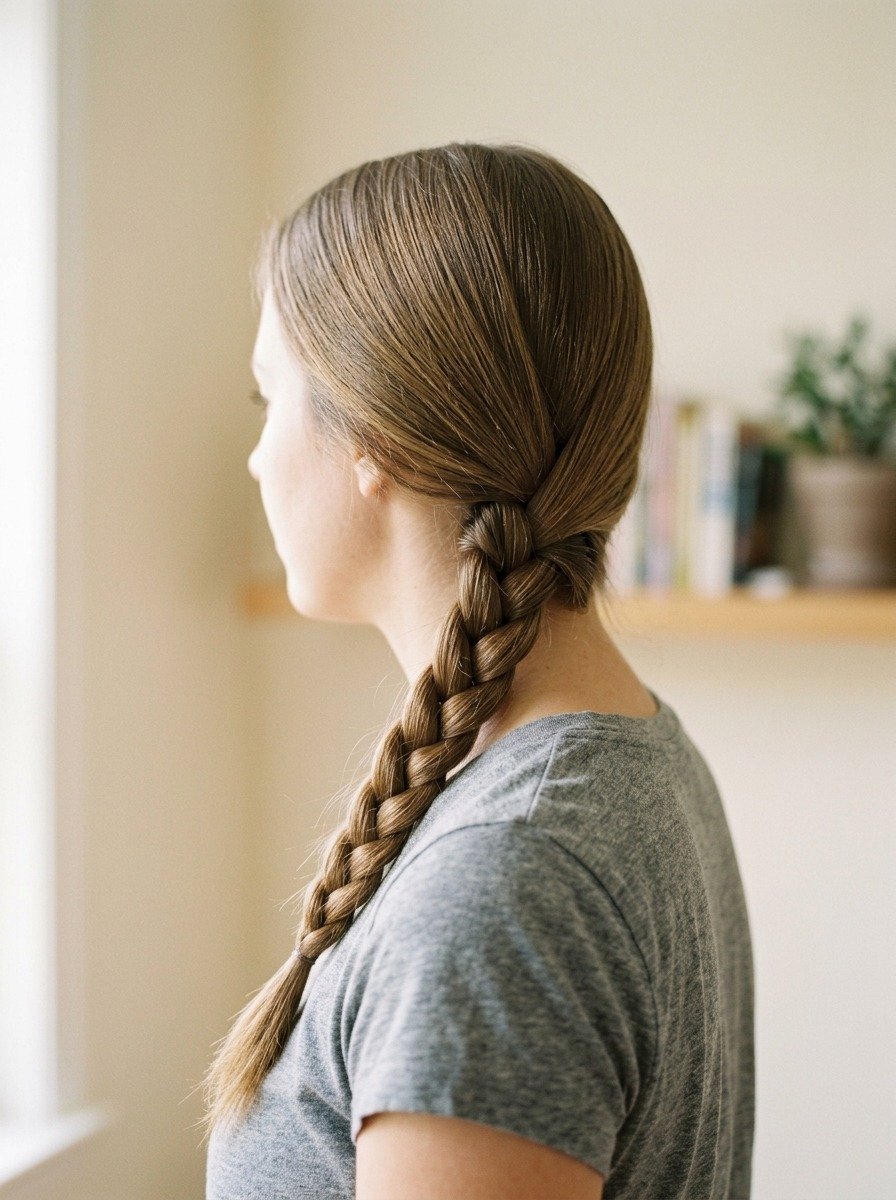
The three strand braid is where most people start. It only needs three sections of hair and a bit of patience. Split your hair into three even parts. Cross the right section over the middle. Then cross the left section over the middle. Repeat until you reach the ends. Secure with a small elastic.
This style works on almost any hair length past the shoulders. It looks neat for work or school and can be dressed up with a ribbon for special occasions. Try pulling small pieces loose along the sides for a softer, less structured finish.
Budget tip: you already have everything you need. No tools required beyond your hands and a hair tie. Practice on dry hair first since it holds shape better than wet strands. Once you get the rhythm down, this braid takes under two minutes.
2. French Braid
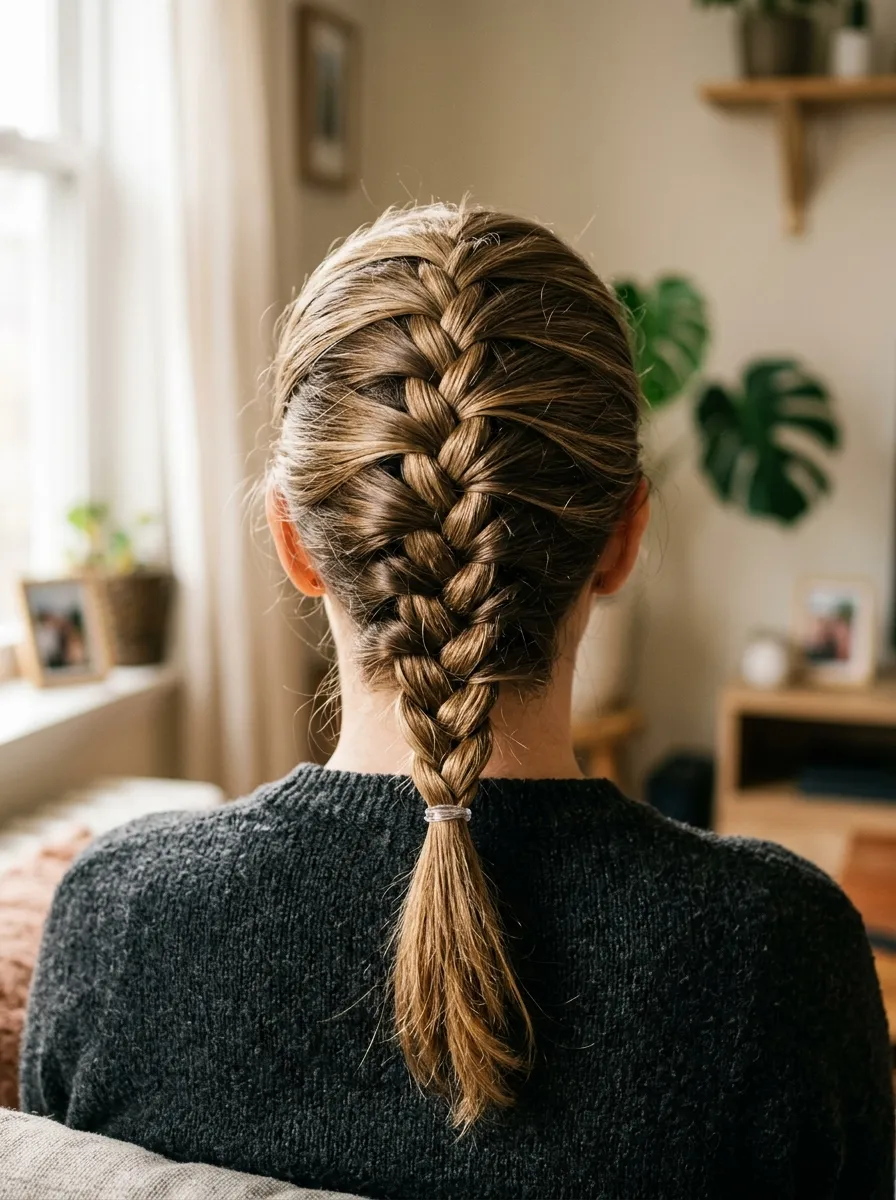
The French braid builds on the basic three strand technique but adds hair from the scalp as you go. Start at the crown. Take a small section and split it into three. Cross the pieces like a normal braid, but each time you cross a strand, pick up a bit more hair from the side before crossing again.
This creates a woven look that sits flat against your head. It works well for keeping hair out of your face during workouts or hot weather. Beginners might find it tricky at first, but a mirror on both sides helps you see what your hands are doing.
Budget tip: practice using a wig head or ask a friend to help you learn the motion. YouTube tutorials are free and show the hand movement clearly. Once mastered, this braid becomes a five minute daily habit that looks polished every time.
3. Dutch Braid
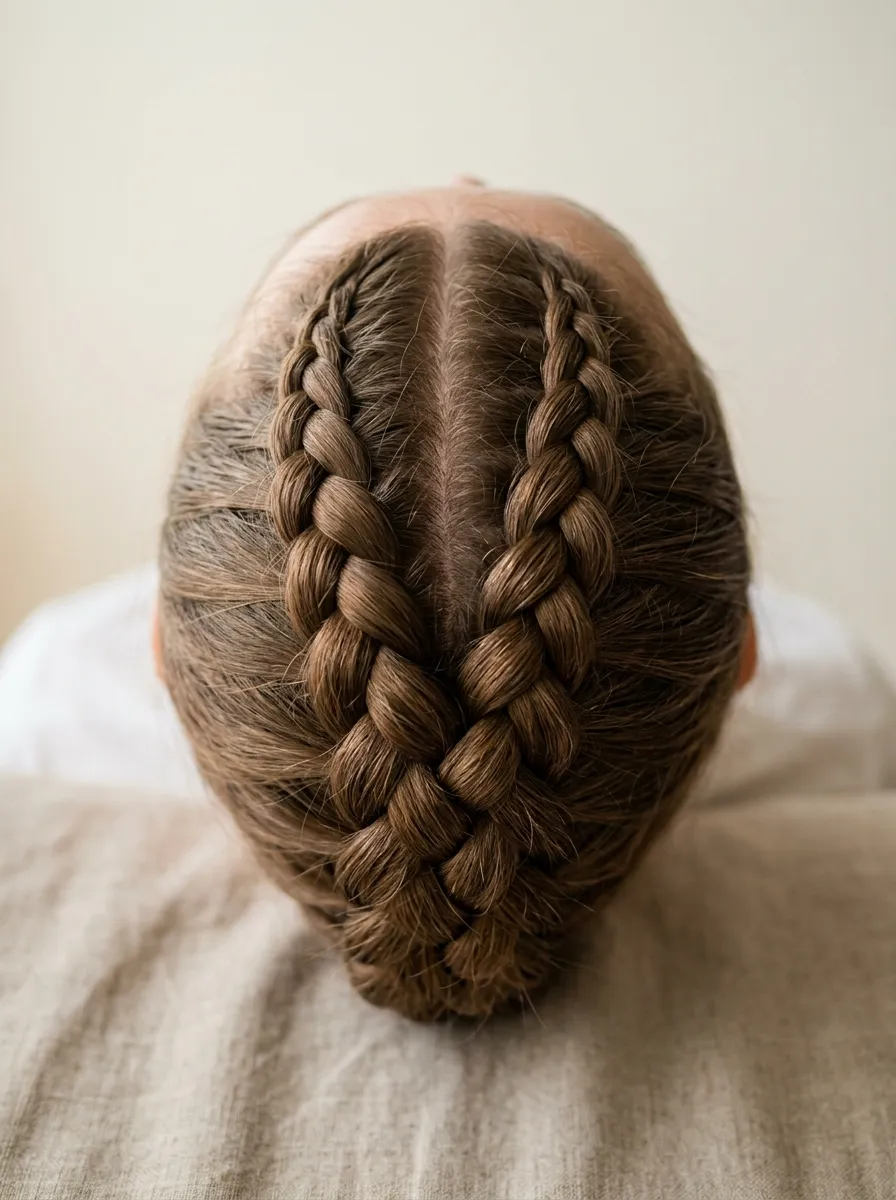
The Dutch braid is the reverse of the French braid. Instead of crossing strands over the middle, you cross them under. This makes the braid pop out from your head instead of lying flat.
Start the same way, sectioning hair at the crown. Cross the right strand under the middle, then the left strand under the middle, adding hair as you go. The result looks like the braid is sitting on top of your head rather than blending in.
This style suits thicker hair since the raised pattern shows off volume. It also holds up well through a full day of activity, making it a solid option for sports or long shifts at work.
Budget tip: use a small amount of gel on your edges before starting. This keeps flyaways down without needing expensive styling products. A wide tooth comb, which costs very little, helps section hair evenly for cleaner results.
4. Fishtail Braid
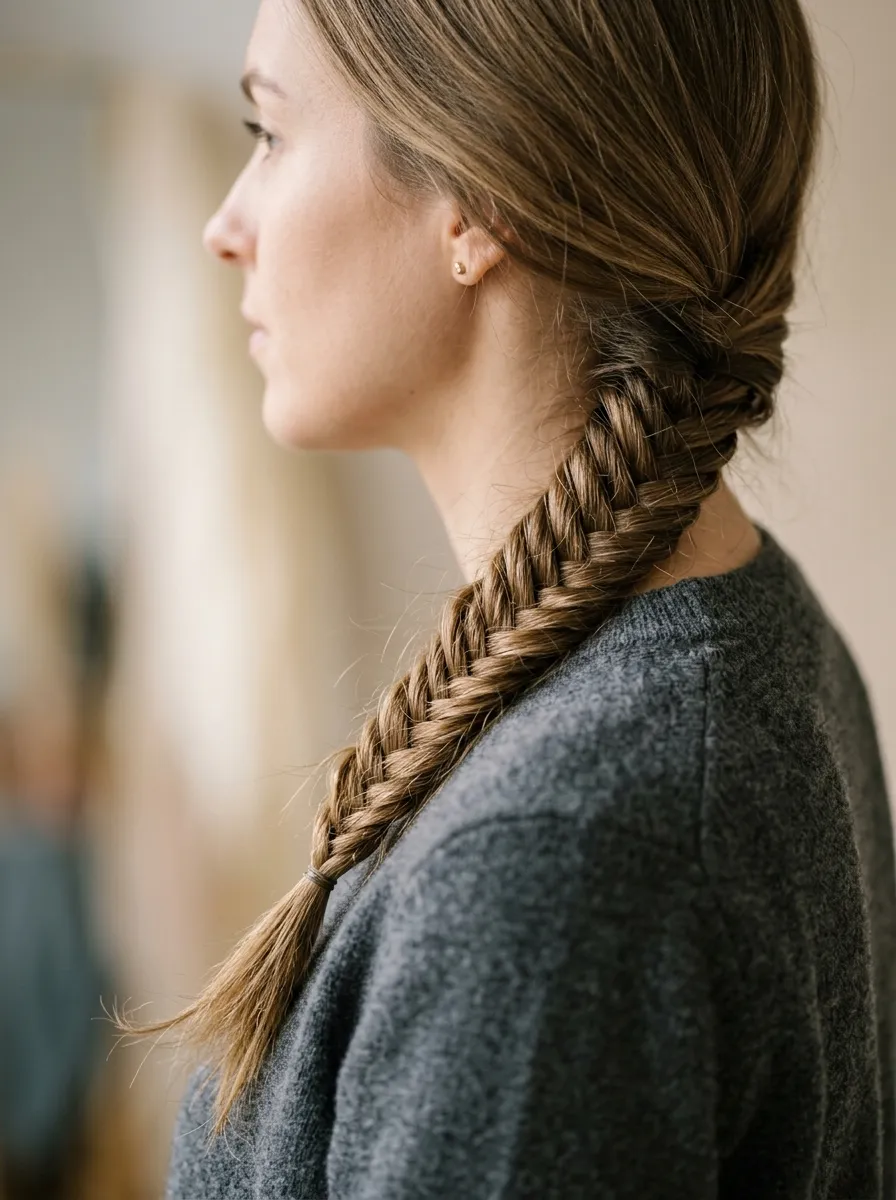
The fishtail braid looks complicated but only uses two sections instead of three. Split your hair in half. Take a thin piece from the outer edge of one section and cross it over to the other section. Repeat on the opposite side. Keep alternating sides, always using thin pieces.
The pattern that forms looks like fish scales, which is where the name comes from. It works especially well on hair with some texture or waves since the small pieces blend into a soft, undone look.
This braid takes longer than a basic three strand style because of the thin sections, but the result feels more elevated for a night out.
Budget tip: don’t stress about perfection. A slightly messy fishtail looks intentional and stylish. Use a fine tail comb, which is inexpensive, to help pull thin strands cleanly without pulling too much hair at once.
5. Waterfall Braid
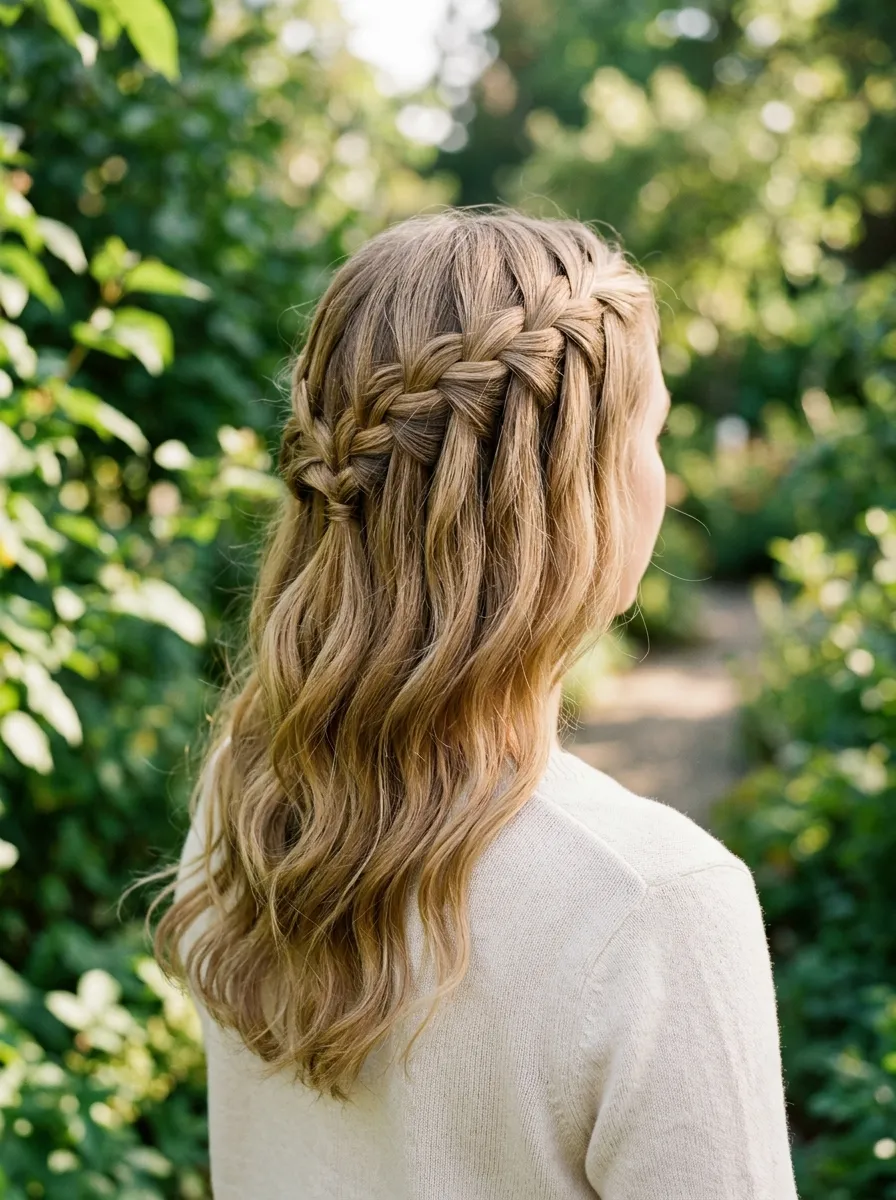
The waterfall braid drops sections of hair as you go instead of keeping them in the braid. It creates a flowing effect where pieces of hair fall like a waterfall while the braid itself stays intact around your head.
Start a small French braid at the side of your head. Each time you would normally add hair from the top, drop the bottom strand out instead and let a new section take its place. Continue around the back of your head.
This style pairs well with curled hair since the loose pieces blend into waves naturally. It suits weddings, parties, or any occasion where you want something that looks more done up.
Budget tip: curl the dropped sections with a basic curling wand you may already own. This adds texture without needing a salon blowout, and the braid itself hides any uneven curls underneath.
6. Boxer Braids
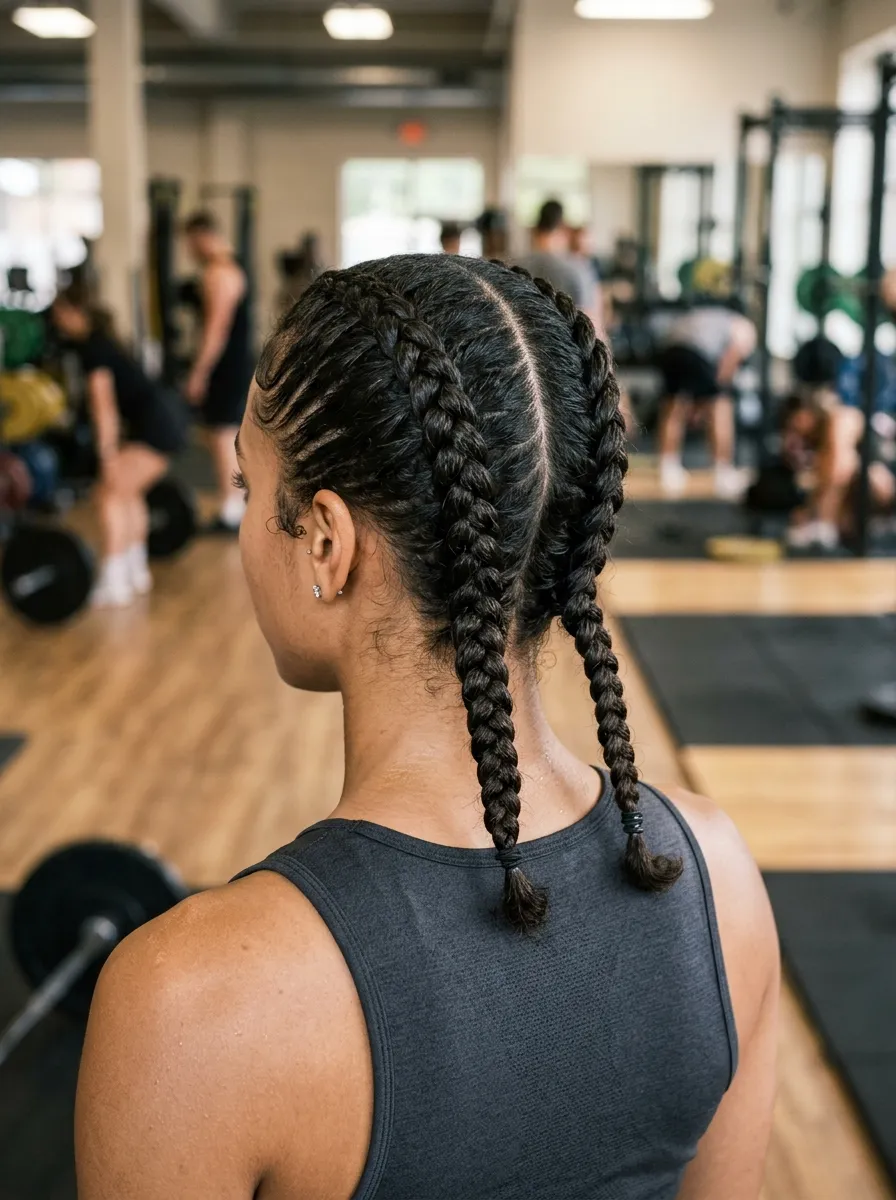
Boxer braids are two Dutch braids running from the front of your head to the back, ending in low ponytails or tucked ends. They became popular because they keep hair fully secured during workouts.
Part your hair down the middle first. Then Dutch braid each side separately, starting close to your hairline and working toward the back of your head. Secure each braid with a small elastic once you reach the nape of your neck.
This style suits gym sessions, hikes, or any activity where you need hair completely out of your face. It also works as an everyday casual look when paired with simple clothing.
Budget tip: use two elastics you already own instead of buying matching hair ties. If your braiding skills are still developing, practice one side at a time in front of a mirror before attempting both together.
7. Braided Ponytail
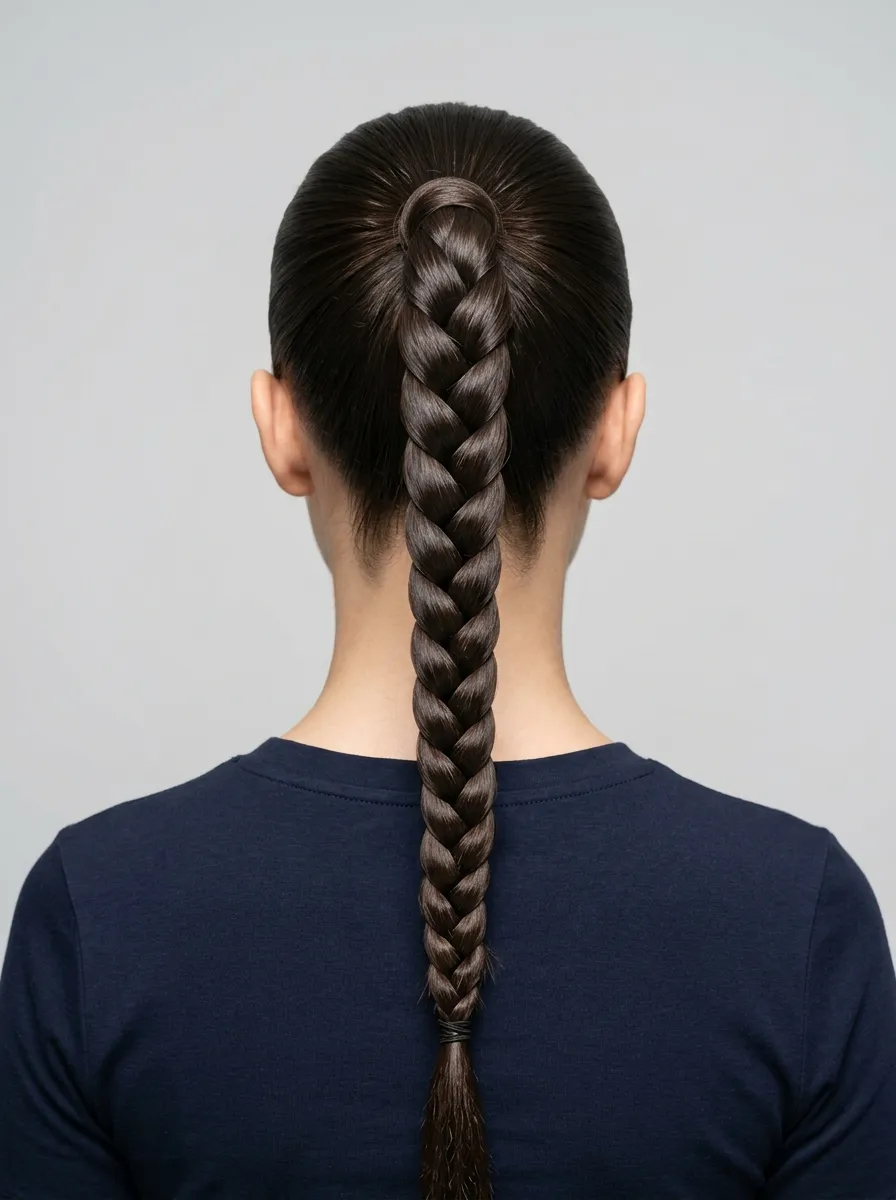
A braided ponytail combines a simple braid with a classic pony for an easy upgrade. Pull your hair into a ponytail first. Then take the ponytail and braid it using the basic three strand method, or wrap a small section around the base to hide the elastic.
This style works for both casual days and formal events depending on how sleek you make the front section. Smoothing your hairline with a brush creates a more polished finish for occasions like interviews or dinners out.
For a softer everyday version, leave a few face framing pieces loose instead of pulling everything back tightly.
Budget tip: use a thin strand of your own hair to wrap around the ponytail elastic instead of buying a decorative hair tie. This hides the elastic completely and costs nothing extra.
8. Halo Braid
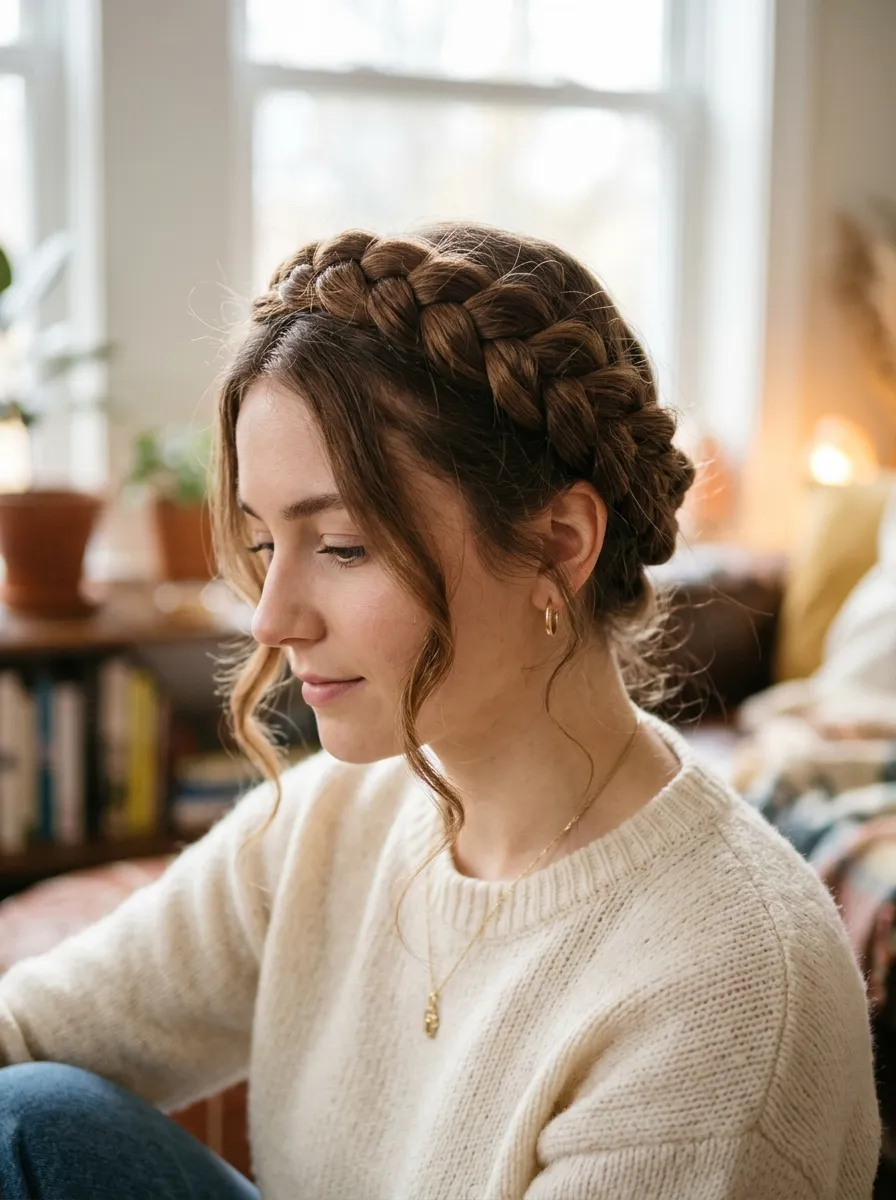
The halo braid wraps around your entire head like a crown, which is how it got its name. Braid two French braids starting at each side of your head. Cross them over the top and pin the ends into place, tucking them under the opposite braid.
This style suits longer hair since you need enough length to wrap fully around your head. It works well for outdoor events, garden parties, or any occasion with a romantic dress code.
Bobby pins are your best friend here. Use several to keep the ends secured and hidden, especially if your hair tends to slip out of place during the day.
Budget tip: a few extra bobby pins, which cost very little, make all the difference in keeping this style intact for hours. Practice the wrap a few times before an event so you feel confident on the day.
9. Milkmaid Braid
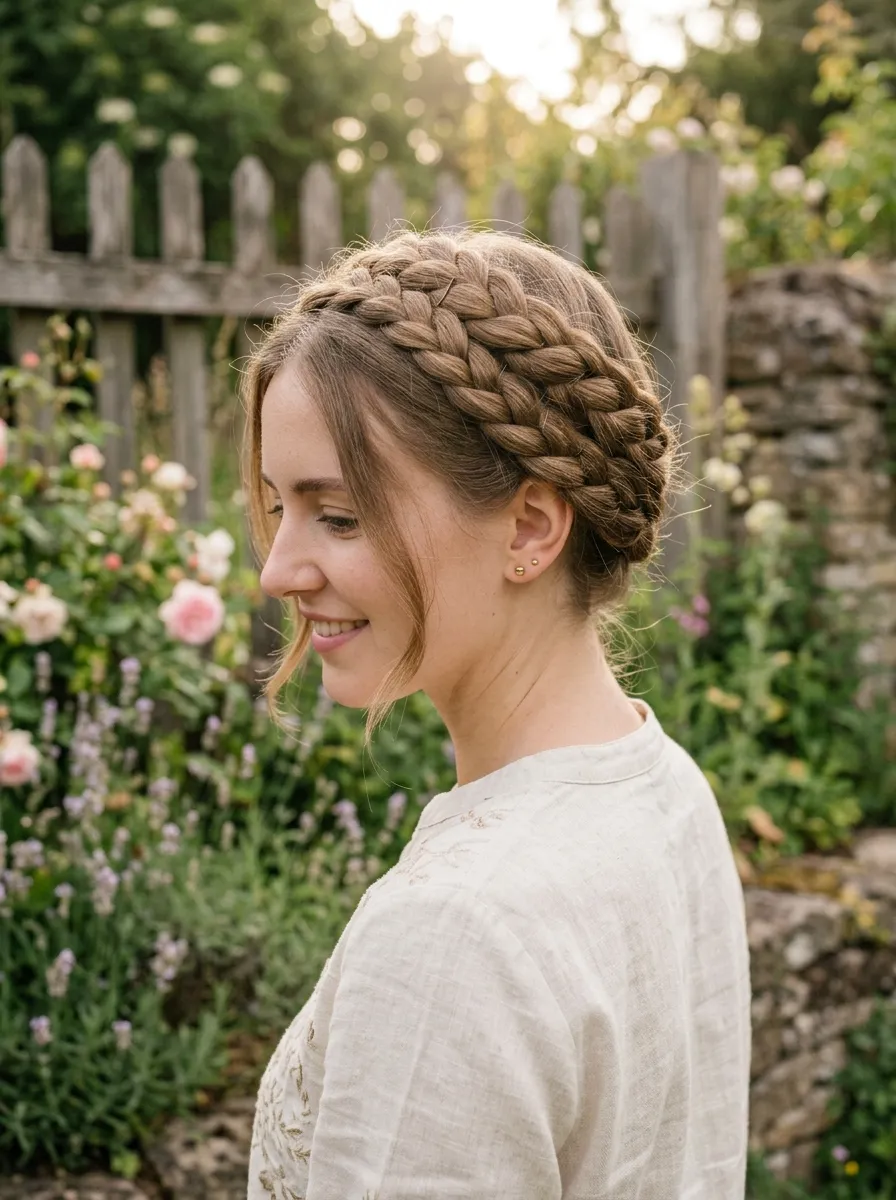
The milkmaid braid is similar to the halo braid but sits closer to the front of your head rather than wrapping all the way around. Braid two sections, one from each side, then cross them over your forehead and pin them near your opposite ear.
This look pairs nicely with casual outfits, especially during warmer months. It keeps hair off your neck while still looking put together for outdoor gatherings or daytime errands.
If your hair is on the shorter side, this version is easier to manage than a full halo since it only needs to reach partway around your head.
Budget tip: leave a few strands loose around your face for a relaxed finish. This softens the style and hides any uneven sections without needing extra products or tools.
10. Braided Bun
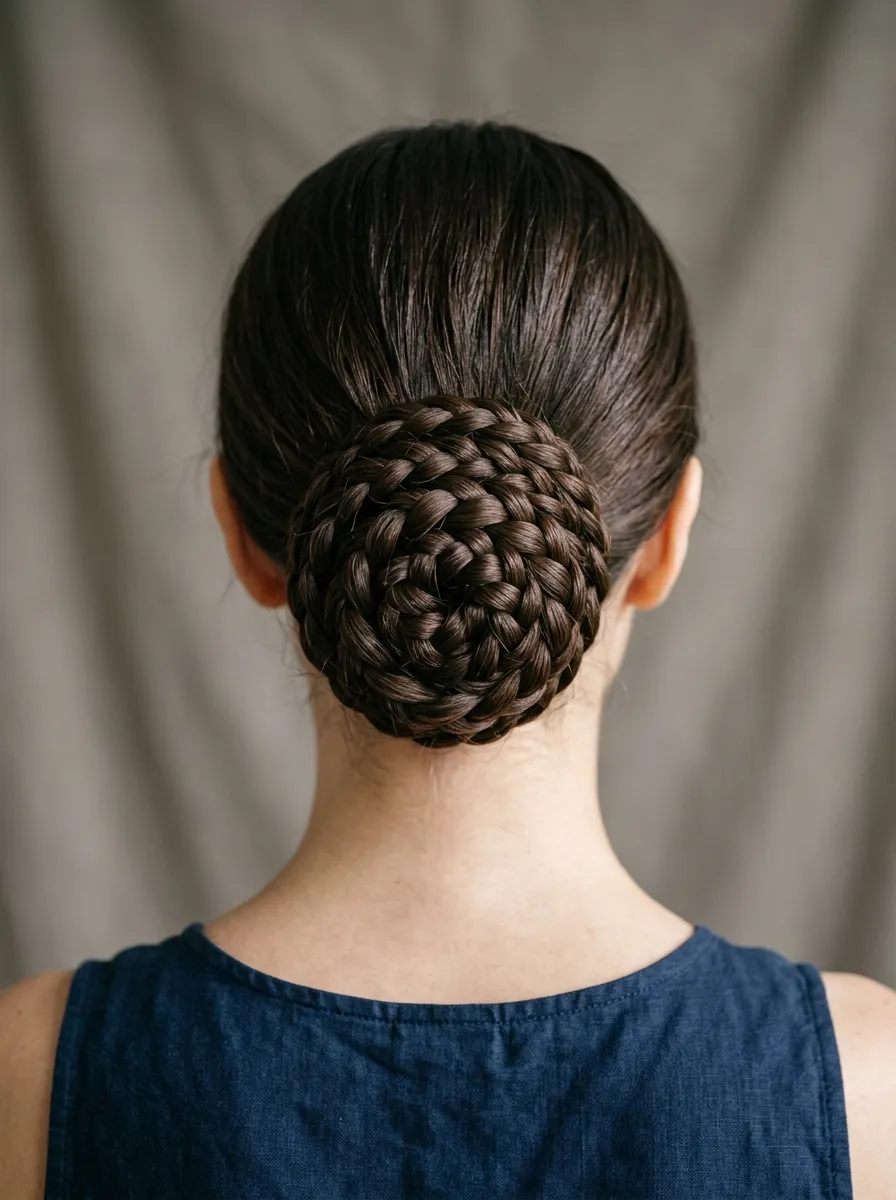
A braided bun takes a simple braid and coils it into a bun shape instead of leaving it hanging. Braid your hair using any method you like, then wrap the braid around itself at the base of your neck or on top of your head. Pin it into place.
This style works for formal events, office settings, or any day you want hair fully off your shoulders. The braid texture adds detail that a plain bun does not have, making it feel more finished without extra effort.
Try experimenting with bun placement. A low bun feels more professional, while a high bun feels more casual and youthful.
Budget tip: use bobby pins you already own to secure the coil. No special bun holders or donut shapers are needed since the braid itself holds its shape well.
11. Crown Braid
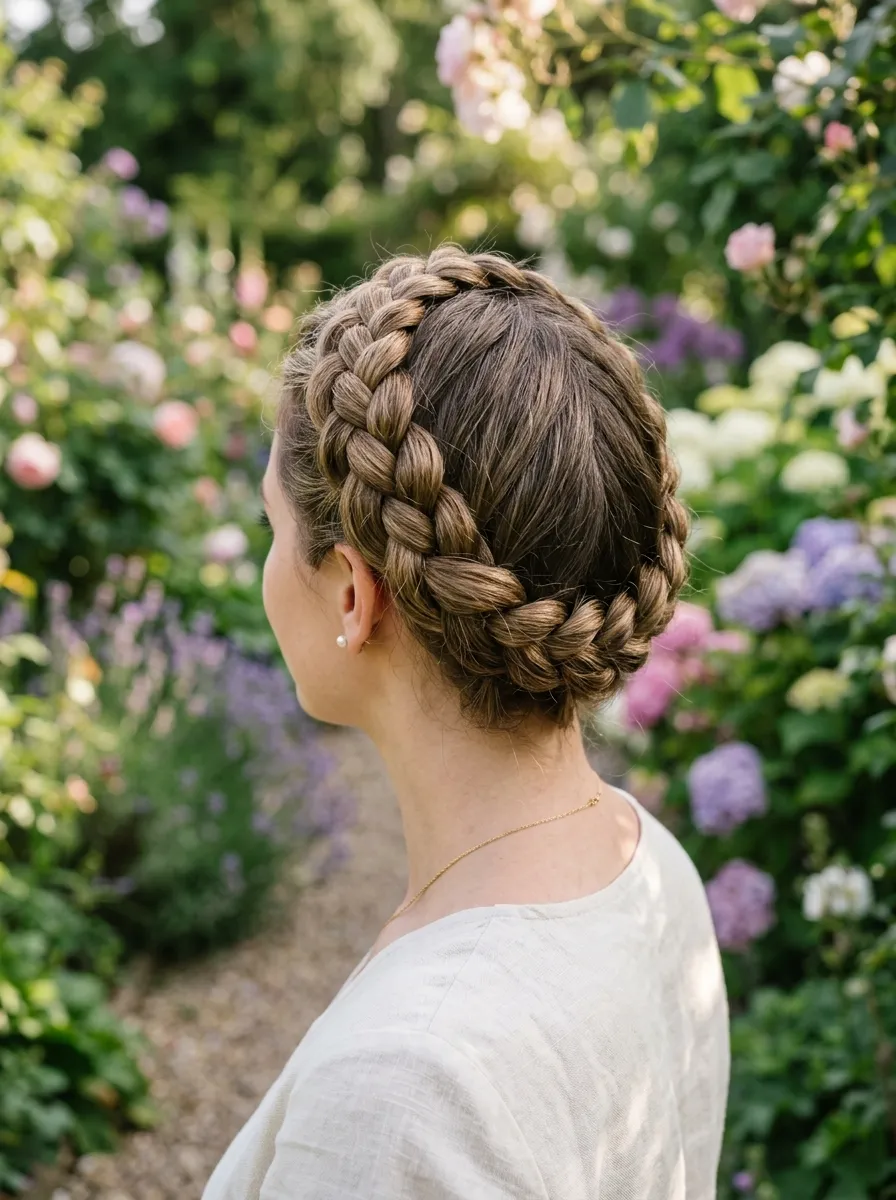
The crown braid is a thicker, fuller version of the halo braid, often using a Dutch braid technique for more volume. Start at one ear and braid around the back of your head to the other ear, picking up hair as you go, then pin the end in place.
This style suits special occasions like weddings or formal dinners since it has a dressier feel than everyday braids. It also works well for hiding a bad hair day since the crown covers most of your scalp.
Adding small flowers or a thin ribbon woven into the braid can make it feel more festive for celebrations.
Budget tip: fresh flowers from your own garden or a local market cost very little and add a personal touch without needing a florist arrangement.
12. Rope Braid
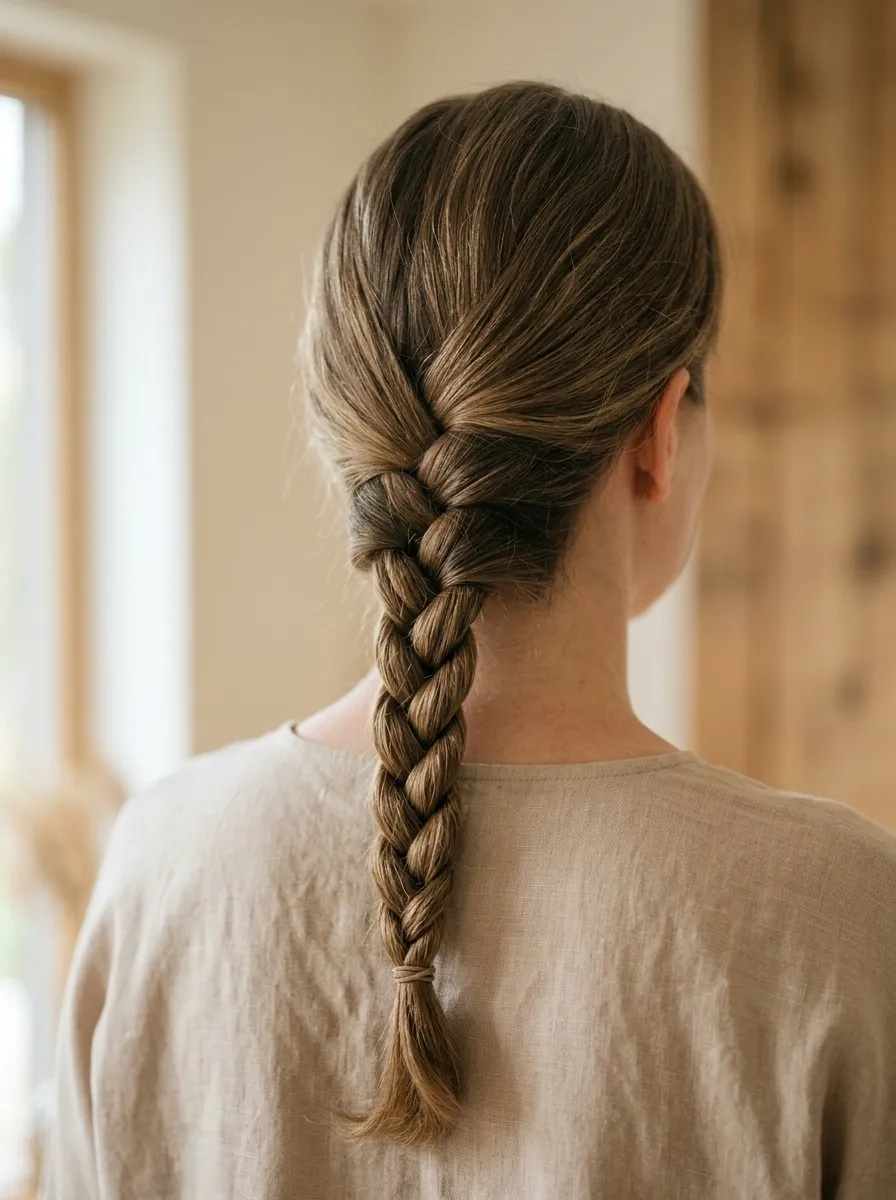
The rope braid is one of the simplest styles on this list since it only uses two sections instead of three. Twist each section individually to the right, then twist both sections together to the left. The result looks like a twisted rope rather than a woven braid.
This style works fast, making it a good choice for busy mornings when you need something quick but still styled. It also holds up well throughout the day since the tight twist resists loosening.
Try this style on damp hair for a slight wave once you take it out later in the day.
Budget tip: no special skill is needed here since twisting is easier than weaving. This makes it a great starting point if you are still building confidence with braiding.
13. Ladder Braid
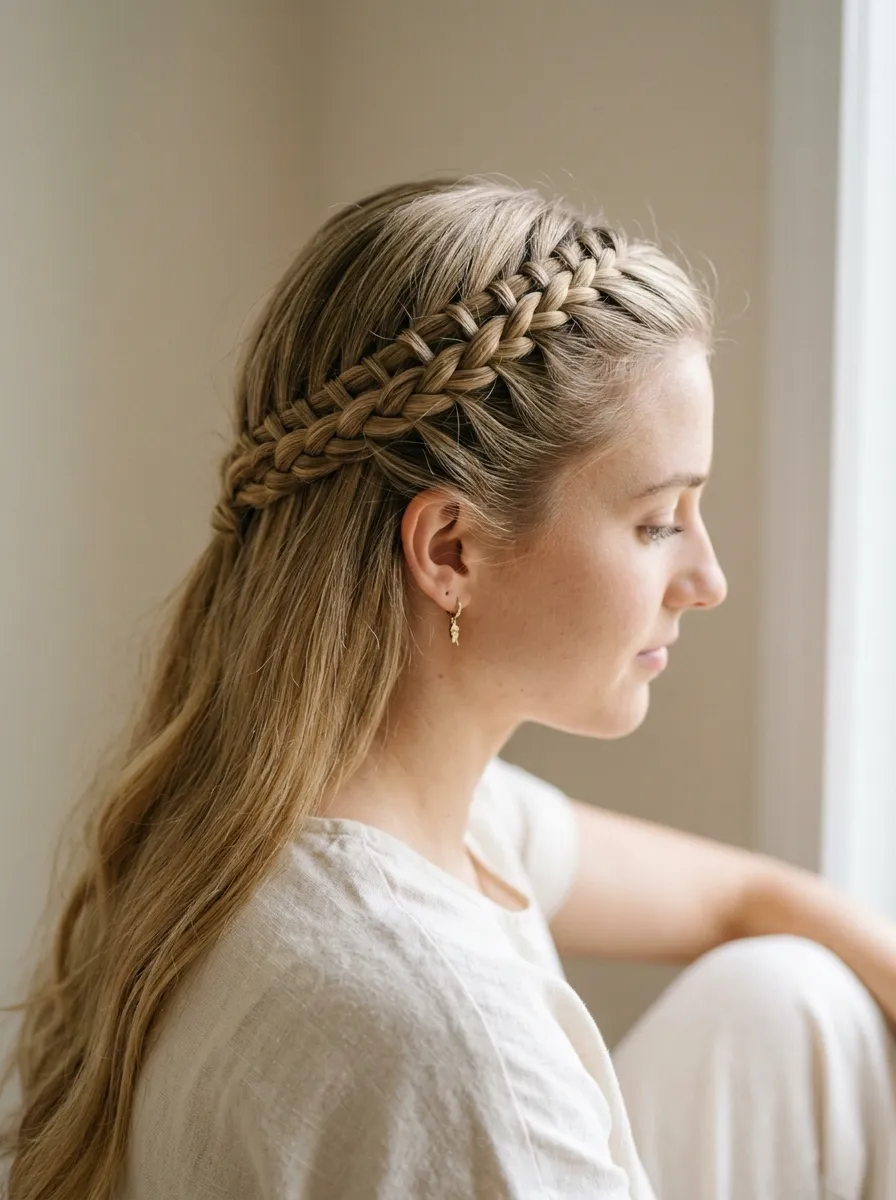
The ladder braid creates small horizontal sections that look like rungs on a ladder. Start a small braid at the front of your head, then instead of adding full sections, add thin horizontal pieces one at a time as you work your way back.
This style takes more time than basic braids but creates a detailed look that stands out for photos or events. It suits hair with layers since the shorter pieces create natural rungs without much extra effort.
Practicing on a hair mannequin or with a friend first can help you understand the pattern before trying it solo.
Budget tip: watch a few free tutorials online before attempting this one, since the technique is different enough from a standard braid that visual guidance helps a lot.
14. Braided Headband
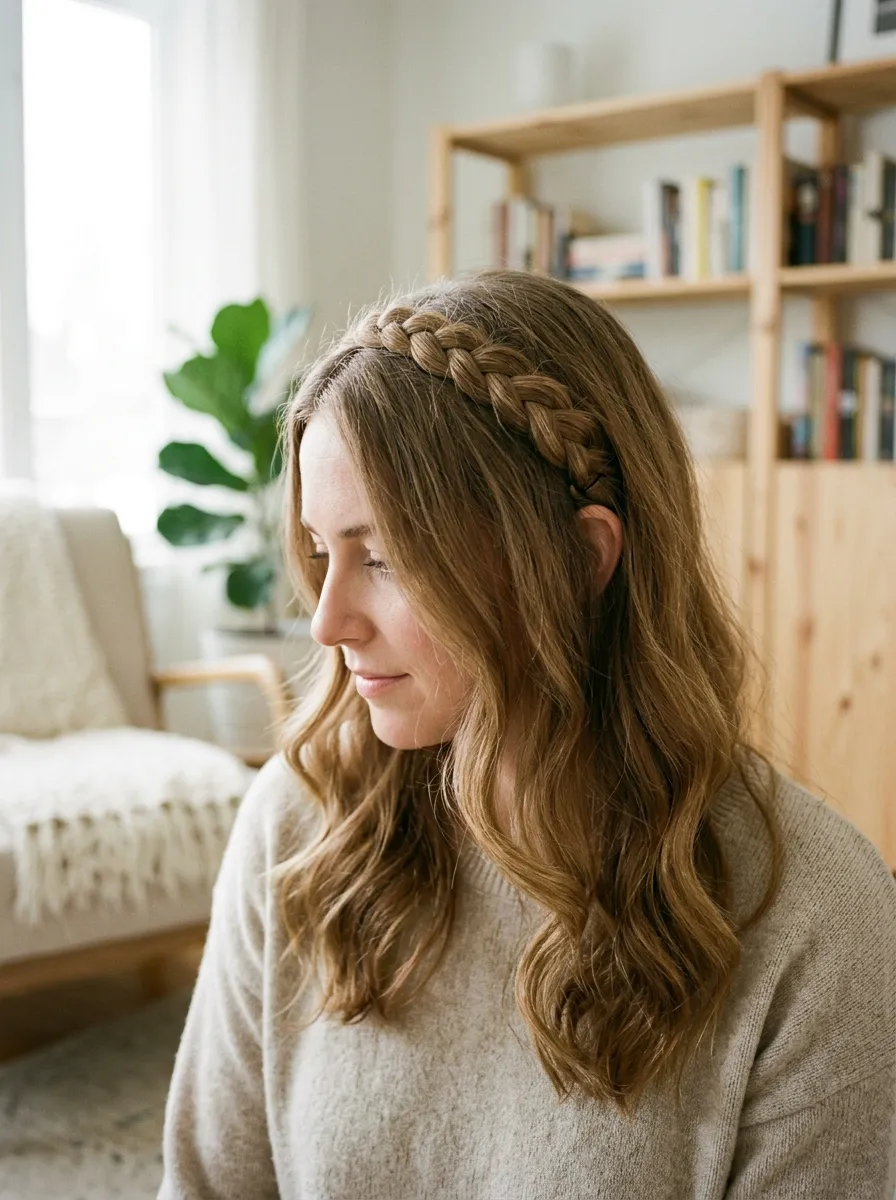
A braided headband uses just one thin section of hair near your part, braided and pinned back like a natural headband. The rest of your hair stays down, giving you a simple way to add detail without committing to a full braided style.
This works well for everyday wear since it keeps hair out of your face without much effort. It also suits second day hair, since the small braid can hide roots or a rough part line.
Try this style with a middle or side part depending on your usual routine.
Budget tip: this uses the least amount of hair out of any style on this list, meaning it takes only a couple of minutes and needs just one bobby pin to secure.
15. Braided Space Buns
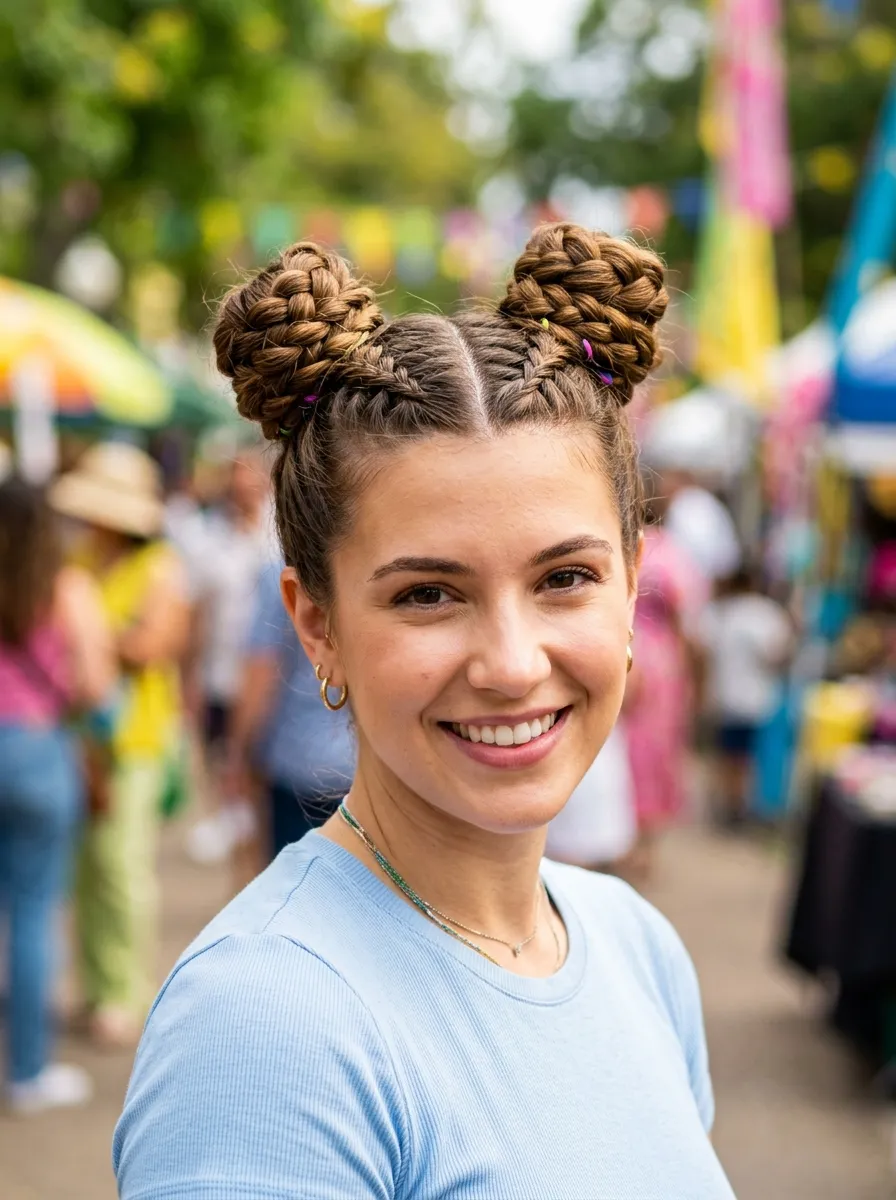
Braided space buns combine two braids with the popular double bun trend. Section your hair into two parts, braid each one, then coil the braids into buns on either side of your head instead of leaving them as ponytails.
This style suits festivals, casual outings, or playful everyday looks. It works on shorter hair too, since buns can be small and still look intentional.
Adding small hair clips or pins in fun colors can make this style feel more personalized for a specific event or outfit.
Budget tip: dollar store hair clips work just as well as expensive accessories for this style. The braided texture already does most of the visual work, so extras are optional rather than necessary.
16. Braid With Curls
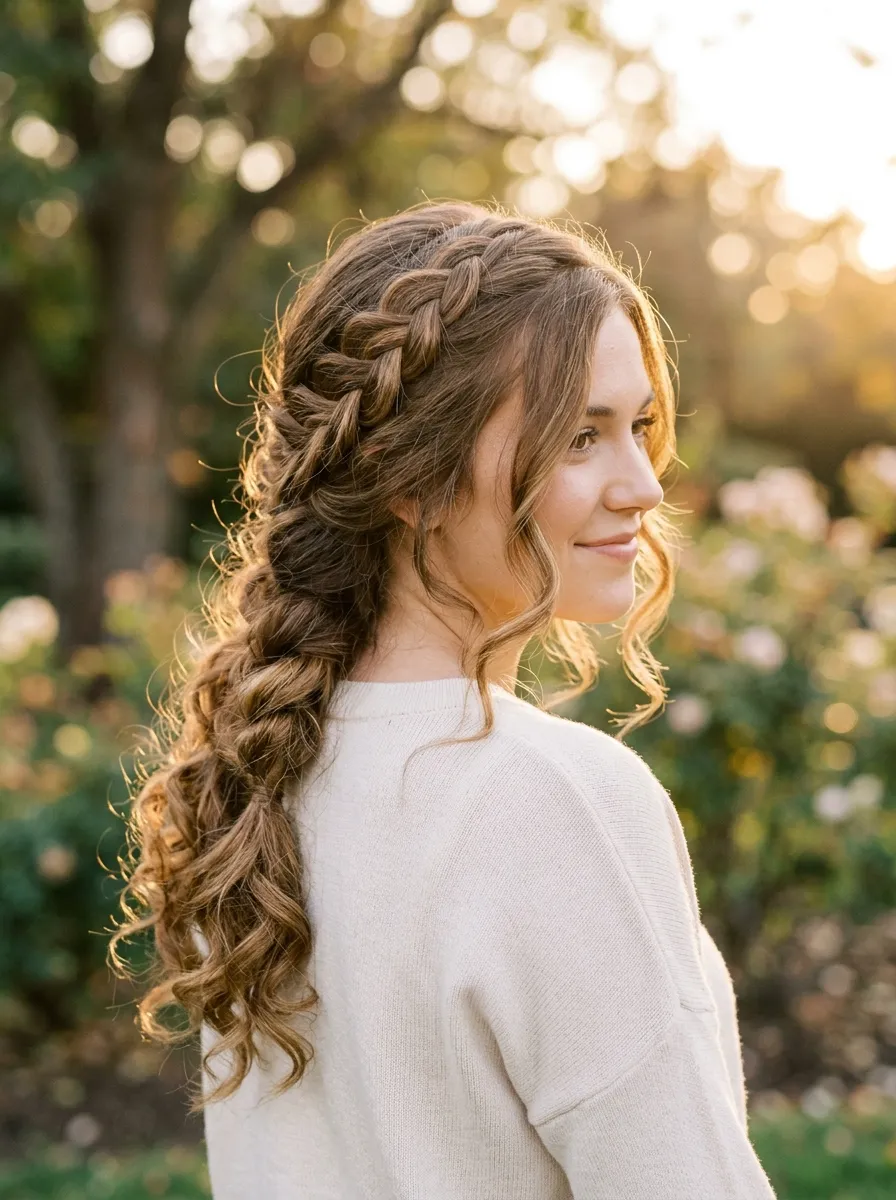
Combining a braid with curls gives you texture at the top and movement at the bottom. Braid the top half of your hair using a French or Dutch method, then curl the loose ends with a wand once the braid is secured.
This style suits date nights or dinners since it feels more done up than a plain braid alone. The contrast between the tight braid and soft curls creates depth without needing an elaborate style.
If you have natural waves already, you can skip the curling wand entirely and let your texture do the work.
Budget tip: curl only the last few inches of hair rather than the whole length. This saves time and still creates a noticeable effect without heat damage to the rest of your strands.
17. Micro Braids
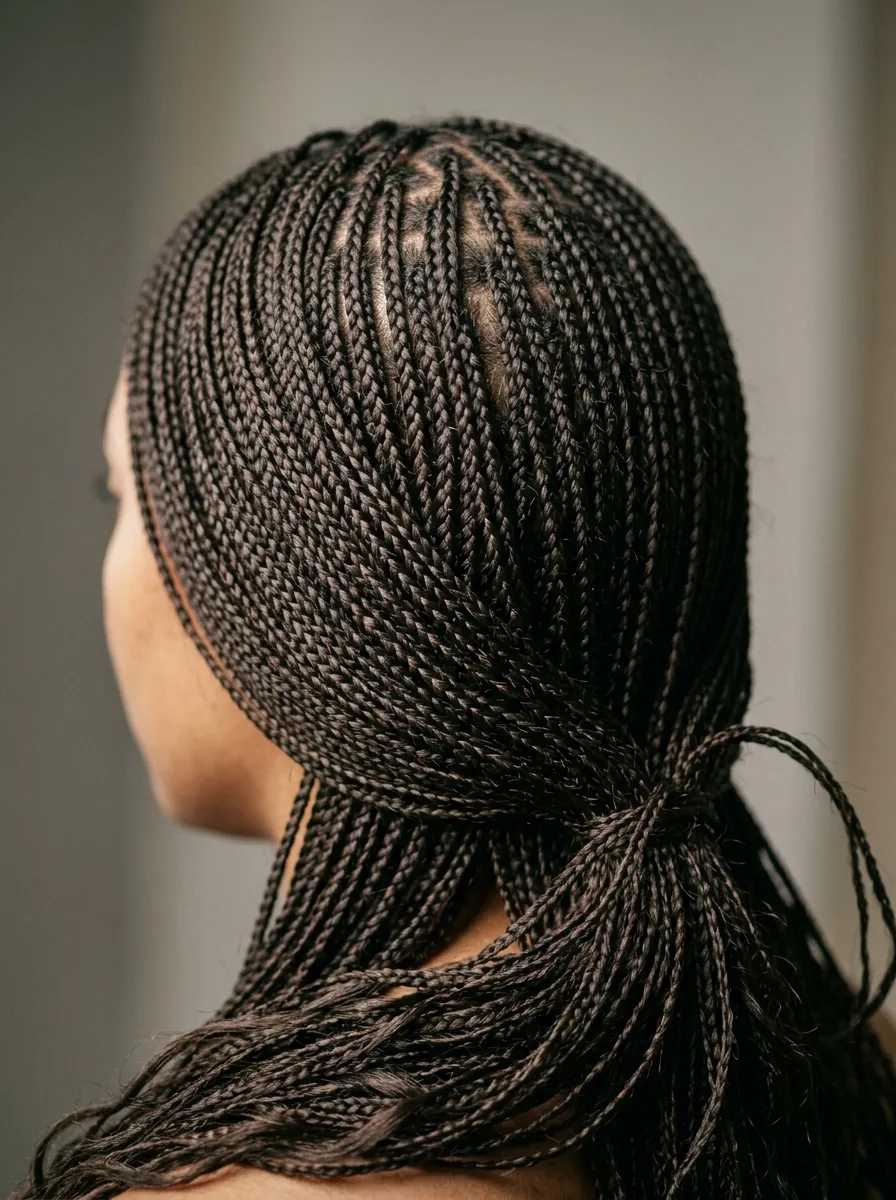
Micro braids use many small, thin braids across the entire head instead of one or two larger sections. This style takes significant time to complete, often several hours, but lasts for weeks once done properly.
This works best for those wanting a low maintenance style that holds up through workouts, swimming, and daily activities without needing daily styling. It suits textured hair especially well since the small braids hold shape naturally.
Because of the time involved, this is often done with help from a friend or family member rather than alone.
Budget tip: recruit a friend to help section and braid in exchange for returning the favor another day. This turns a potentially expensive salon service into a free at home project between friends.
18. Feed In Braids
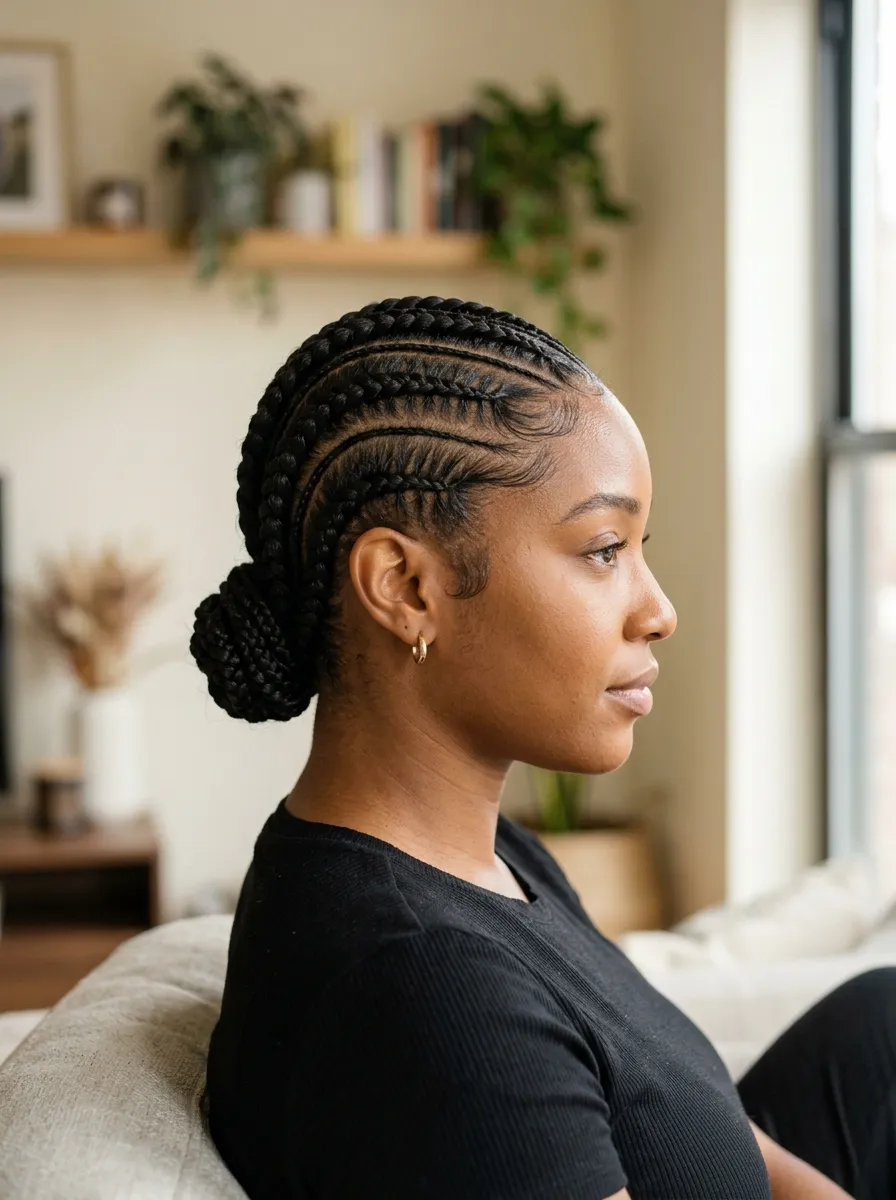
Feed in braids start thin near the hairline and gradually get thicker as extra hair is fed into the braid while working backward. This creates a smooth, natural looking transition from scalp to length.
This style suits those wanting length or fullness without a bulky look at the roots. It works well for protective styling since your natural hair stays braided and protected underneath any added extensions.
If using extension hair, matching the color closely to your natural shade keeps the blend looking seamless rather than obvious.
Budget tip: synthetic braiding hair is far less expensive than human hair extensions and works just as well for this style. Buying a few extra packs during sales keeps costs down for repeat styling.
19. Braided Bangs
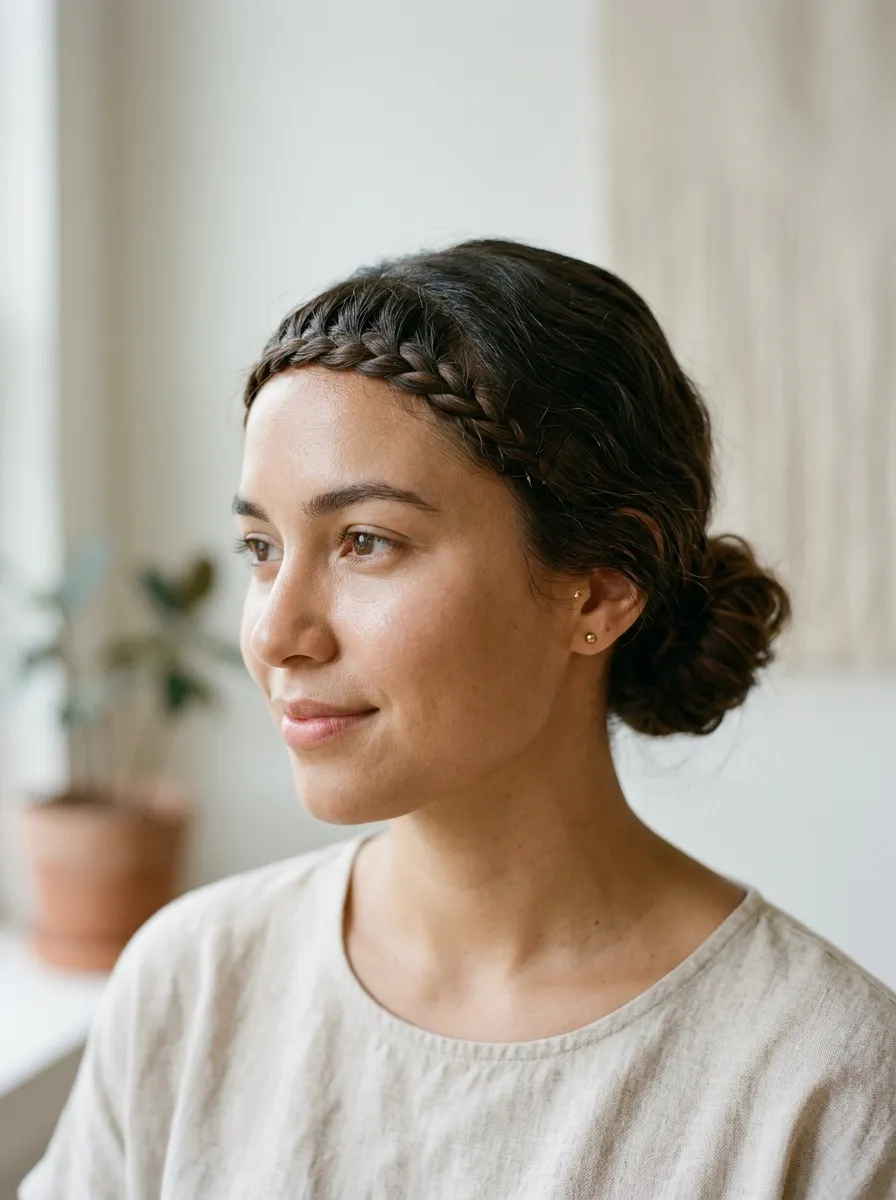
Braided bangs take the front section of your hair and braid it across your forehead instead of cutting actual bangs. This gives you the look of fringe without any commitment to scissors.
This style works well for those wanting to test out bangs before making a permanent change. It also suits hot weather since the front section stays off your face without needing a full updo.
Pair this with a low ponytail or bun for a complete, easy going everyday look.
Budget tip: this costs nothing extra and requires no hair cutting appointment. It is a completely reversible way to experiment with a fringe style before deciding if you want the real thing.
20. Braided Updo
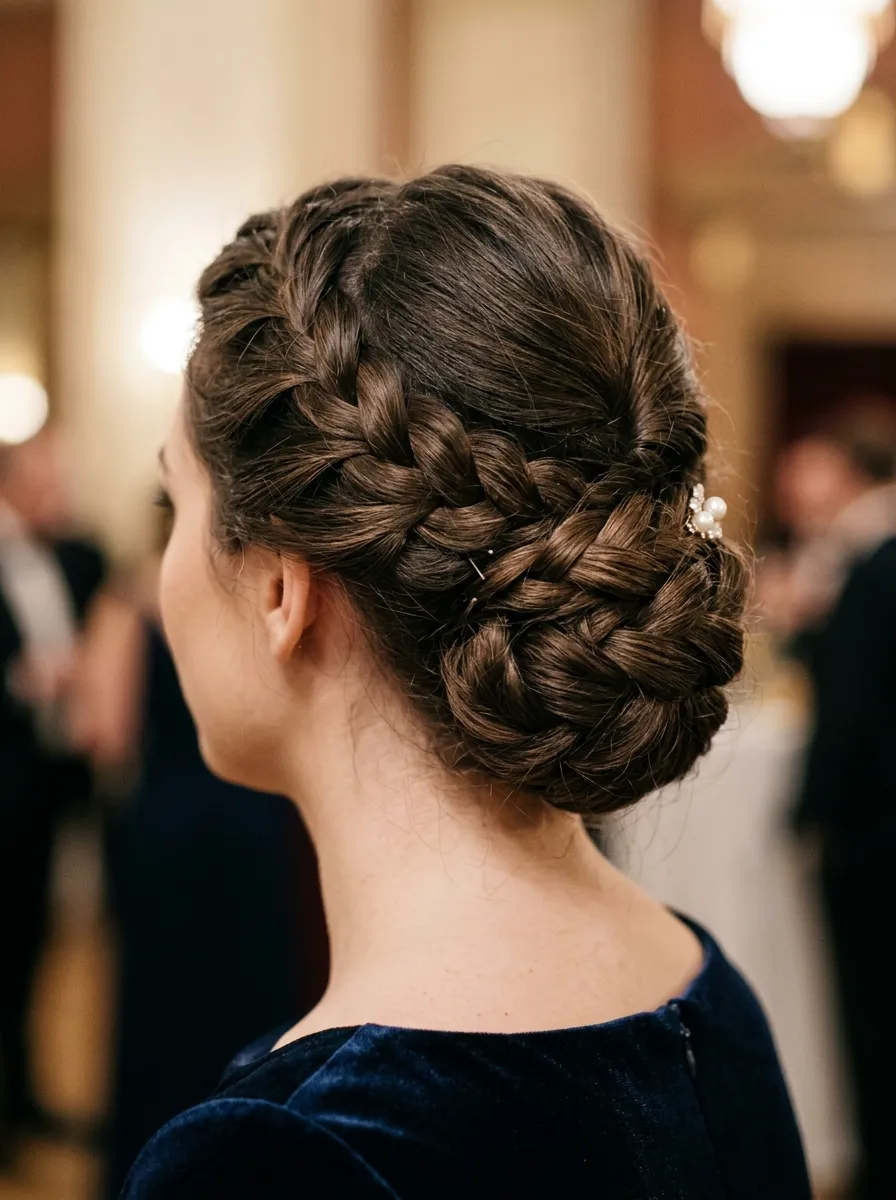
A braided updo combines multiple braids gathered and pinned into a full updo style. Braid several small sections around your head, then gather all the ends together and pin them into a bun or twist at the back.
This style suits weddings, formal dinners, or any event with a dressier expectation. It takes more time than single braid styles but creates a finished, elegant look that photographs well from every angle.
Practicing the pinning process ahead of an event helps you feel confident and saves time on the actual day.
Budget tip: a set of clear bobby pins, which are inexpensive, blend into any hair color and keep the style looking clean without visible metal showing through.
21. Twisted Braid Combo
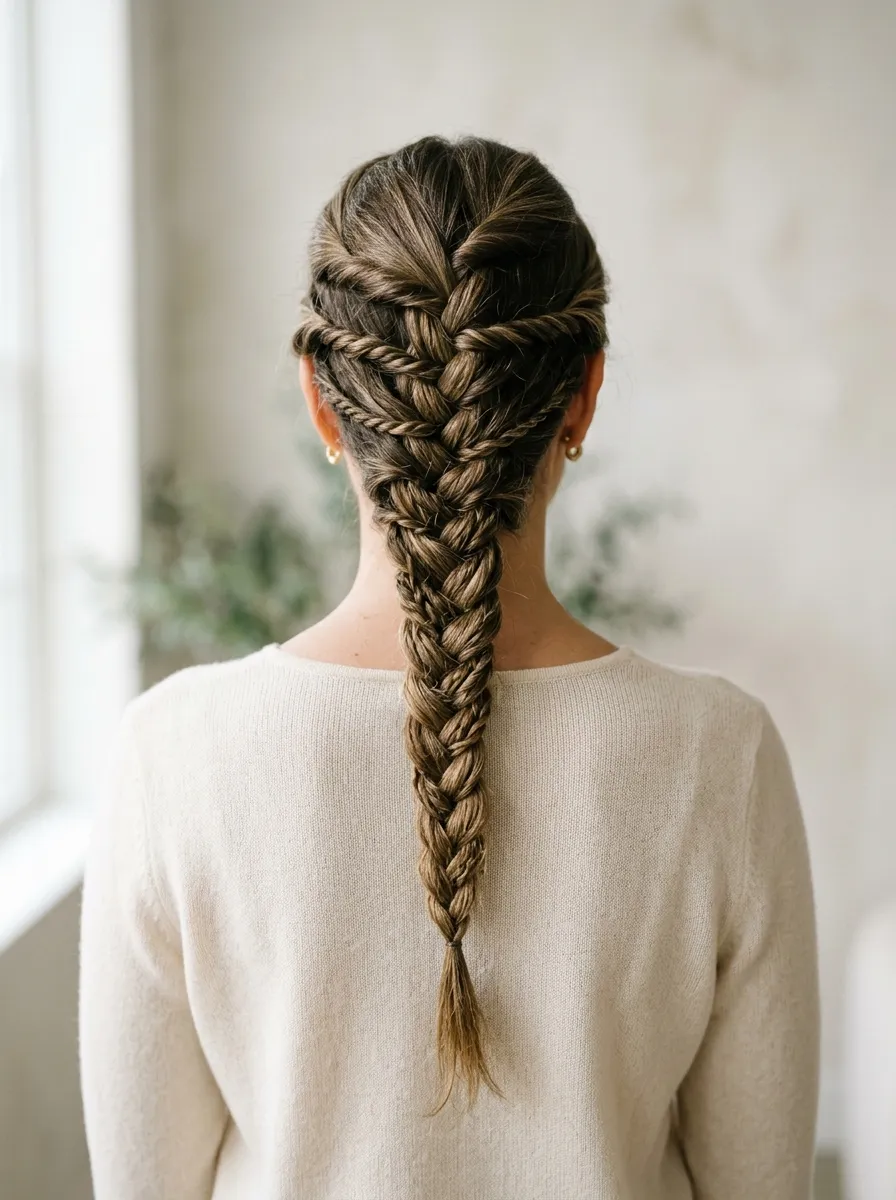
Combining twists with a traditional braid adds texture variety in a single style. Twist two sections at the crown of your head, then join them into a regular three strand braid partway down.
This style suits those wanting something a little different from a standard braid without a complicated technique. The twisted section adds visual detail near the top, while the braid keeps the rest manageable and secure.
This works especially well for second day hair since the added texture hides a rough part line easily.
Budget tip: this uses your existing hair length and needs no additional products. A single small elastic at the base of the braid is all that is required to finish the look.
22. Braided Pigtails
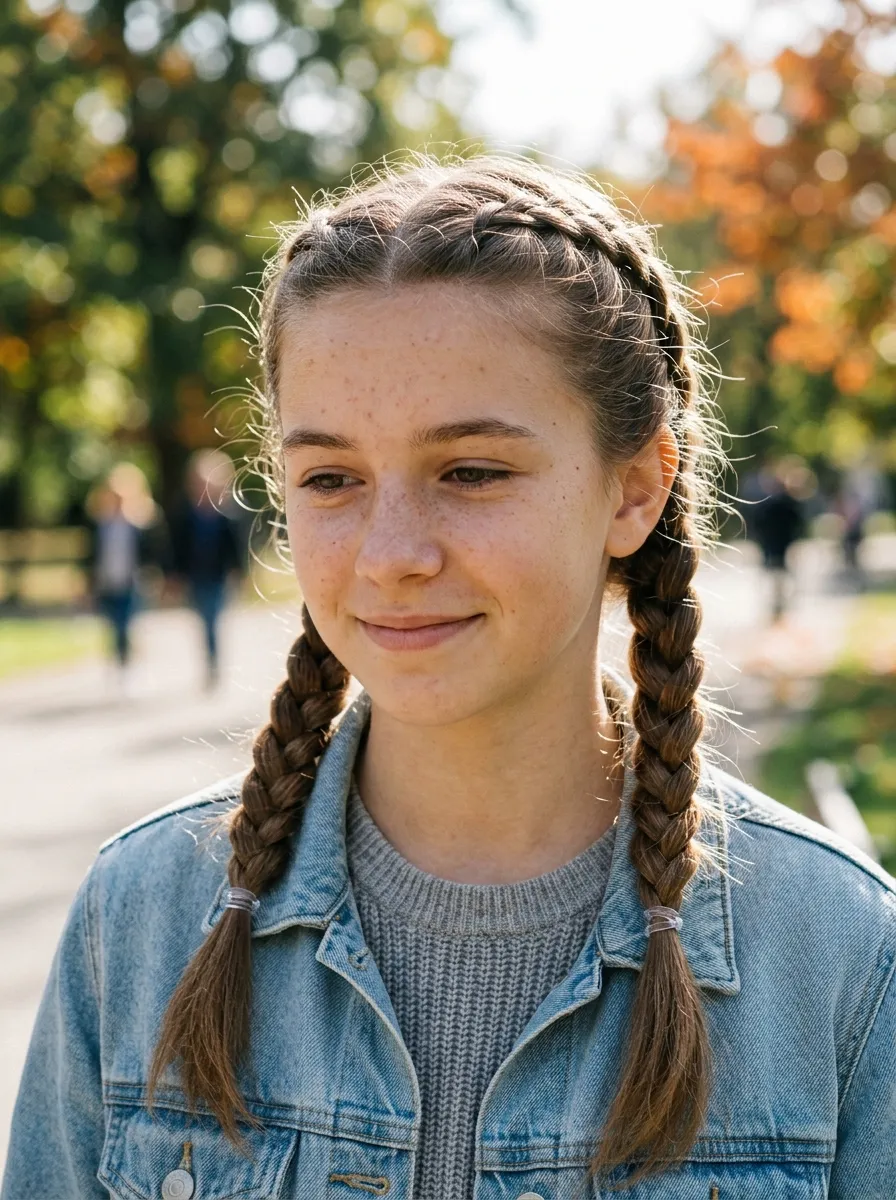
Braided pigtails split your hair into two even sections, each braided separately down to the ends. This simple style works for casual days, school runs, or weekend outings where you want something quick but still styled.
This look suits most hair lengths and textures, making it one of the more forgiving styles to try as a beginner. Uneven parting is easily hidden once both braids are secured with matching elastics.
Adding small ribbons or bows at the ends can make this style feel more playful for casual weekend plans.
Budget tip: this style needs only two elastics and takes under ten minutes total. It remains one of the most affordable and time efficient options on this entire list.
Conclusion
Braids offer something for every hair type, schedule, and occasion. From a five minute three strand braid before work to a detailed crown braid for a wedding, there is a style here that fits almost any moment. Most of these looks need nothing more than a comb, a few elastics, and some bobby pins already sitting in your bathroom drawer. Start with the simpler styles first, then build toward the more detailed ones as your hands get used to the movements. With a little practice, braiding becomes a fast, affordable habit that changes your everyday routine without ever needing a salon appointment.