

Messy buns are the one hairstyle that somehow works for everything. Rushed mornings, lazy Sundays, date nights, even weddings if you do it right. There is something about the undone, lived-in look that feels more real than a sleek, pulled-back style ever could. The best part is that you do not need a salon appointment or a drawer full of products to get it right. A few bobby pins, a little texture spray, and five minutes in front of the mirror is usually all it takes. Below are 29 ways to wear a messy bun depending on your hair length, texture, face shape, and the occasion you are dressing for. Some are quick and lazy, others are a little more polished, but all of them keep that easy, effortless spirit that makes messy buns so likable in the first place.
1. The Classic Top Knot
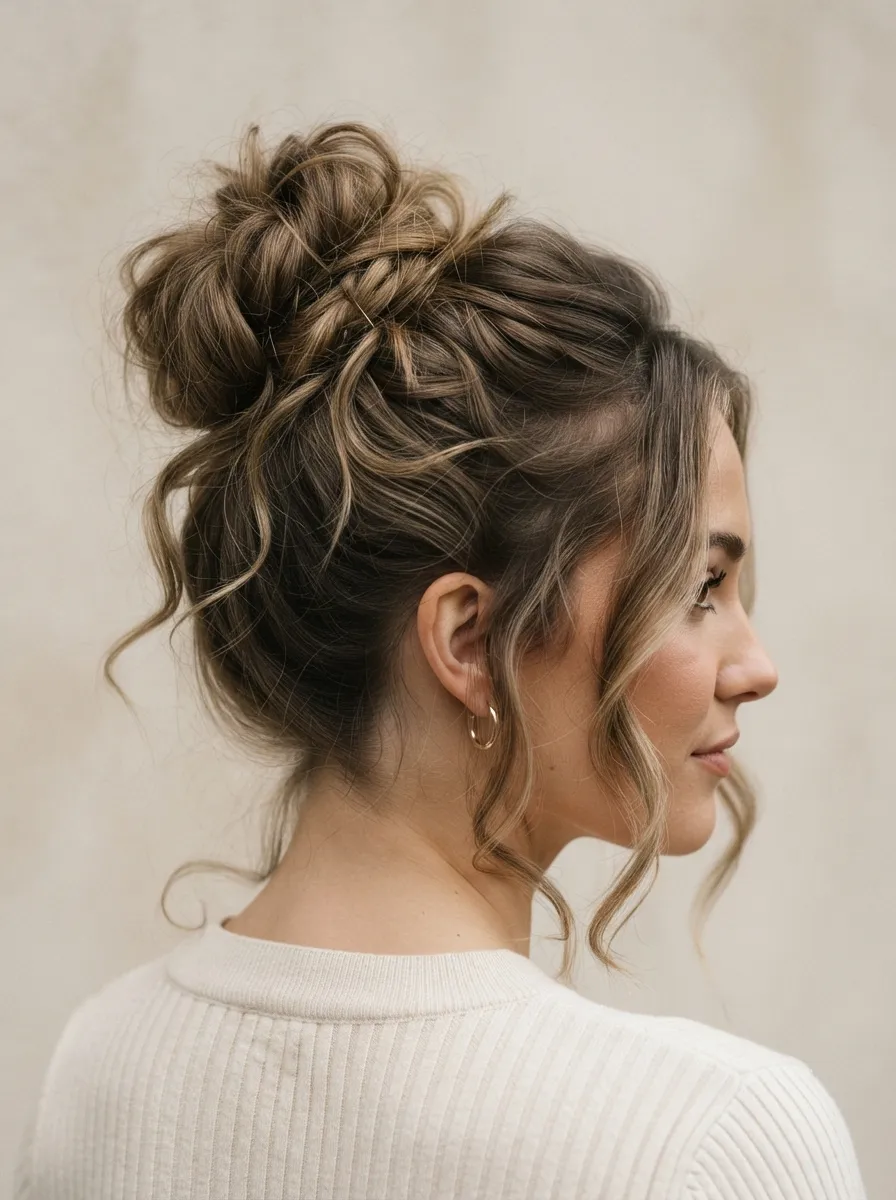
This is the bun most people picture first, and for good reason. Gather your hair at the crown, twist it loosely, and wrap it around itself before securing with a couple of bobby pins. Do not smooth it down. The whole point is to let a few pieces stay loose around your hairline. If your hair is fine, try teasing the roots first with a comb so the bun has something to hold onto. A texturizing spray like a drugstore sea salt formula gives it grip without stiffness. This style works best on second or third day hair when it already has a bit of natural oil and texture. It sits high enough to show off earrings and works with almost any neckline, from crew necks to off the shoulder tops. Pull a couple of face framing pieces loose and curl them lightly with a flat iron for extra softness.
2. Low Messy Bun for Fine Hair

Many Easy Ponytail Hairstyle Ideas focus on quick, polished styles, but the same effortless approach works beautifully for a low bun as well. If you have fine hair, a low placement is often easier to manage without looking flat. Gather your hair at the nape, twist it gently, and pin it into a slightly lopsided shape rather than a perfect circle. The asymmetry gives it an intentionally effortless finish. Before you begin, spray a little dry shampoo at the roots, even on clean hair, to add the grip and volume that fine strands often need. If possible, skip the elastic and secure the bun with two or three bobby pins crossed in an X shape for better hold. This low style flatters almost every face shape because it doesn’t pull attention upward or make the forehead appear wider. It also pairs beautifully with soft makeup since nothing competes for attention. It’s an excellent option for office days when you want a polished hairstyle with minimal effort.
3. Messy Bun with Face Framing Curls

If your face shape is longer or more angular, loose curled pieces around the face soften things beautifully. Do your bun as usual, then pull out two thin sections near your temples and curl them away from your face using a small barrel wand. Let them cool before touching them so the curl actually holds. A light hold hairspray on just those pieces keeps them from falling flat too quickly. This works on curly, wavy, and straight hair alike since you are creating the curl rather than relying on natural texture. It is a favorite for engagement photos and family gatherings because it photographs well from every angle. Keep the curls loose and undone rather than tight ringlets, since tight curls read as more done up and defeat the messy vibe. This pairing of structure and softness is what makes the whole look feel intentional.
4. Double Twisted Messy Bun

Instead of one twist, split your hair into two sections before gathering it up. Twist each section separately, then cross them over each other before wrapping into the bun and pinning. This creates subtle texture and dimension that a single twist cannot replicate on its own. It works especially well on hair with layers since the twists catch shorter pieces and keep them from escaping too soon. Try this on damp hair with a little leave in conditioner for smoother twists, or on dry hair with texture spray for a grittier finish. The double twist also holds up better through a full workday or a long flight, since the crossed structure resists loosening compared to a plain wrapped bun. It is a small technique change that makes a noticeable difference in both look and longevity, and it costs nothing extra to try.
5. Messy Bun with a Middle Part

A clean middle part paired with a deliberately messy bun creates a nice contrast between structure and looseness. Comb your part straight with a fine tooth comb before gathering the rest of your hair back loosely. This combination flatters oval and heart shaped faces particularly well since the part elongates the face while the bun keeps volume balanced. Use a little pomade along the part line to keep flyaways controlled right at the root, then let the rest of the bun stay wild. This is a great option for those who want to look put together without spending real time on it, since the part takes seconds and the bun forgives any imperfection. It also transitions well from day to night, since you can dress up the same base with statement earrings or a bold lip for evening plans.
6. Braided Messy Bun
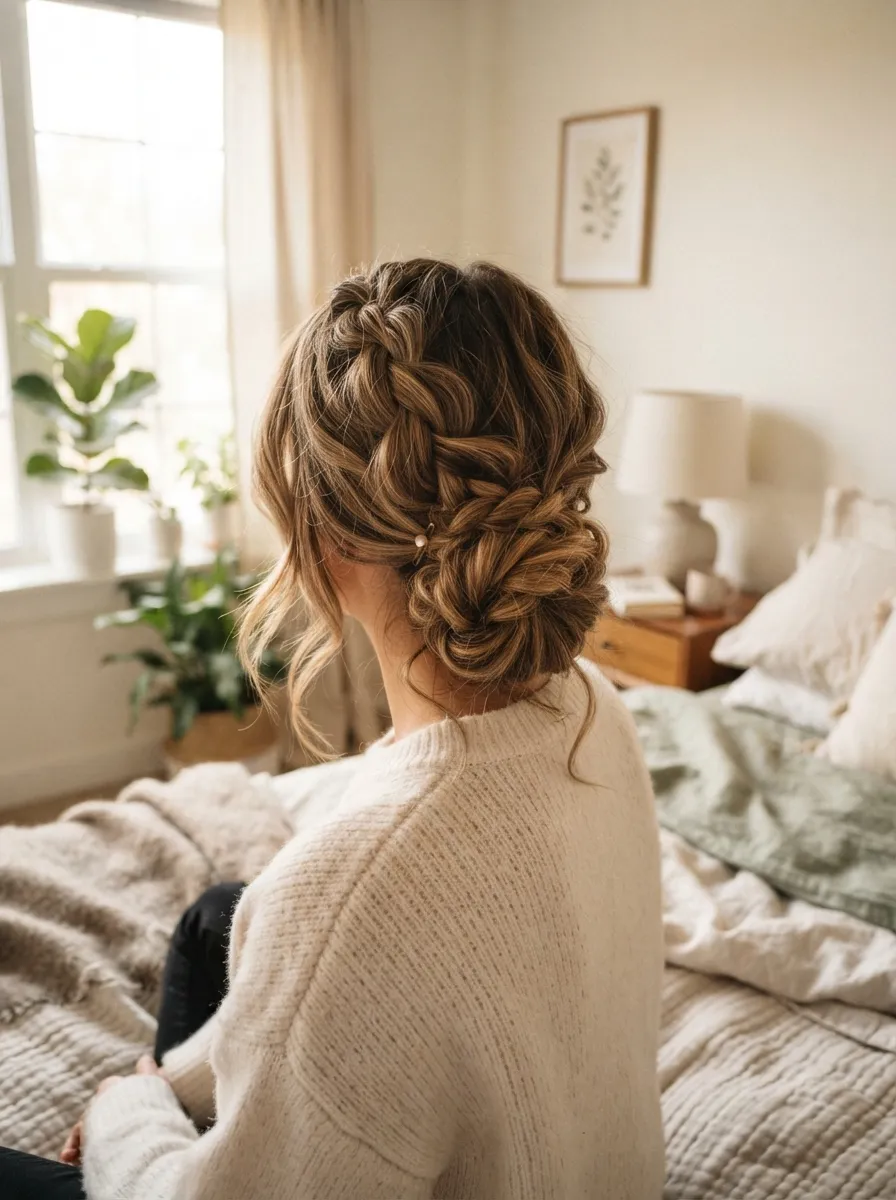
Braiding your hair before twisting it into a bun adds texture without requiring any curling tools. Do a loose, slightly undone three strand braid down your length, then coil it into a bun shape and pin it in place. Pull gently on the braid loops after pinning to loosen them and avoid a too neat look. This style holds exceptionally well through workouts or long days since the braid itself provides structure underneath the mess. It also works beautifully on second day hair that already has some grip. If your ends are thin or wispy, tuck them under the bun rather than leaving them out, since braided ends can look scraggly if left loose. A spritz of texturizing spray on the braid before you start helps it hold shape without needing hairspray after. This is a favorite for hikes, beach days, and anywhere you need a bun that lasts.
7. Half Up Messy Bun
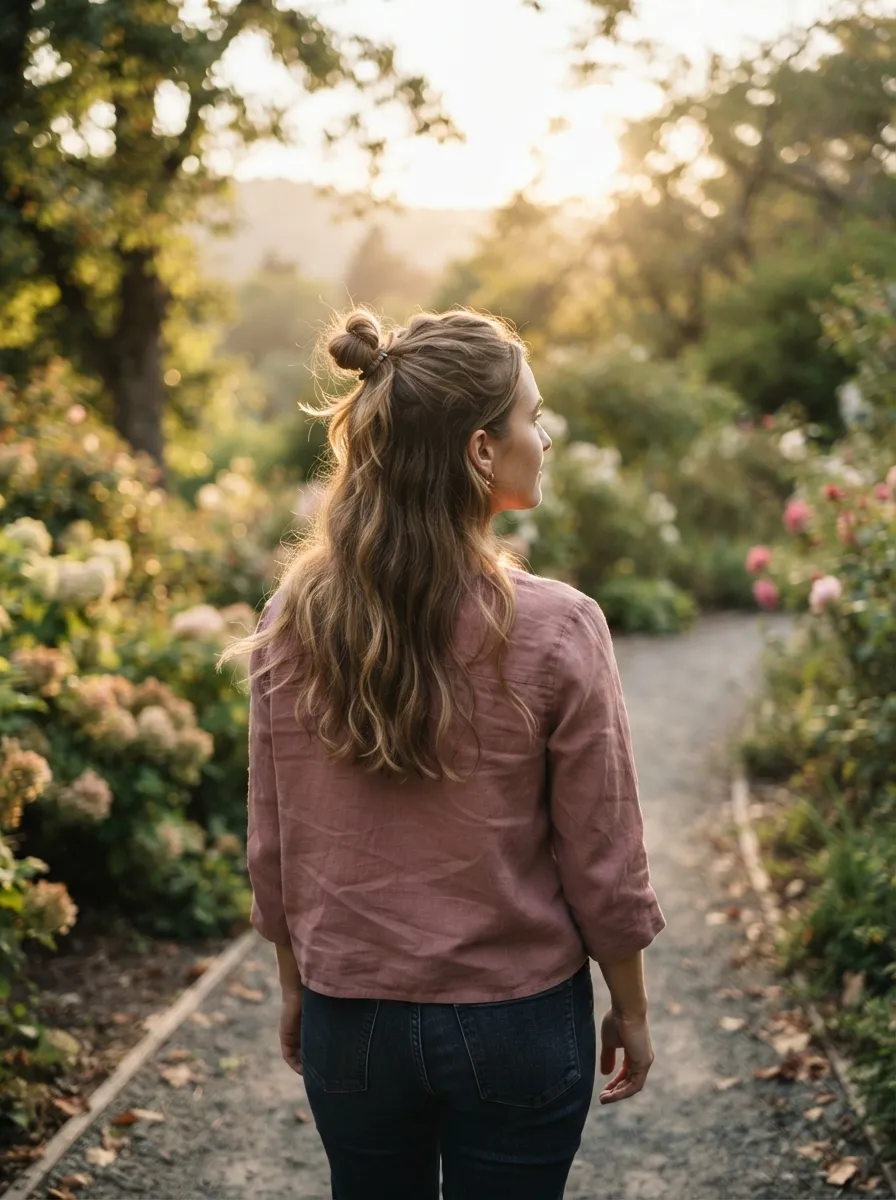
This is the style for anyone who loves the look of a bun but is not ready to put all their hair up. Gather just the top section, from ear to ear, and twist it into a small messy knot, leaving the rest down. It is especially flattering on long hair since it shows off length while still keeping hair off your face. Curl the ends of your down hair loosely for extra dimension, or leave it straight for a more casual feel. A light hair oil on the ends keeps them looking healthy and prevents that dry, staticky look that can happen with loose hair. This half up version works well for both casual outings and slightly dressier occasions, since it reads as more done than a full bun while still keeping that relaxed energy. It is also quick, usually under two minutes once you get the motion down.
8. Messy Bun for Curly Hair
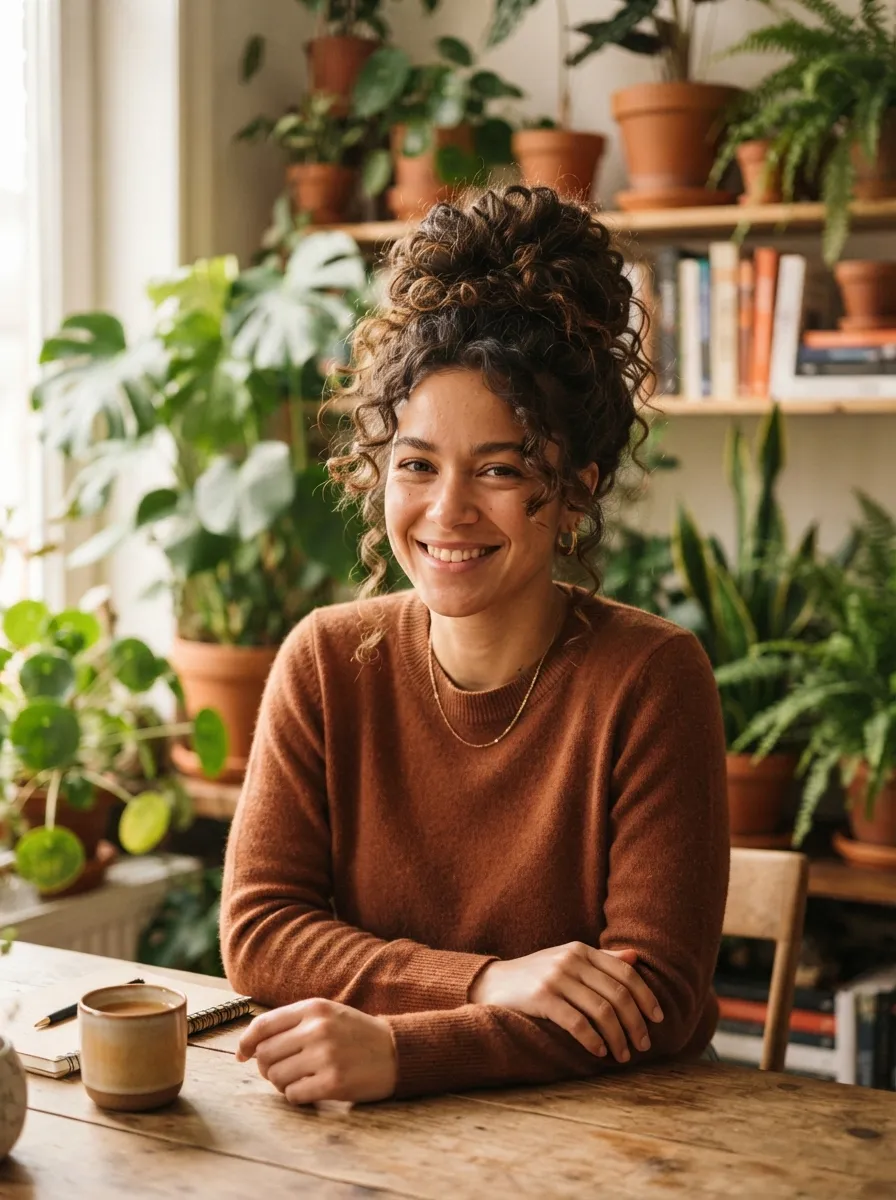
Curly hair has natural texture that makes messy buns almost effortless, but the trick is working with your curl pattern instead of fighting it. Gather your curls loosely at the crown using your fingers rather than a brush, which helps preserve curl definition instead of turning it into frizz. Twist gently and secure with a soft scrunchie rather than a tight elastic, since curly hair is more prone to breakage under tension. A curl cream applied before gathering keeps the curls looking defined even once they are pulled up. Leave a few curls loose around the hairline for extra volume and shape. This style holds shape for days since curly hair naturally resists falling flat, making it perfect for busy weeks when restyling daily is not realistic. It also works beautifully for humid weather when other styles might frizz out completely.
9. Messy Bun with a Bandana
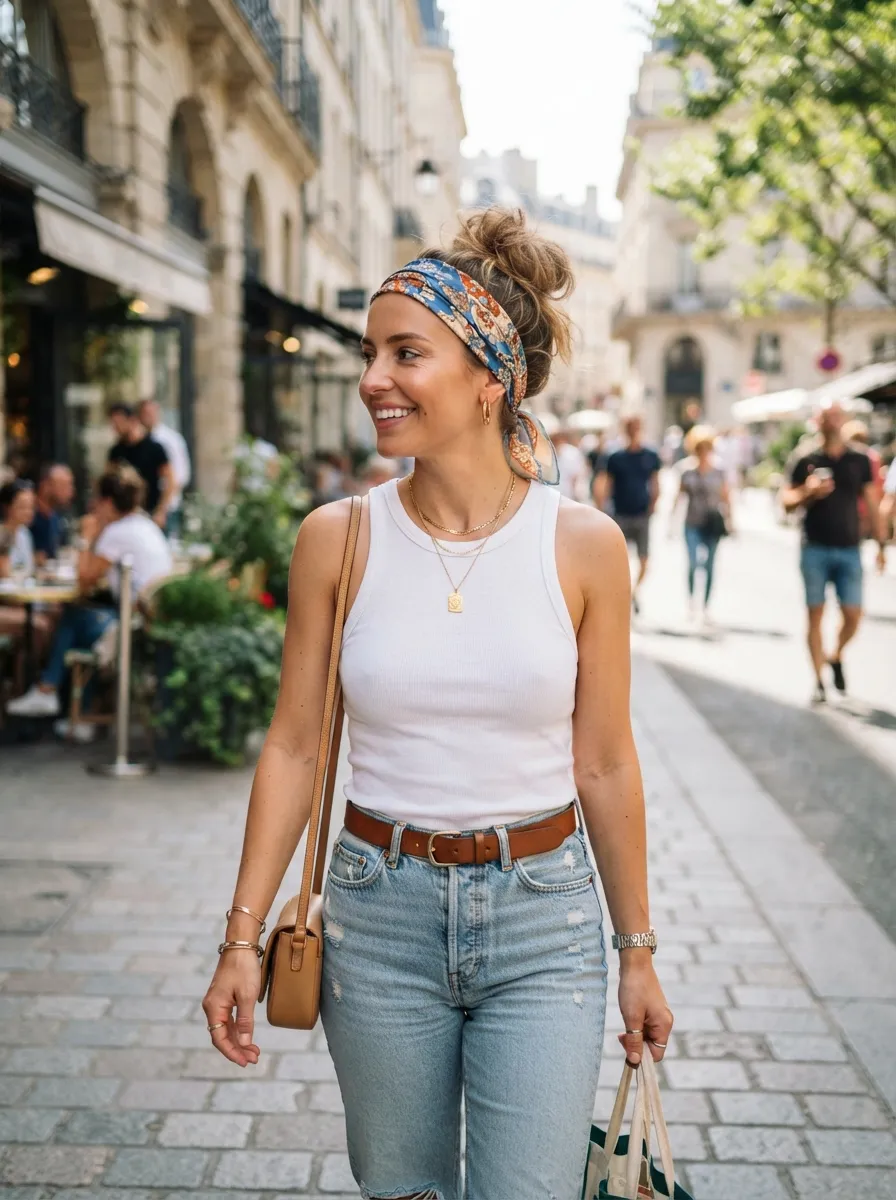
Adding a bandana or scarf instantly upgrades a basic messy bun into a full outfit statement. Fold a square scarf into a strip, place it just behind your hairline, and tie it at the nape or the crown depending on the look you want. Gather the rest of your hair into a loose bun behind or through the scarf knot. This is a great trick for stretching second or third day hair, since the scarf hides roots and adds color without any actual washing. Cotton bandanas work best since silk can slip out of place throughout the day. Pair it with hoop earrings for a retro feel, or keep accessories minimal for a more modern take. This combination is popular for festivals, road trips, and any day when you want your hair to feel like part of the outfit rather than an afterthought.
10. Sleek Front, Messy Back Bun
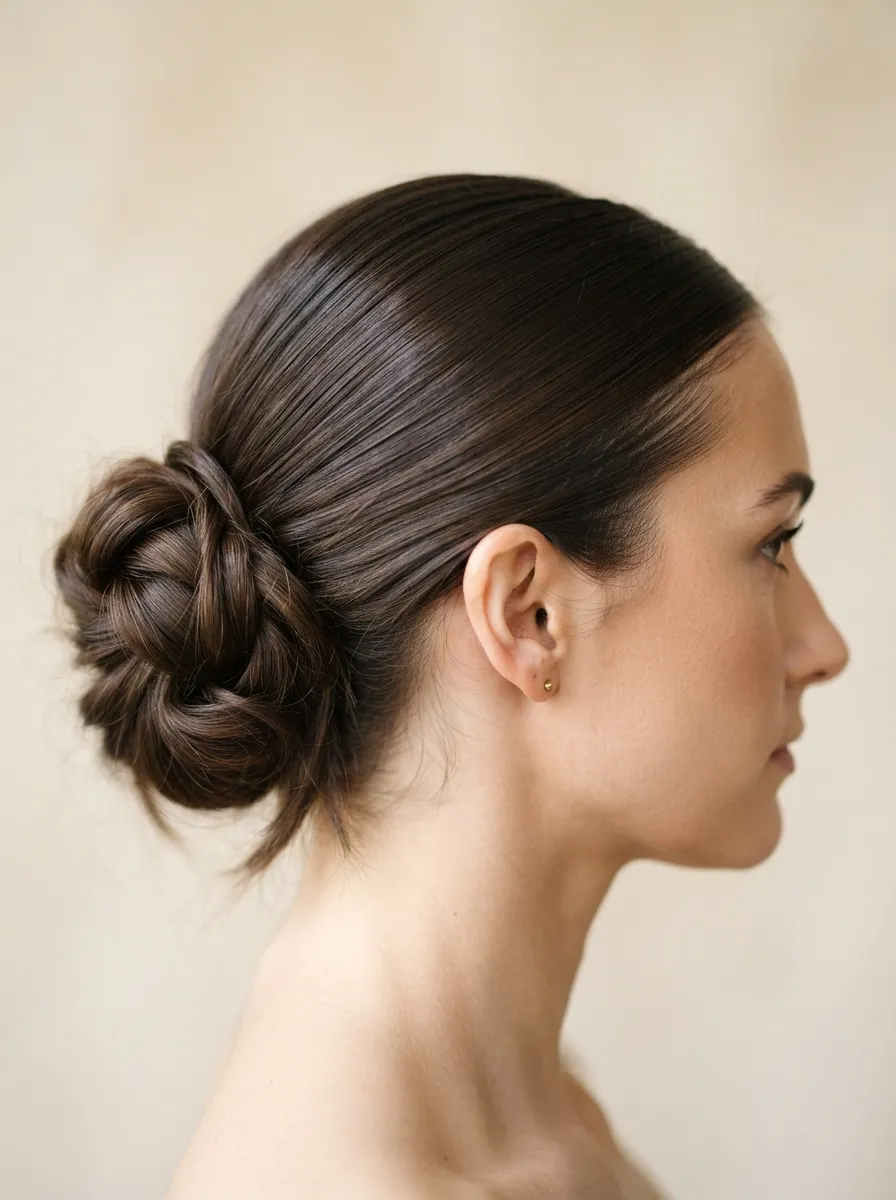
This style plays with contrast by keeping the front of your hair smooth and controlled while letting the bun itself stay loose and undone. Use a fine tooth comb and a little gel to slick back the top and sides until they lie completely flat, then gather the rest into a loose, textured bun. The result looks polished from the front and relaxed from behind, which makes it a favorite for photos since it looks intentional from every angle. This works particularly well for those with some hair regrowth or baby hairs, since the gel smooths them into the style rather than letting them stick out. It is a slightly more elevated take on the messy bun, appropriate for work events or dinners where you want something a step above casual but still easy to achieve in under five minutes.
11. Messy Bun with Bangs
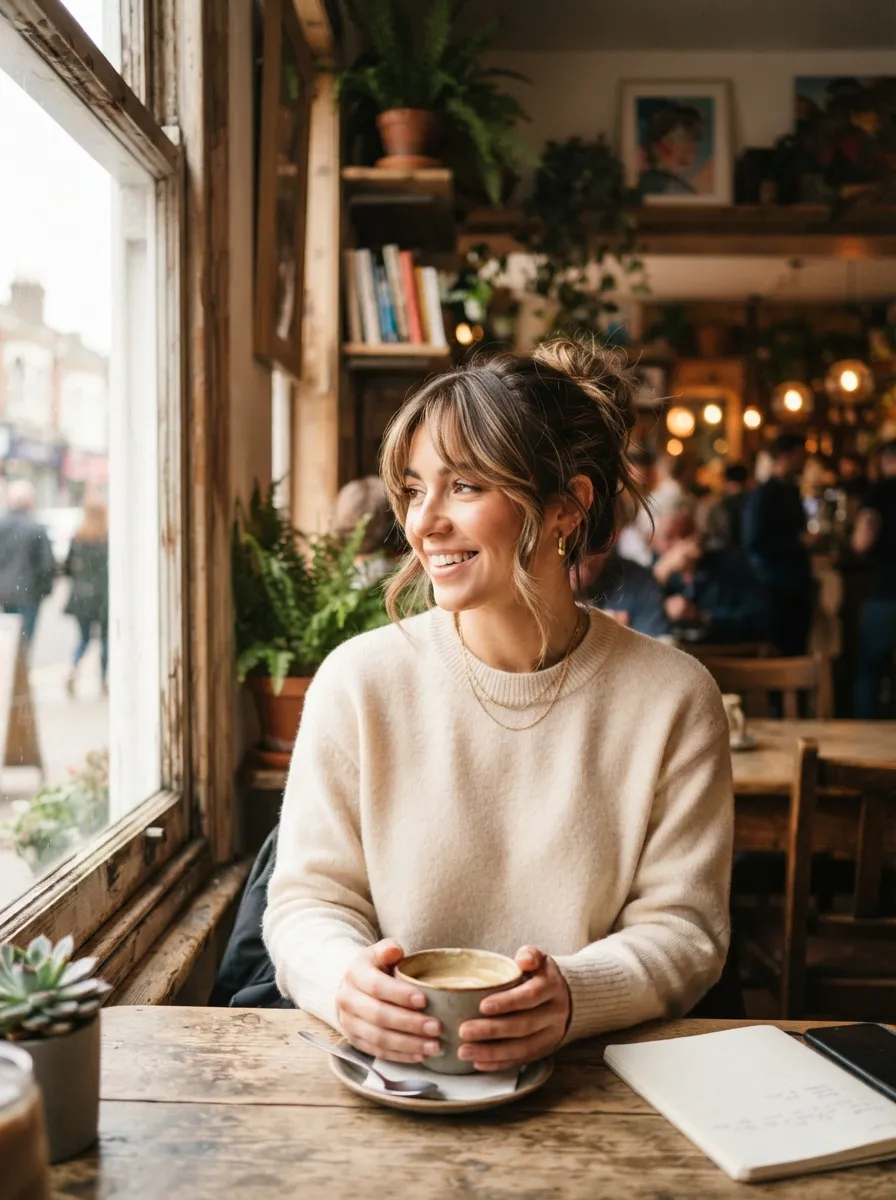
Bangs and messy buns are a natural pairing since the bangs add face framing softness while the bun keeps the rest manageable. If you have curtain bangs, style them with a round brush and a little heat for movement, then gather the remaining length into your usual messy bun. Blunt bangs work too, just keep them slightly textured rather than perfectly straight so they match the relaxed energy of the bun. A dab of styling cream on the bangs prevents them from looking greasy by midday while keeping them soft rather than crunchy. This combination is especially good for round or square face shapes since the bangs break up width across the forehead. It also means less hair to manage day to day since your face framing pieces are already set, leaving just the back section to deal with each morning.
12. Voluminous Messy Bun for Thick Hair
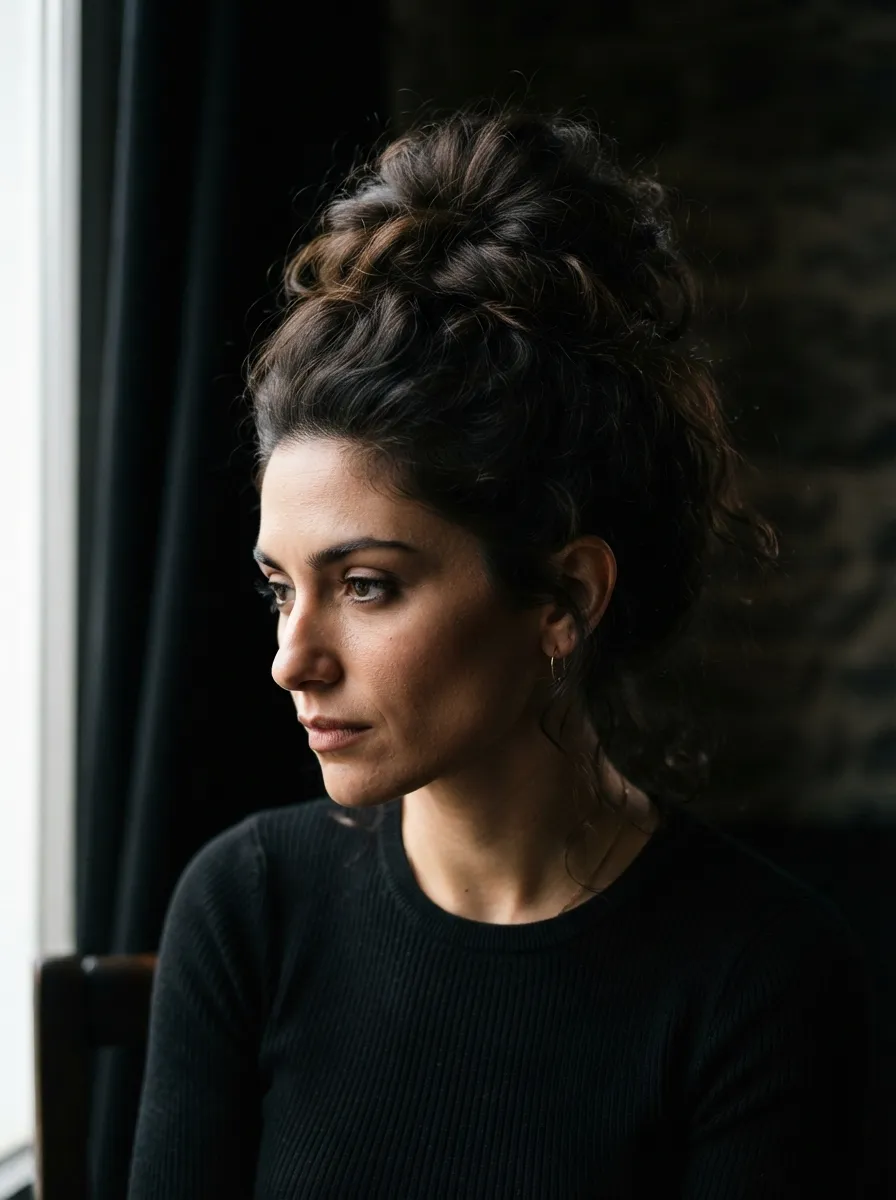
Thick hair naturally creates a fuller, more dramatic bun without any extra effort, but it does need the right tools to stay secure. Use strong, thick bobby pins rather than thin ones, since fine pins tend to bend or pop out under the weight of dense hair. Gather your hair loosely rather than pulling it tight, since thick hair already has volume and does not need help looking bigger. A wide hair tie made for thick hair prevents breakage compared to thin elastic bands. This bun looks especially good slightly off center rather than perfectly symmetrical, since it plays into the natural fullness rather than fighting it. If your hair tends to be heavy, consider using two elastics stacked for extra hold throughout the day. This style is great for those who want a statement bun without needing any added volume products.
13. Beachy Messy Bun

This version leans into undone, wind blown texture rather than trying to smooth anything out. Spray your hair with a sea salt spray and scrunch it gently before gathering it into a loose, low bun. Do not worry about neatness here, since the whole appeal is the just came from the beach look. Leave several pieces loose around your face and neck, and do not bother pinning down flyaways. This works best on wavy or slightly curly hair that already has movement, though straight hair can fake the texture with a salt spray and some finger scrunching. It holds up well in humidity and wind since it is not trying to fight either. This is the easiest bun on this list in terms of effort, making it perfect for vacation days, pool afternoons, or any time you want hair that looks good without looking styled.
14. Messy Bun with a Claw Clip
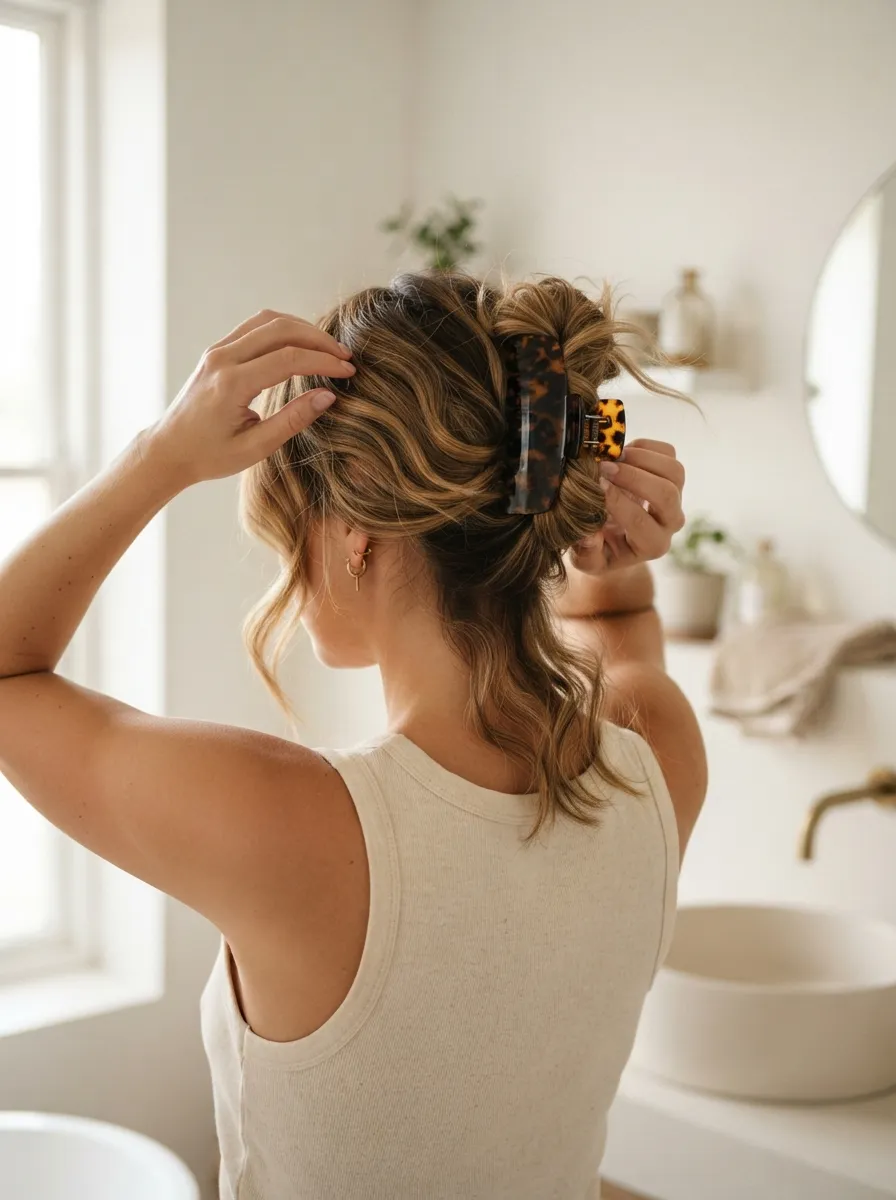
Claw clips have made a comeback, and they are one of the fastest ways to get a messy bun without any pins or elastics at all. Twist your hair loosely, fold it up and over itself, then clamp a large claw clip vertically or horizontally depending on your hair length. Vertical placement tends to look more natural and less structured. This method works particularly well for hair that is too short for a traditional bun but too long to leave completely down, since the clip does the holding work that pins usually handle. It also takes seconds, making it ideal for those days when even bobby pins feel like too much effort. Choose a clip in a neutral tone like tortoiseshell or matte black so it blends with your hair rather than becoming the focal point, unless you want it to stand out on purpose.
15. Space Bun Inspired Messy Look

Instead of one bun, this style splits your hair into two sections for a playful, youthful take. Part your hair down the middle, gather each side separately, and twist into two loose buns rather than tight, structured ones. Keep both a little uneven and let pieces fall loose for that undone quality. This works well for medium to long hair and is a fun option for festivals, gym days, or casual weekends when you want something a little different from your usual bun. A little texturizing spray on each section before twisting helps them hold without looking stiff. This style is lower maintenance than it looks since two smaller sections are actually easier to manage than one large one, especially if your hair tends to be slippery or fine. It also balances out visually on most face shapes since the buns sit symmetrically.
16. Messy Bun with a Bump

Adding volume at the crown before pulling your hair back creates a retro inspired lift that looks more done up than a flat bun. Tease the top section of your hair gently with a comb, then smooth just the very top layer over it before gathering everything into your bun. A little hairspray on the teased section holds the bump in place throughout the day. This works particularly well for those with thinner hair near the crown since it fakes volume without needing extensions or clips. It also flatters longer face shapes by adding width at the top rather than length. This style takes a bit more time than a basic messy bun, closer to five or seven minutes, but the payoff is a noticeably more polished result that still keeps the relaxed, undone quality through the rest of the bun.
17. Wet Look Messy Bun

This edgier take skips the texture spray entirely and instead uses styling gel for a wet, glossy finish. Comb your hair back smoothly at the roots, then gather it into a low bun and let the ends stay slightly separated and undone rather than perfectly smooth. The wet look reads as more fashion forward and works particularly well for evening events or creative settings where you want something with a bit of an edge. This style tends to hold especially well since gel provides stronger grip than dry texture products, making it a good option for long nights out. It also works on all hair types, though those with naturally oily roots should wash first since the wet look combined with actual oil can look greasy rather than intentional. Keep jewelry minimal since this style already makes a strong statement on its own.
18. Messy Bun for Short Hair

Short hair can still get in on the messy bun trend with the right adjustment. Gather only the top and front sections into a small, loose bun near the crown, leaving the shorter back layers down. This half up style is really the only version of a full bun that works well below shoulder length, but it captures the same relaxed energy. A texturizing paste helps grip shorter strands that might otherwise slip out of an elastic. Use a small, soft hair tie rather than a large scrunchie, since bulky accessories can overwhelm a smaller amount of hair. This look is great for growing out a bob or lob, since it keeps hair off your face without requiring length you do not have yet. It also works well under baseball caps or headbands if you need extra hold throughout an active day.
19. Messy Bun with Two Front Braids
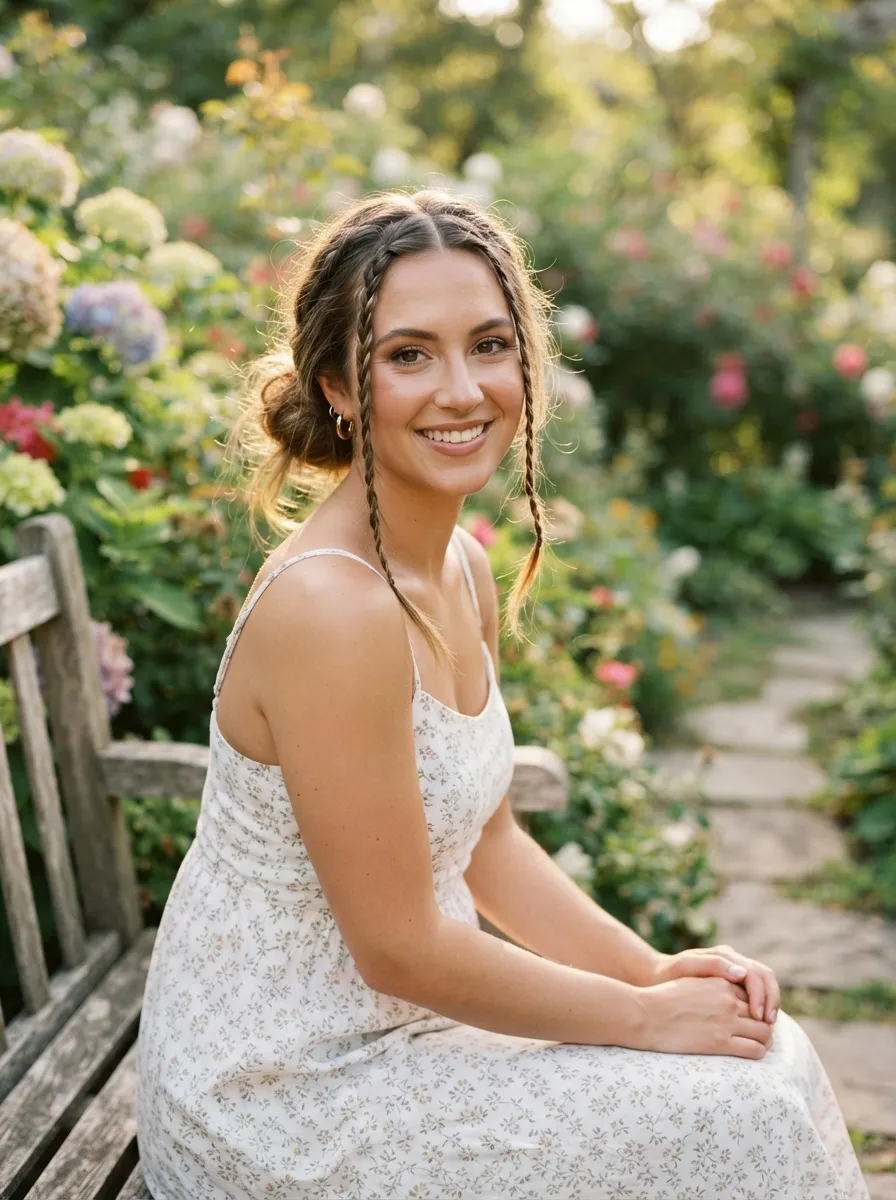
Adding two thin braids near your part line before pulling the rest back gives a boho, festival ready feel to a basic bun. Section off a thin piece on each side near your part, braid loosely, and then gather everything, braids included, into your bun. Pull on the braids slightly after securing to loosen them and match the messy energy of the rest of the style. This works on any hair type and length as long as you have enough hair near the front to braid. A little shine spray on the braids makes them catch light nicely without adding extra texture that could compete with the main bun. This style holds up especially well through long days outdoors since the braids keep hair out of your face even as the bun itself loosens throughout wear. It is a favorite for outdoor weddings and summer events.
20. Messy Bun with Baby Hairs

This detail oriented version focuses on styling the tiny hairs right along your hairline before dealing with the rest. Use a small edge control product and a soft toothbrush to shape baby hairs into soft waves or swoops along your forehead and temples. Once those are set, gather the rest of your hair into your usual loose bun. This creates a nice frame around the face that makes the whole look feel more finished, even though the bun itself stays undone. It works particularly well for those with shorter layers or baby hairs that tend to stick up or frizz throughout the day, giving them a purpose instead of fighting them. This technique takes a little practice to get the shaping right, but once you find your pattern it becomes a quick, repeatable step that elevates any bun style on this list.
21. Messy Bun with a Silk Scrunchie
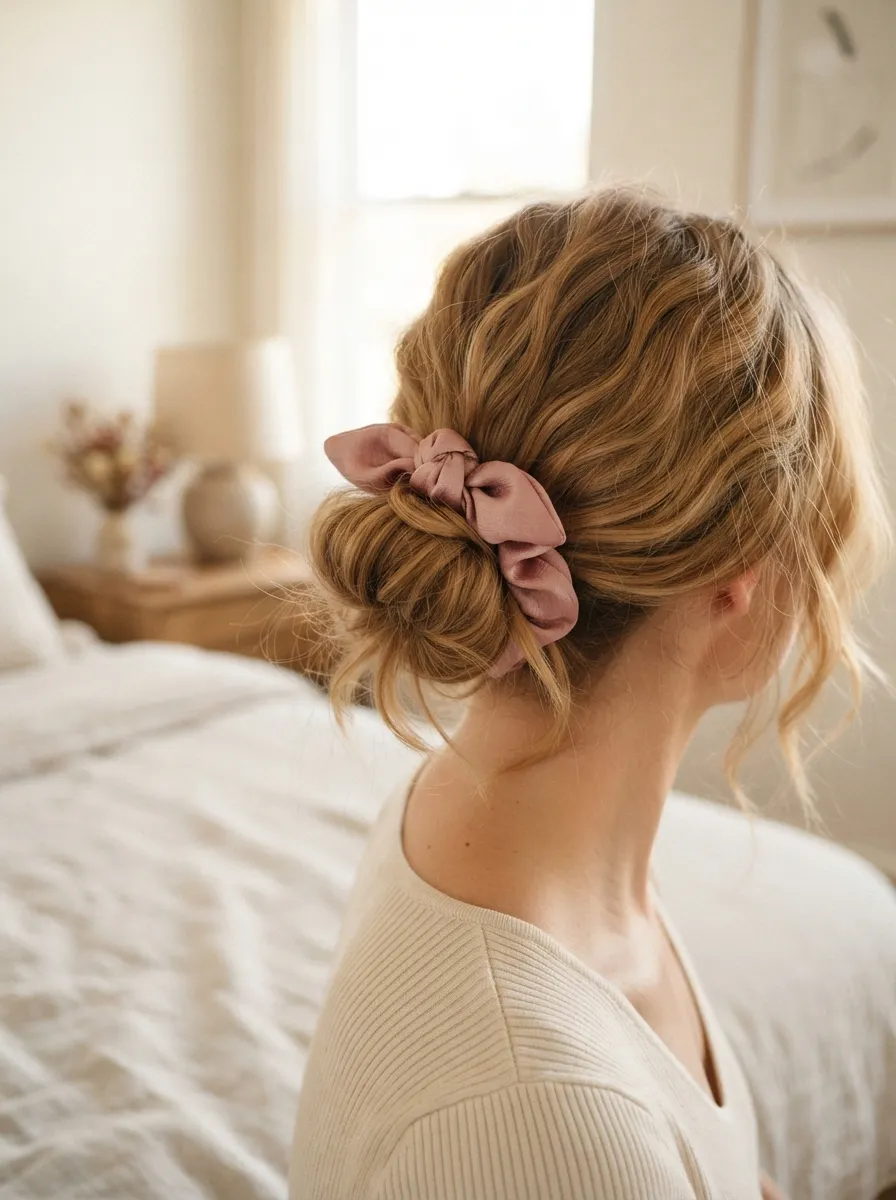
Swapping a regular elastic for a silk scrunchie changes both the look and the health of your bun. Silk creates less friction than elastic hair ties, which means less breakage and fewer flyaways caused by static. Gather your hair loosely and wrap the scrunchie two or three times depending on your hair thickness, leaving it a little loose rather than pulling it tight to the scalp. The soft fabric also gives the bun a slightly more polished, put together appearance even though the hair itself stays undone. This is an easy upgrade that costs very little and works with literally any of the other techniques on this list, since it is more about the tool than the technique. It is especially worth trying if you deal with dents or creases from tighter elastics, since silk leaves barely any mark once removed.
22. Low Side Messy Bun
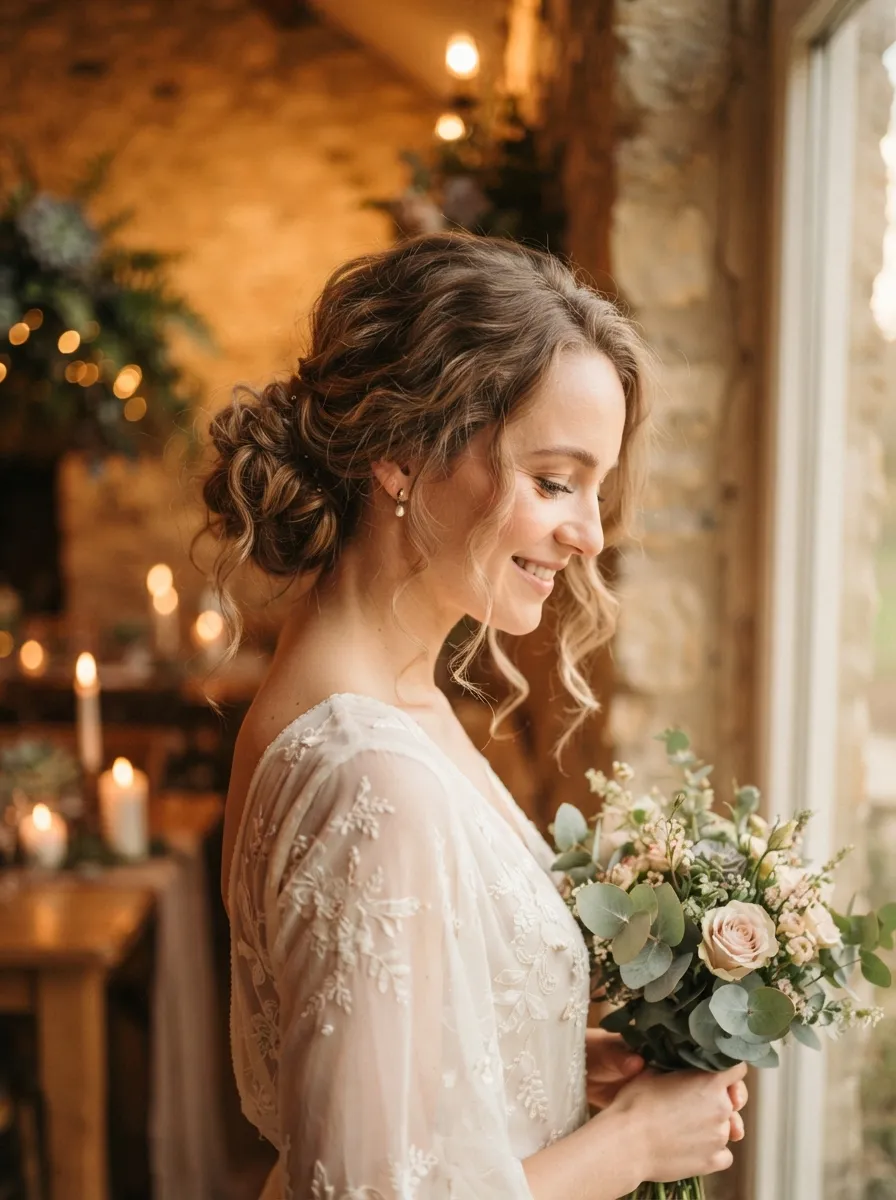
Instead of centering your bun, shift it to one side just above your shoulder for a softer, more romantic look. Gather your hair as usual, but pull it slightly to one side before twisting and pinning. This placement works beautifully for off the shoulder tops or dresses since it keeps the neckline visible on one side. It is a popular choice for date nights and dinners since it feels a touch more elevated than a centered bun without requiring extra effort. Secure with a couple of decorative bobby pins that peek out slightly for added detail, or keep everything hidden for a cleaner finish. This asymmetrical placement is also flattering across nearly every face shape since it draws the eye diagonally rather than straight up or back, which tends to be more universally flattering in photos.
23. Messy Bun Updo for Weddings

This is the dressed up version of the messy bun, built for formal occasions without losing that soft, romantic quality. Curl your whole head first with a wand, then gather your hair loosely into a bun, pulling small sections out along the way to create texture and dimension. Secure with decorative hair pins or small florals tucked in for extra detail. This version takes closer to fifteen or twenty minutes since it involves more layering and pinning than a casual bun, but the result looks intentional and elevated enough for weddings, formal parties, or photoshoots. Setting the whole thing with a strong hold hairspray ensures it lasts through hours of dancing or event activities. This style proves that messy buns are not just a lazy day option, they can absolutely carry a formal look when styled with a bit more care and time.
24. Messy Bun with Highlighted Pieces
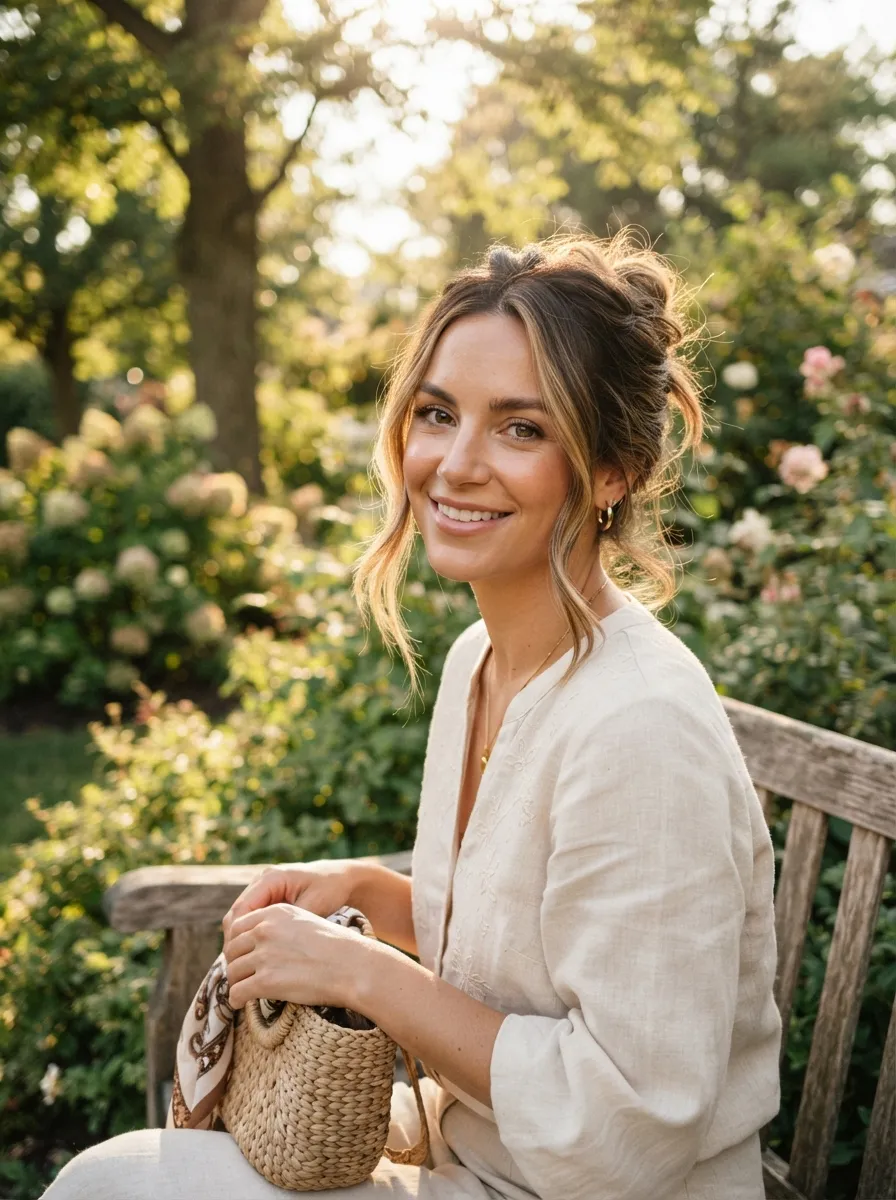
If you have highlights or balayage, a messy bun is one of the best styles to actually show them off. Instead of tucking everything back tightly, pull out a few of your lightest pieces around the face and let them fall loosely outside the bun. This creates dimension and draws attention to your color work in a way a sleek, tight style never could. A little shine serum on those loose pieces keeps them looking healthy rather than dry or frizzy. This works on any length as long as your highlights sit near the front or crown of your head. It is a great trick for stretching time between salon visits too, since face framing pieces are usually the first to grow out and blend, and keeping them visible distracts from regrowth elsewhere. This version pairs especially well with warm toned makeup looks.
25. Second Day Hair Messy Bun
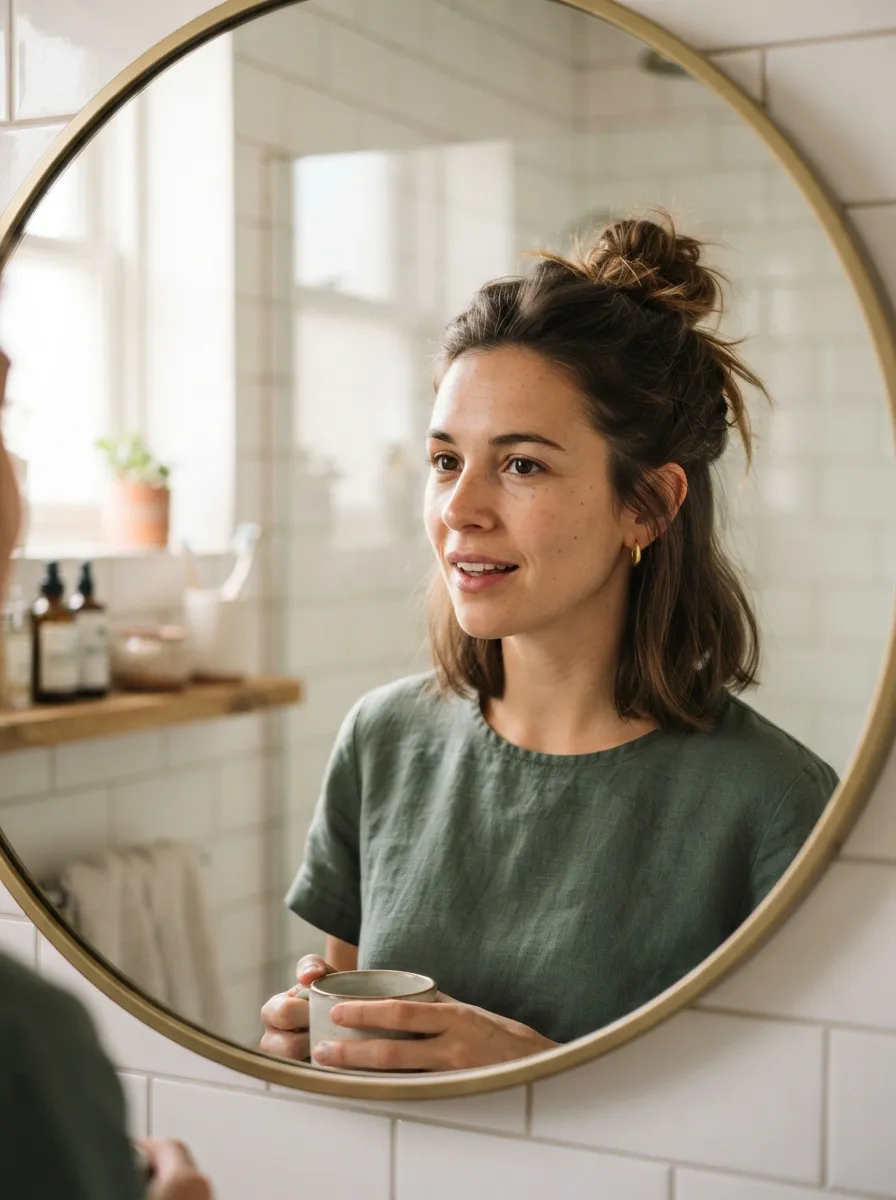
This bun is built specifically for the hair you have on day two or three, when it is not fresh but not quite due for a wash either. The natural oils at your roots actually help the bun hold better than freshly washed hair, which tends to be slippery. Apply dry shampoo at the roots first to absorb excess oil and add texture, then gather your hair into your usual bun shape. You will likely need fewer pins than usual since the hair already has grip. This is the most practical bun on the list for busy mornings since it turns a hair care inconvenience into a styling advantage. It also tends to last longer throughout the day compared to a bun done on freshly washed hair, since there is less slip for pieces to work their way loose from the style.
26. Messy Bun with a Headband

A thin fabric or knotted headband adds a sweet, put together detail to an otherwise casual bun. Place the headband just behind your hairline, then gather the rest of your hair into a loose bun behind it. This combination is popular because it hides regrowth and roots while adding a small style element that makes the whole look feel considered. Fabric headbands with a bit of stretch tend to stay in place better than rigid plastic ones. Pair a neutral cotton headband with a simple bun for daytime, or a silk one for a slightly dressier feel. This is a great option for those with a lot of shorter face framing layers that usually escape a bun, since the headband holds them back without needing extra pins or product. It works well for both errands and casual outings alike.
27. Undone Bubble Bun

For something a little different, try sectioning your ponytail into two or three small elastics before wrapping it into a bun, creating a bubbled, layered effect. Gently pull at each bubble section to loosen and add volume, then coil the whole thing into a bun shape and pin. This adds noticeable texture and dimension compared to a plain wrapped bun, without needing any curling tools. It works especially well on longer hair since you need enough length to create multiple sections. A light hold spray keeps the bubbled shape from collapsing throughout the day. This style takes a few extra minutes to master but becomes quick once you get the rhythm down. It is a fun option for those wanting to switch up their usual bun routine without committing to a completely different hairstyle altogether.
28. Messy Bun with Curtain Fringe
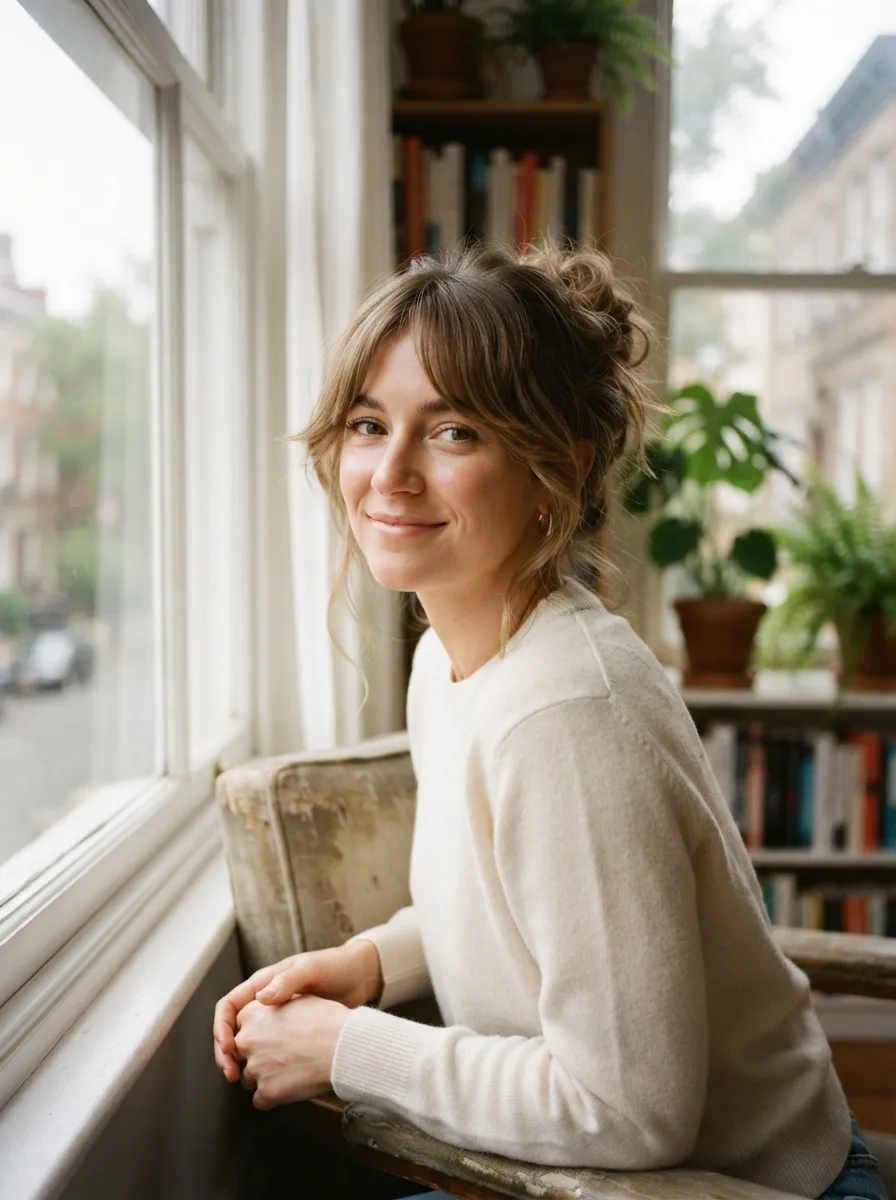
Long, face framing curtain fringe pairs beautifully with a messy bun since both styles share that soft, undone quality. Style your fringe with a round brush for a slight outward curve on each side, then gather the rest of your hair back into your usual bun. Keep the fringe pieces separate from the bun entirely so they continue framing your face rather than getting swept up and lost. A touch of flexible hold hairspray on the fringe keeps the shape without stiffness. This combination flatters nearly every face shape since the fringe softens the forehead area while the bun keeps things off your neck and shoulders. It is a low maintenance pairing overall, since curtain fringe generally requires less daily styling than blunt bangs, leaving more of your morning routine focused on the bun itself.
29. Textured Crown Wrap Bun

This version focuses on the wrap technique itself rather than a simple twist. Gather your hair, then instead of twisting it into a knot, wrap it around the base of your ponytail in a loose, layered coil, tucking the end underneath and securing with pins hidden inside the wrap. This creates a slightly more sculptural, textured shape compared to a basic twisted bun. It photographs particularly well from above or behind, making it popular for social media worthy hairstyles. A light texturizing cream applied before wrapping gives the coil more grip and prevents it from unraveling too quickly. This technique works on most hair lengths and types, though those with very fine hair may want to tease slightly at the base first for added volume and hold throughout the day.
Conclusion
Messy buns earn their popularity because they bend to whatever your day actually looks like, whether that is a gym session, a wedding, or a slow morning where five extra minutes just is not happening. Try a few of these versions and see which ones feel the most natural for your hair type and daily routine, then keep the tools and products that worked close by so your go to bun becomes second nature. The beauty of this style is that it never has to look perfect to look good.