

Sleek buns have a way of making any outfit feel finished. They work for a quick errand run and they work just as well for a wedding, which is rare for a single hairstyle to pull off. The polished, no fly away look reads expensive without needing an expensive salon visit. Whether your hair is fine, thick, curly, or somewhere in between, there is a version of the sleek bun that fits your texture and your day. Below are twenty six ways to wear it, from low and minimal to high and dramatic, so you always have a fresh option ready.
1. Classic Low Glassy Bun
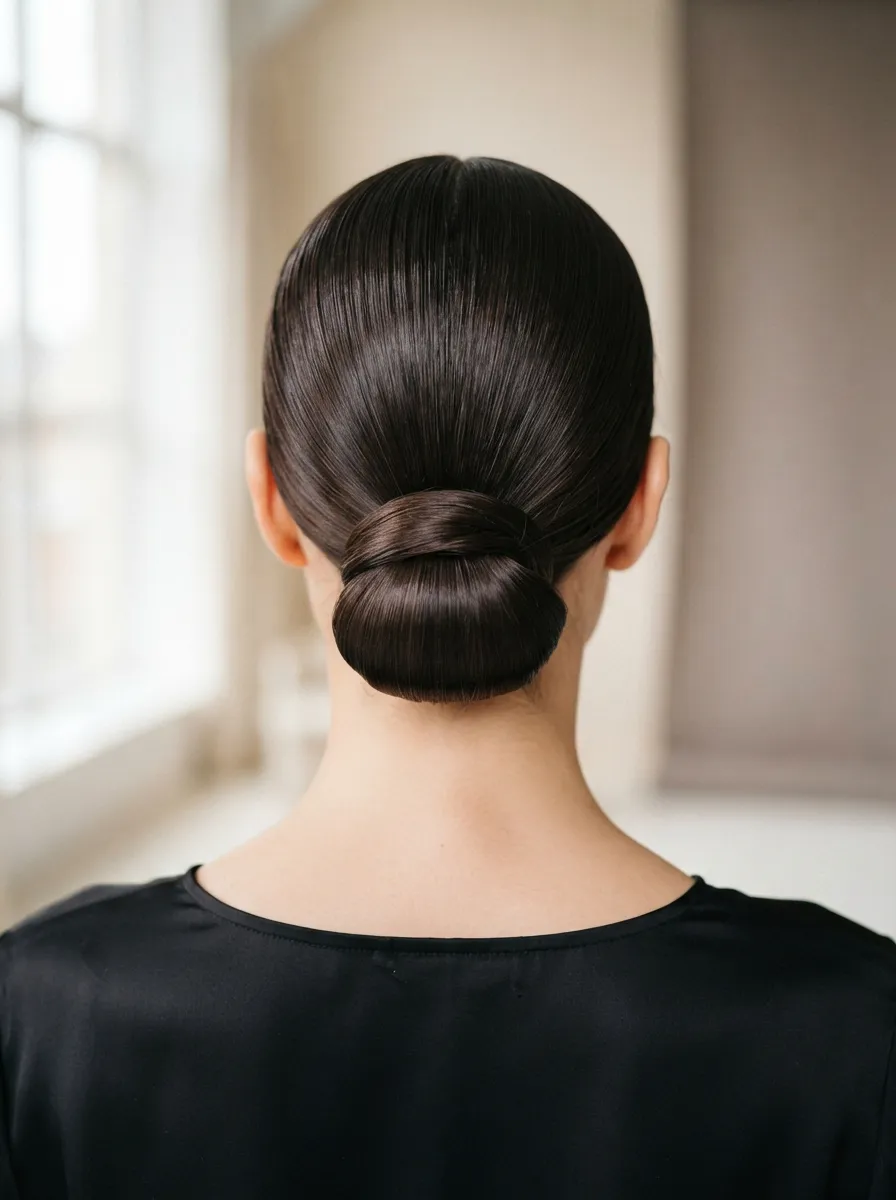
This is the version most people picture first, and for good reason. Hair is pulled back tight, smoothed with a light gel, and twisted into a knot right at the nape. The glass like shine comes from using a boar bristle brush to smooth the surface before you tie it off, not from a fancy product. A drugstore edge control stick works fine here. Wrap a small section of hair around the base to hide the elastic, then pin it flat. This style flatters almost every face shape because it keeps the focus on your jawline and cheekbones. It also holds up well through a full workday since there is nothing loose to fall apart. If your hair is naturally frizzy, spritz a bit of water mixed with a drop of hair oil in a spray bottle before smoothing, and let it dry in place for a few minutes before you touch it again.
2. High Sleek Bun for a Sharp Look

While many Messy Bun Hairstyle Ideas embrace a relaxed, undone finish, moving your bun up to the crown creates a more polished and structured look. This is the style to reach for when you want to look put together in five minutes flat. Gather your hair high, brush out every bump with a fine tooth comb, and secure it with a strong hold elastic before twisting it into a knot. The higher placement also gives your face a subtle lifted appearance, making you look more refreshed if you’re feeling tired. A strong-hold hairspray, even an affordable one, helps keep flyaways under control throughout the day. This hairstyle pairs naturally with statement earrings since your neck and ears remain fully visible. It’s also a favorite for gym days because it stays secure through movement much better than a loose bun.
3. Middle Part Sleek Bun
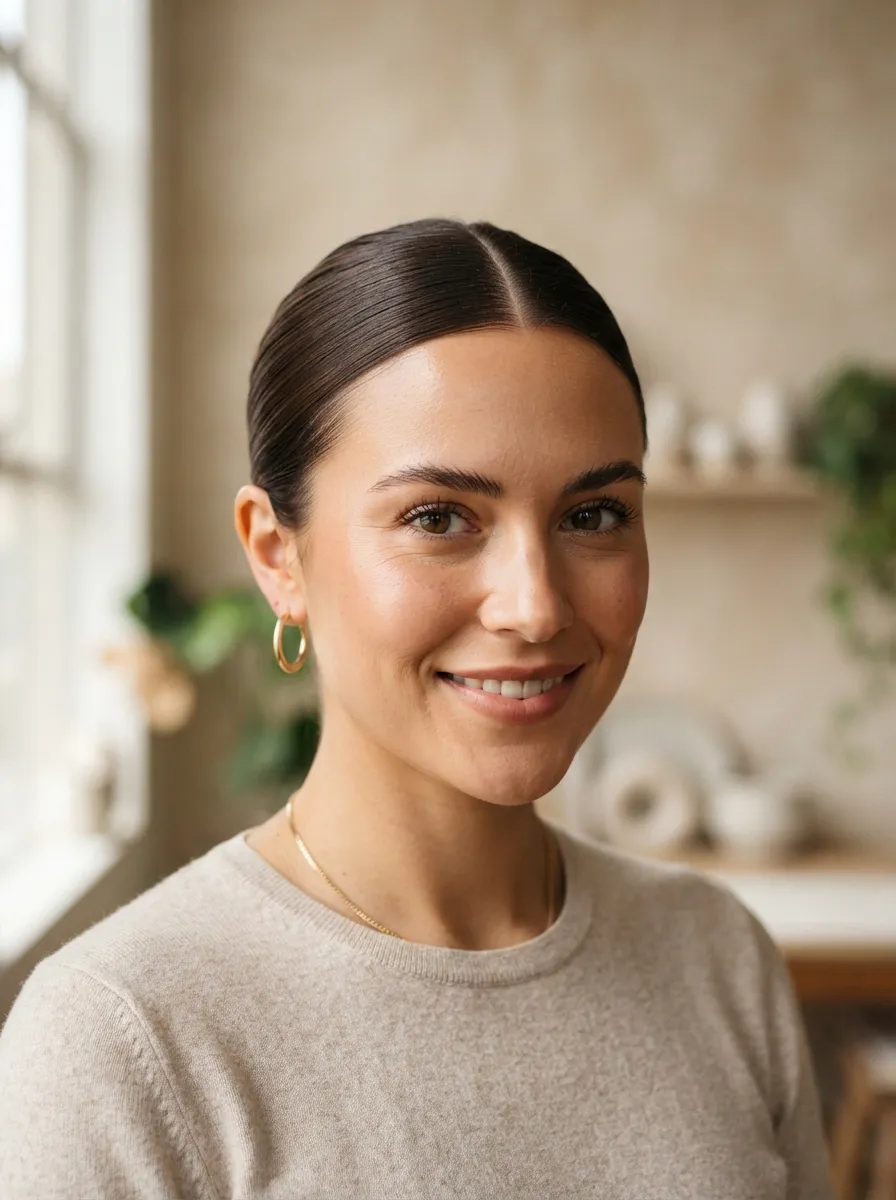
A crisp center part adds symmetry and a slightly more polished, editorial feel to the sleek bun. Start by combing a straight line down the middle using the tip of a rat tail comb, then smooth both sides back evenly before twisting into the bun. Symmetry is the whole point here, so take your time getting the part even rather than rushing straight to the bun itself. This look tends to suit rounder or heart shaped faces particularly well since the straight line adds length. If your part keeps shifting throughout the day, a tiny dab of clear brow gel along the parting line locks it in place without looking greasy. It is an easy way to make a simple bun look more intentional for something like a dinner or interview.
4. Bubble Bun
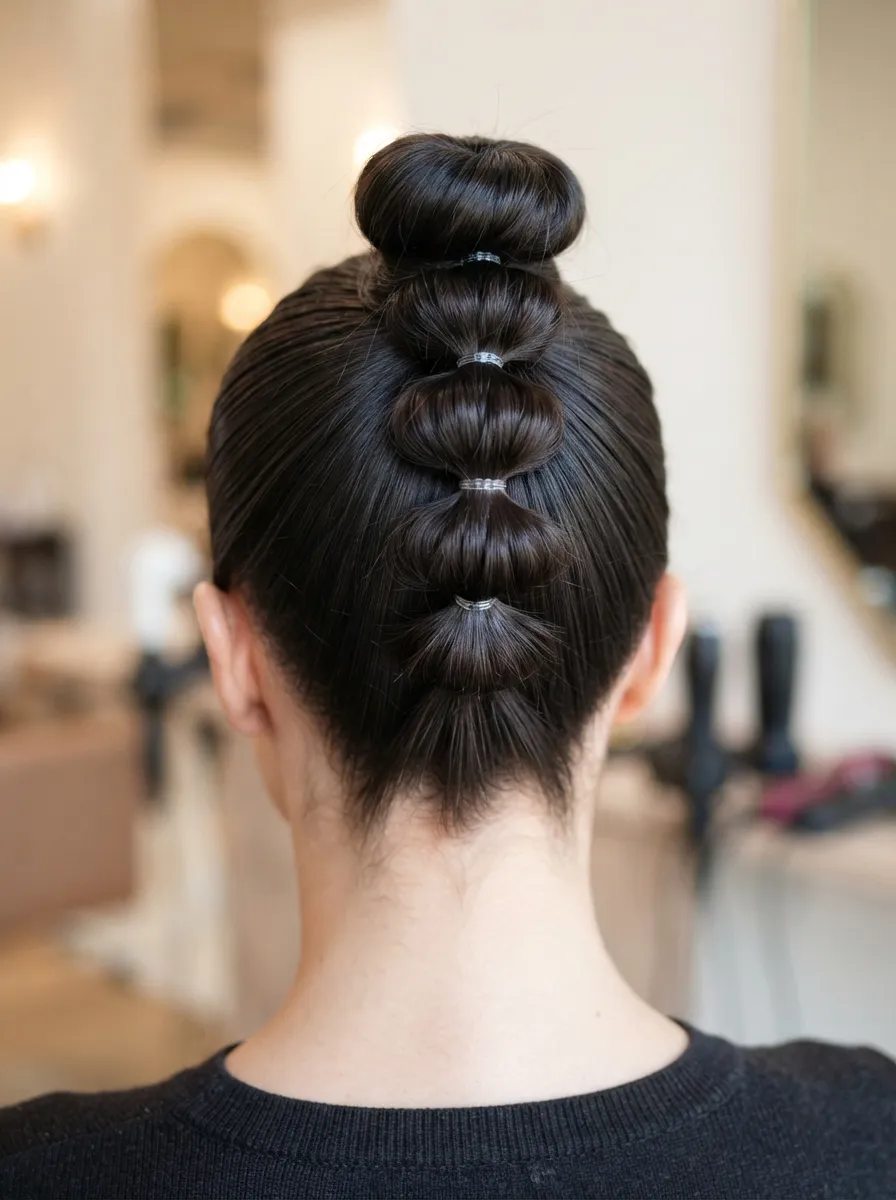
The bubble bun takes the classic shape and adds playful texture through sectioning. Pull hair into a ponytail, then use two or three small clear elastics spaced an inch apart down the length before tucking the end under to form the base. Gently pull at the edges of each section to create small rounded bubbles, keeping the surface smooth so it still reads as sleek rather than messy. This works especially well on medium to long hair since you need enough length to section. It is a fun option for date night or a party since it has more visual interest than a plain knot but still feels tidy. A little shine spray on the bubbles after shaping keeps the glassy finish consistent throughout.
5. Sleek Bun with Front Bangs Out
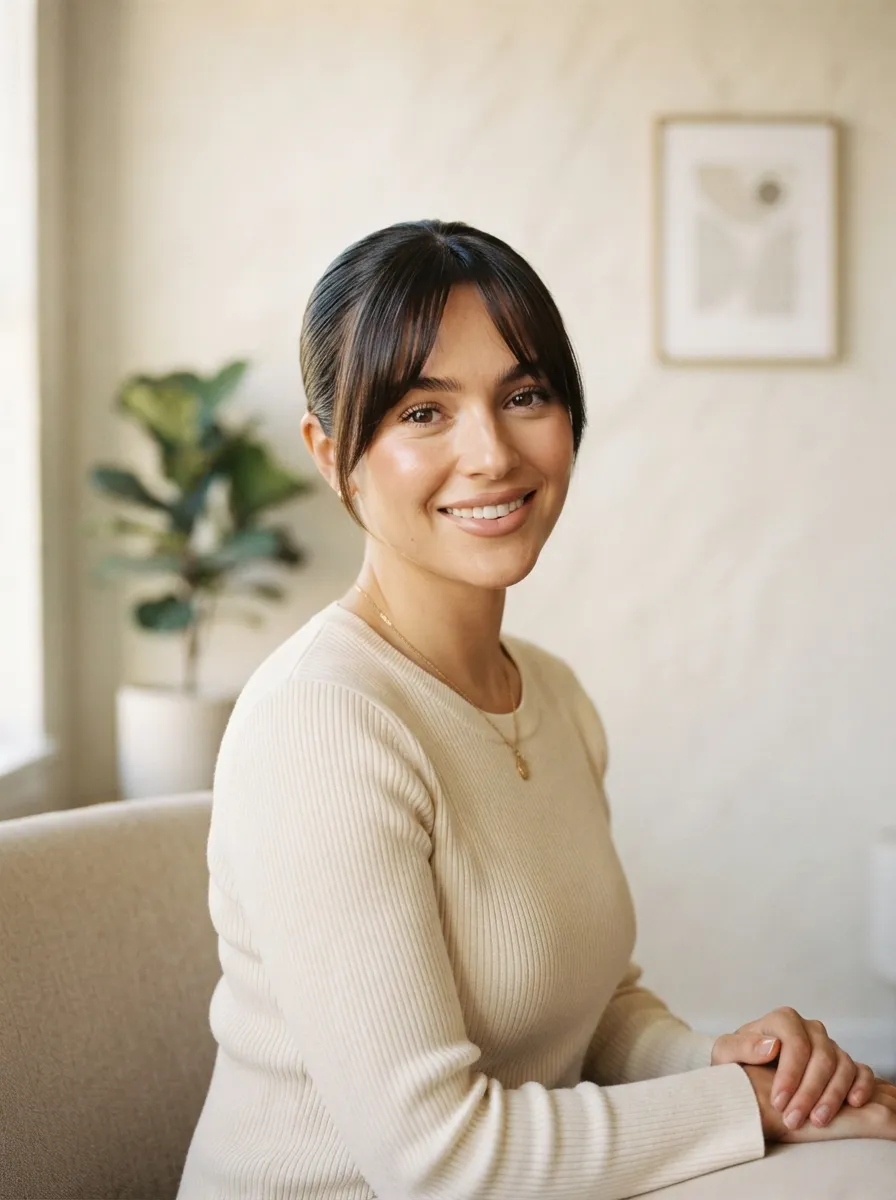
If you have bangs or face framing pieces, leaving them out softens the entire look and gives your face some movement against all that pulled back hair. Smooth the rest of your hair into a sleek bun as usual, then curl the bangs lightly with a small barrel iron so they sit nicely rather than falling flat. This version works particularly well for square or angular face shapes since the soft pieces balance out stronger features. It also gives you a style that photographs well from the front, since a fully pulled back look can sometimes feel harsh in close up pictures. Keep a small travel size flat iron nearby if your bangs tend to lose their curl during the day.
6. Braided Wrap Sleek Bun
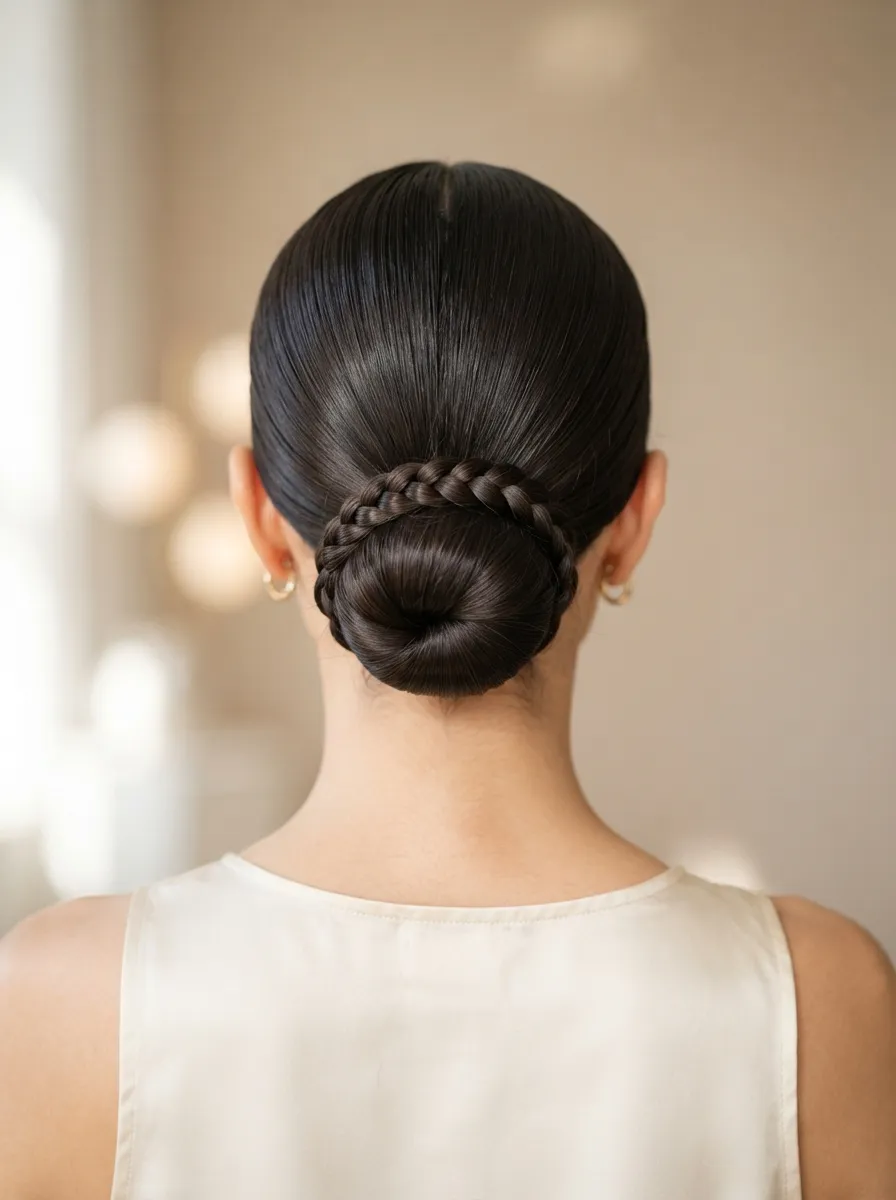
Instead of wrapping a plain section of hair around your bun base, braid a thin piece first for extra texture. This tiny detail makes a simple bun look noticeably more done up without adding real time to your routine. Take a small section before you form the main bun, braid it loosely, then wrap it around the base once the bun is secured and pin the end underneath. This is a great trick for weddings or events where you want something that photographs a little more special than the everyday version. Because the braid is small, it stays sleek and controlled rather than looking bulky. Finish with a light shine serum on just the braided section to make it stand out slightly against the rest.
7. Low Side Bun
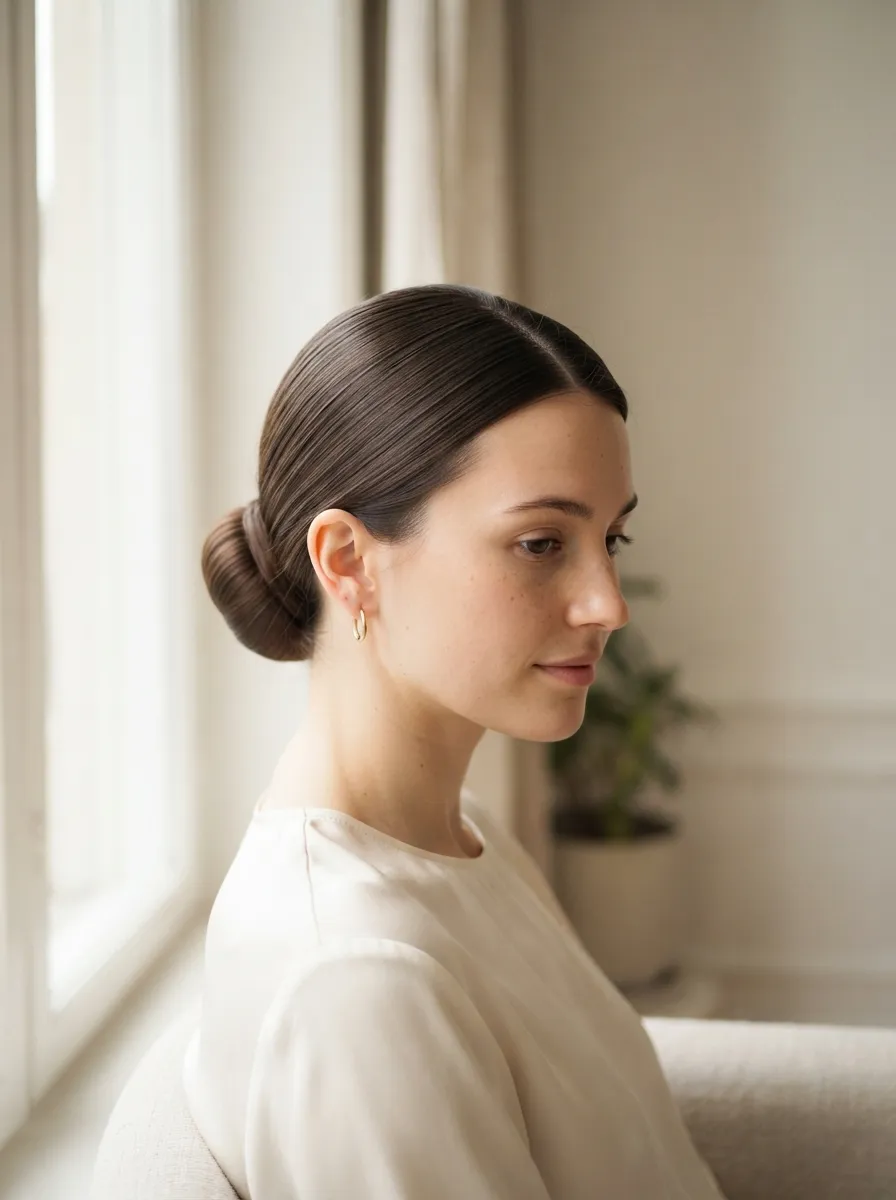
Shifting the bun to one side instead of dead center gives a more romantic, old Hollywood feel. Gather your hair at the nape as usual, then instead of centering it, twist it toward one ear and secure. This asymmetry works beautifully with off shoulder tops or dresses since it keeps one side of the neck bare and highlighted. It is also a smart pick if you have a cowlick or part that never sits quite straight in the center, since the side placement can hide those inconsistencies. Bobby pins in a color matching your hair keep the twist secure without showing. This style tends to photograph especially well in profile, so it is worth considering for portrait style pictures.
8. Sock Bun Method for Beginners
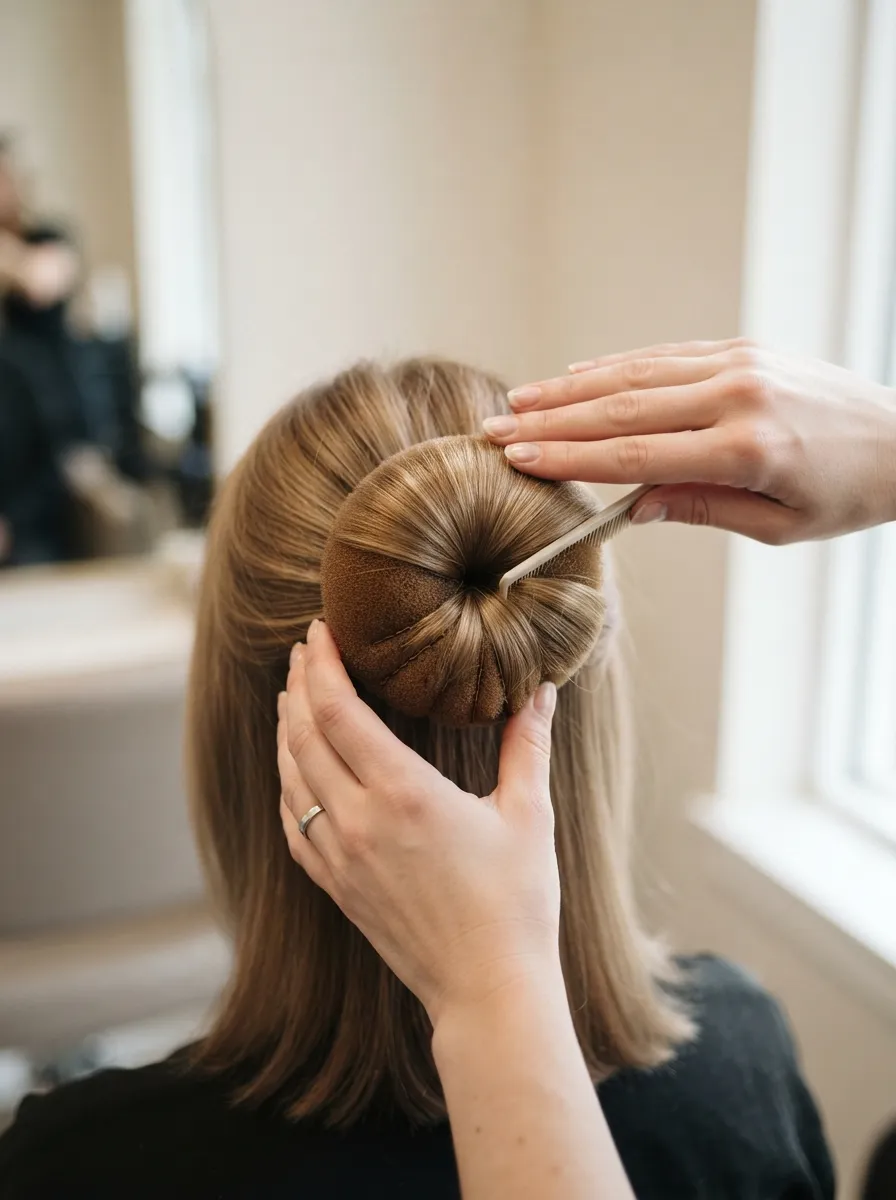
If twisting a neat bun by hand feels tricky, a foam donut or an actual cut sock is the easiest cheat. Pull your ponytail through the center of the donut, spread your hair evenly around it, then tuck and pin the ends underneath. This method gives a rounder, more uniform shape than a hand twisted bun and takes very little practice to get right. It is a great option for beginners or for anyone getting ready in a rush. A cut off athletic sock rolled into a ring works exactly the same as a store bought donut, so there is no need to buy anything special. Smooth the surface with a bit of gel afterward so the shape still reads as sleek rather than puffy.
9. Sleek Bun with a Bow

Adding a ribbon bow at the base of your bun turns a basic style into something that feels a little more special without any extra styling effort. Any thin satin ribbon works, tied in a simple bow shape and pinned so it sits flat against your bun rather than sticking out. This is a favorite for birthday looks, brunch outings, or anytime you want a touch of femininity added to an otherwise simple hairstyle. Pick a ribbon color that either matches your outfit or contrasts with it for a bolder effect. Keep the rest of the hair glassy smooth so the bow becomes the clear focal point rather than competing with texture elsewhere.
10. Curly Hair Sleek Bun
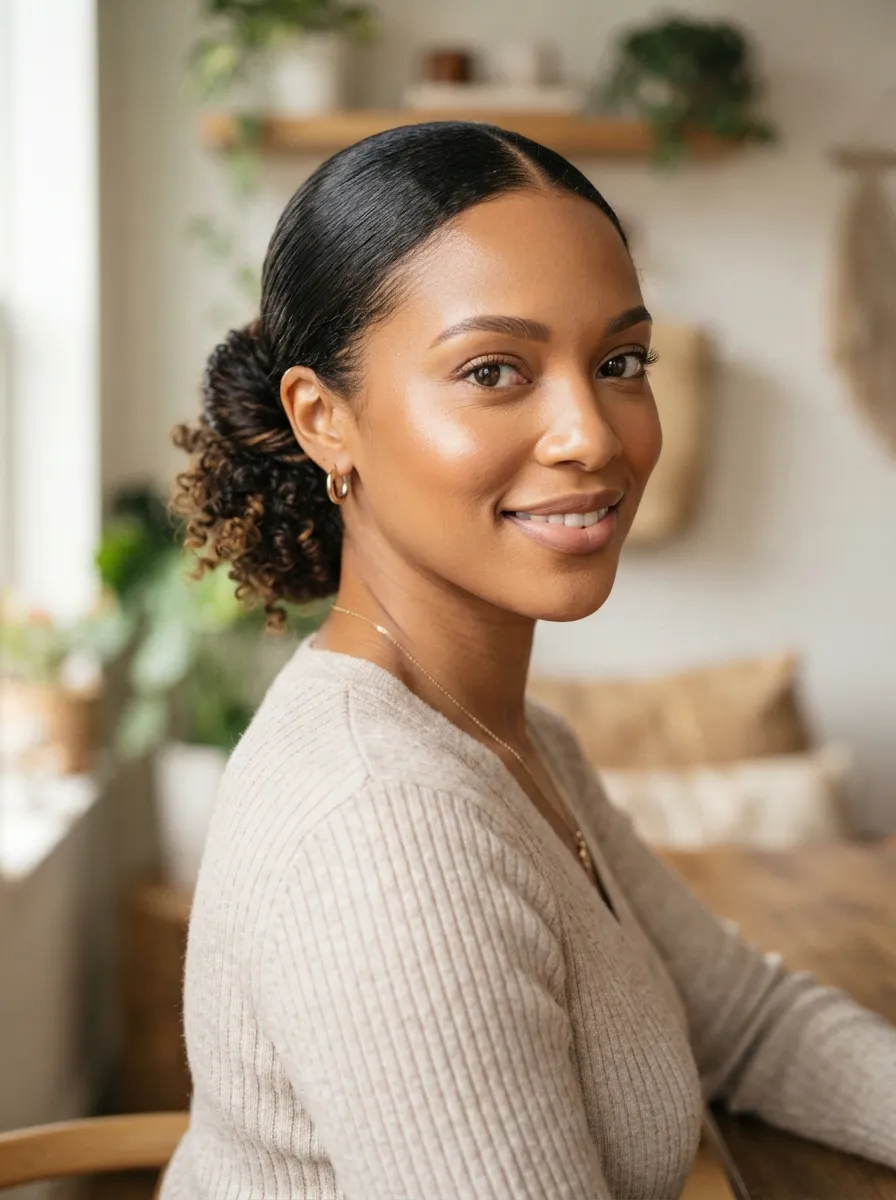
Curly hair can absolutely wear a sleek bun, it just needs a slightly different prep. Detangle while hair is damp, apply a curl smoothing gel generously through the lengths, then pull back using a brush rather than fingers to get a flatter surface at the roots. The natural curl pattern at the ends can peek out from the twisted bun for a softer finish, or be tucked in fully for a more severe polished look. A silk or satin scrunchie instead of a regular elastic helps avoid breakage on curly strands, which tend to be more fragile. Letting your roots air dry stretched with clips before styling also cuts down on the frizz you would otherwise be fighting against later.
11. Textured Undone Sleek Bun
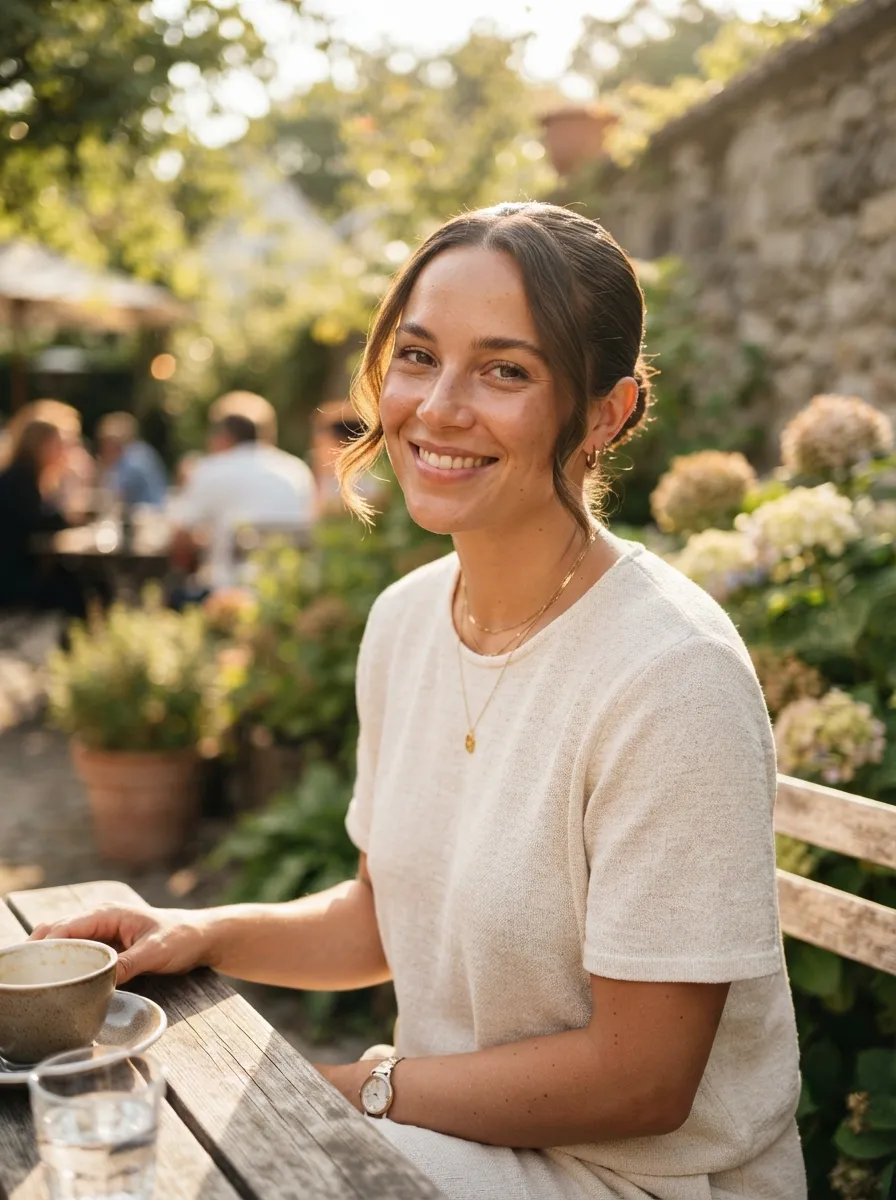
Not every sleek bun needs to be perfectly severe. This softer version keeps the main bulk of hair smooth but leaves a couple of face framing pieces loose around the temples for a lived in feel. It suits daytime looks and casual outings where a fully polished bun might feel too formal. Pull the majority of hair back tight as usual, then simply free two thin pieces near your face and leave them uncurled and natural. This small adjustment makes the whole hairstyle feel more relaxed and less like it took real effort. It is an easy transition style between weekday work looks and weekend errands since it still looks tidy from a distance.
12. Sleek Bun with Baby Hair Swirls
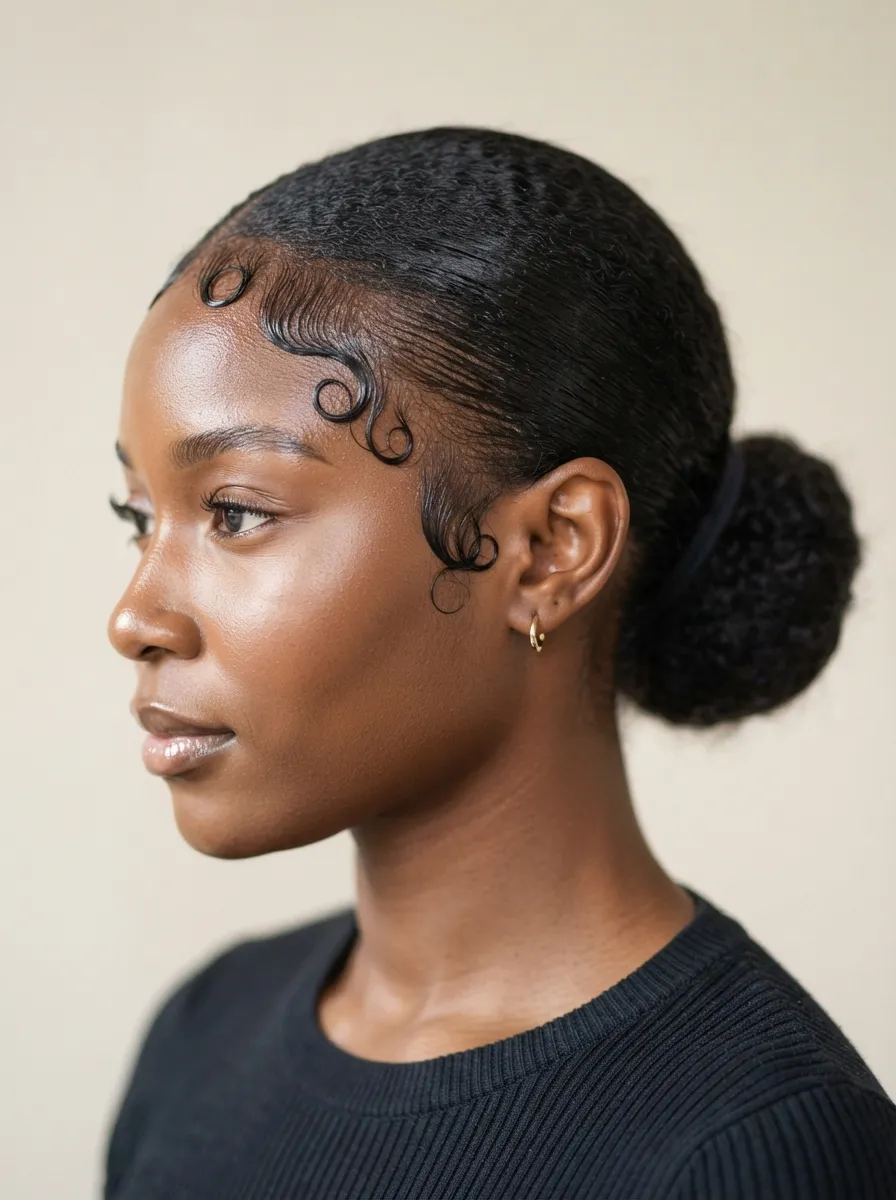
Laying down small swirl patterns along the hairline before pulling the rest back into a bun adds a graphic, detailed touch that photographs beautifully. Use a strong hold edge gel and a thin bristle brush called an edge brush to shape small waves or swirls at the temples and front hairline. Set the pattern with a hair net for a few minutes while it dries completely before removing so it holds all day. This detail works on any hair type but shows up most clearly on straighter or relaxed textures. It is a popular choice for special occasions since it takes a bit more time than a plain sleek bun but delivers a much more elevated finished result.
13. Two Braids Into a Bun
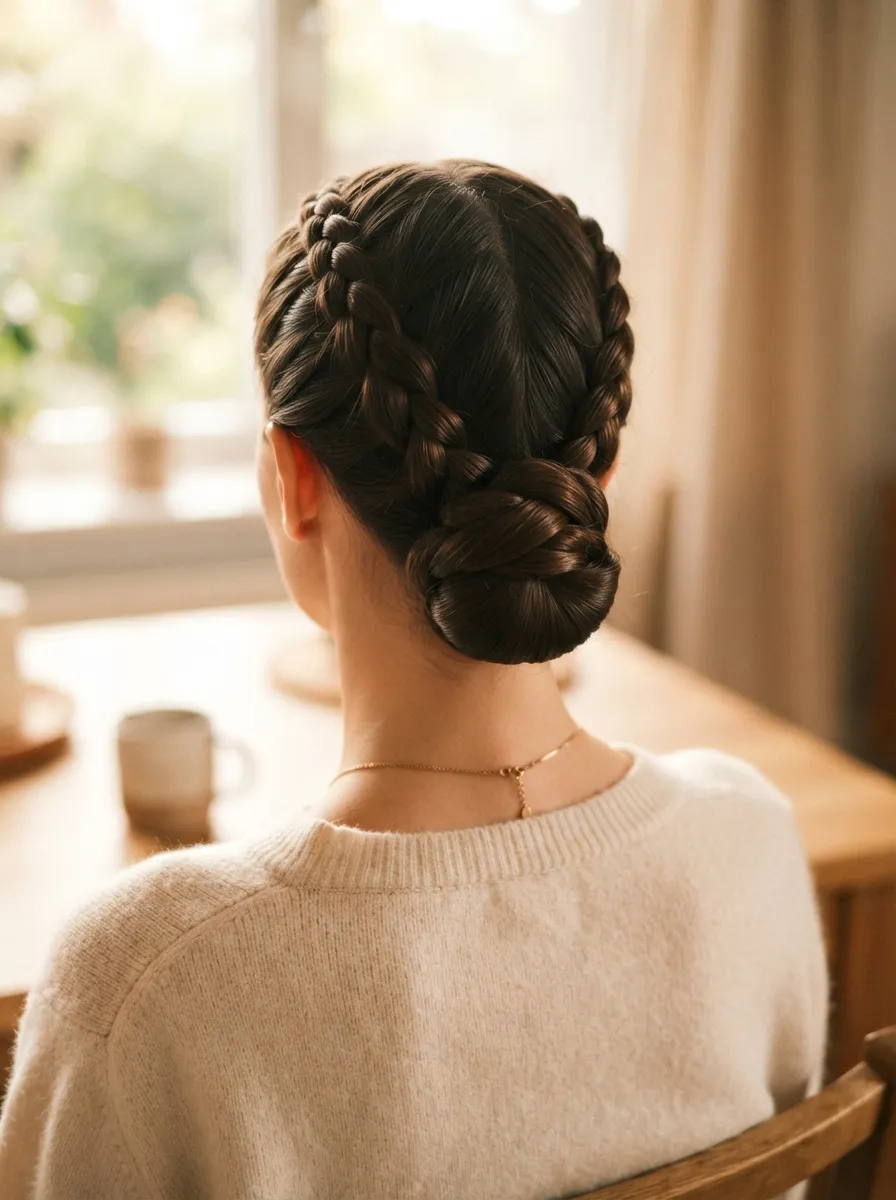
Braiding your hair into two sections first and then twisting both braids together into a single bun creates gorgeous texture underneath a still polished surface. French braid each side from the crown down to the nape, then combine both ends and twist them around each other before pinning into place as your bun. This method also helps the style last longer through active days since braids hold up better than plain smoothed hair. It works particularly well for hair that has some natural texture or waves, since the braids control that texture cleanly. This is also a nice option if you want a hairstyle that still looks great even after the bun itself loosens slightly later in the day.
14. Sleek Bun with a Middle Swoop
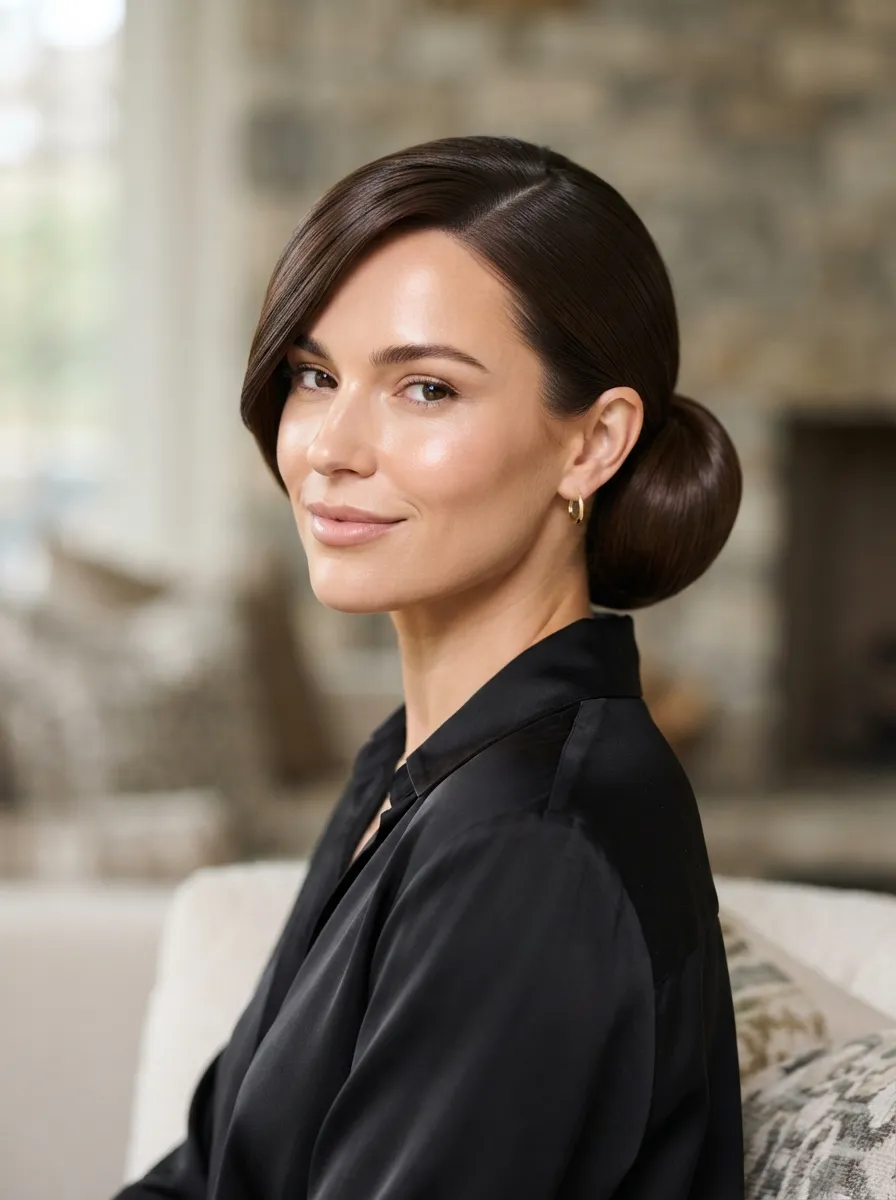
A deep swooping section at the front, almost like a soft side bang swept dramatically across the forehead, adds old glamour energy to a simple bun. Section off a triangle piece at the front, sweep it heavily to one side using a comb and light gel, then pull the rest of the hair back into your usual sleek bun. This look suits evening events particularly well since the swoop reads as more dramatic than a standard center or side part. It also helps soften a very high forehead if that is something you like to work with. A strong hold pomade keeps the swoop from falling flat or moving throughout the night.
15. Chignon Style Sleek Bun
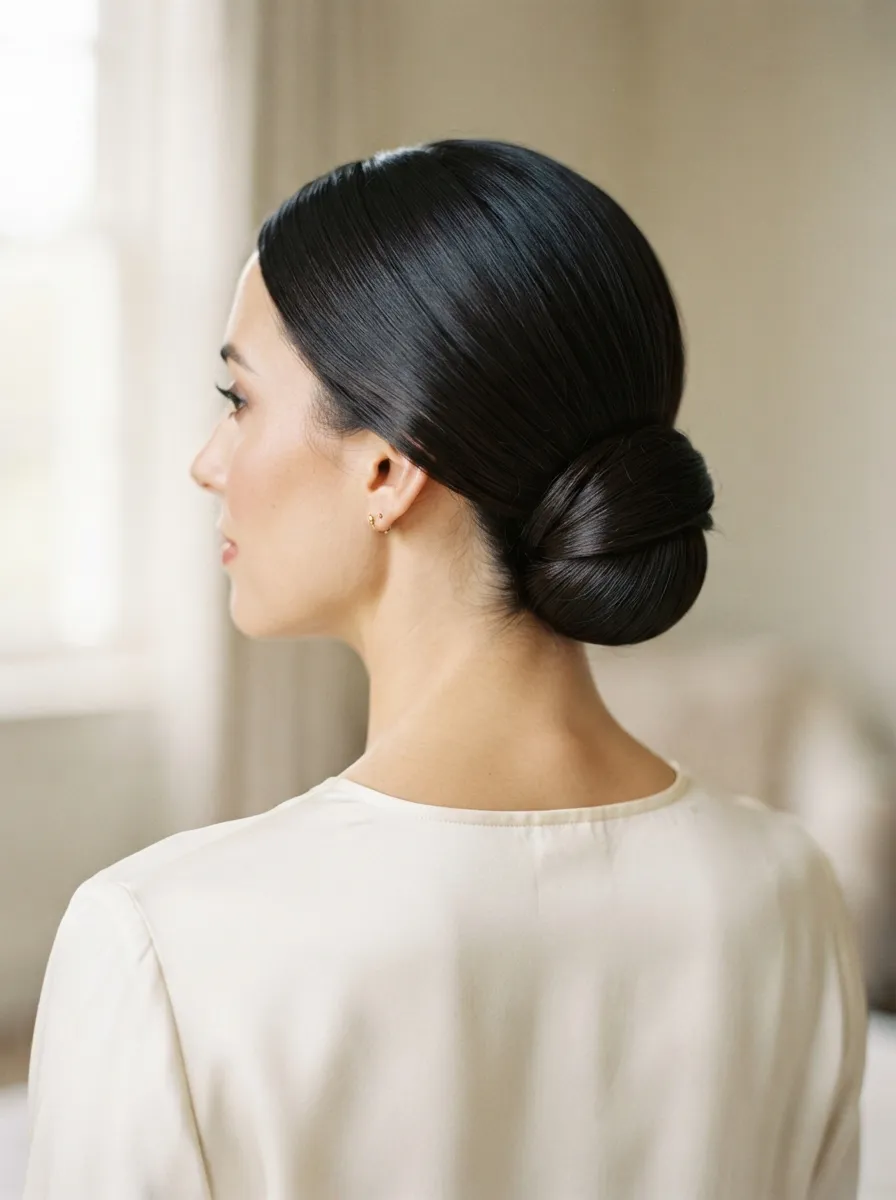
A chignon is technically a folded bun rather than a twisted one, and it gives a flatter, wider silhouette at the nape that reads as very elegant. Gather your ponytail, fold it upward into itself rather than twisting it around, then pin flat against your head. This shape tends to suit longer necks and works beautifully with strapless or v neck outfits. It is a classic choice for formal events like galas or black tie weddings since it has a timeless, almost bridal quality to it. Smooth baby hairs down with a bit of gel around the edges so the flat folded shape stays crisp rather than puffing up during the day.
16. Sleek Bun with Layered Twists
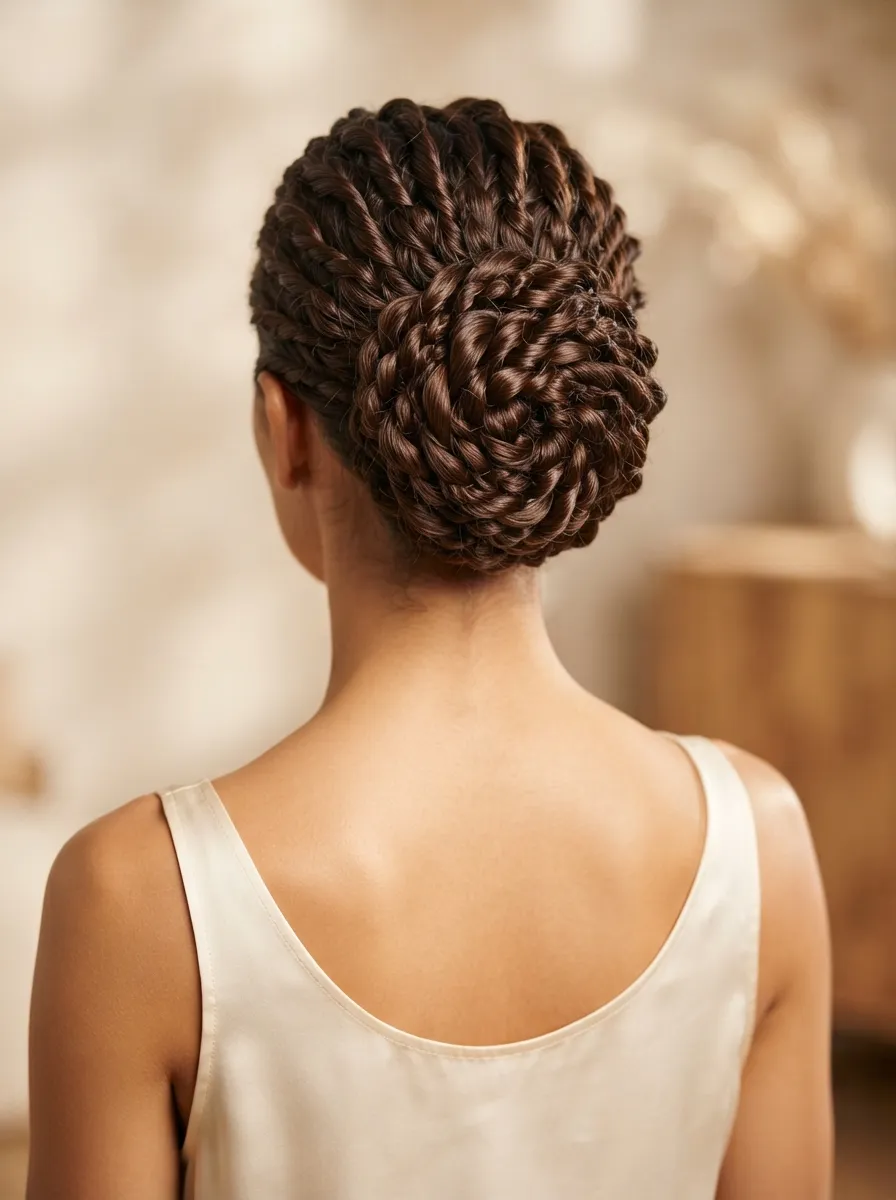
Instead of one single twist, this version separates your ponytail into three or four smaller sections, twists each one individually, then coils them together into one bun. The result has more visual dimension while still reading as neat and controlled. This technique also tends to hold longer since multiple smaller twists have more grip than one large one. It works well on thicker hair that might otherwise create a bulky single twist. Secure each individual twist with a small pin before wrapping them together and pinning the whole shape once more. Finish with light shine spray across the entire bun so the layered twists blend into one smooth surface rather than looking separated.
17. Half Up Sleek Bun
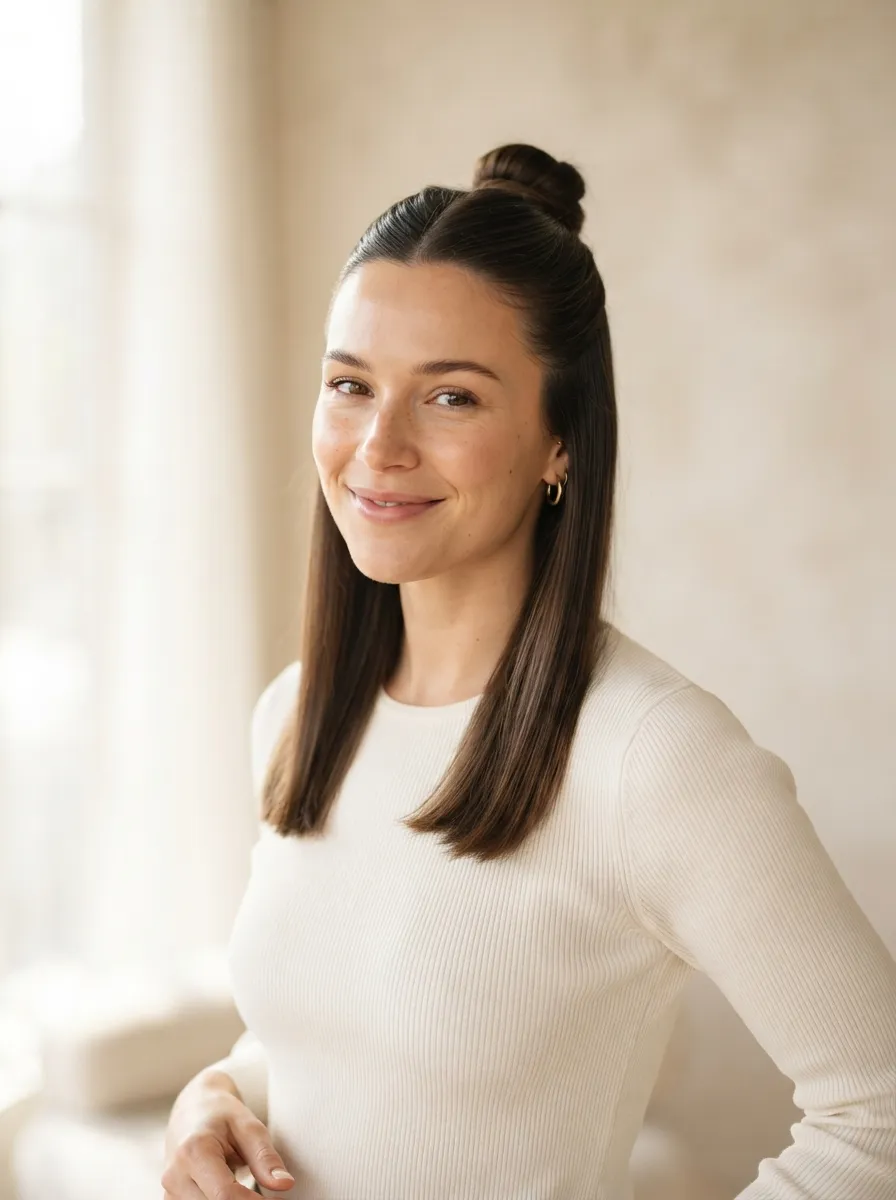
A half up version keeps some length visible while still giving you that clean pulled back effect near the crown. Section off the top half of your hair, smooth it flat, and twist it into a small tight bun, leaving the bottom half down and straightened for contrast. This style is a nice middle ground for anyone who loves their length but still wants a polished element near the face. It also works well if your ends have some damage you would rather not show fully pulled back, since only the top section gets the sleek treatment. Flat iron the loose bottom section for the cleanest overall finish that matches the smoothness of the bun above it.
18. Sleek Bun for Curtain Bangs

Curtain bangs and sleek buns are a natural pairing since the bangs already do the work of softening a fully pulled back style. Curl the curtain pieces lightly away from the face, then smooth the remaining length back into your bun of choice, low or high depending on your mood. This combination flatters nearly every face shape since curtain bangs are famously versatile on their own. It also gives you an easy going, effortless look perfect for daytime wear or casual meetups. A dab of styling cream through just the bangs keeps them separated and soft looking rather than stiff, which balances nicely against the sleekness of the rest of your hair.
19. Sleek Bun with a Claw Clip Twist

For the fastest possible version of this hairstyle, a large claw clip can hold a twisted sleek bun in seconds without a single bobby pin. Smooth your hair back, twist it once or twice, fold it upward, and clamp the claw clip over the twist to secure it in place. This works especially well for second day hair or days when you are truly short on time but still want a finished look. Choose a claw clip in a matte neutral tone if you want it to blend in, or a bold color if you want it to double as an accessory. This method is gentler on hair than tight elastics too, since there is less tension pulling at the root.
20. Sleek Bun with Face Framing Curls
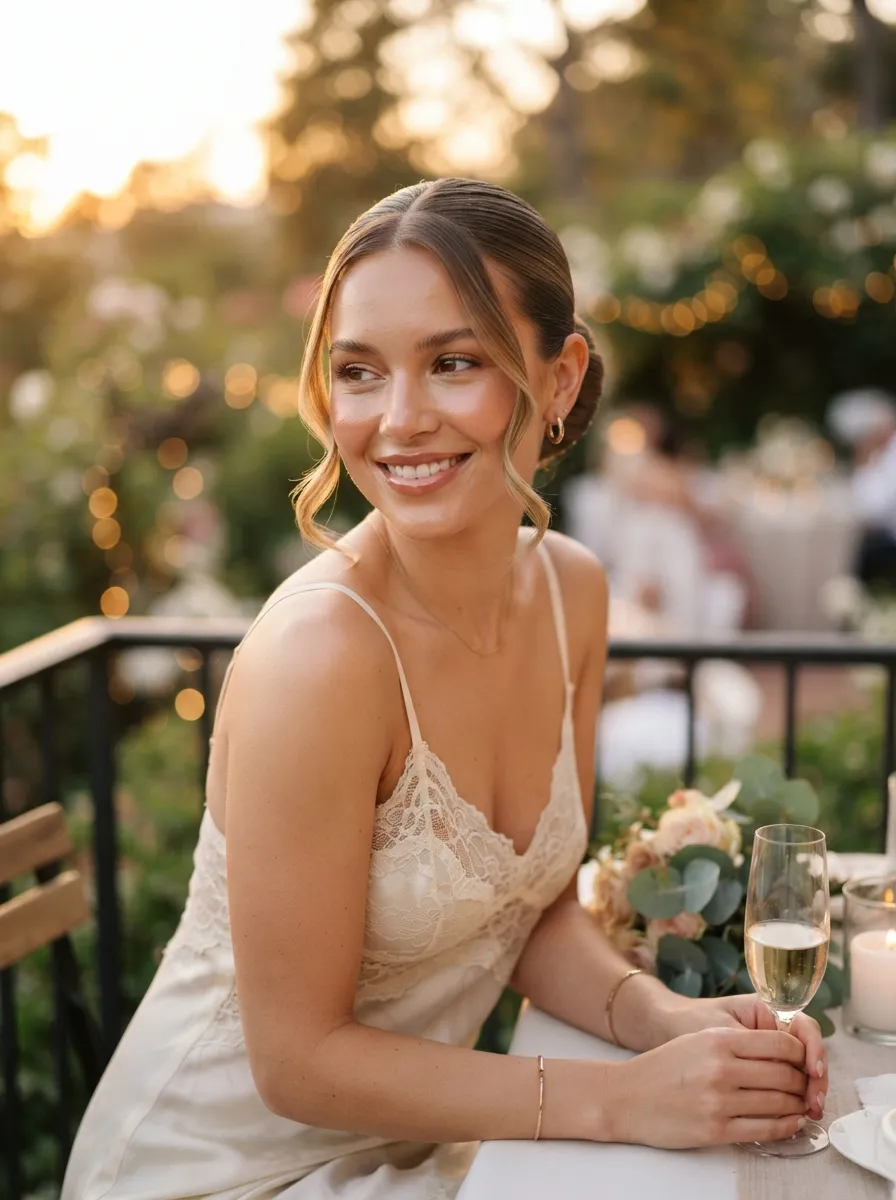
Leaving two curled pieces at the front while the rest goes into a sleek bun gives a romantic, bridal quality that works for both weddings and date nights. Curl two thin sections near your temples with a small barrel iron, let them cool completely, then finger separate gently before pulling the remaining hair back. The contrast between the soft curls and the glassy bun creates a nice visual balance that feels dressed up without looking stiff. This is one of the more requested styles for engagement photos or anniversary dinners since it photographs so well from every angle. A light hold hairspray on just the curled pieces helps them last through a full evening out.
21. Sleek Bun with a Headband
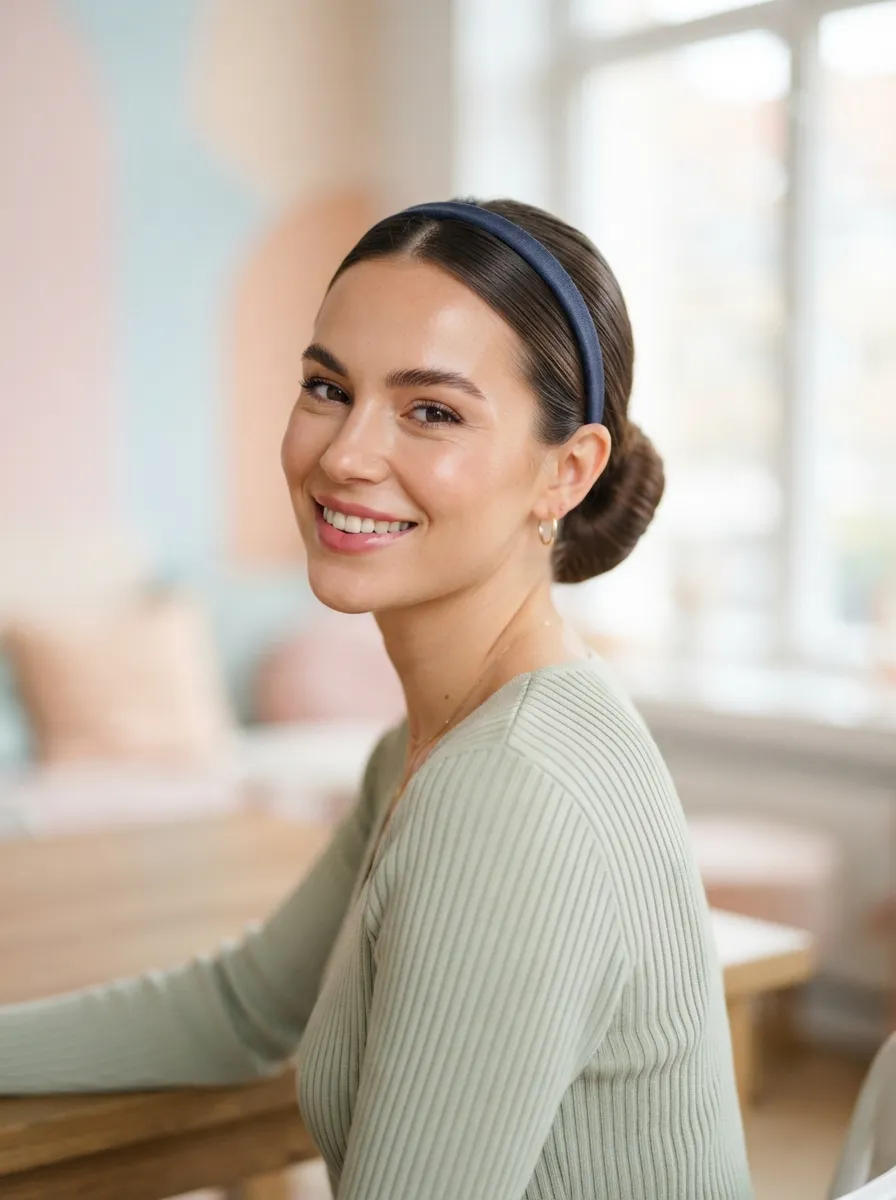
A thin headband adds instant polish and also helps flatten any bumps along your part line before you tie off the bun. Push the headband back from your forehead, smooth the hair behind it flat, then twist the remaining length into your usual bun shape. This combination works particularly well for office settings or brunch outings where you want something slightly more styled than a plain bun alone. Fabric headbands in neutral tones blend more seamlessly, while patterned ones can add a fun pop of personality to an otherwise simple hairstyle. It is also a great trick for days when your roots feel a little oily, since the headband hides that first section completely.
22. Low Bun with a Deep Side Part

A deep side part changes the entire shape of your face compared to a center part, adding more drama and asymmetry to the overall look. Comb a sharp diagonal line from one side of your forehead back toward the crown, then smooth everything into a low bun at the nape. This variation tends to suit oval and long face shapes especially well since the deep angle adds width visually. It also gives a slightly more editorial, fashion forward feel compared to the classic centered version. Keep a small amount of gel along the parting itself so it does not shift or soften throughout the day, especially if you plan on wearing this look for several hours.
23. Sleek Bun with Pearl Pins
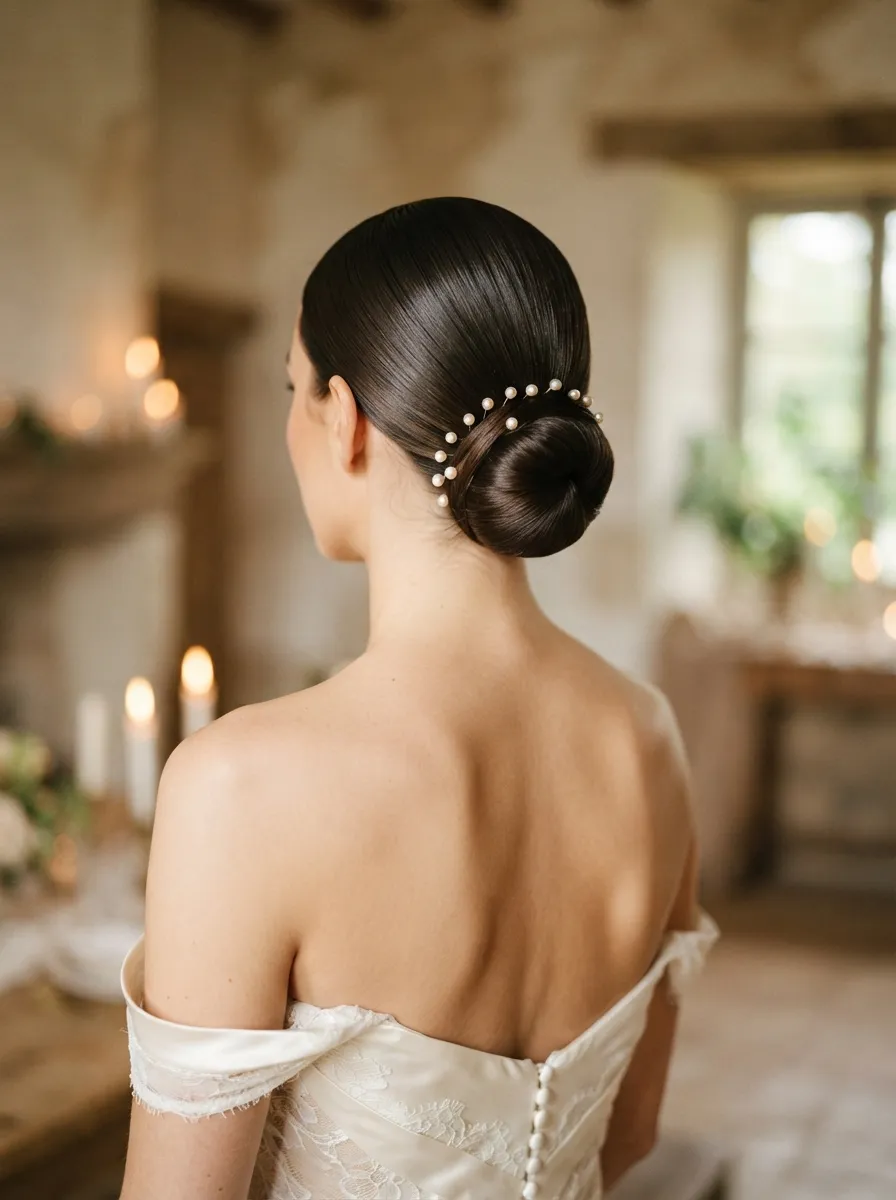
Scattering a few small pearl pins across your bun turns a plain style into something that feels bridal without any extra styling time. Push each pin in at a slight angle so they catch the light, arranging them in a loose curve or scattered pattern rather than a stiff straight line. This detail works beautifully for weddings, both as the bride and as a guest, since it dresses up the hair without competing with jewelry or a veil. It also photographs nicely in soft natural light, which pearls tend to reflect well. Keep the base bun as smooth and glassy as possible so the pearls stand out clearly against the surface rather than getting lost in texture. A handful of pins from a craft store is all you need, no salon visit required.
24. Wet Look Sleek Bun

The wet look takes shine to its most dramatic extreme, using a clear gel applied generously so hair looks freshly out of the shower even hours later. Apply gel section by section while hair is still slightly damp, combing it flat before it dries completely to lock in that glassy, almost lacquered finish. This version tends to photograph incredibly well under flash or studio lighting, which is why it shows up so often in editorial shoots. It works on any length as long as you are generous with product, since a light hand will not achieve the same intensity. This is a bold choice for a night out or a themed party rather than an everyday office look, since the finish reads as very intentional and high impact.
25. Sleek Bun with a Scarf Wrap

Wrapping a thin silk or satin scarf around the base of your bun adds color, pattern, and a bit of personality to an otherwise neutral hairstyle. Twist your hair into the bun as usual, then wind the scarf around the base a few times before tying it into a small knot or bow and tucking the ends underneath. This is a great trick for stretching a second or third day hairstyle since the scarf draws attention away from the roots. It also works well for summer looks or vacation photos, where a pop of pattern feels fitting against a plain outfit. Pick a scarf that either matches your jewelry or contrasts with your clothing for the most noticeable effect, and keep the rest of your hair smooth so the wrap remains the clear focal point.
26. Sleek Bun for Special Occasions with Crystal Clips
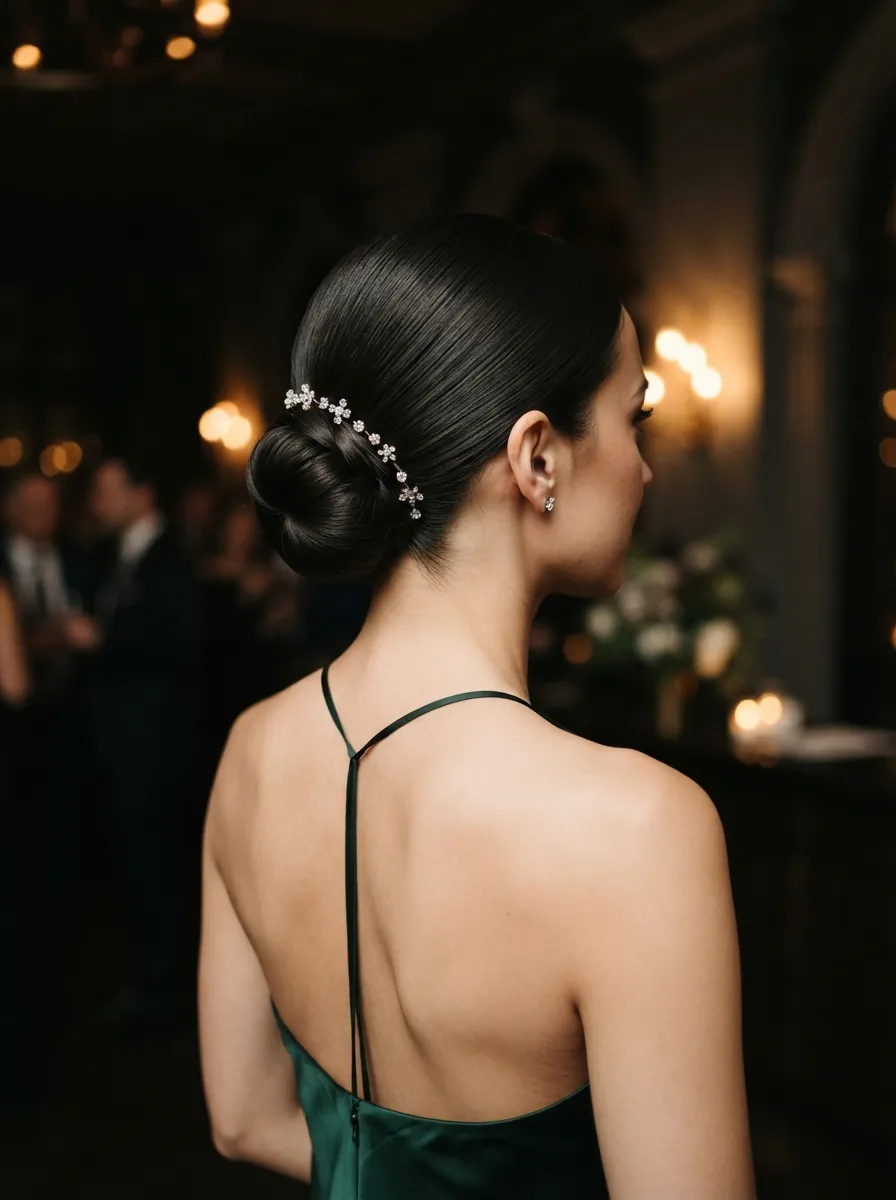
For the most dressed up version on this list, small crystal clips placed along one side of the bun catch the light beautifully under evening lighting. Arrange three or four clips in a diagonal line from the top of the bun down toward the ear, spacing them evenly so the sparkle reads as intentional rather than scattered. This look is a favorite for proms, galas, and other formal events since it adds shine without needing a full head of jewelry or a tiara. Keep the underlying bun extremely smooth and tight so the clips have a clean, glossy surface to sit against. This is one of those small additions that takes only a minute or two but makes the entire hairstyle feel considerably more special for the occasion.
Conclusion
Sleek buns prove that one simple concept can flex into dozens of different moods, from barely there minimal to fully dressed up glam. Once you get comfortable with the basic smoothing and twisting technique, all these variations become quick tweaks rather than entirely new skills to learn. Keep a few drugstore staples on hand, a strong hold gel, some bobby pins, and a boar bristle brush, and you will always be ready to switch things up depending on your day. Try a new version from this list next time you need a fast but polished hairstyle.